


Uglyside38
-
Posts
22 -
Joined
-
Last visited
Content Type
Profiles
Forum
Gallery
ATV Magazine
Events Calendar
Downloads
Store
Community Map
Posts posted by Uglyside38
-
-
Well...the cdi seems to be doing ok. Need to do some carb work/tuning...and I need a new fuel petcock and clean out fuel tank. However... project will be on hold for a bit (couple weeks probably) due to some family emergencies and just a lot going on in life at the moment.🤙
-
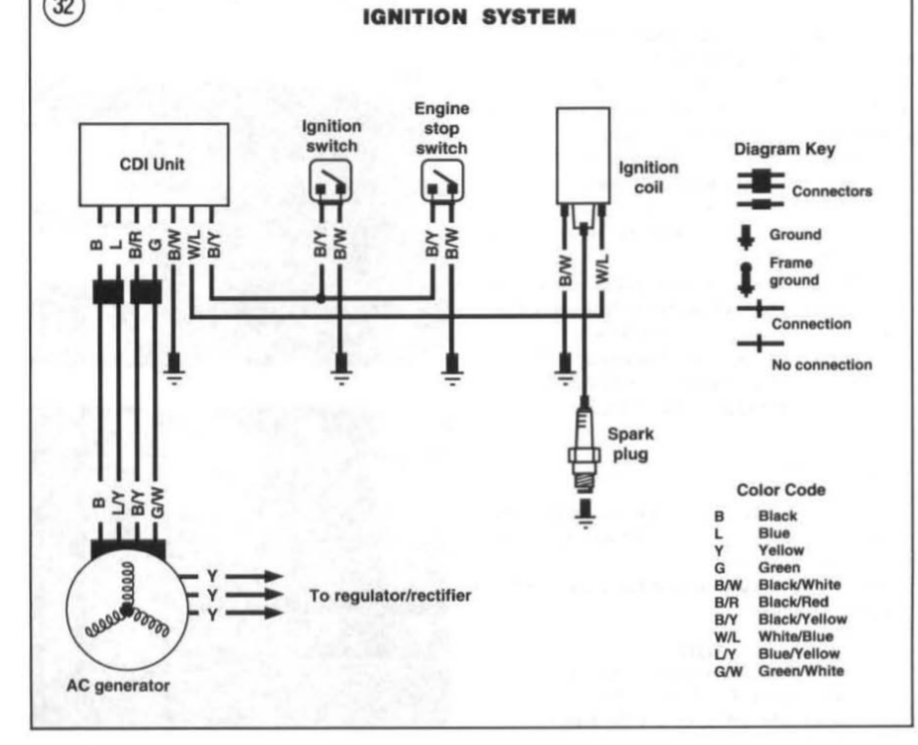
Has anyone had any luck converting an older quad from a 7 wire CDI to the newer (and cheaper) 5 wire CDI?
I have a 1988 Suzuki Quadrunner and I believe the CDI is on it's way out...🤦🏼♂️ A used CDI from 1988 goes for $250-$300 on the bay...and that's when you find them. The Chinese CDIs for the 1990 and up quadrunner are only about $40. I have read a blog from a guy who says it's possible and that 2 of the wires can be omitted if the rectifier is a newer one also. Any experience with this would be greatly appreciated!!!🤙
-
Got it all buttoned back up and everything is good in the case now. Sealed up and shifting from low to high🤙. However...still having to tap the cdi to get spark...and it will run as long as I leave it on, but after it's been shut off a few minutes, have to tap the cdi again...🤦🏼♂️. So, it's probably on its way out. So, we go back to the "7 wire cdi to 5 wire cdi" discussion... because I really have a hard time bringing myself to spend $250-$300 on a 1988 cdi off eBay... perhaps I can get with Ricks or something and see what they'd charge to build me one.🤷🏼♂️She runs great when it fires though!!!!
-
Just found out it's the hi/low shift mechanism that's causing the issues. It's in a bind somehow. Ran it through the gears to be sure everything was working properly but couldn't get it into high. 🤦🏼♂️ I'll pull it back apart this week and get it figured out 🤙. I did find a rogue washer when I picked it up off the blocks...🤦🏼♂️ Learning the hard way!!!😬🤣
I'll let ya know what I find
-
 1
1
-
-
It's ALIIVVEEE!!!😀 Got everything back together and it still had the "intermittent" spark issue🤦🏼♂️. But, I tapped on the rectifier and the cdi and Bam... consistent spark. Went over all the connections and one from CDI had a bit of corrosion. So hopefully that was the issue. It sat for so long before I got it. Maybe just using it more often will keep her in better condition.
Still gotta do some tuning on the carb (air/fuel and idle)...but she sounds great. One other issue...on the top right hand side of the stator cover, the corner closet to the rear on top of it, is not sealed properly at the gasket. Bolts are torqued properly but the gasket isn't tight at that point. Wondering if there was a reason that washer I put in wasn't there...not sure. But I'll look into that. If it says it needs the washer then it must need it...🤷🏼♂️
-
Well, it's been a rough couple weeks here on the home front. After my last post, I was waiting on the stator cover gasket to arrive, and once it did I was looking over the manual to make sure everything was in it's correct place before closing her up, I realized I was missing a washer on the reverse shift linkage. I looked everywhere and couldn't find it, nor could I recall there ever being one in there. So, unsure if someone had been in it before, I ordered up a new washer. $1.81 part. $8 shipping...😬🤦🏼♂️ So, after about a week, it arrived and I was able to get the stator cover back on. Just need to add oil and put everything back together to do some more troubleshooting. However, my entire household tested positive for the flu!!!🤧🤒 So, been waiting it out. Been a rough several days here. Excited to get it put back together though. Hopefully this week I can feel well enough to get out to the shop.
-
Just a bit more info on these CDIs...
In comparing the 2 CDIs, 1987-99 to1990+, I was trying to determine what the 2 extra wires coming from the stator assembly were for. I was assuming ground. After some research, it appears I may have been correct about one of the wires. And the other should be for the style of rectifier used prior to 1990. So, if I ground the one wire and use a 1990+rectifier, I could possibly use the 6 pin CDI...
I'm jumping ahead of myself with this CDI as I'm not entirely sure yet if the one I have is even faulty...😜🤦🏼♂️. But, I do find all of this very interesting to note. Wish my stator gasket would hurry up and get here so I can test everything!!!

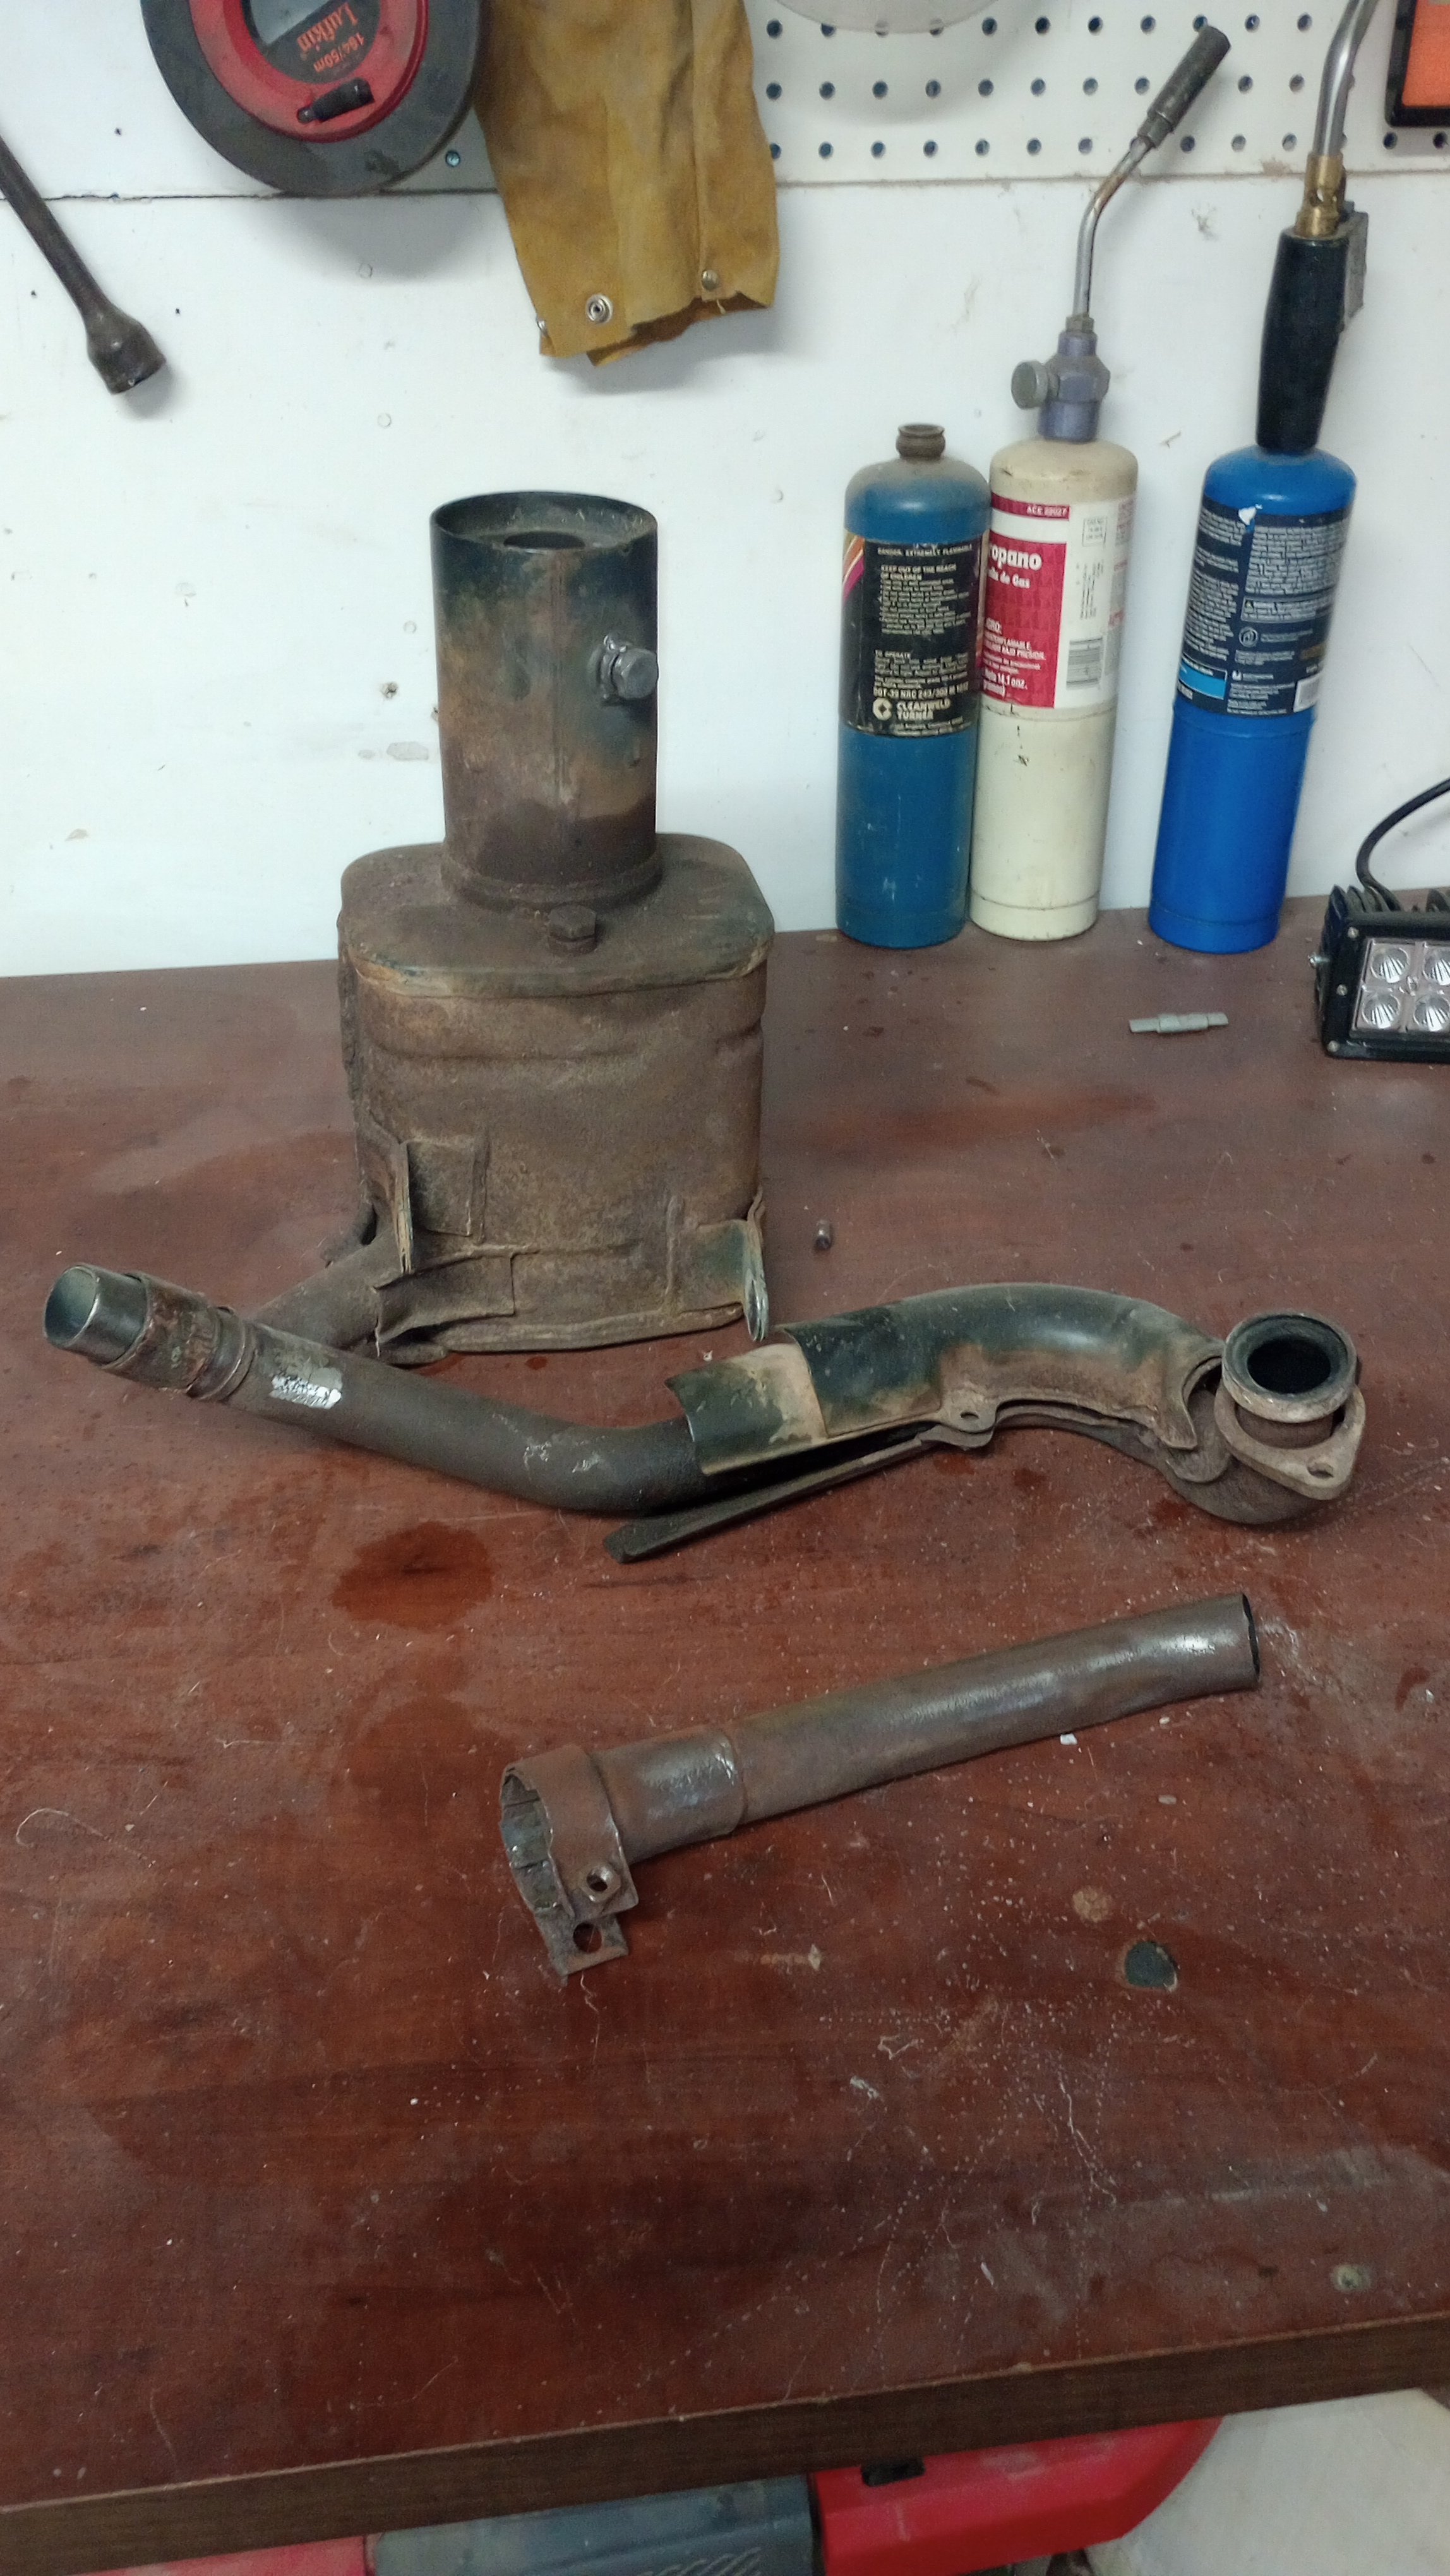
Working on exhaust tonight. Prepping for paint. I had to cut it off, so I'll get it welded back up when I re-fit it.🤙
-
8 minutes ago, Gwbarm said:
There were some aftermarket CDI that claim to fit yours on Amazon but i didnt check the number of wires. According to you schematic what does the seventh wire do, it may just be a ground and the aftermarket CDI grounds differently.
Mine does have a ground...I suppose the 6 wire one could ground itself?🤔🤔
-
19 minutes ago, Mech said:
I don't think the kill switch is going to last long if the capacitor is discharging through it.
This is why I need y'all's help!!!!😜 Lol.
Do you know of a way at all to use a 6 wire cdi then?
-
So, obtained a manual. Stator assembly ohms out in spec. Stator cover gasket ordered. So when I get that I'll put it all back together and see what we've got. Fixed ignition coil wire so hopefully that gets us somewhere. At least I know the stator is good so I can start diagnosing from there up. 🤙
Looked into CDI box just in case. Mine has 7 wires coming out of cdi. Most aftermarket ones are 6 wires, but I think I can wire the kill switch to the coil and it should be able to shut it off?🤔 That's how my mind is working anyways...lol. OEM cdi is about $300. So hopefully it's not that, but I'm worried if the rectifier is bad, it may have fried the cdi...🤷🏼♂️🤦🏼♂️ We shall see!
-
12 hours ago, Gwbarm said:
Did a great job with the heat, i have never tried that , i was afraid i might burn through, i guess it takes practice. What i did with mine was take all the plastics off. I set up a table in the back yard with the plastics on it. I washed all the dirt off and let them dry. Them sprayed them down with armour all it will suck it up fairly quickly for the first few days, I did this multiple times a day over a 2 week period, the color started coming back. After that i just kept it wet with the protectant walk by and it be dry spray it down again. After it stayed wet for a day and i was sure the moisture level was back in the plastic, i wet sanded with all grits up to 1000 spend more time with 220 to get out imperfections. After that i went over it all with boiled lindseed oil. Worked well. If you have a lot of broken pieces may not be worth the time but your front piece looked good.
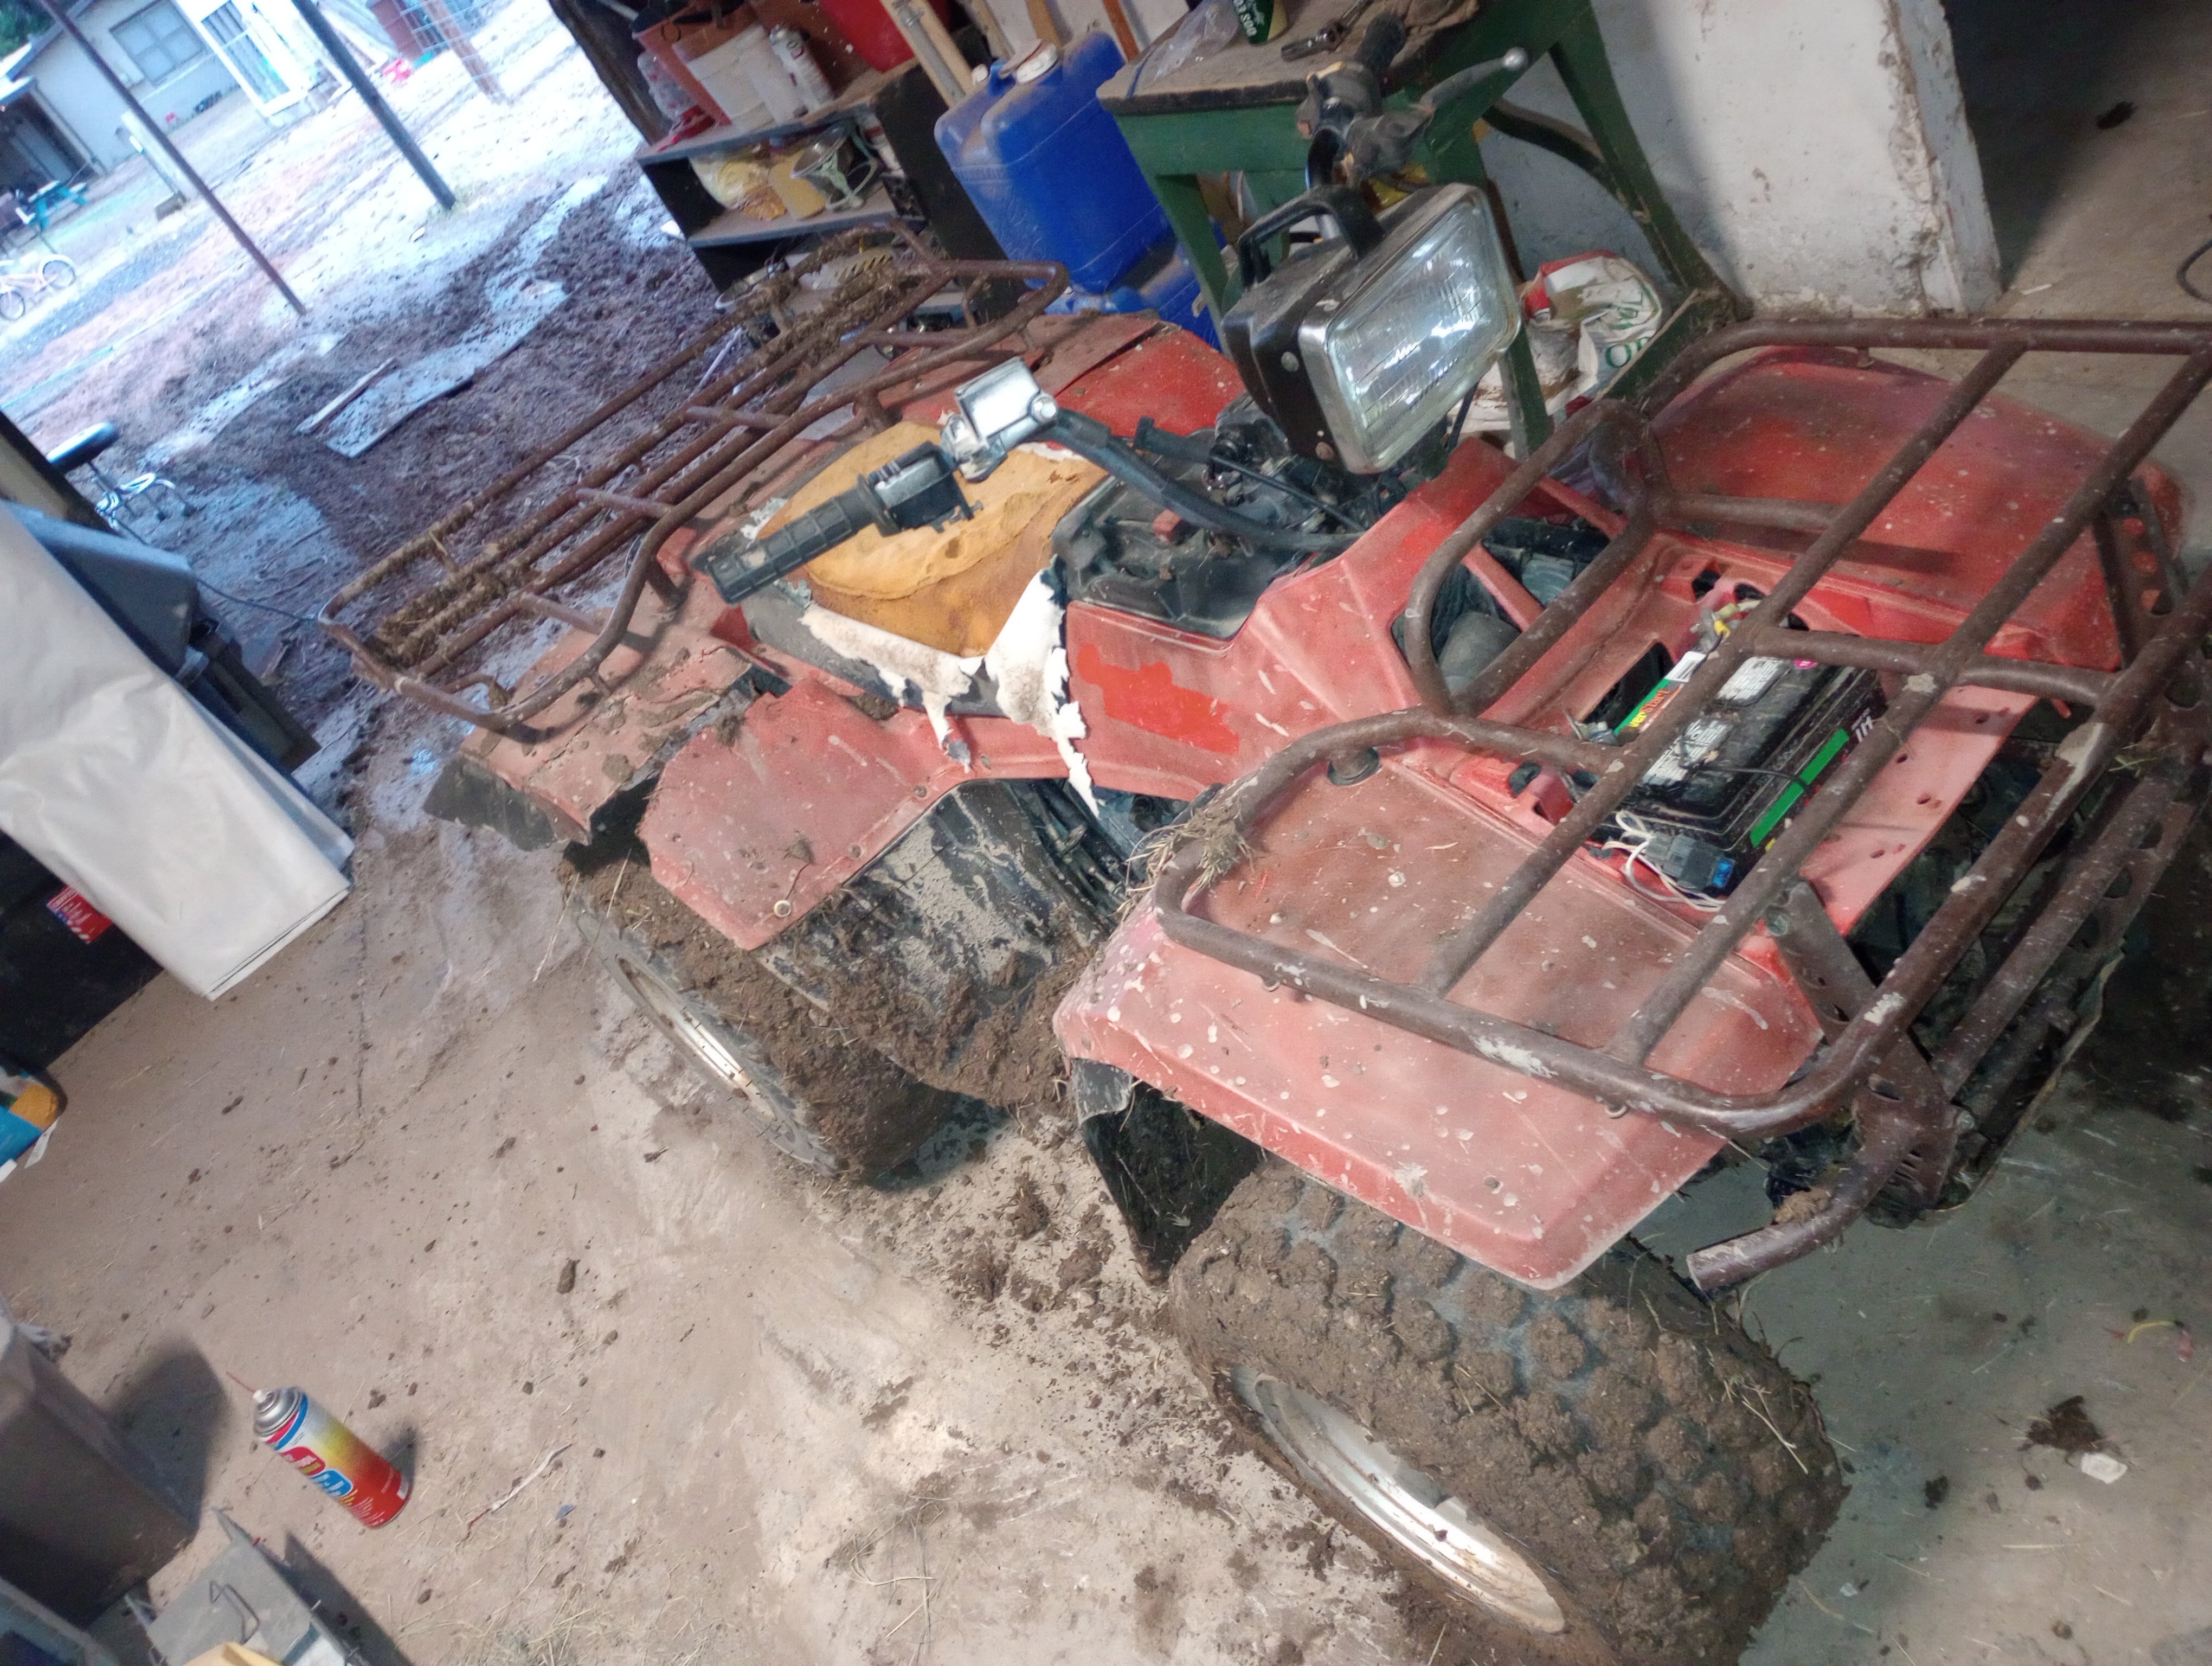
Here you can see the back plastics...😬 Pic from back in September when we played in the mud a bit when it was running.
Pretty rough condition lol 😆. I have some tin formed and riveted underneath the broken parts to just maintain the shape for the time being. Aftermarket plastics will be on the agenda down the road. Although, used ones do come up from time to time on the Bay...🤷🏼♂️ Also, I keep an eye out on marketplace for a used quad. Have seen a few on there I'd like to pick up for parts.
-
I believe the starter I purchased a few months ago was a Niche starter... seems to be holding up ok so far!
-
1 hour ago, Gwbarm said:
Did a great job with the heat, i have never tried that , i was afraid i might burn through, i guess it takes practice. What i did with mine was take all the plastics off. I set up a table in the back yard with the plastics on it. I washed all the dirt off and let them dry. Them sprayed them down with armour all it will suck it up fairly quickly for the first few days, I did this multiple times a day over a 2 week period, the color started coming back. After that i just kept it wet with the protectant walk by and it be dry spray it down again. After it stayed wet for a day and i was sure the moisture level was back in the plastic, i wet sanded with all grits up to 1000 spend more time with 220 to get out imperfections. After that i went over it all with boiled lindseed oil. Worked well. If you have a lot of broken pieces may not be worth the time but your front piece looked good.
Front really not too bad...back is terrible 🤦🏼♂️. I'll get a pic of it tomorrow
-
46 minutes ago, Gwbarm said:
This thing looks good, i see very little rust. Looks better than most that follow me home. This will be a nice project, built like a tank. Plastics will usually come around with patience, if they are not all broken up. I didnt know they were aftermarket plastics available i will have to take a look im still looking for some for one of my projects, thanks for the tip.
The frame really is in good shape considering it's age. Surface rust on front bumper assembly, both racks, and the hitch. But I'll address those once I get it running again. I did the torch trick for the plastics... since they were so chalky white and flaking. Here's a pic of while I was doing that awhile back. I was pretty impressed!
-
6 hours ago, kawasig said:
Those big smiles are definitely worth it! My Wife says I have that smile every time I ride! I can feel it in My bones! $20 is nothing compared to the feeling of finding and fixing the thing and then riding it! There is something about bringing a great old machine back to life. Enjoy the time with Your Son!
They definitely don't make them like they used to! I figure I'll be about $1k deep if I go all the way with this thing... aftermarket plastics are probably the most expensive part of the entire build...🤦🏼♂️ Plastics on this thing are pretty rough 😬 I have them patched together at the moment
-
25 minutes ago, Mech said:
Yup, the size of the smile is pretty much the measure of a bike I reckon. Doesn't matter if it's a little mini or some beast, if it makes us smile then it's a good one.
Good idea to go right over the bike when you first get them I reckon Ugly. Take all the plastics off and grease all the bolts and screws, inspect and re-tape the wiring and check it's tied on securely, check all the hoses for ageing,
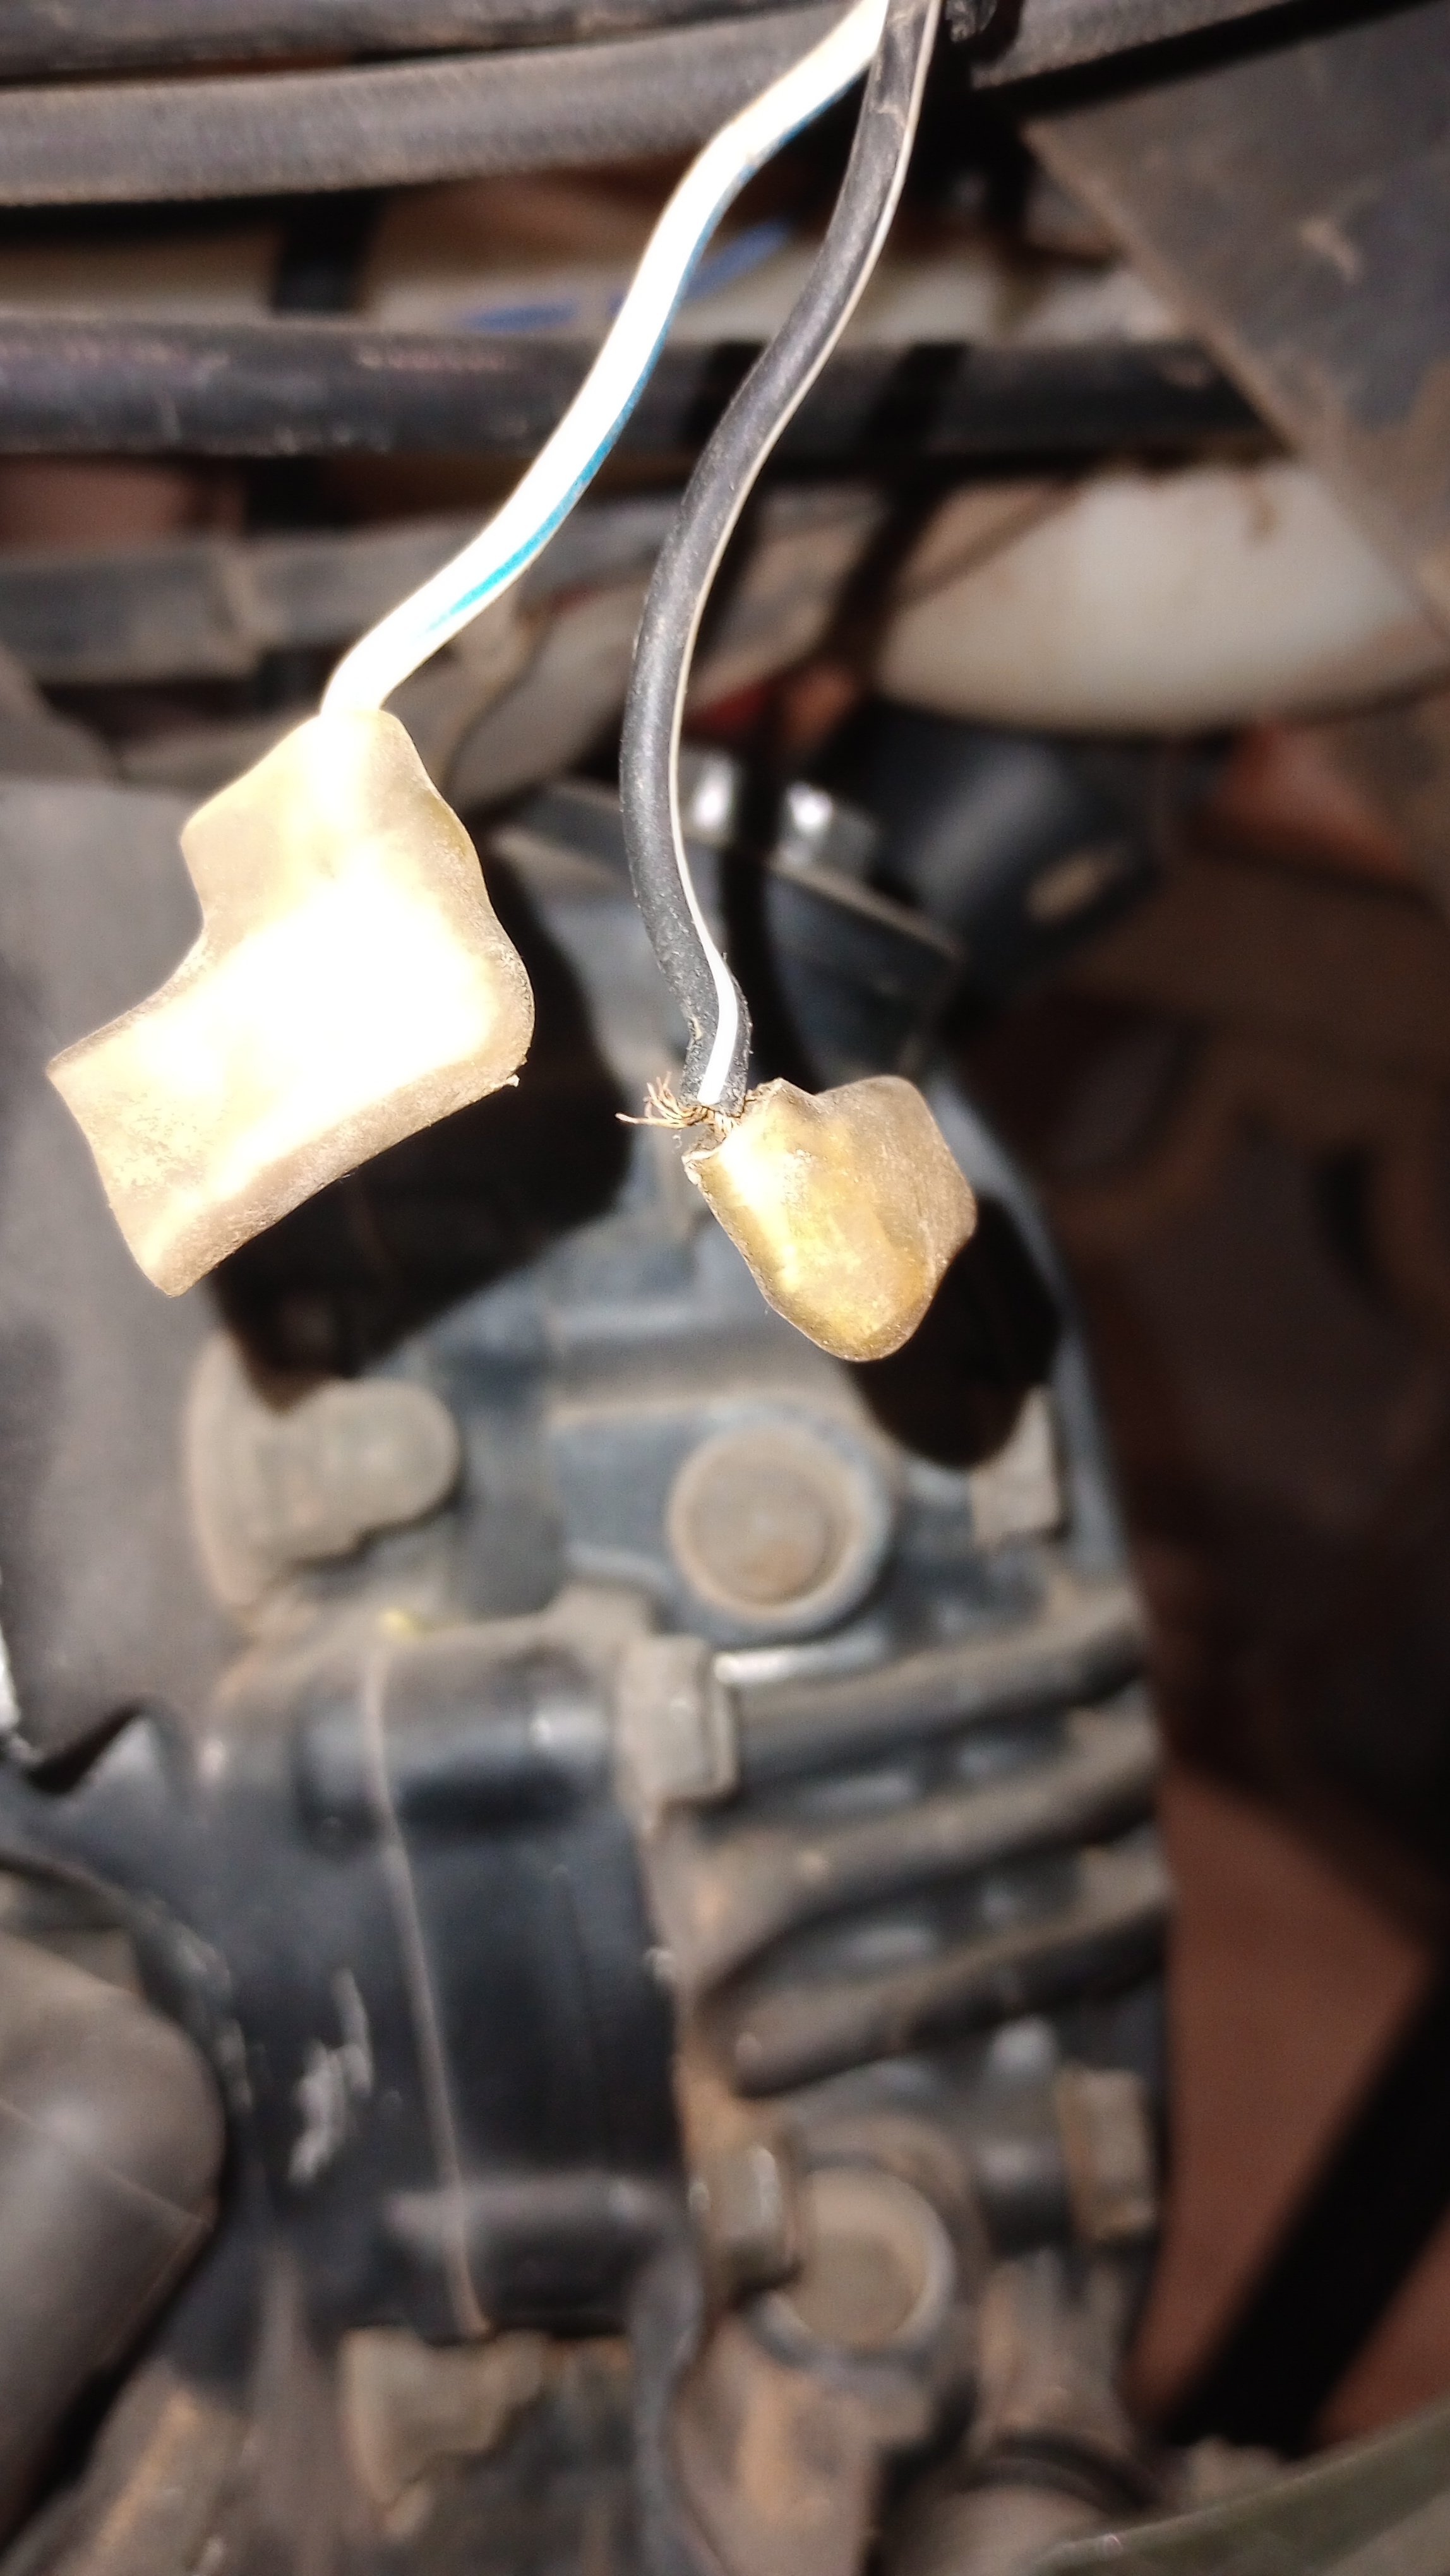
Wires nearly always break right where they go into their metal terminals, and sometimes it can be inside the insulation so it always pays to wriggle each wire gently checking it isn't suspiciously flexible. Hopefully that near broken wire will be the trouble. If that doesn't fix it and you have the plastics off you could disconnect the regulator and try it. If the earth or battery power wire going to the regulator break they cause misfiring. While it's apart I'd clean every electrical plug because dirt in them if it gets wet can conduct and cause problems. I like to clean them, let them dry and then fill them up with petroleum jelly, which is vaseline.
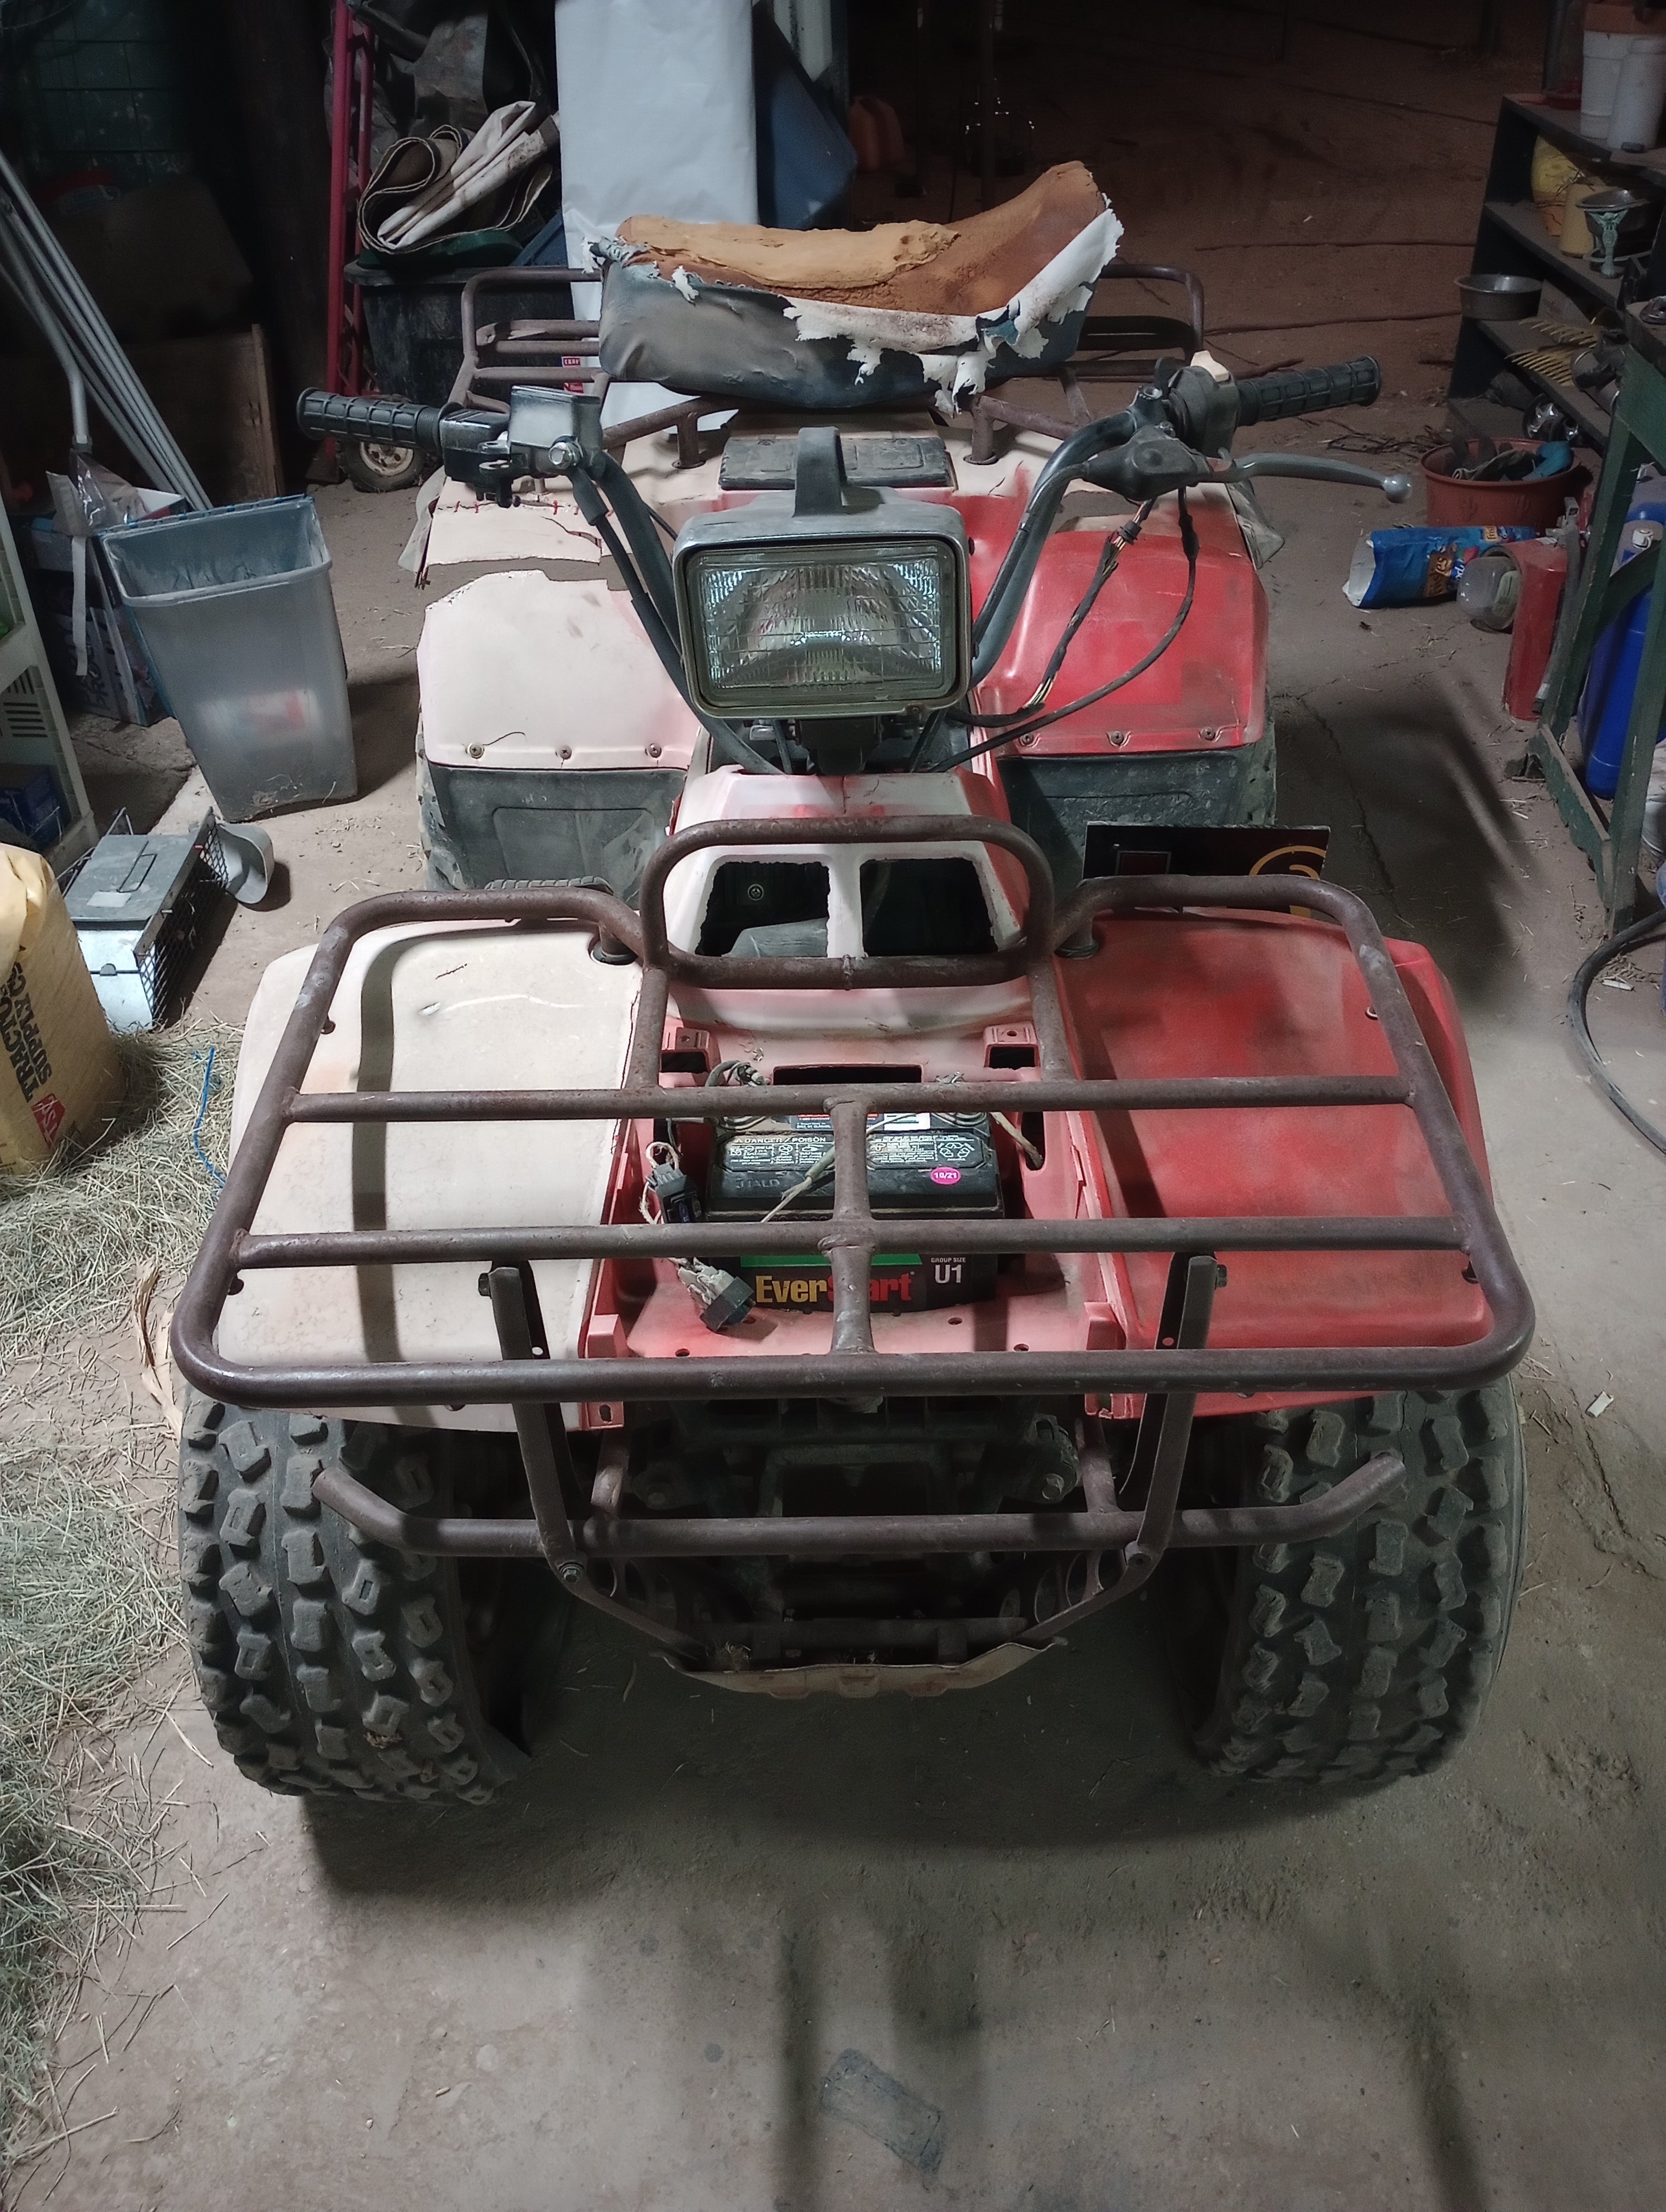
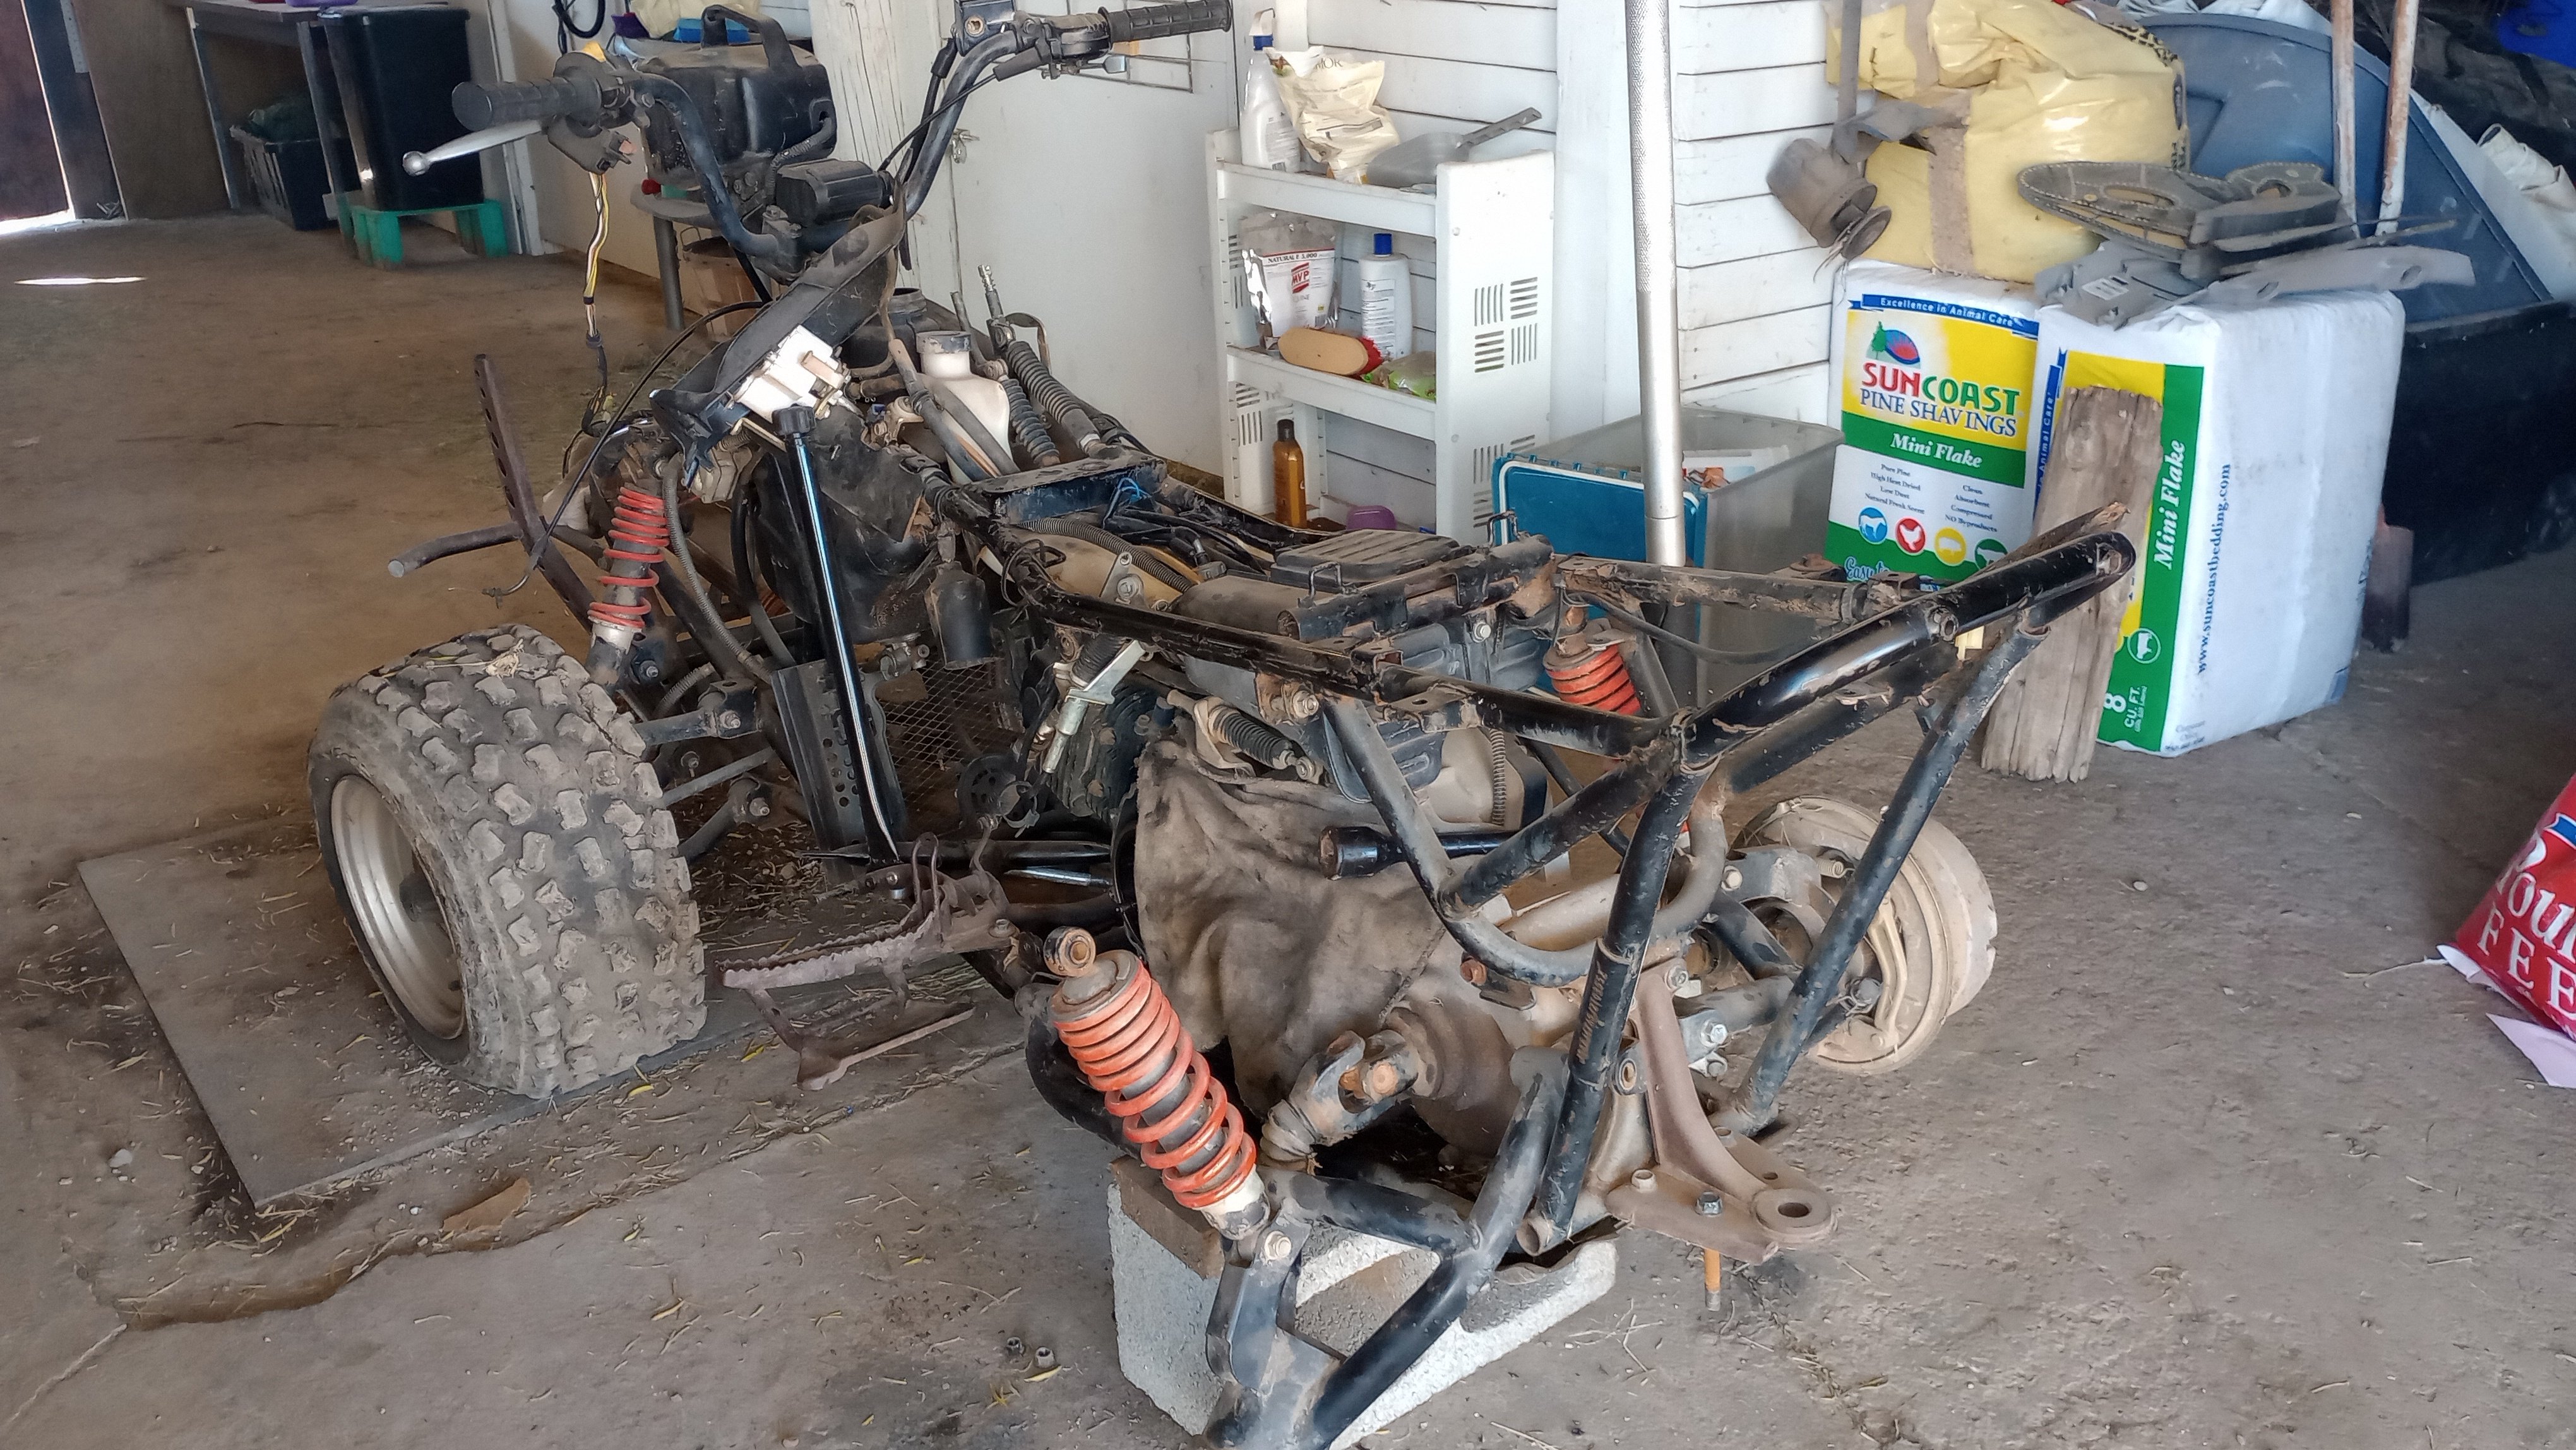
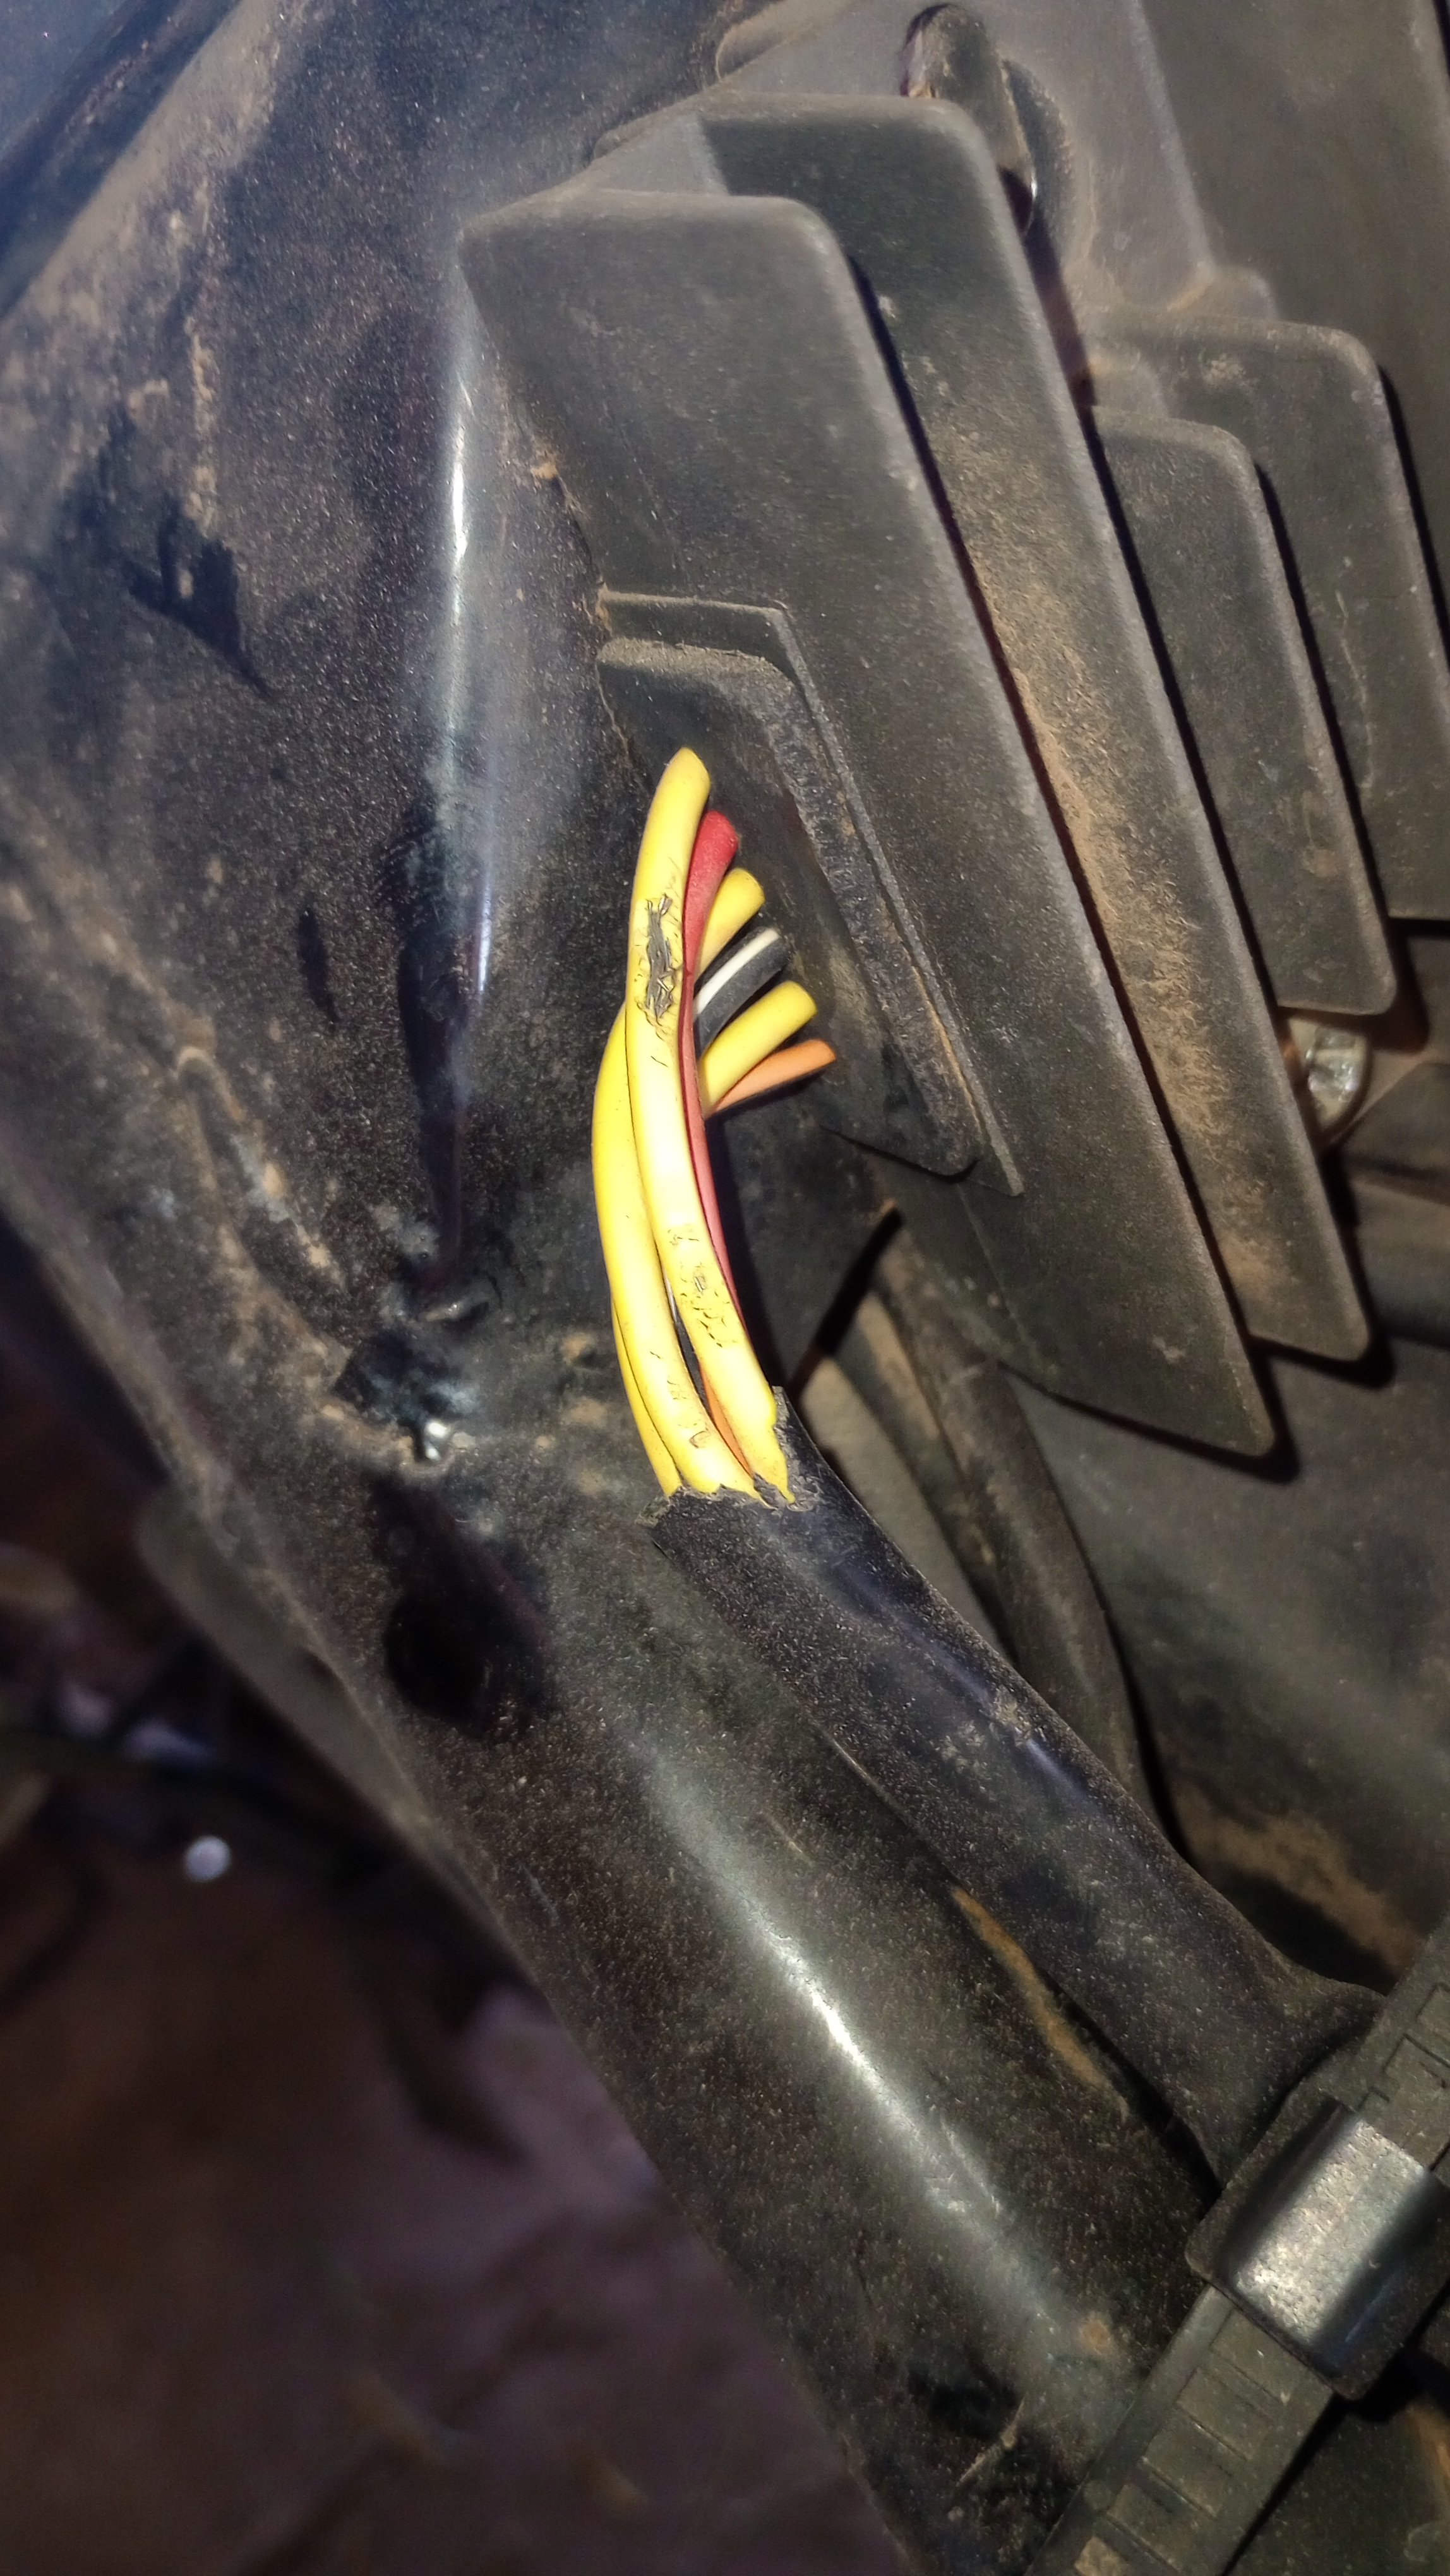
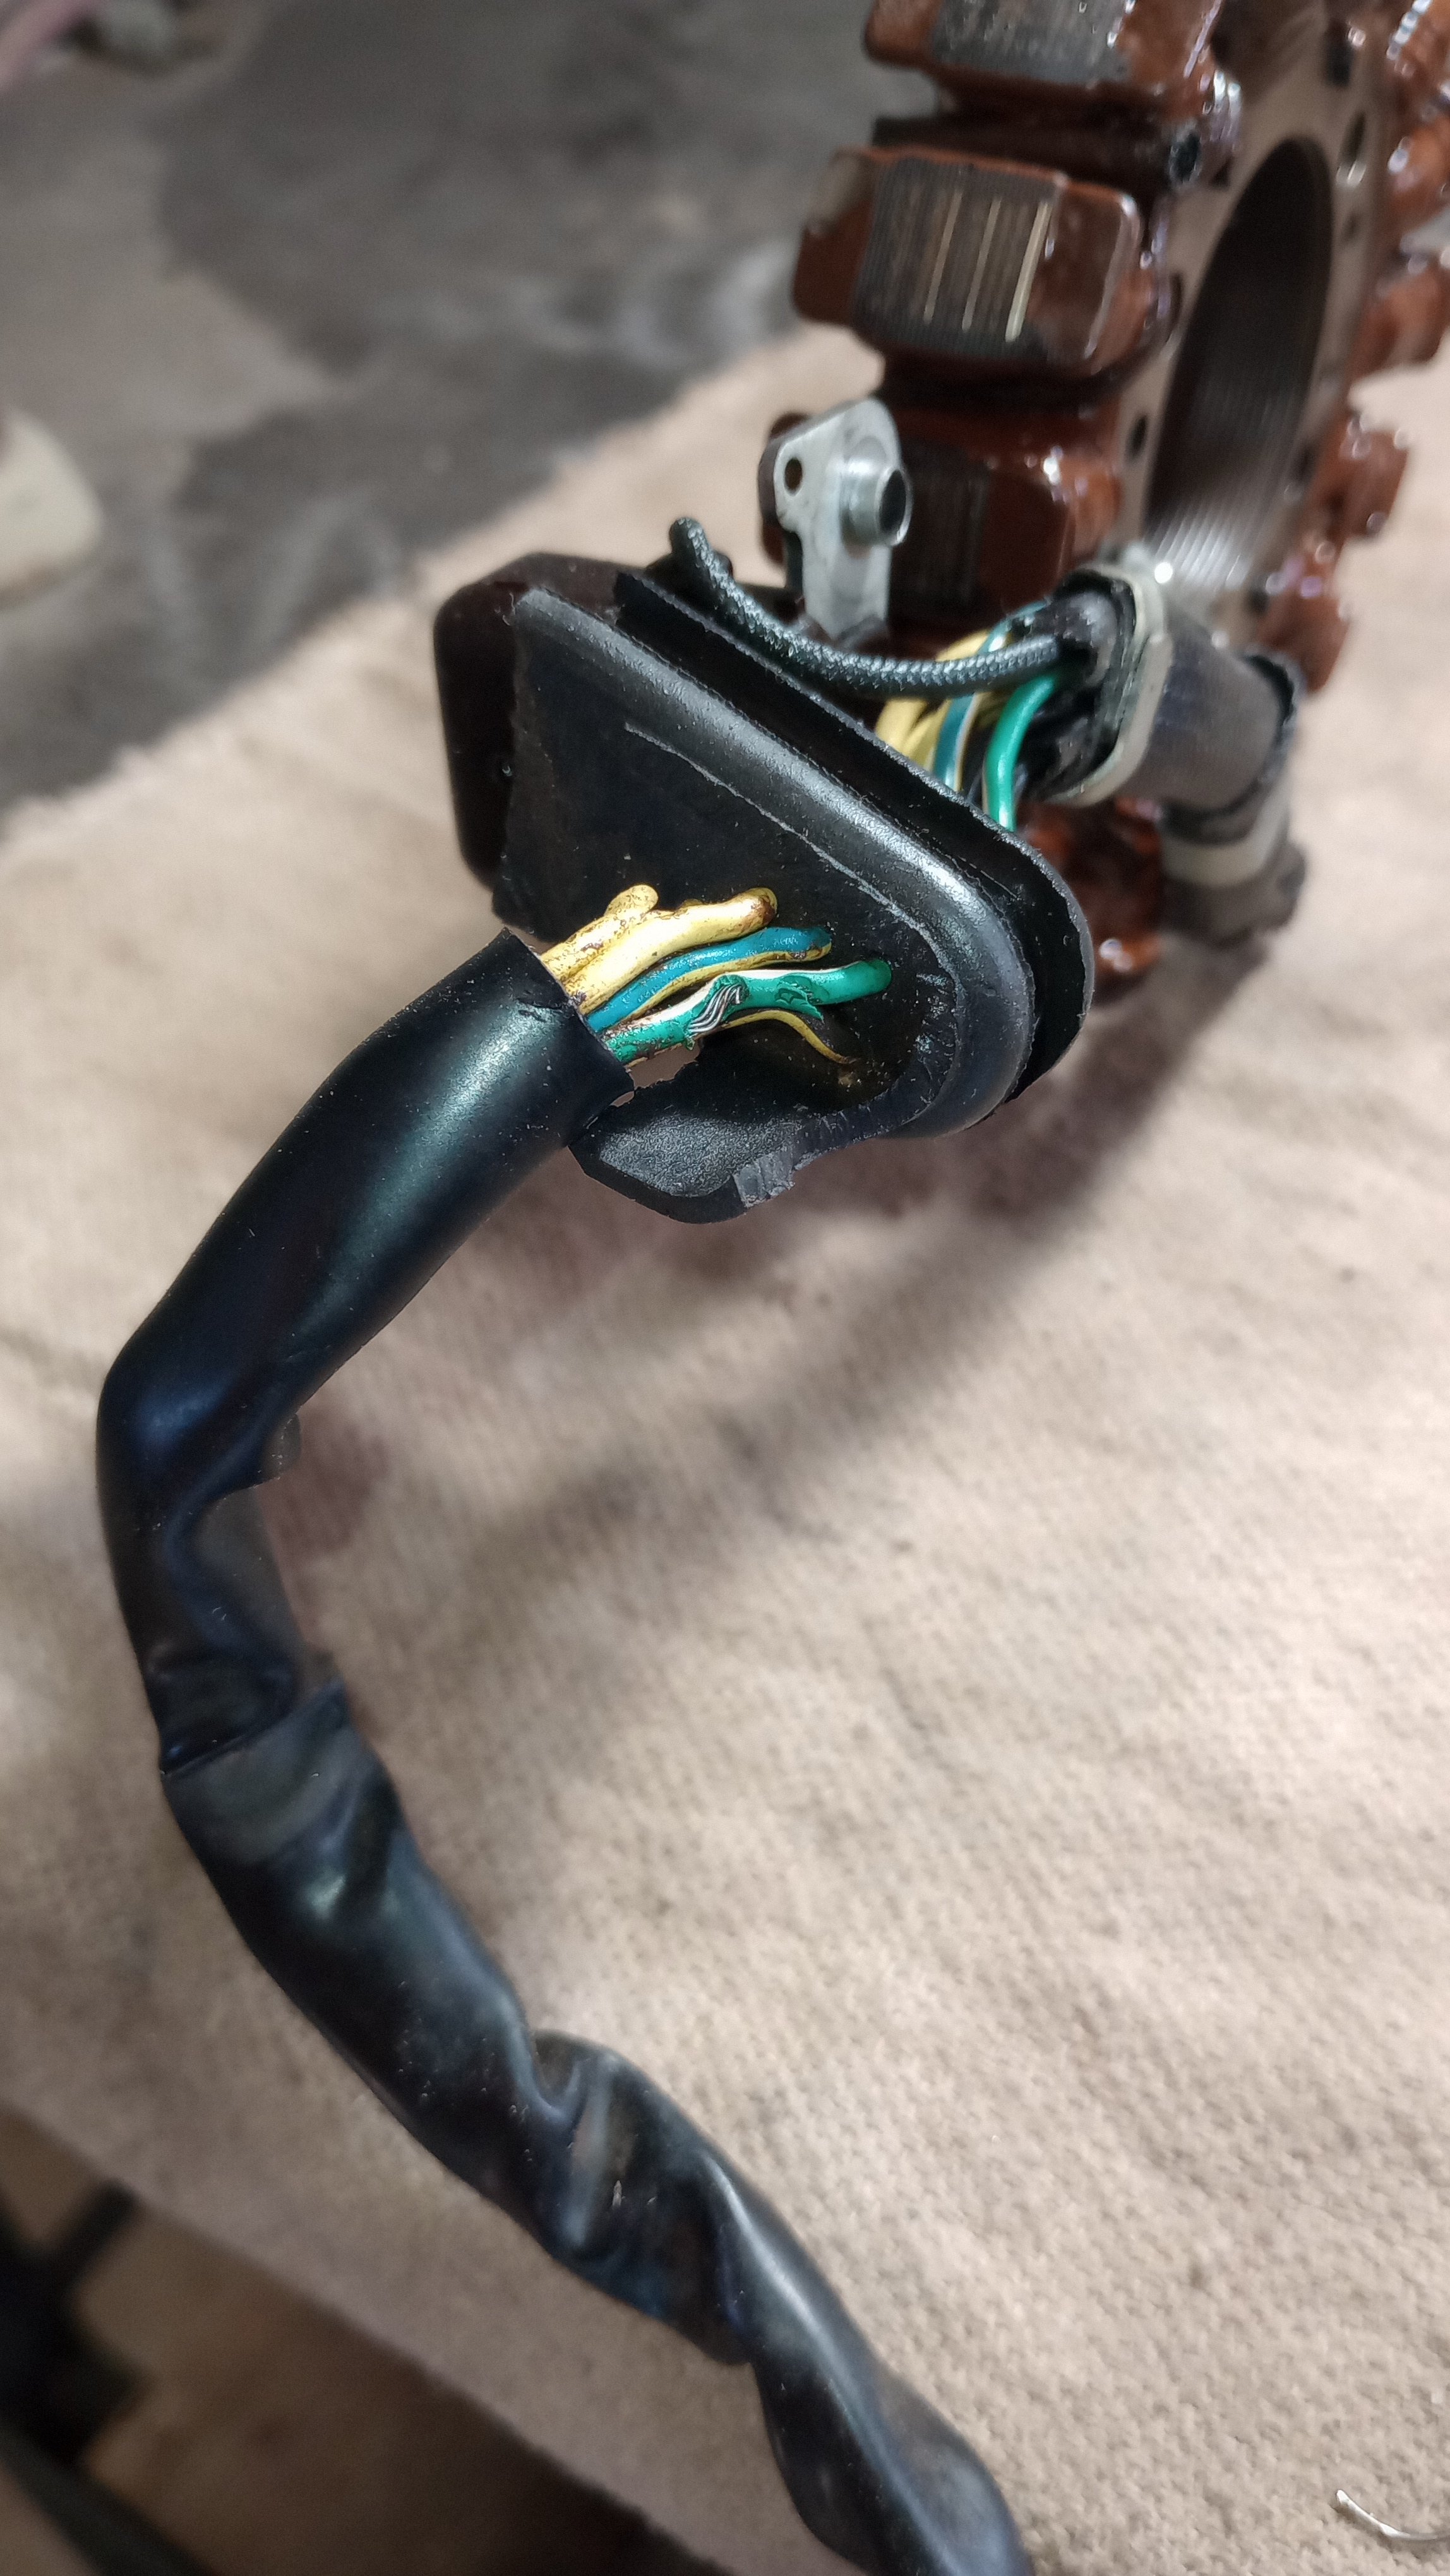
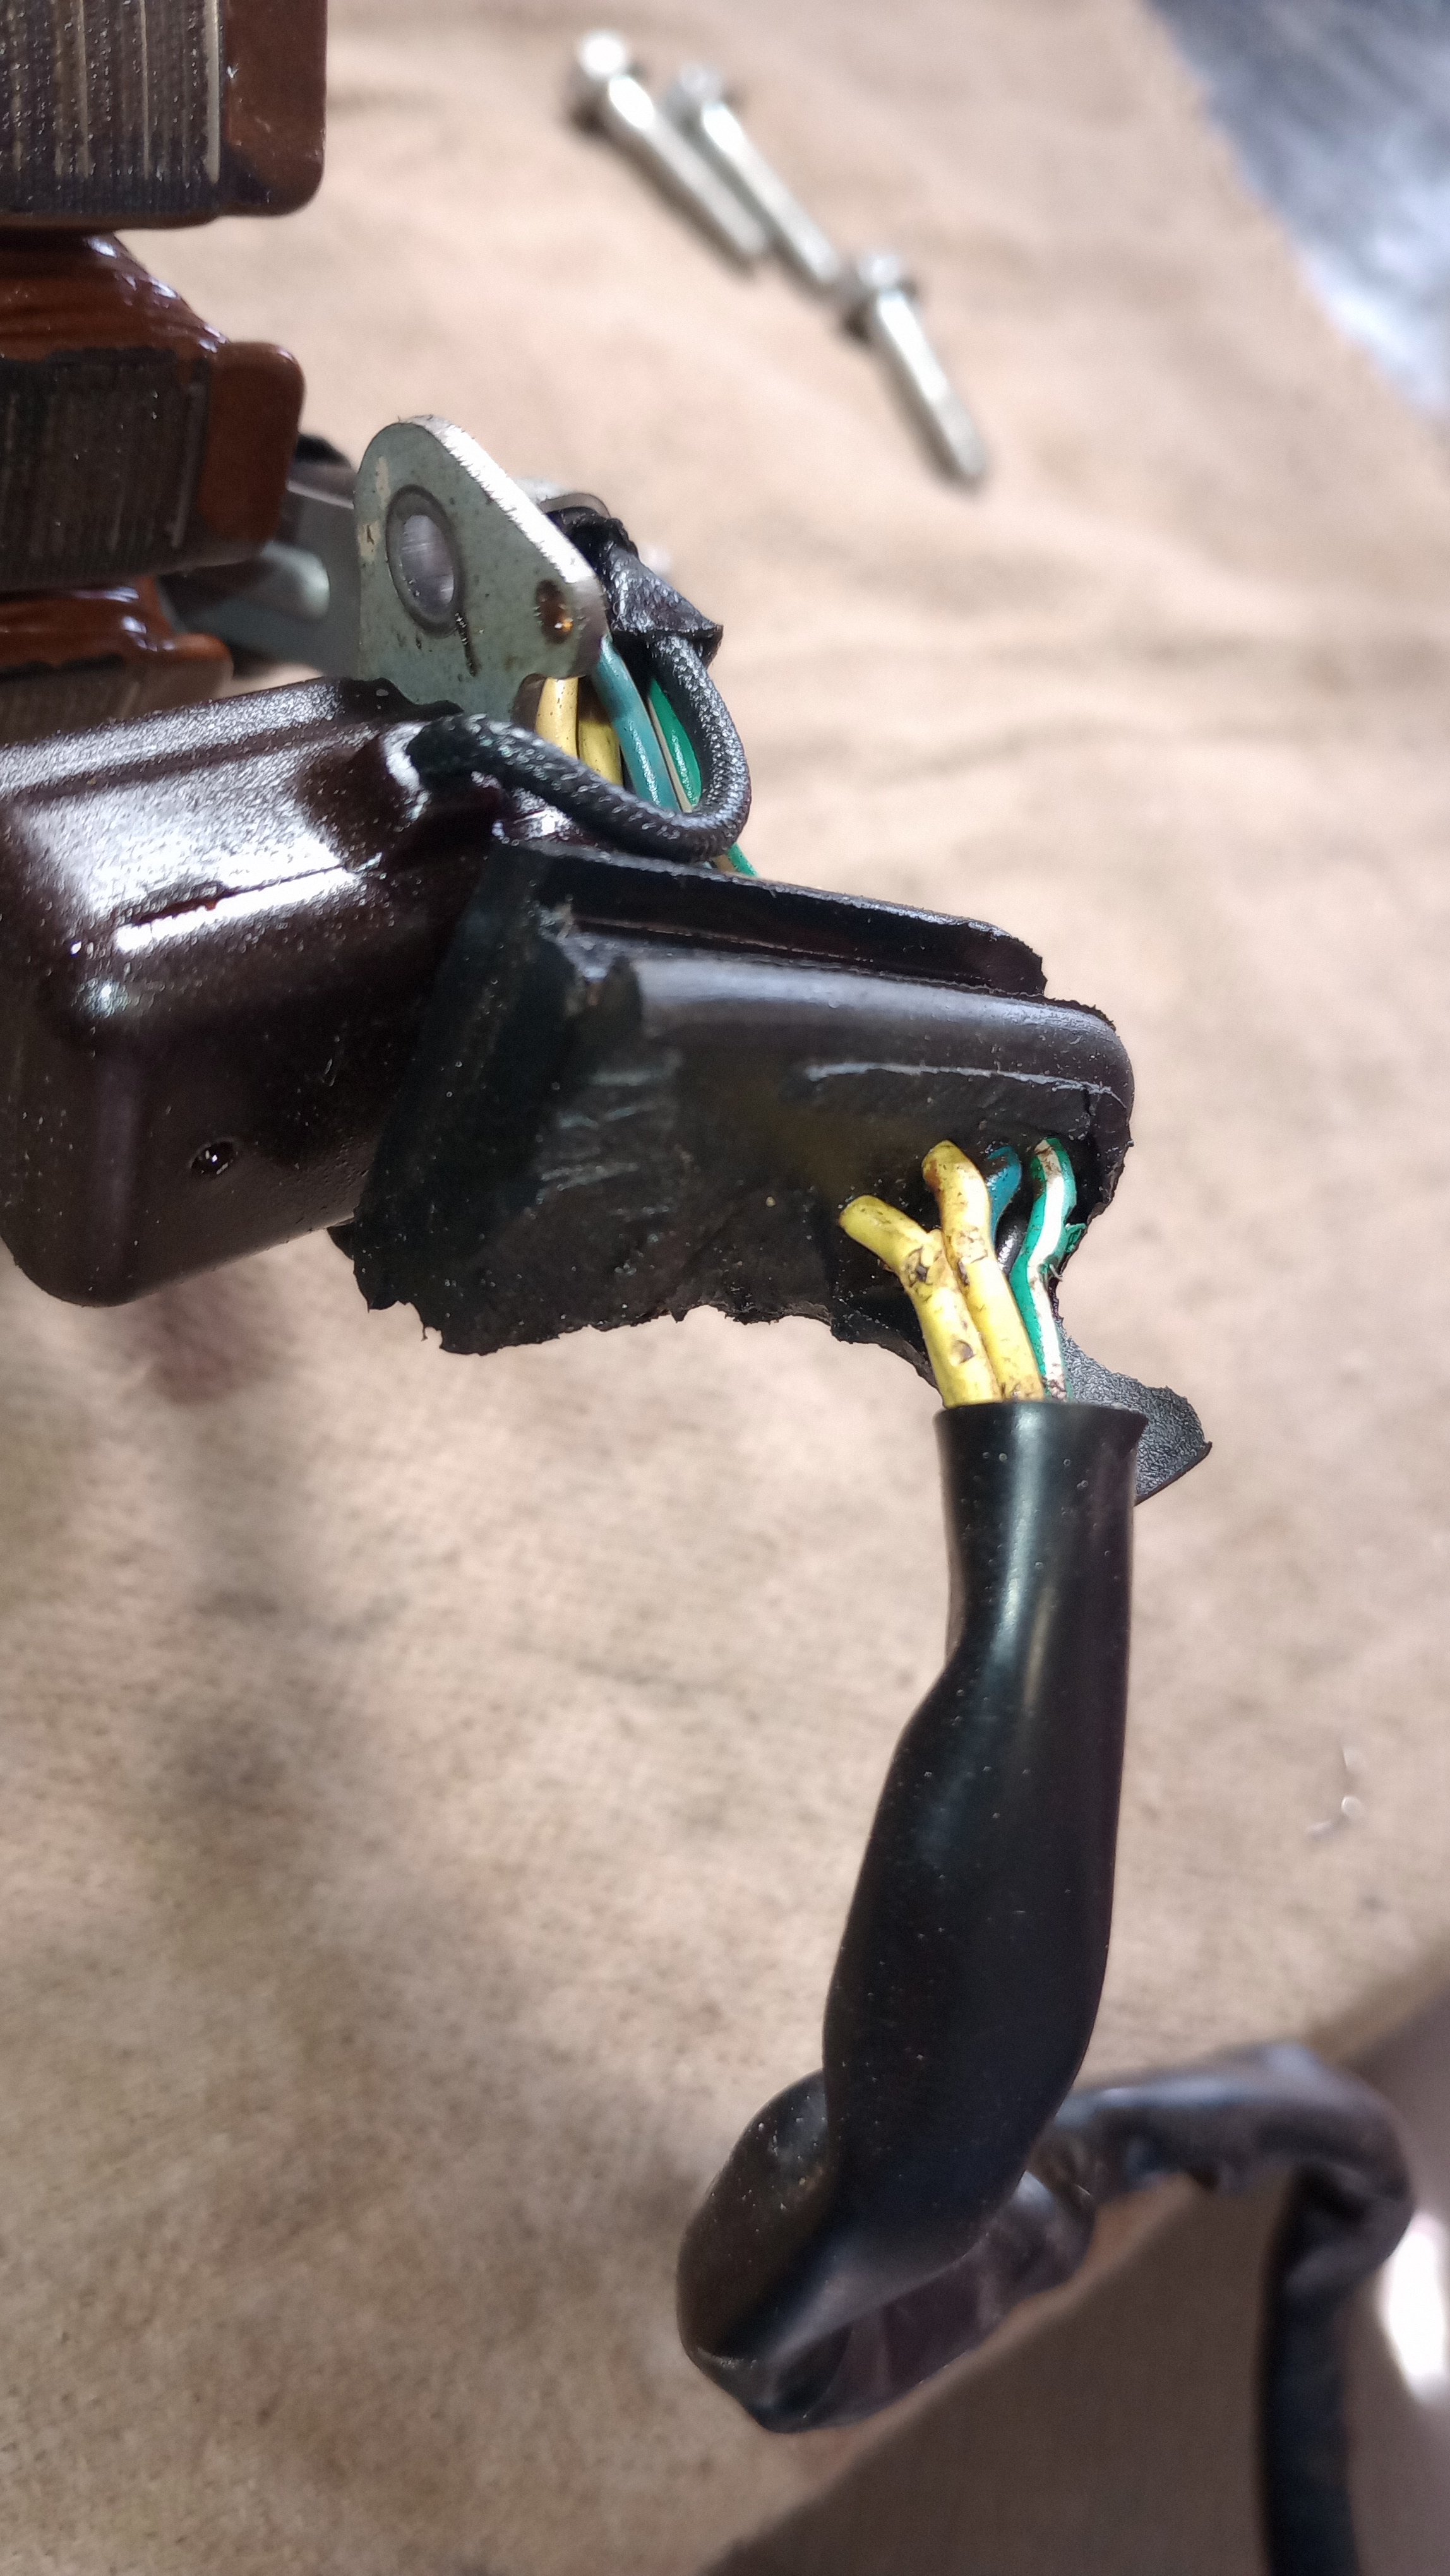
There are definitely a few wires throughout that have been chewed on...one at the rectifier, a couple at the pulse coil/stator and a few more minor ones that I'll address while I've got it all opened up. I'm learning a lot about these things. I'm a "get in there and just do it" type of learner...lol. But it definitely helps to have all this advice! Here's some pics of the current state of it and some of the wiring issues. Might just get some of these open insulation areas taped/sealed off and see what I've got. The pulse coil and stator tests out ok...so I think if I get them sealed up I may be ok there until I can get a new one.
-
Anyone have experience using Meier aftermarket plastics? OEM ones are shot on my quad I'm restoring and I have them "Frankenstein'd" for now...🤦🏼♂️😬
Just curious on opinions on Meier as that seems to be the only place I can find any type of replacements. (And they're pretty pricey!)
-
On 10/8/2023 at 9:20 AM, Ajmboy said:
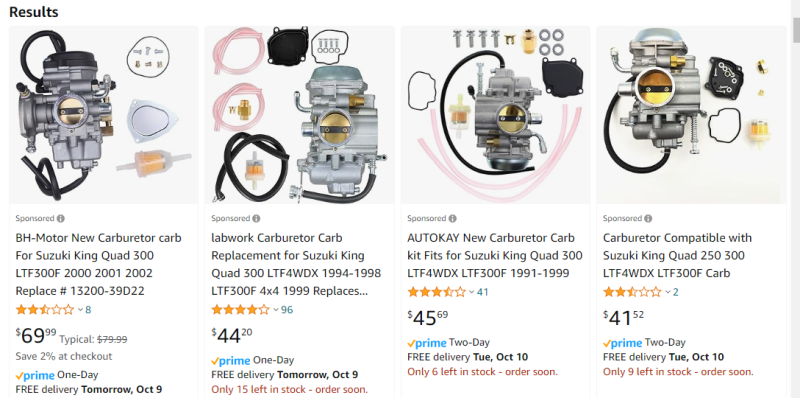
Did you ever get this fixed? I would check/replace the air filter and fuel filter a start and the rebuild the carb. However, depending on your budget, I would just buy and slap a new one on there. You can get them for under $50 on Amazon

I know this post is a couple months old, but have you had good luck with these carbs? I had bought a cheap one on Amazon awhile back for a mower, and it seemed ok for the short time I had it...🤷🏼♂️
-
2
-
-
5 minutes ago, Gwbarm said:
Thats funny! $20 he should have give him 20 to haul it away.
Lol. Even if I didn't do anything else to this quad, the few times my son was on it when we had it running was definitely worth $20! Smiling ear to ear the whole time. But, since I'm this deep into it, I'm gonna take it all the way and get it somewhat restored 🤙
-
7 hours ago, Mech said:
You really need to download the service manual and follow the diagnostic procedure. The battery needs to be charged.
First I'd carry out the resistance tests on the cdi unit. You need the manual for that.
Then I'd check all the wiring for continuity from the stator and pickup coil to the cdi and all the earths on the bike, and for any chafed wires that could be shorting to earth.
The pulse sounds about right but the manual should tell you what it's meant to be. You need to be sure it and the stator are connected to the cdi though so I always test their output at the cdi plug. If there's any chafed wiring they might have continuity but they might be shorting to earth intermittently, so inspect the wiring. The spark should be fat and blue even when it's intermittent. If the sparkplug cap comes off the lead I'd take that off and test the spark. The switches earth to kill the spark and in theory shouldn't have a problem with dirty contacts but I'd strip them and check they were getting full travel of the contacts and that they didn't have dirt in them causing shorts. I'd check all the connection plugs too for dirty contacts, broken wires or dirt causing shorts.
Get the manual and have a look. The models vary a little and you need to check which model you have to test things properly.
Thanks Mech,
I will get a hold of manual. Working on my requirements on here...lol. Last night I did find that the black wire coming to the ignition coil only has about 50% of the strands connected.🤦🏼♂️ So, that could very well be the problem. Once I get ahold of the manual I will look into all the testing procedures.
-
I have a 1988 Quadrunner 250 2wd. My brother in law sold it to my son for $20...had been sitting outside for several years. Got it home and had it running in about 30 mins. Ran it a bit and then went to looking at the carb as it was having trouble idling. Was getting it pretty close, then started losing spark...Also, it wouldn't start up every time...only about 1 in 5 tries. Anyway...now, it has what I can only describe as "intermittent" spark. I can get 1 light spark right when the start button is pressed and sometimes one when it's released...but none while cranking. 🤷♂️
I have replaced the spark plug, ignition coil/wire, and traced wires best I can. I noticed a couple frayed wires at the pickup coil where it enters the case. So, now I have the cover off, stator and pickup coil out and trying to test the coil. I do have about 114 ohms resistance for pickup best I can tell. And I can read minute voltage when I drag a magnet across it. Could it still be bad? Can a bad ignition switch/button cause this? (I did have the switch off to oil the choke cable)...pulling rope makes no difference though...any ideas or help would be greatly appreciated!!! It's the intermittent part that's throwing me off!

1988 Suzuki Quadrunner 250 intermittent spark
in Suzuki ATV Forum
Posted
Hey! So, I got back on the project this week. I've started up a part time small engine repair gig and it's been keeping me busy!
Anyhow, I got the ol girl running pretty good. I cleaned out the fuel tank and while doing so, realized that was 90% of my problem all along.🤦🏼♂️ Can't believe I overlooked that. Tank was FILTHY! Pretty much was mud at the bottom and once I got that flushed and added fresh gas, she fired right away. Now to buy some front tires and she'll be ready to have some fun and be put to work. Painting the racks and front bumper also. Will have them put back on next week. (Busy this weekend 🥵)