
Venom
-
Posts
44 -
Joined
-
Last visited
Venom's Achievements
")


-
Does anyone make aftermarket engine parts for the Suzuki Quadsport LT-Z50? Pistons, Valves, etc...? I have found rings and complete gasket sets.... I need an oversize piston kit and valves.. One company is selling a piston, but upon further inspection it is an LT50 piston that they are saying is for the 2006 Suzuki Quadsport LT-Z50. Yet the LT50 Piston is not interchangeable with the LT-Z50 according to the pistons listed by Suzuki. Any help would be appreciated
-
A little update. After refusing to pay $300 for a new OEM carburetor, I built a new intake adapter that lets me use a Suzuki LT50 carburetor that I got on Amazon for $15. Now that the engine is running better I have discovered the next problem. Compression is low.... I will take some pics of the adapter today.
-
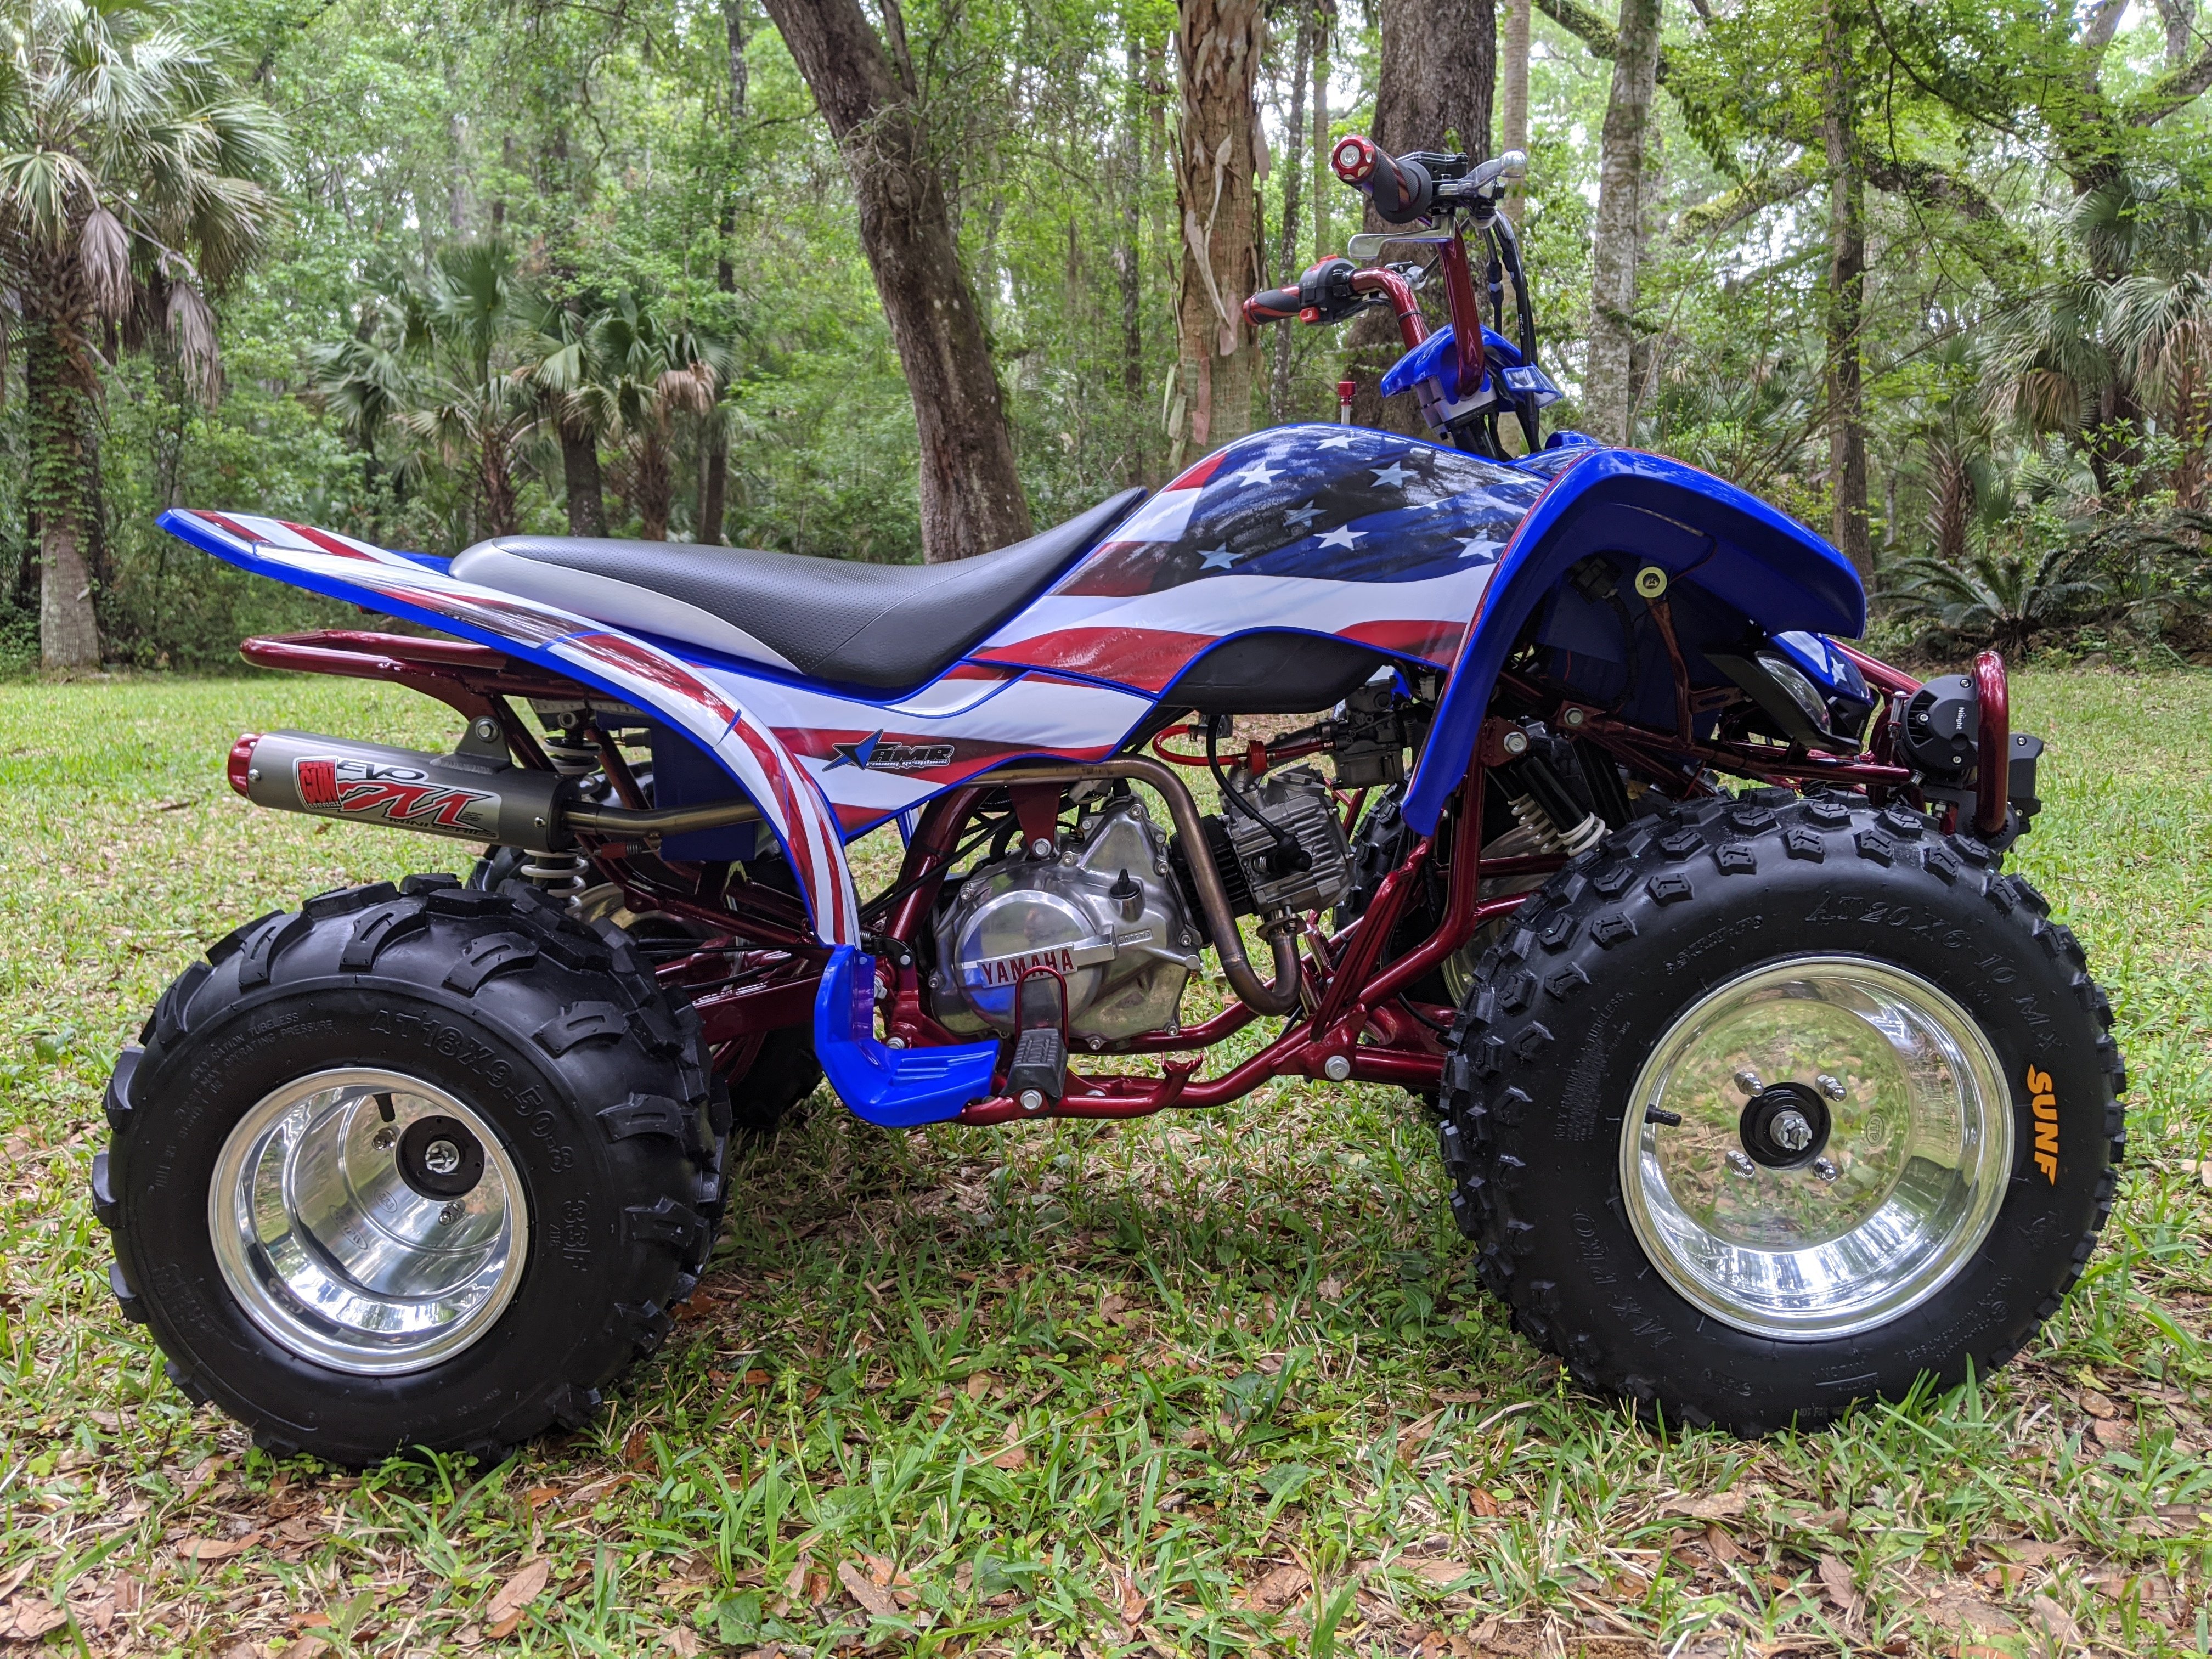
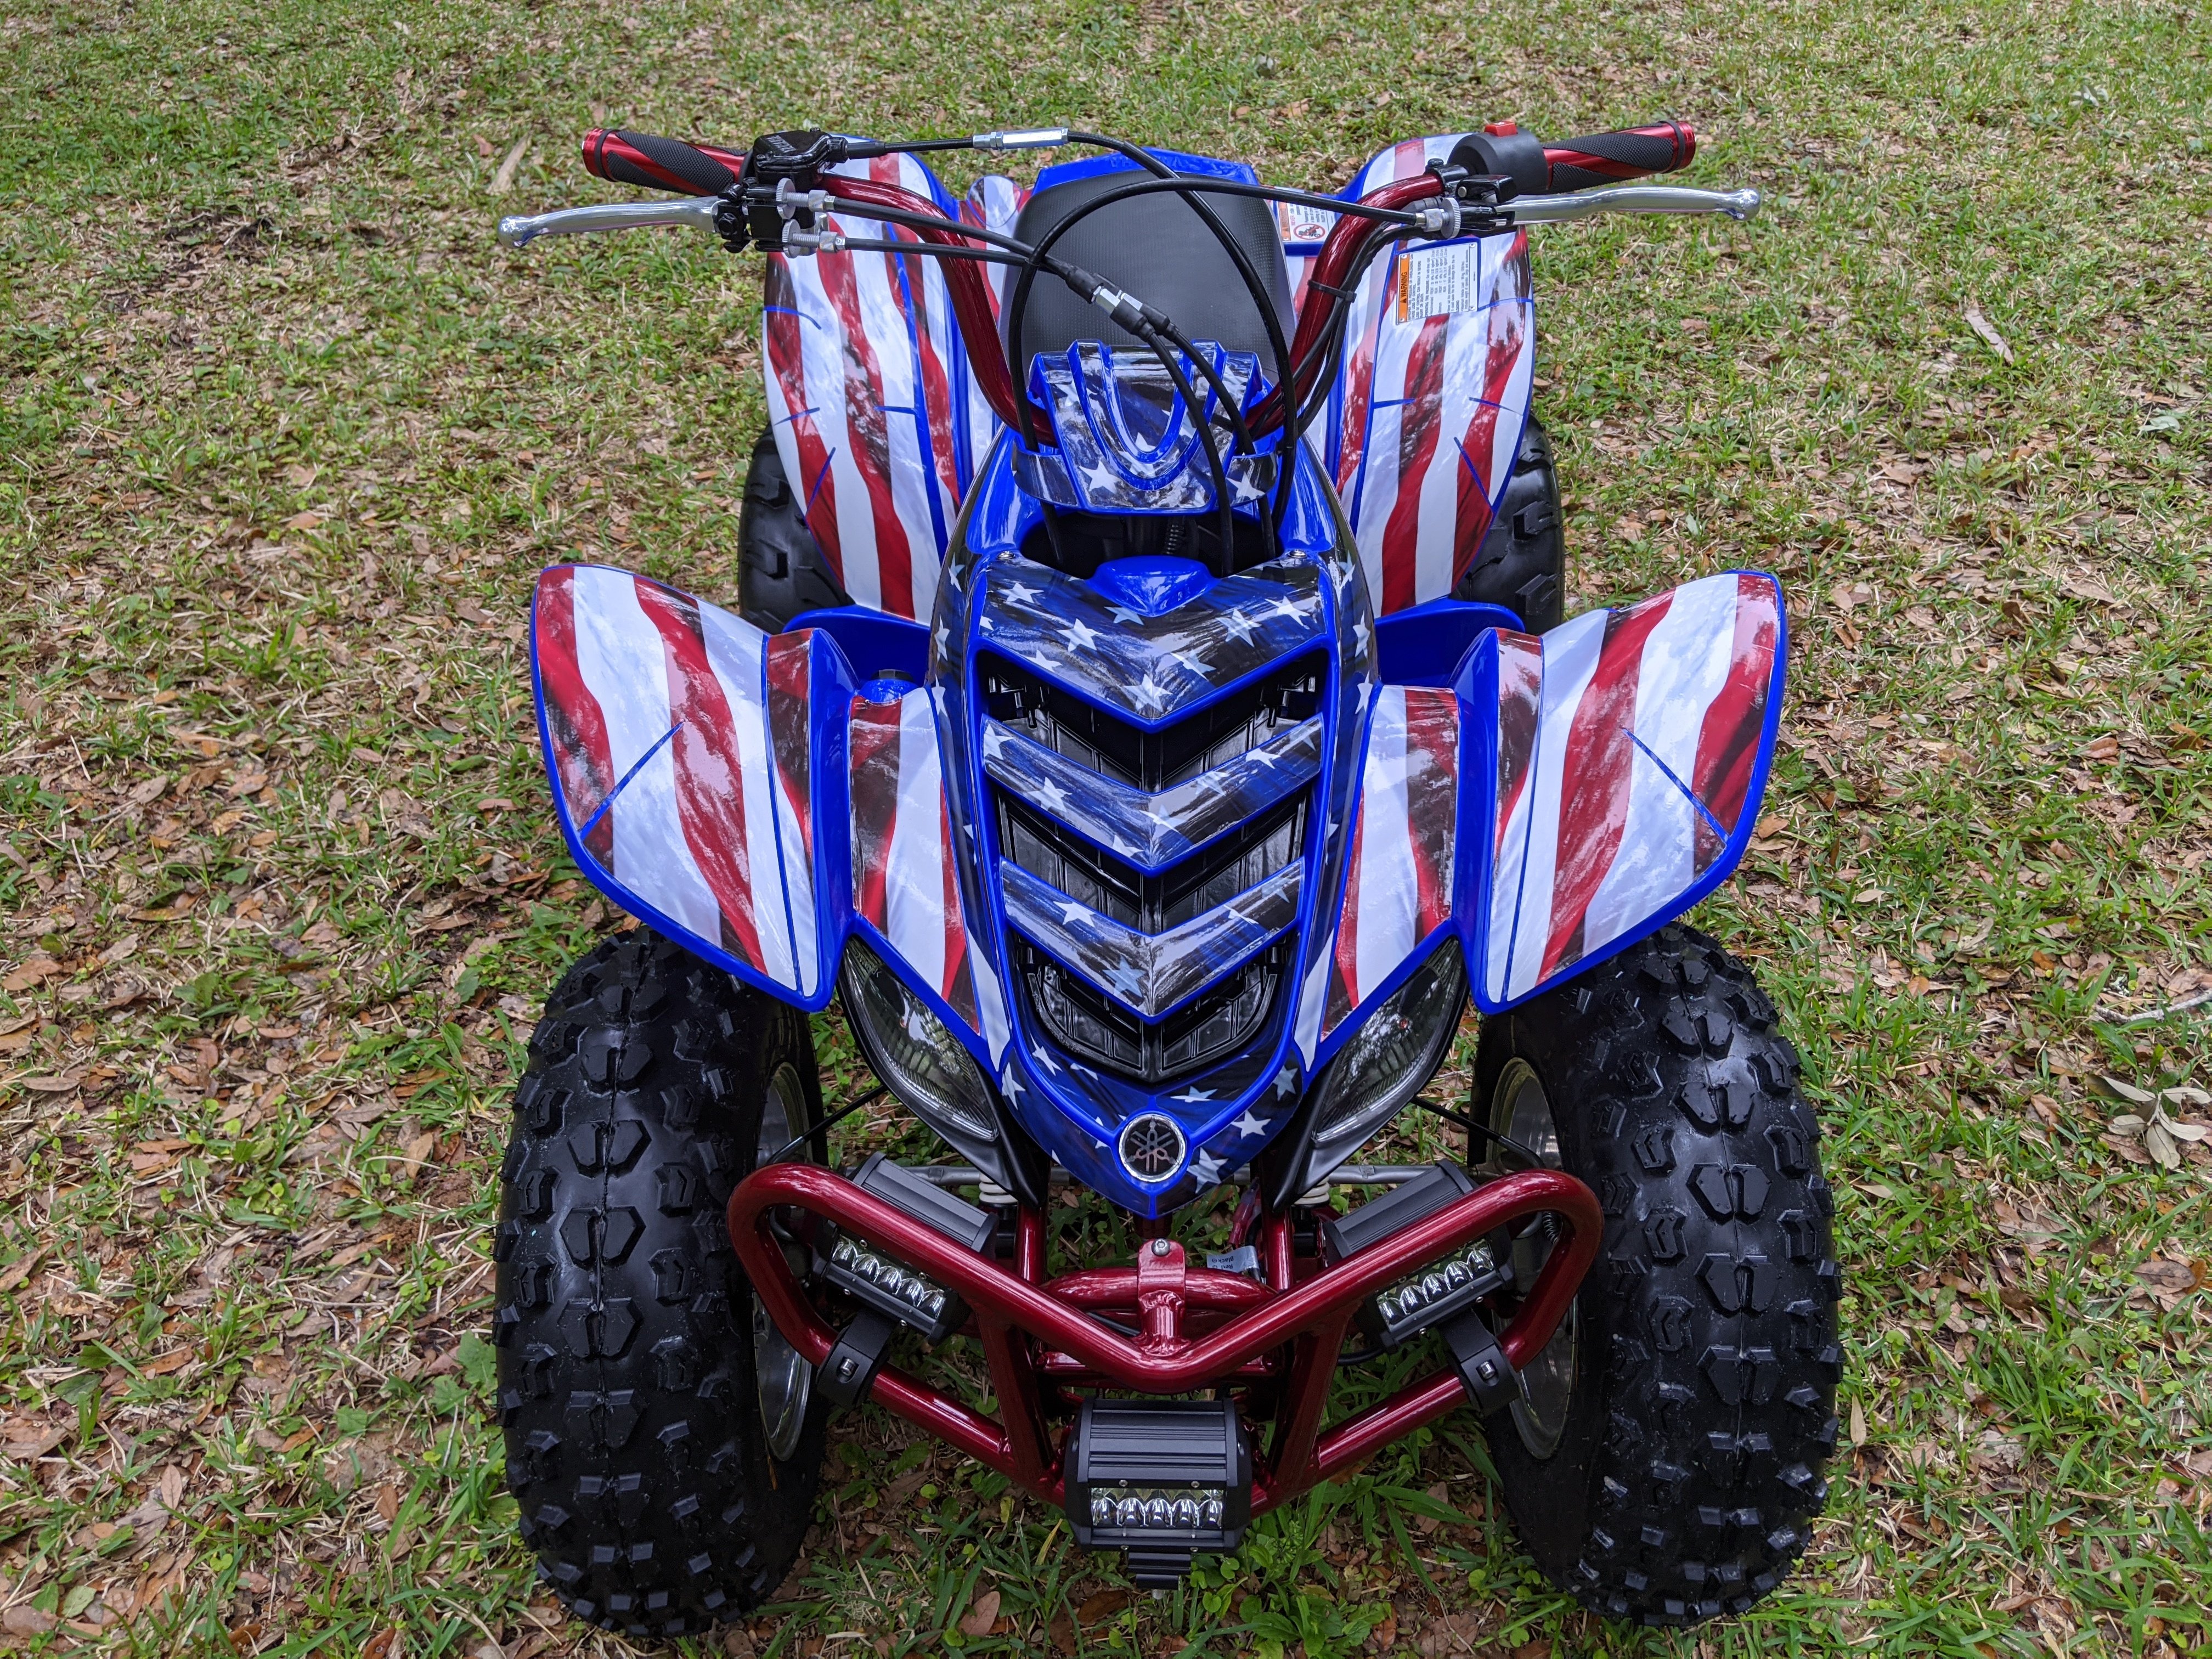
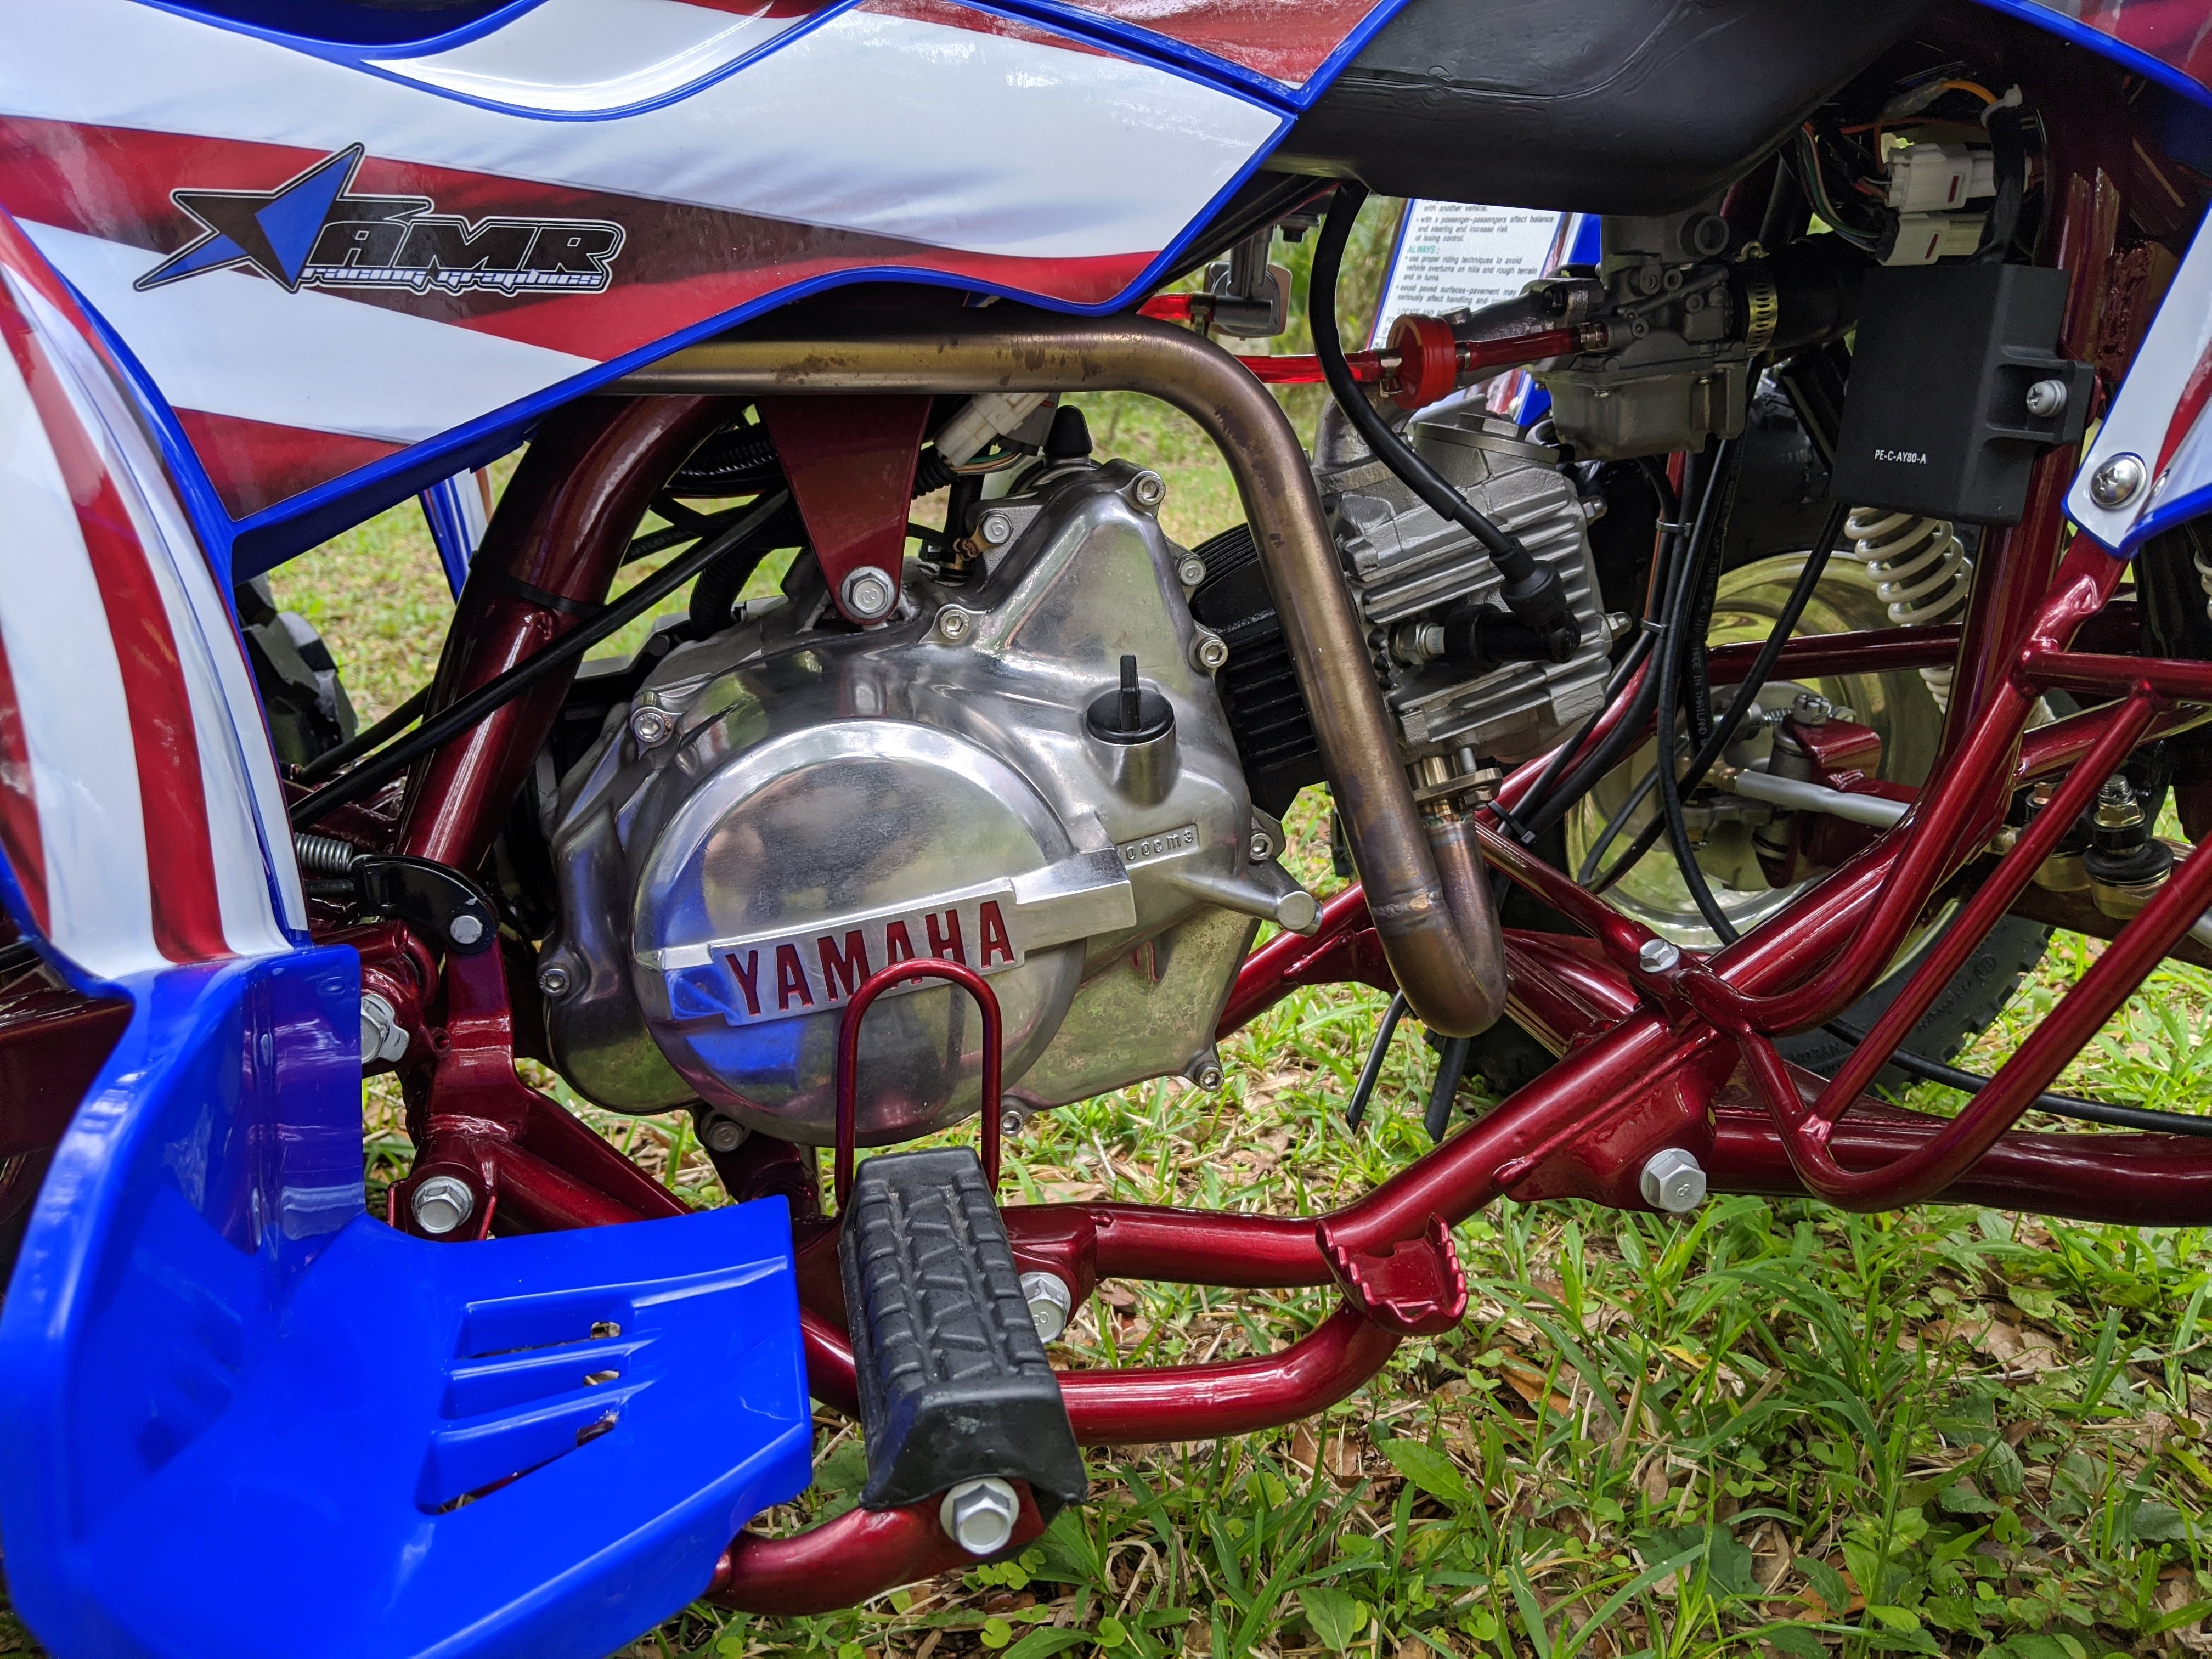
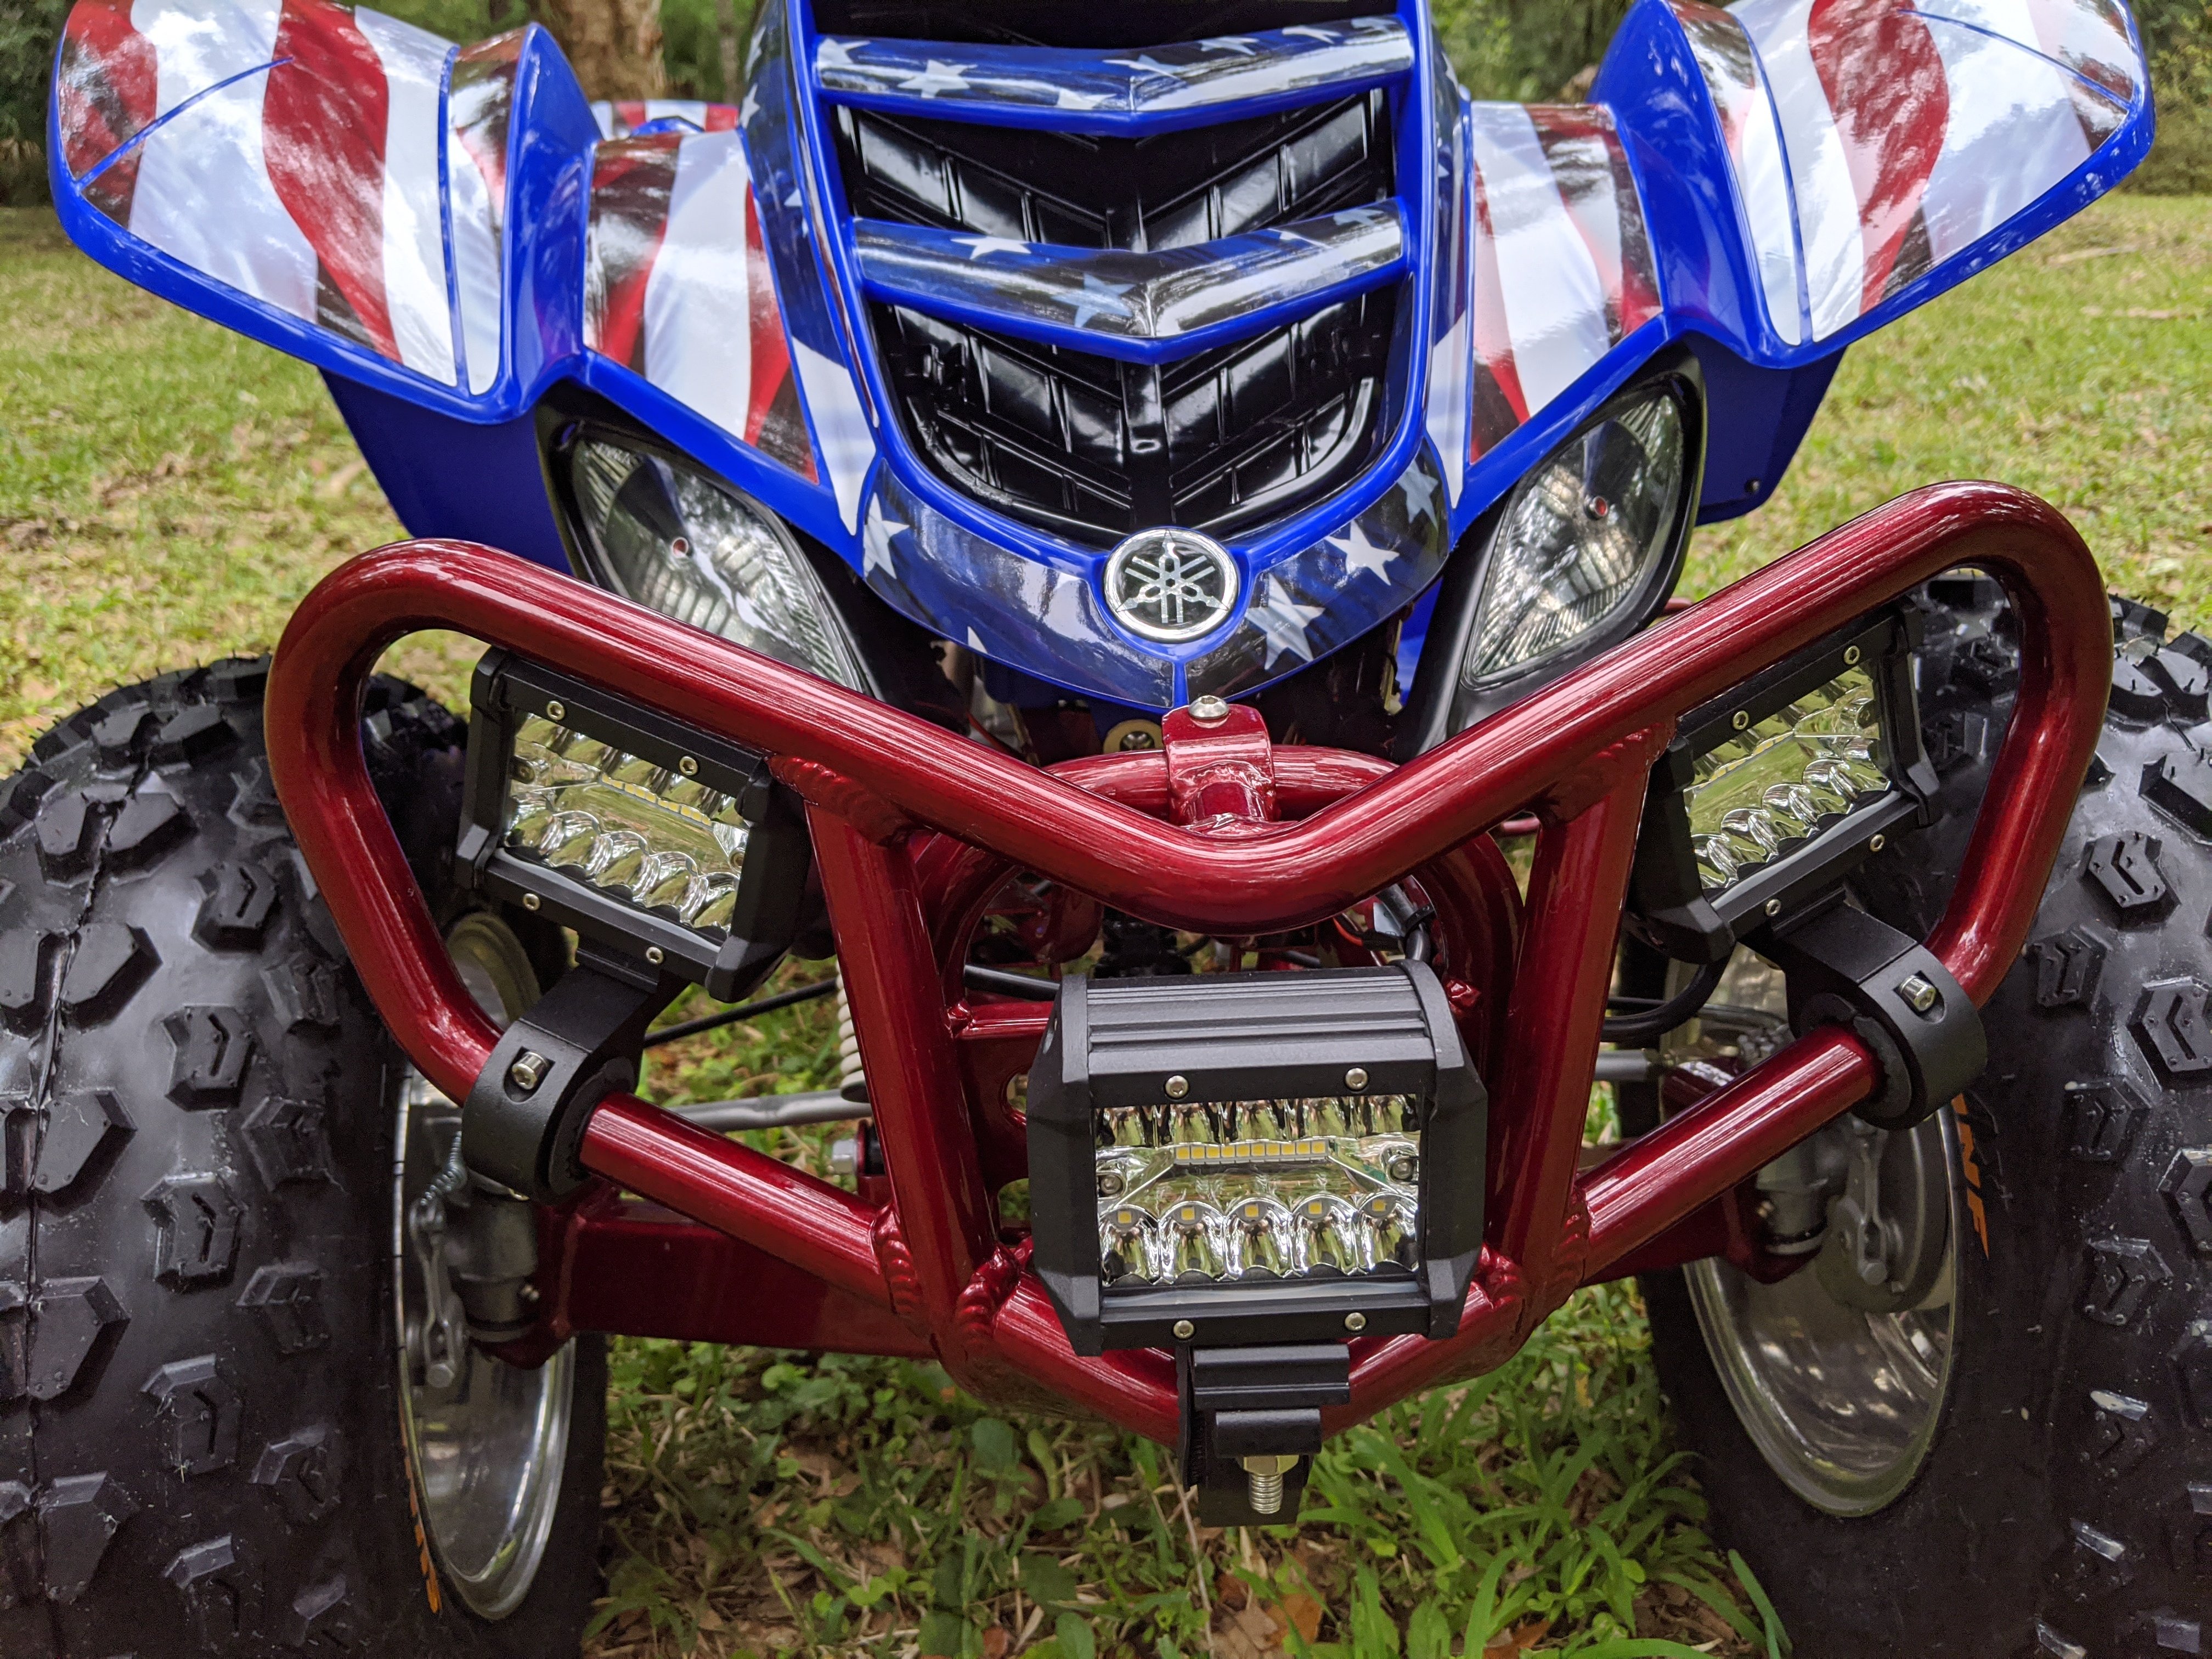
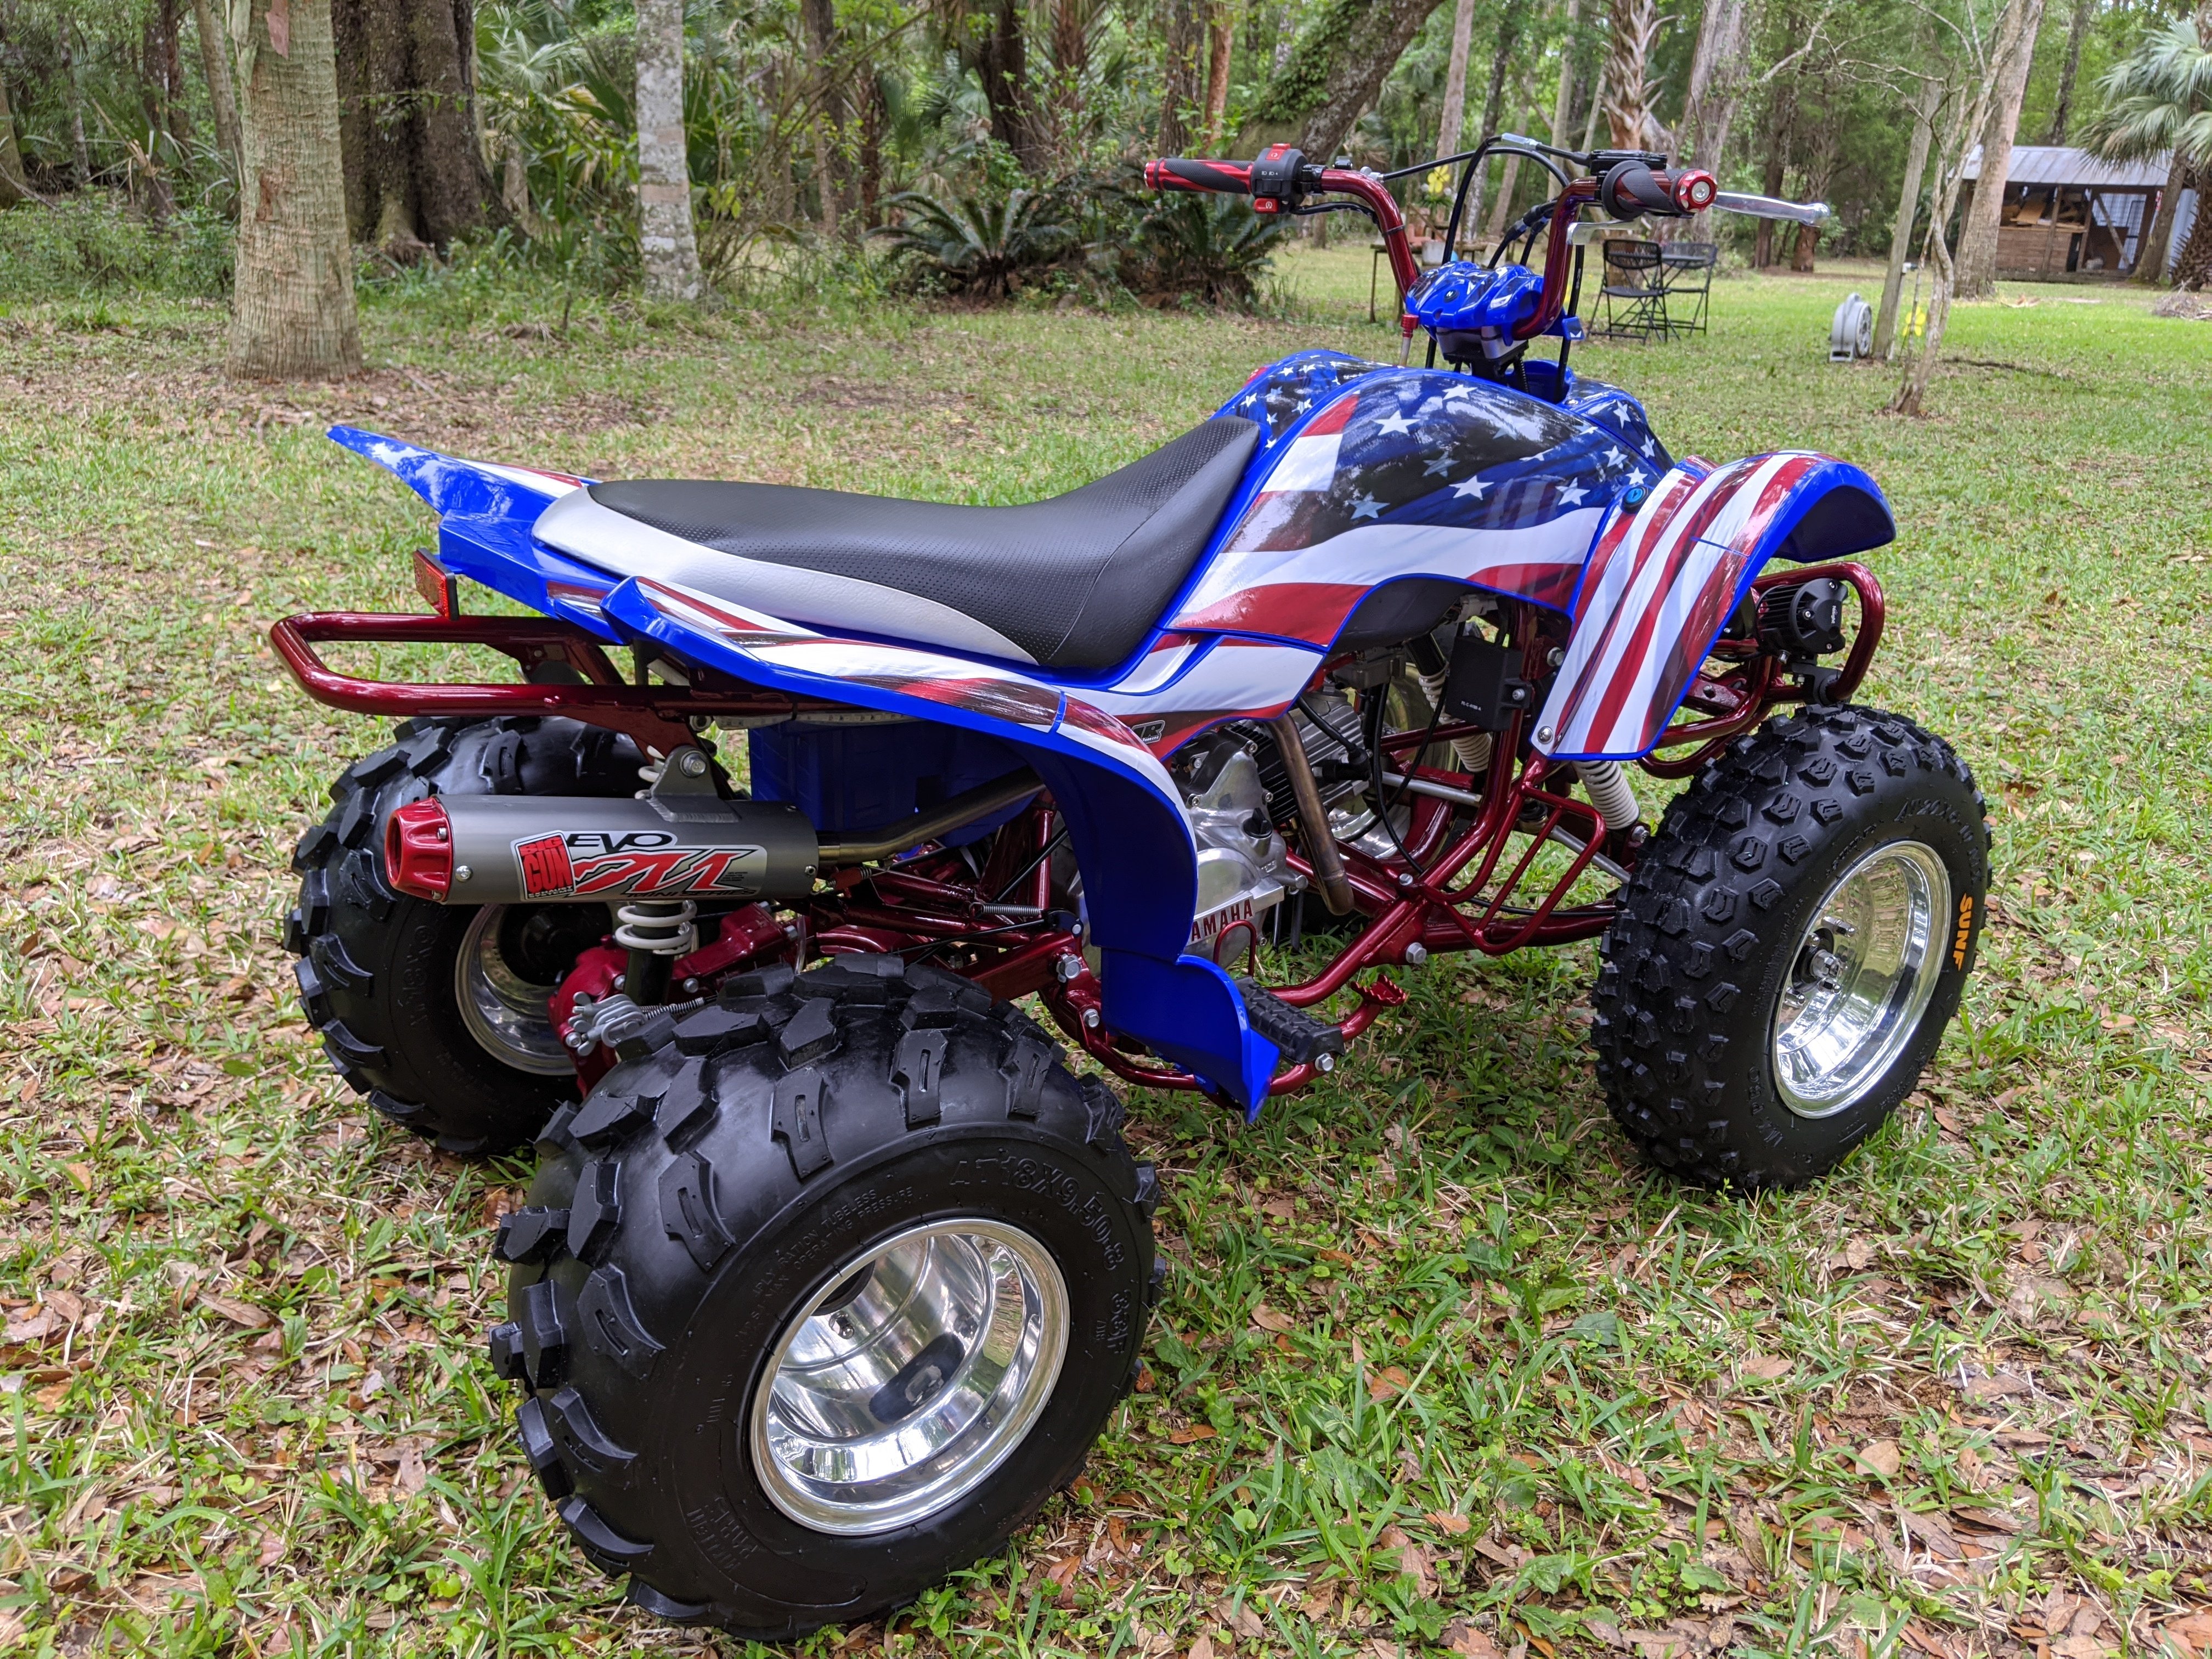
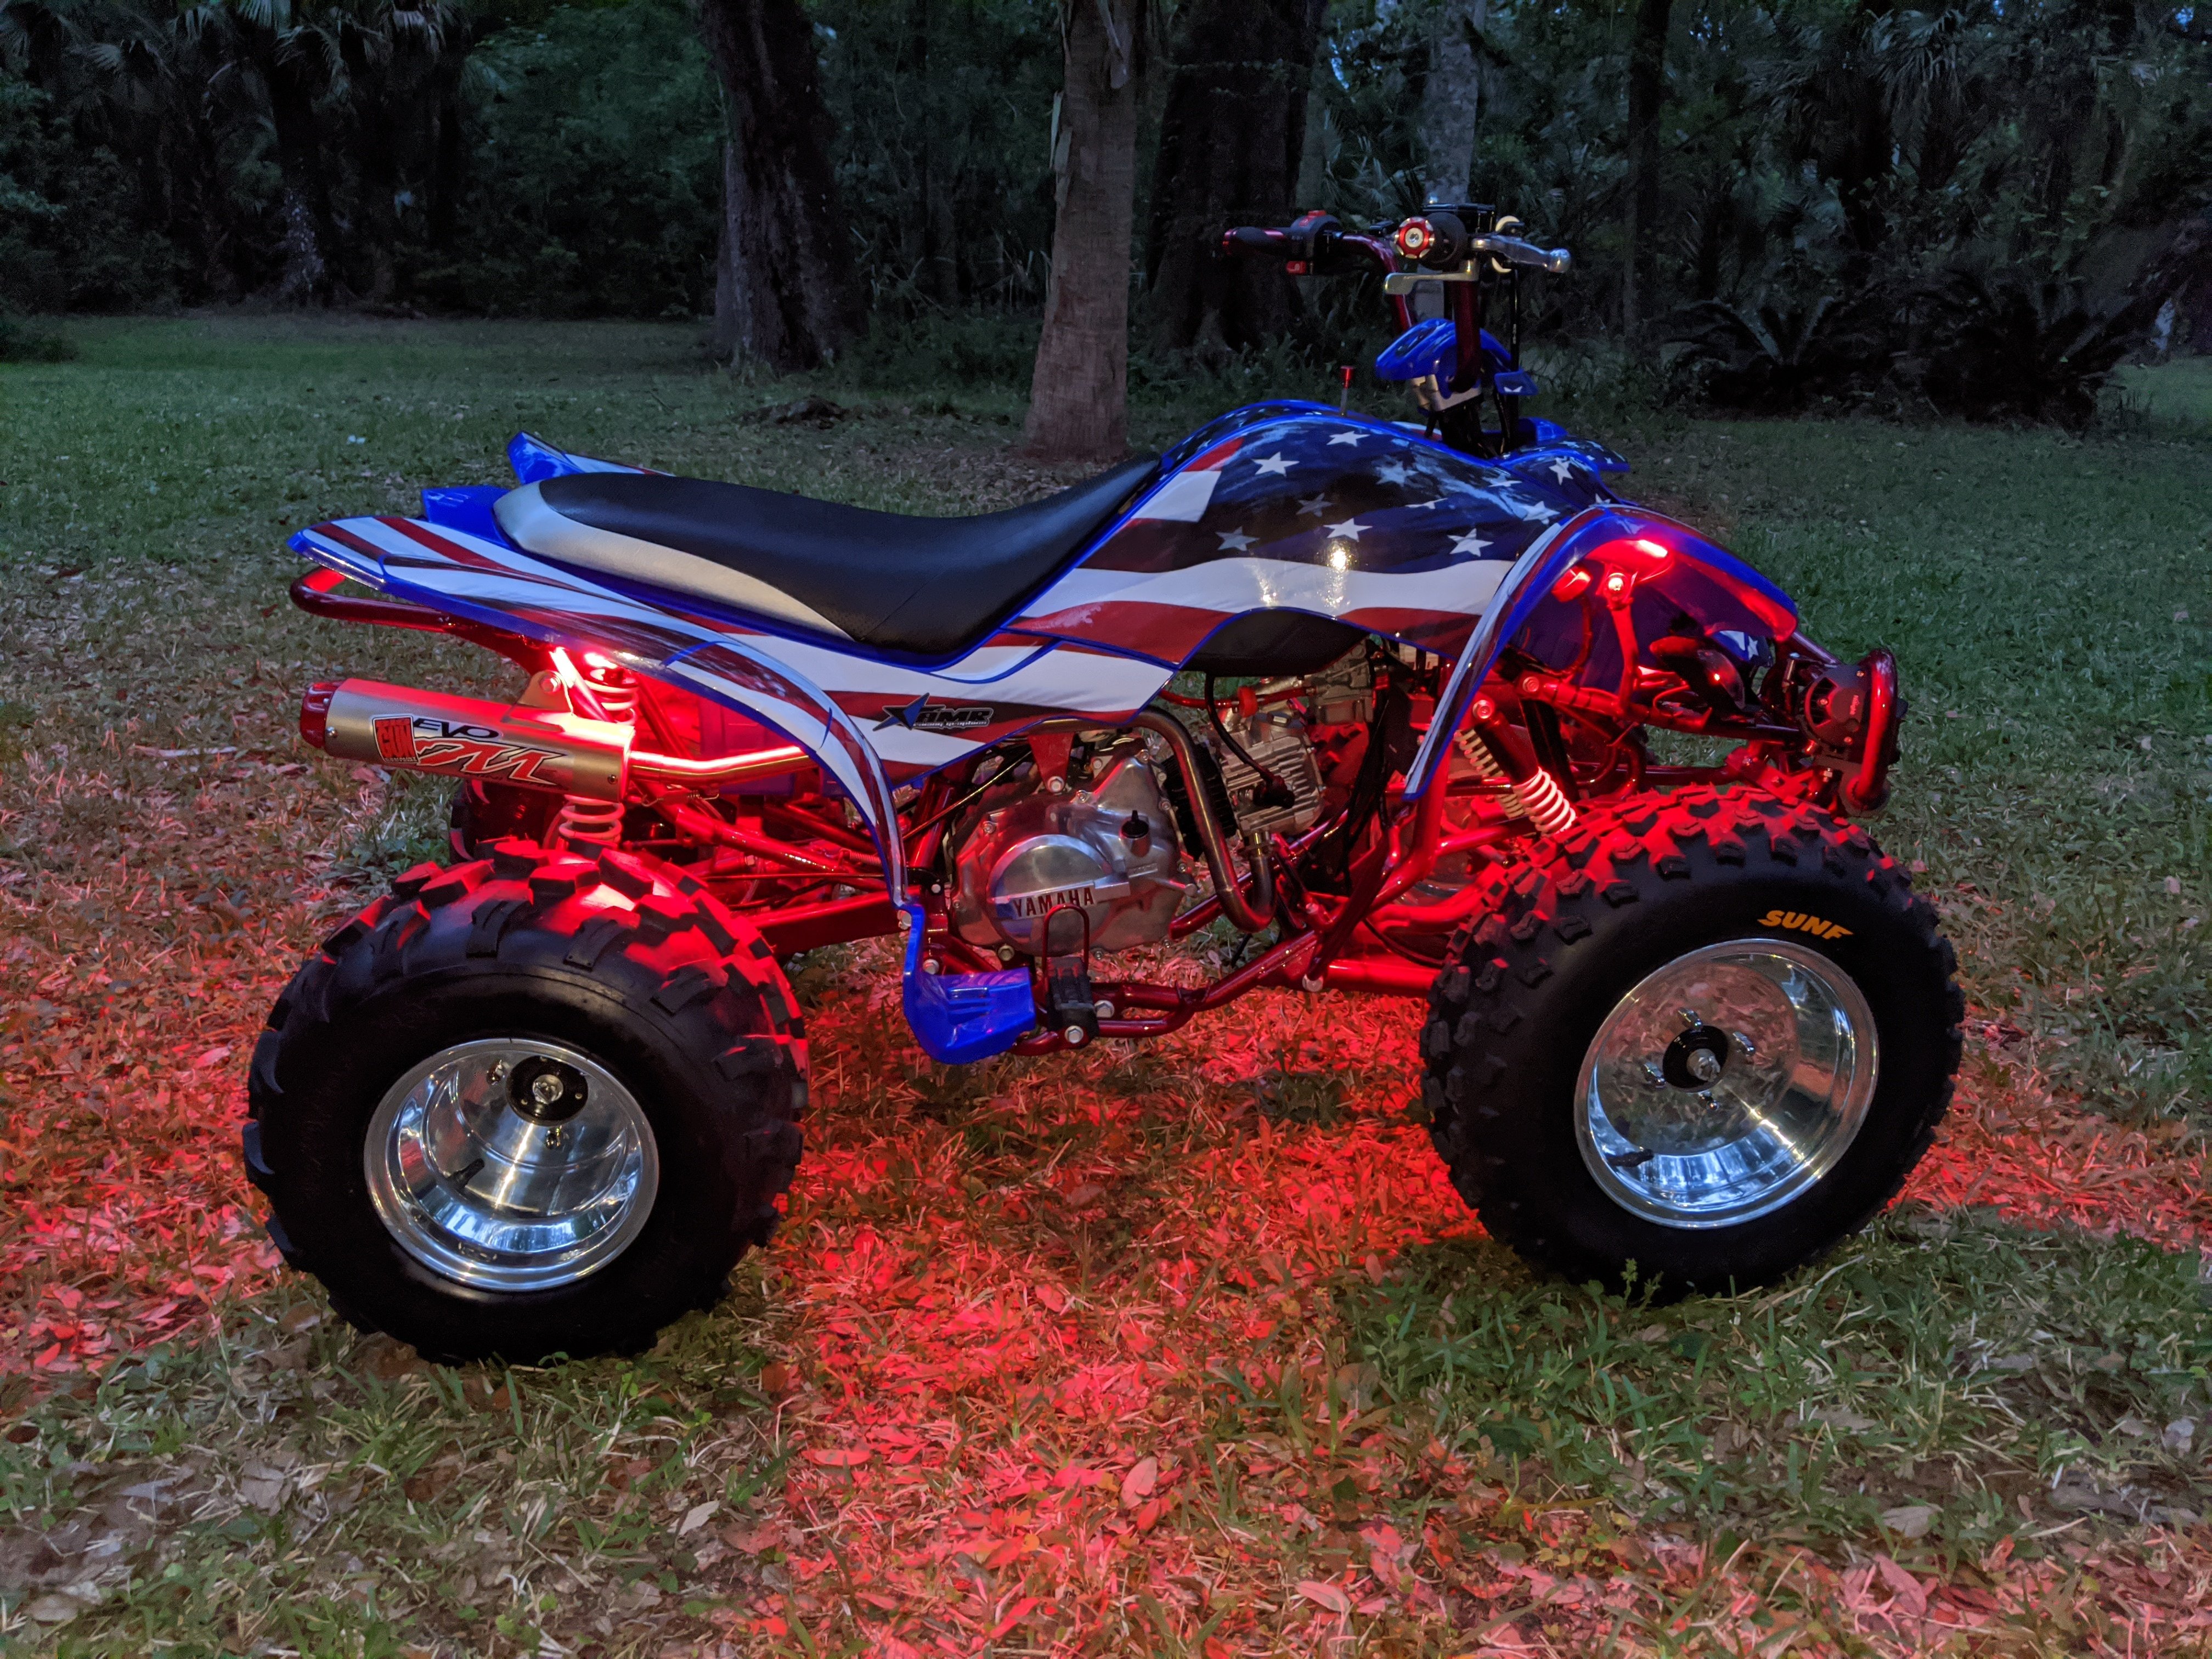
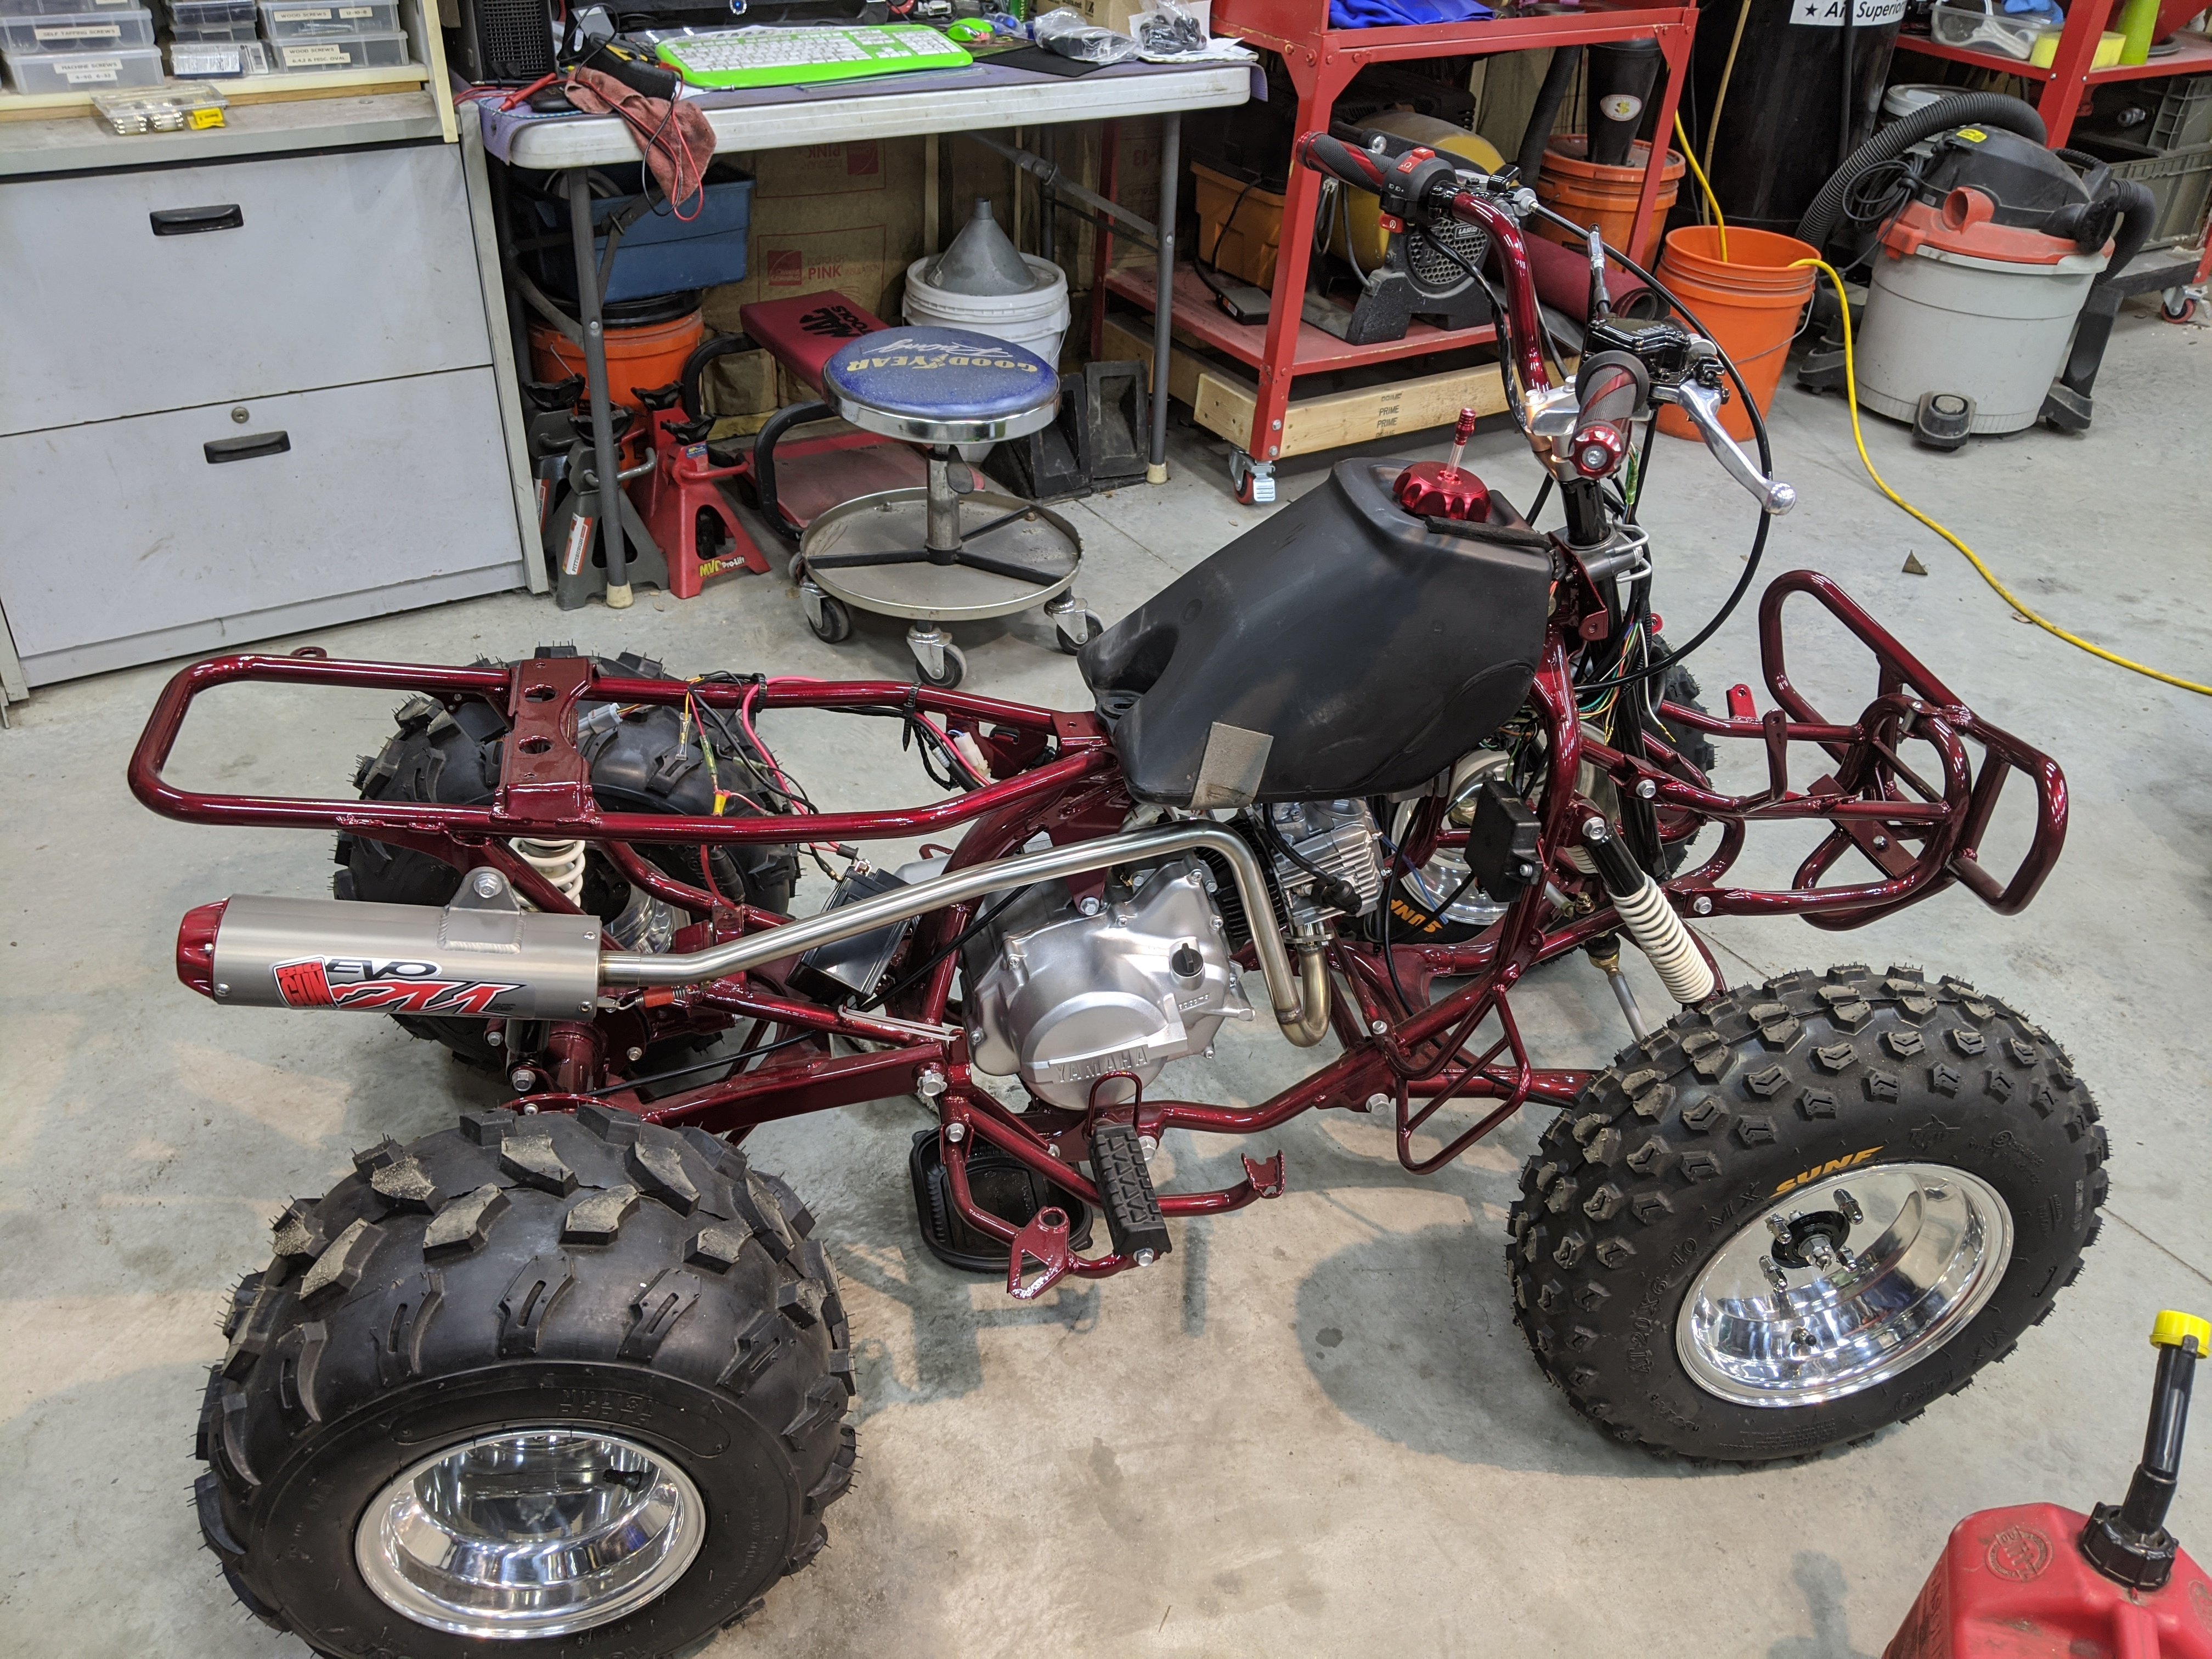
I neglected this thread... I finished this build and I have tons of photos... I will post everything soon, but here is what she looked like finished,

-
Thanks for the response... It is weird , Suzuki used that carb in 2006-2009 and then started using it again in 2017-2020 in the 50cc. I think this is the only carb I have come across that does not have an aftermarket version. I am currently working on an intake manifold plate that will let me use a different carb. I will post results and pictures...
-
I am working on a friends 2006 Suzuki LT-Z50 that they purchased not running. I took apart the carb to rebuild it and someone had already been in there... They really destroyed the Air/Fuel Mixture opening in the body of the carb.. It is in no way repairable. I have not been able to find an aftermarket carb to fit this model. Does anyone know if an aftermarket carb is available? Thanks for any help.
-
Took me a long time to get out that shift lever. It was rusted solid... Kept spraying it with PB Blaster and worked on it evey hour or so in between other things I was working on. After a couple of days it finally broke free.
-
I may have been able to salvage the gaskets, but I decided to play it safe and get new ones.. I have a post on here about the complete restoration of this Raptor 80. I have been slacking on adding updates, but have all the photos and will update it soon.. https://www.quadcrazy.com/atvforum/topic/14419-2003-yamaha-raptor-80-restoration/
-
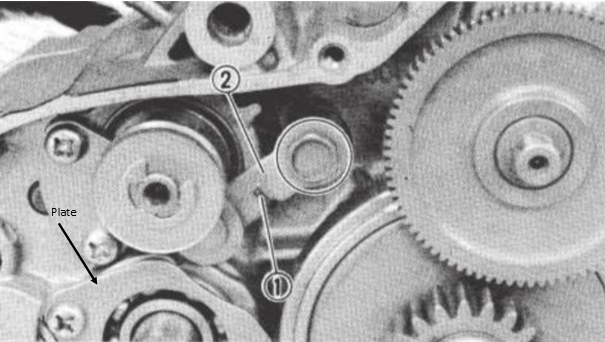
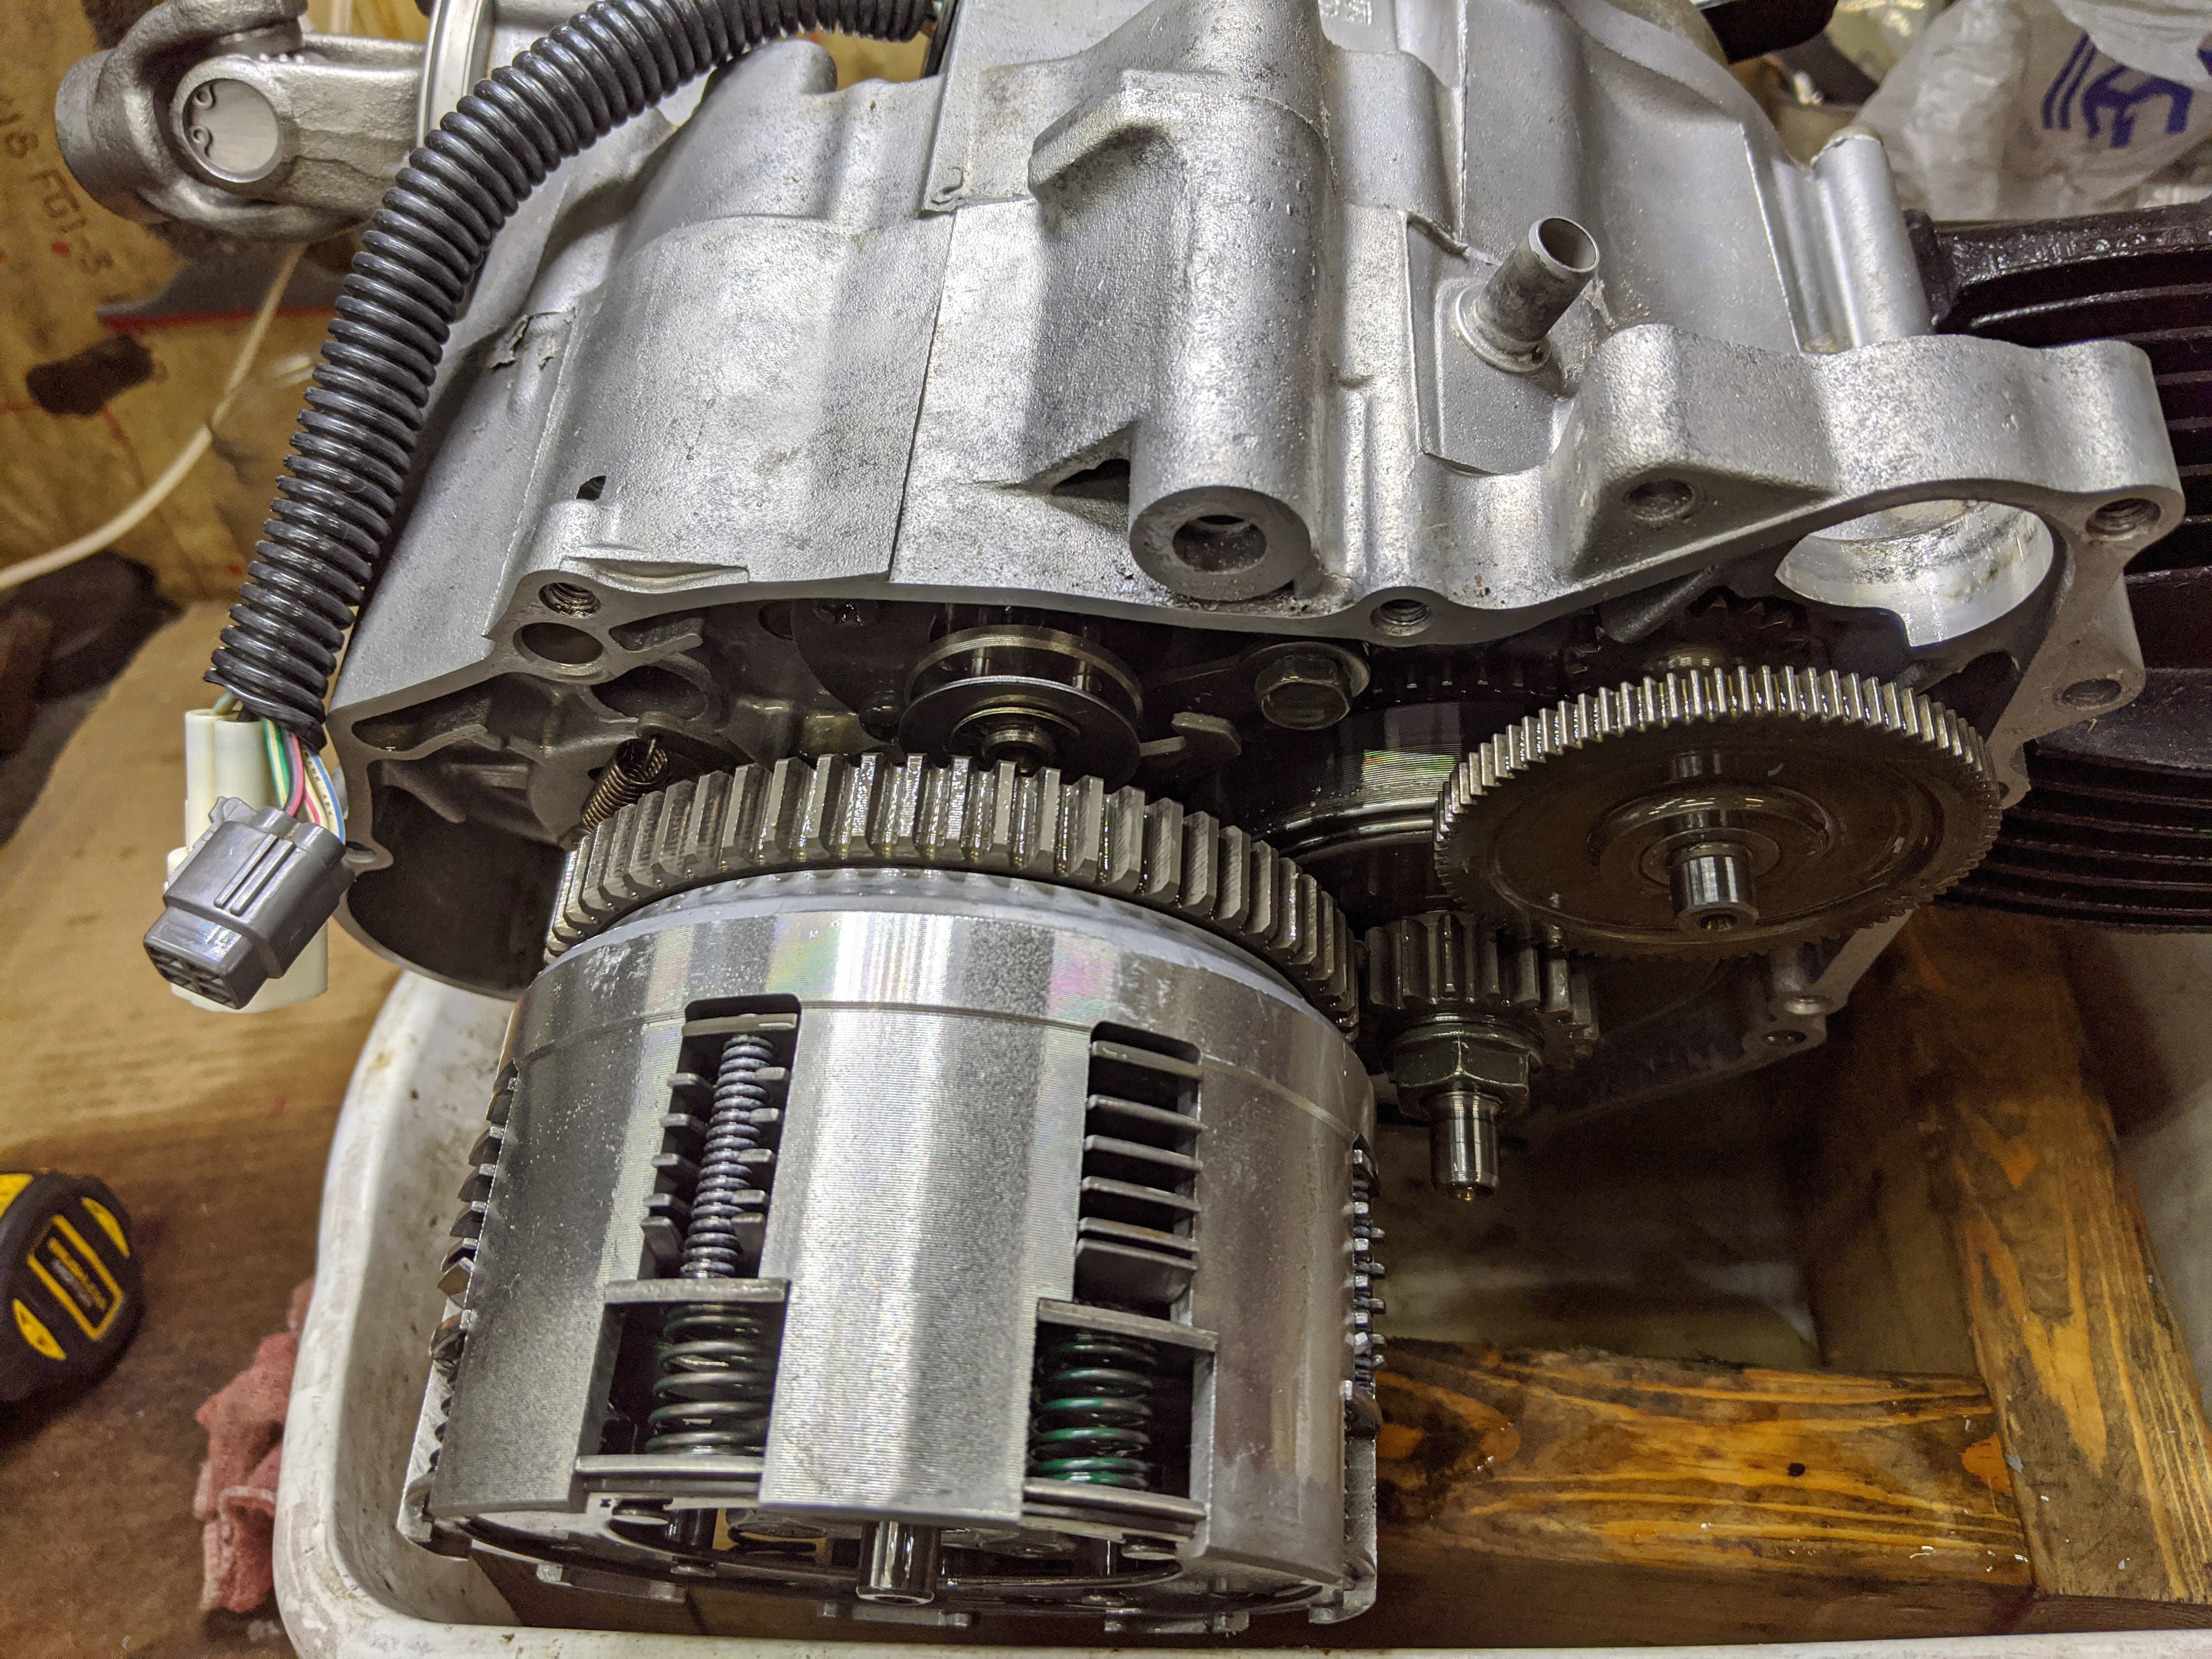
Luck was on my side.... While inspecting everything while the engine was in Neutral I grabbed the case and main axle shaft to move the engine for a better look and low and behold it was no longer in Neutral even though the transmission had not changed gears... After gently moving all the transmission parts in every direction looking for slop I found a slight movement of the Main Axle Shaft. It was sliding about 1/8" left and right. This was enough to engage 1st gear and Neutral.. Upon further inspection I found that the plate that holds the Main Axle Bearing in place had come loose and the bearing had moved out 1/8" creating the shifting problem. I tightened the plate back up and no more shifting problem. The two screws that hold in the bearing plate had been torqued down according to the Service Manual. This time I added Loctite before torquing them down. Just in case this ever happens to anyone else I have added a photo showing the location of the Bearing Plate. It sits behind the clutch... That is correct... Behind the clutch... If I had initially seen that I would not have had to split the case... 🙄
-
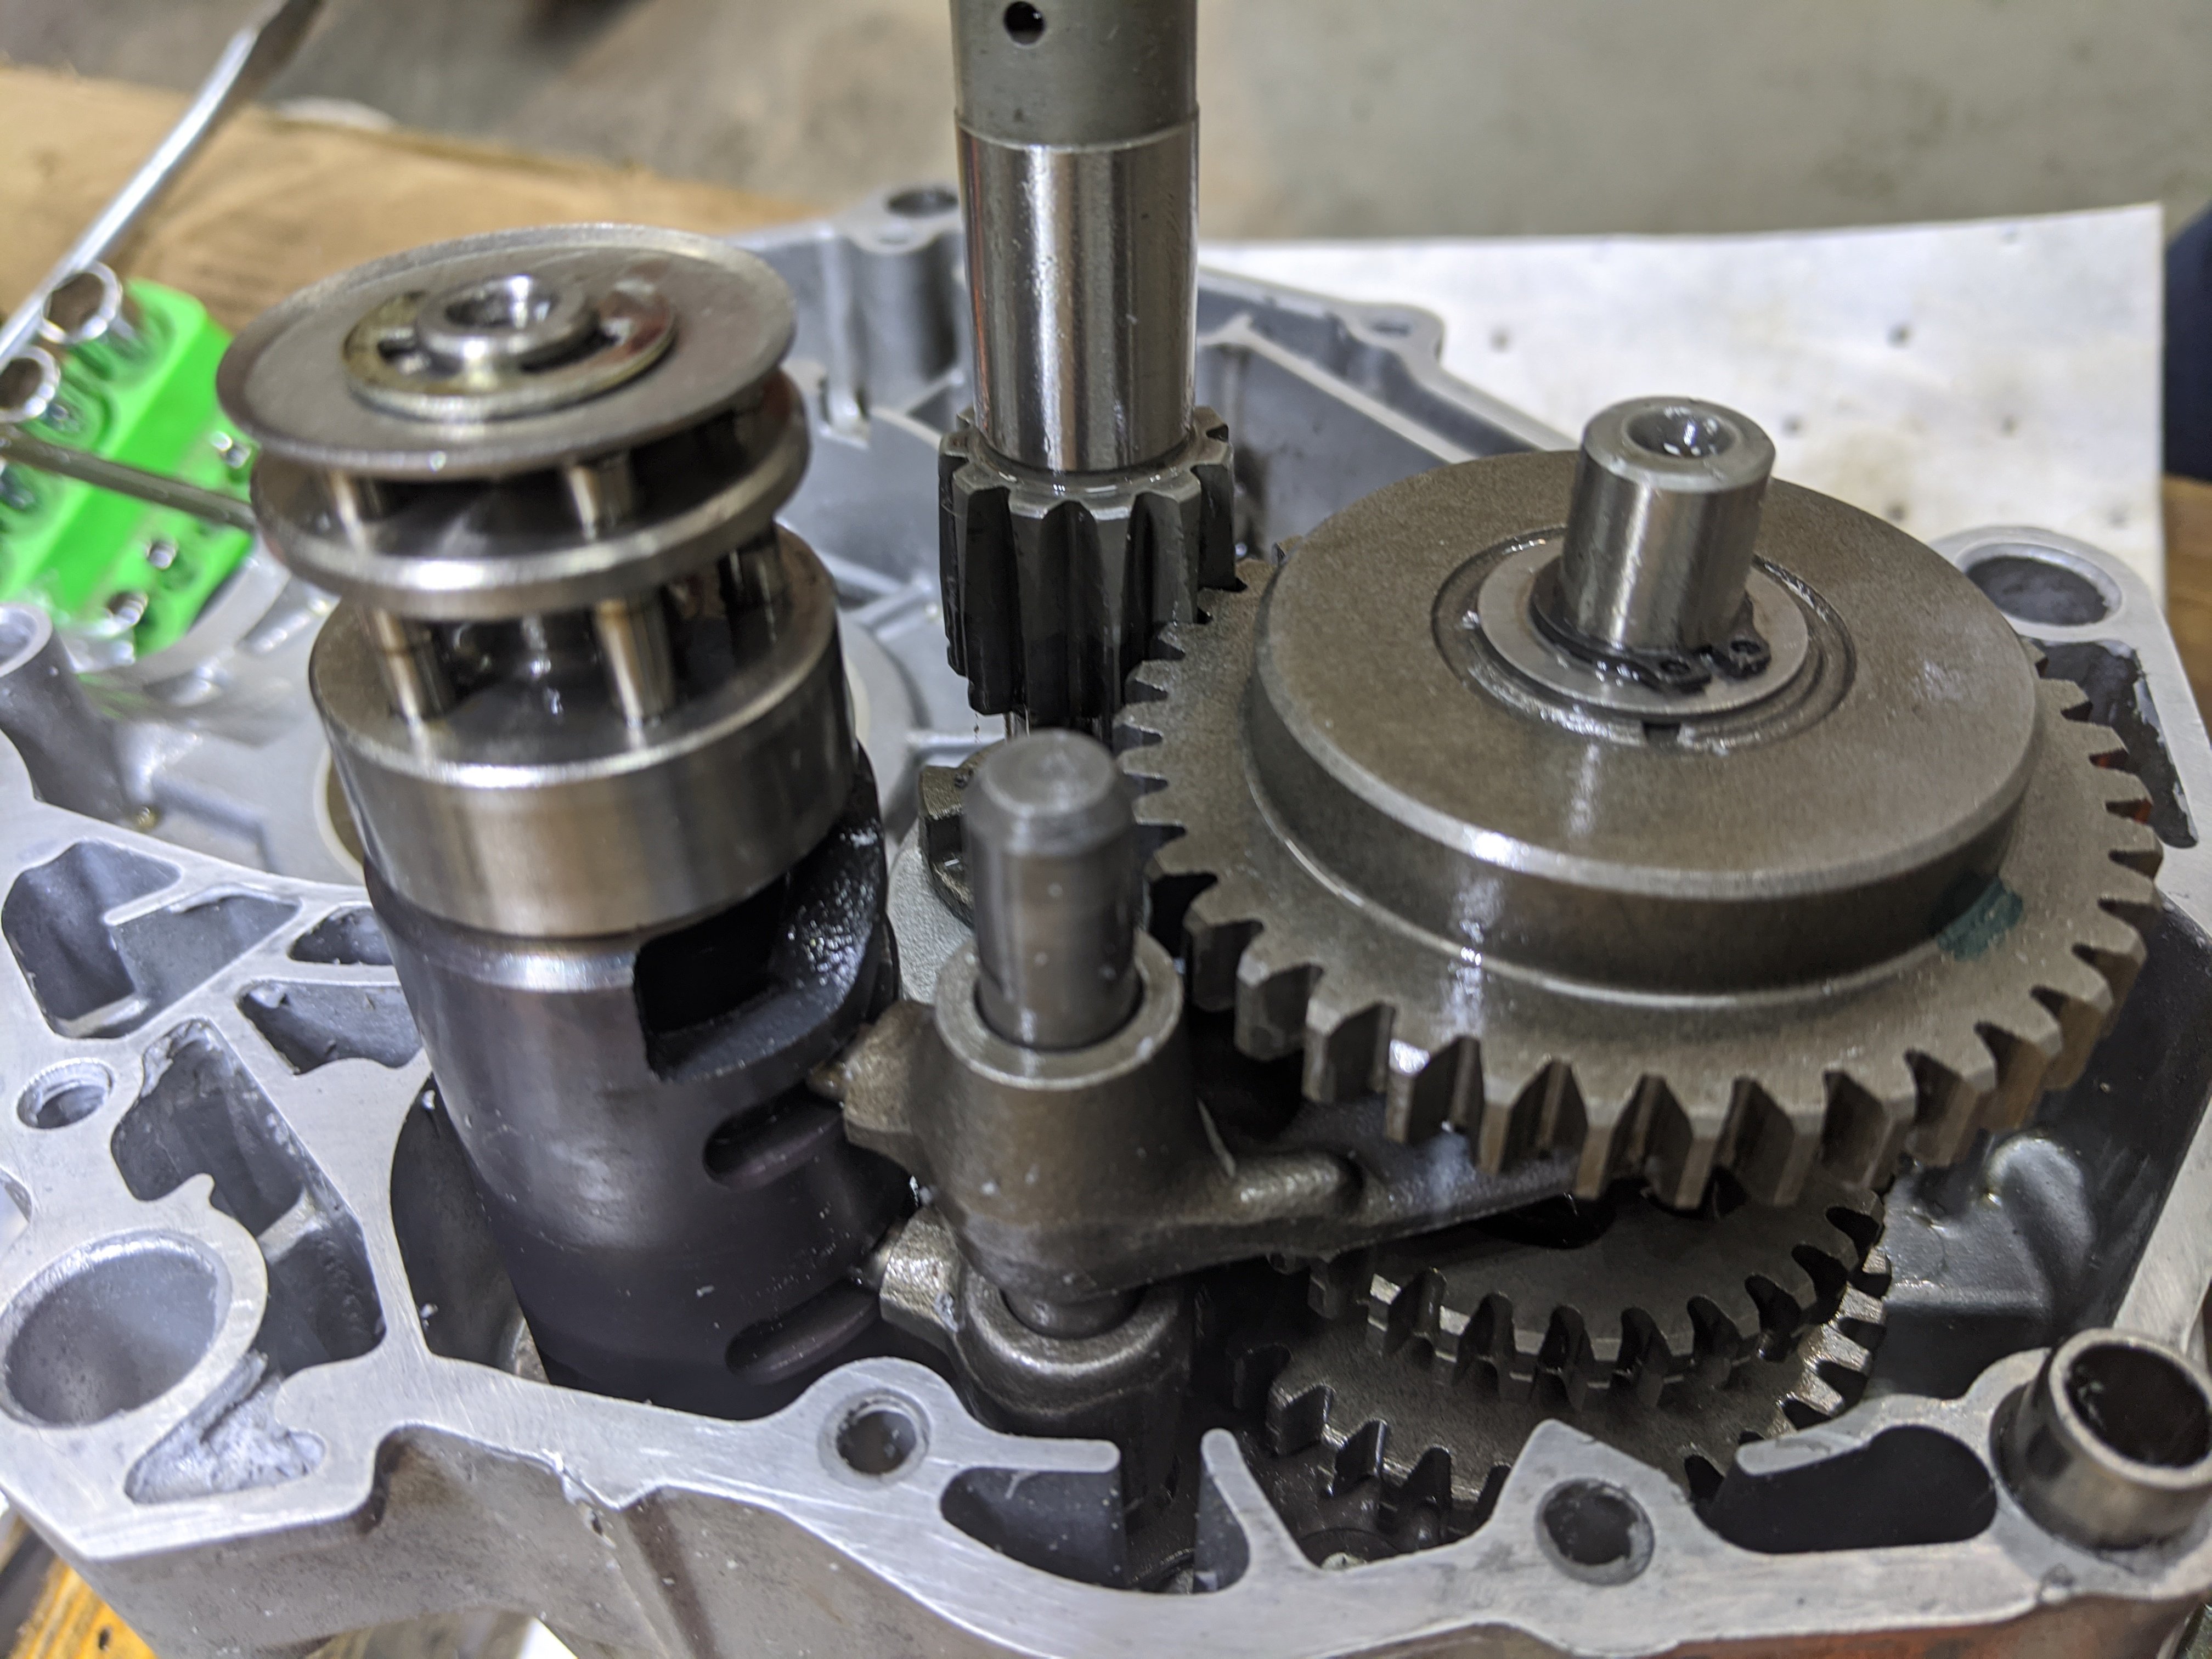
Once I split the case and was manually trying to go through the gears by hand I could feel it binding up... I took out all the transmission parts and inspected each one according to the service manual. Everything was fine and in spec. I reinstalled everything and the gears changed like butter, as they should. Something has to have caused the issue... I need to really look at everything....
-
Ok , got the motor out.. Took off the clutch cover. The shift shaft is working properly and all springs are intact and working properly. The shift cam assembly seems to only be turning between 1st and 2nd gear. No neutral or 3rd gear. Next I will disassemble the engine and split the case.... It would have been so nice if it was a spring..... More updates coming...
-
Thanks for the response... I had a feeling splitting the case was going to be needed... All I had left was to put on the plastics.... I will update here with what I find.. Thanks again...
-
Hi All, I did a total restoration on a 2003 Yamaha Raptor 80. Rebuilt the engine and tranny.. Started it up today and it runs great. Took it for a ride and the transmission worked perfectly. Adjusted the carb a little more and went for another ride. It ran awesome, pulled into the workshop shifted into neutral ( Neutral light came on) and shut off the bike. went to roll it and noticed she would not roll. Turned on the key and neutral light was on... After some troubleshooting I found that she is in first gear with the neutral light on and will not shift into neutral... It seems to up shift fine into 2nd and 3rd and then back down to 1st. I am hoping somebody can shed some light on what is happening... Thanks for any help...
-
Hi All, I started stripping the engine down while I am waiting on some parts for the frame. I ran into my first problem... I cannot get the gear selector shaft out... I took out the circlip.. Then the push lever behind the circlip is supposed to slide off, then you take a pin out of the shaft and then two washers and a ball bearing... The problem is the push lever seems to have fused itself to the gear selector shaft... I do see some rust.. I have spent the last 2 hours trying to take it off and nothing has worked... gently prying, heating and tapping to try and rock it back and forth... Anyone have any ideas?... It is really on there...
-
First thing to do is to put in the new Frame Bushings.. I have a 20 ton press, but it would be pretty awkward to use for the bushings.. So, I made a bushing insert tool. It is 7/16" Threaded Rod, 3 - 7/16" Nuts 4 - 7/16" Regular Washers and 4 - extra thick 7/16" Fender Washers. The thicker and stronger the washers the better. I greased up the bushings and they went in with some wrenching. The last 1/8" was tough to get in, but the tool worked... I got the front arm installed and I think I want to buy new shocks.. Can anyone recommend some shocks they have used and like?
-
This was another post i had made elsewhere: Hi All, Rebuilding a 2003 Yamaha Raptor 80.. Currently taking apart the rear diff. To get out the Pinion gear you need a Spanner Socket.. It looks like the part number for the Yamaha tool is no longer good. Anybody know who sells the correct Spanner socket? Yamaha lists it as 32mm but I don't see how that is possible. Pin to Pin on the nut is 48mm.. Any help is greatly appreciated.. After no response I posted the following: Ok, So it would appear that this question has been asked many times on many forums for many years and no one has ever answered this question... After many hours of searching I have found the correct information! First pay no attention to the Yamaha part number in the Raptor 80 service manual, it is incorrect. The correct Yamaha Part number for the Ring Nut Wrench / Socket is YM-38404. But Yamaha no longer has this tool to ship. You have to order it directly from the company that makes it.. K&L Supply Company. The K&L part number is KL-0530R This number along with the Yamaha part number are on the tool itself. But when you call them they go by the part number 35-38404. That is the number you give them in order to buy the part. It cost $45 + Shipping. This tool will work on the rear end pinion gear and also on the rear axle hub. It is needed if you want to change worn out bearings. I am including pics of the rear pinion with the nut as well as the tool. Here is a link to K&L Well guess you don't get the link since I am new here... Go to klsupply.com and use part number 35-38404 Ok, getting out the Spanner nus in the rear end was a job, but the frame bushings were the worst... See the details in the links above. Now the parts were ready for sandblasting and then to be dropped off at the Powder Coaters. I am going with a Translucent Candy Apple Red Metallic.. First they lay down a chrome powder coating and then powder coat over that with the candy apple red. Ok, parts are back...... These are all the parts I had done... The photo does not do the color justice. Outside in the sunlight it sparkles and looks like a candy apple.

.jpg.99780d9f0e1fd832dc37ba75121936b4.jpg)
.jpg.01b7a91e08c296c607769b5f0bd860cc.jpg)
.jpg.cc6d2584dbfdad8e324e8d63a9a77390.jpg)
.jpg.a55a4c4ba8bd8ee58bbc39695a0af7b7.jpg)
.jpg.fe9b85b315fce6a5d2e913d8d036f4fc.jpg)
.jpg.2aafaca4bb2e2b81ed710ad9f8c8c2cb.jpg)
.jpg.4e2dfc6acef63bfaacfe7e5222cb4621.jpg)
.jpg.5e7e9f08f70ed09ae431edde0de78124.jpg)
.jpg.d641f9df90026dd968e444c88af09c0e.jpg)
.jpg.e0c693bc46bc86dc782f886b7146ddb3.jpg)