Sonders
-
Posts
104 -
Joined
-
Last visited
-
Days Won
1
Content Type
Profiles
Forum
Gallery
ATV Magazine
Events Calendar
Downloads
Store
Community Map
Everything posted by Sonders
-
thanks for this items to check out. It had an aftermarket single exhaust pipe on it when purchased, but I put the stock dual exhaust back on it as I didn't like the super loud aftermarket exhaust. I wonder if the stock exhaust could be partially clogged up from sitting around in barn for years. Radiator is clean, so it's not that. Not sure how to check to see if it's running lean?
-
Hey everyone. 2007 Sportsman 800 and the exhaust on passenger side is getting so hot it melted the bottom side of the seat. It's not low on coolant or anything. Any ideas what would cause the exhaust to get that hot?

-
great tip Caseknife. I'll give that a try with the tps first. I haven't touched the idle screw, so atleast that's one thing I didn't mess up haha.
-
oh yep, I see it now, overlooked it before. Thanks, I'll give that a read.
-
ok, so I was right thinking it was something with the TPS. Crap. Well thanks for confirming guys. I'll start researching how to reset it.
-
I purchased a super clean 07' Sportsman 800 EFI last year from the original owner with around 700 miles on it, The only thing I haven't liked about it since purchasing was the aftermarket twist throttle they had installed on it. They had it set up for running up and down the road, which was fine for them; but I needed it for a workhorse around the house pulling a bush hog, log splitter and wagon loads of wood. Twist throttle doesn't work too well for my applications. I purchased a oem thumb throttle and cable and installed yesterday. After install the quad will start right up and idles perfectly, but as soon as I give it some throttle it sputters and tries to die. Can bump the throttle hard and fast and it will go, but it tries to sputter still. It's like older style carb that has junk in the fuel line or not getting enough fuel, however I didn't touch anything on it, other than disconnecting the aftermarket cable from the carb and connecting the new one. I checked the points inside the thumb throttle control box (forgot actual name) and they are gapped, so they're not killing it. The only thing I can think of is the throttle position sensor had to be unbolted and pulled off the carb so I could remove the entire carb assembly to gain access to the side of it to remove side cover and unhook old cable and hook up the new cable. I installed it back the exact same way it came off, but could that somehow still have gotten messed up? I have no clue what else to check as I'm not real familiar with these EFI set ups. Any thoughts/help are appreciated. Apparently I should have just left it alone and lived with the dumb twist throttle as it was running perfectly fine.
-
help diagnosing starting issue 01 Sportsman 500
Sonders replied to Sonders's topic in Polaris ATV Forum
Finally getting around to working on this. Installed new starter lastnight and still no go. Jumped a wire from positive battery post to positive post of starter and it immediately turned over. I tried to look at ground connection, but all I see is the negative wire going from battery to negative on starter. What other ground wire is there to check? I ordered a new relay solenoid to go ahead and replace as they don’t cost very much. Hopefully that’s all it is. Will find out in a few days once it arrives. it was mentioned above to try jumping the solenoid. How do I go about doing that to test it? -
help diagnosing starting issue 01 Sportsman 500
Sonders replied to Sonders's topic in Polaris ATV Forum
Thanks guys. Honestly I haven’t messed with it yet. I did buy a starter over the winter, but the quad has been tucked away in back corner of garage all winter. Garage isn’t heated so I didn’t have any motivation to go out there and mess with it in the cold haha. Hopefully here soon I’ll drag it out and get to work on it. -
help diagnosing starting issue 01 Sportsman 500
Sonders replied to Sonders's topic in Polaris ATV Forum
thanks for the info Dave. I'll have to give skipping the solenoid a try to do some process of elimination and go from there. -
please ignore my ignorance here as I'm not real good determining the cause; however once I know what the problem is I can figure out how to fix. Like title says, 01' Sportsman 500 H.O. When I push the start button it just clicks several times but doesn't turn over or try to start. Can do this several times and then it will finally turn over and start. The first thing I tried was swapping the battery from my other quad that I know is good with no change. So I'm assuming it's either starter or relay solenoid. How do I determine which is the culprit for sure? Thanks in advance for any assistance.
-
great tip Mark, thanks!
-
Thanks Mark, I'll have to pull the carb back off and give that a try next.
-
Hey all, I recently bought an 01' Sportsman 500 HO from my brother in-law that he's had since new. It runs awesome, just has 2 slight issues that I am addressing. 1st issue is fuel dripping out of overflow. I did some searching around and saw that the O-rings in the carb wear out and allow fuel to leak, so I replaced both the Orings inside the carb. This didn't fix it and still leaking which leads me to believe the float needs adjusted, I'm just not sure on correct way to check and correct this. 2nd issue is no speedometer. Also in researching this it appears to be Hall Effect/speed sensor. I'll be ordering one of those to replace, which sounds like a pretty straight forward process. I guess really my only reason for the post is to get some help on the gas leak issue. Any thoughts? Other than that, I love the bike and really enjoy riding it. Thanks in advance for any replies.
-
Took the bike out for another ride yesterday and it did fine. I just left the fuel selector valve on Reserve; haven’t looked into why ON position isn’t working yet. Cleaned it up for the first time after riding yesterday as well. Cleans up halfway descent.
-
Merry Christmas all. We had a very welcomed warm day today so took advantage and went for an afternoon ride with the wife and kids. The wife took our trusty Sportsman 500 while I took the Prairie for its maiden voyage. Let’s say I still have some bugs to work out, but it did survive the ride. For some reason the fuel selector switch doesn’t work in the ON position. It ran for a few minutes than shut off. It runs fine on Reserve. Tank is full. It also developed an oil leak from the front output shaft on the gear drive housing. Other than that it seemed to run fine.
-
It’s alive! Fired it up after work and let it idle for a little bit. It’s pretty cold out so idle is off some. I think it’s going to warm back up this weekend, so I’ll try to get it out of the garage and ride it around some to see how it does. Still need to adjust left hand brake for rear also.
-
Of course battery is dead from the bike sitting for the past 6 months so tried starting it tonight with the pull cord. Started on the 2nd pull with choke on. However it didn’t really want to stay running. I’ll try again this weekend after I get some more gas in it (hardly any in it, fuel set on reserve) and battery is charged. I’m sure the carb is going to need some adjustment. I’m hoping it just hasn’t gotten much gas cycled through it to stay running yet.
-
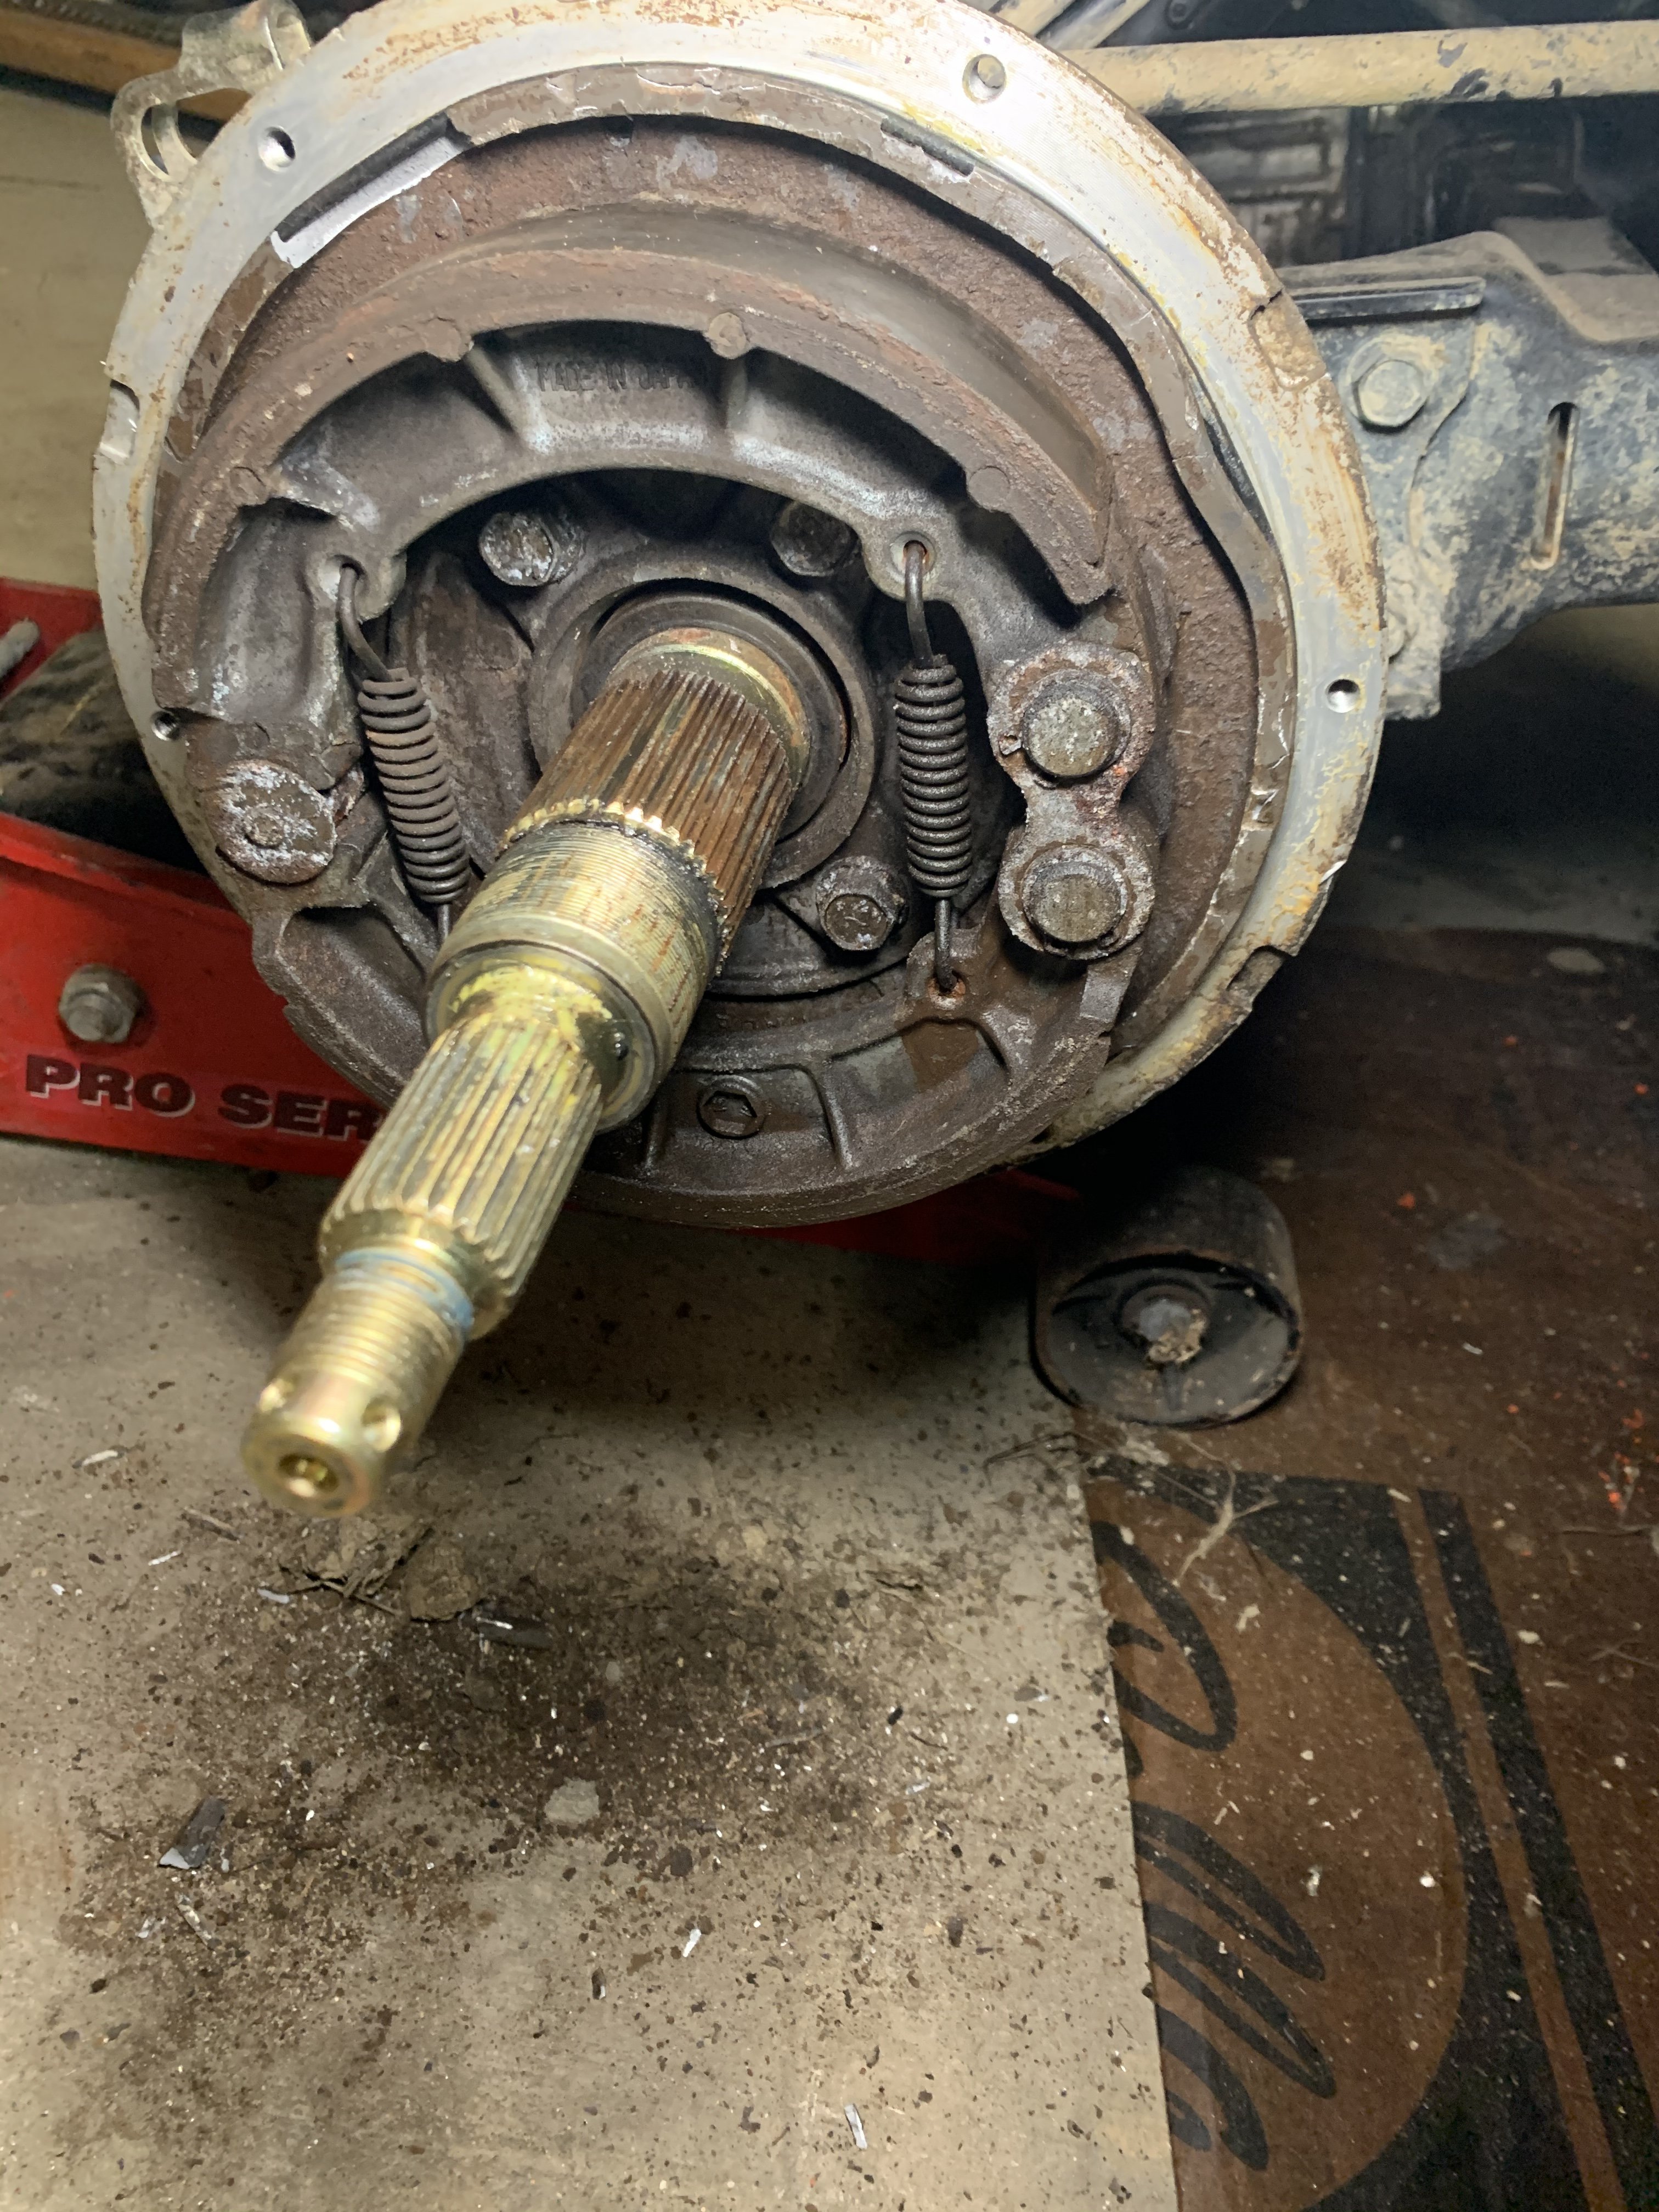
spent some time in the garage this weekend. I ended up completely disassembling the entire rear brake; pulled the brake pads off, removed the brake lever and pulled the cam out. The cam was all rusty and nasty. I steel wooled the sh** out of it and got it nice and clean and smooth. Put a very generous amount of grease all over it and slid it back into place. Put it all back together and boy is it rolling smoothly and brake working nice now. I just need to adjust the parking brake as it has too much slack and the lever doesn't engage the brake. The foot brake pedal works good though. It's now back down on all four wheels. I believe all that's left to do is top off the oil and some fresh gas and should be ready to fire up. Stay tuned.
-
Ok, kind of what I thought but can honestly say I’ve never really messed with drum brakes before so wasn’t 100% sure. Will lube it all up this weekend and hopefully get it put back together.
-
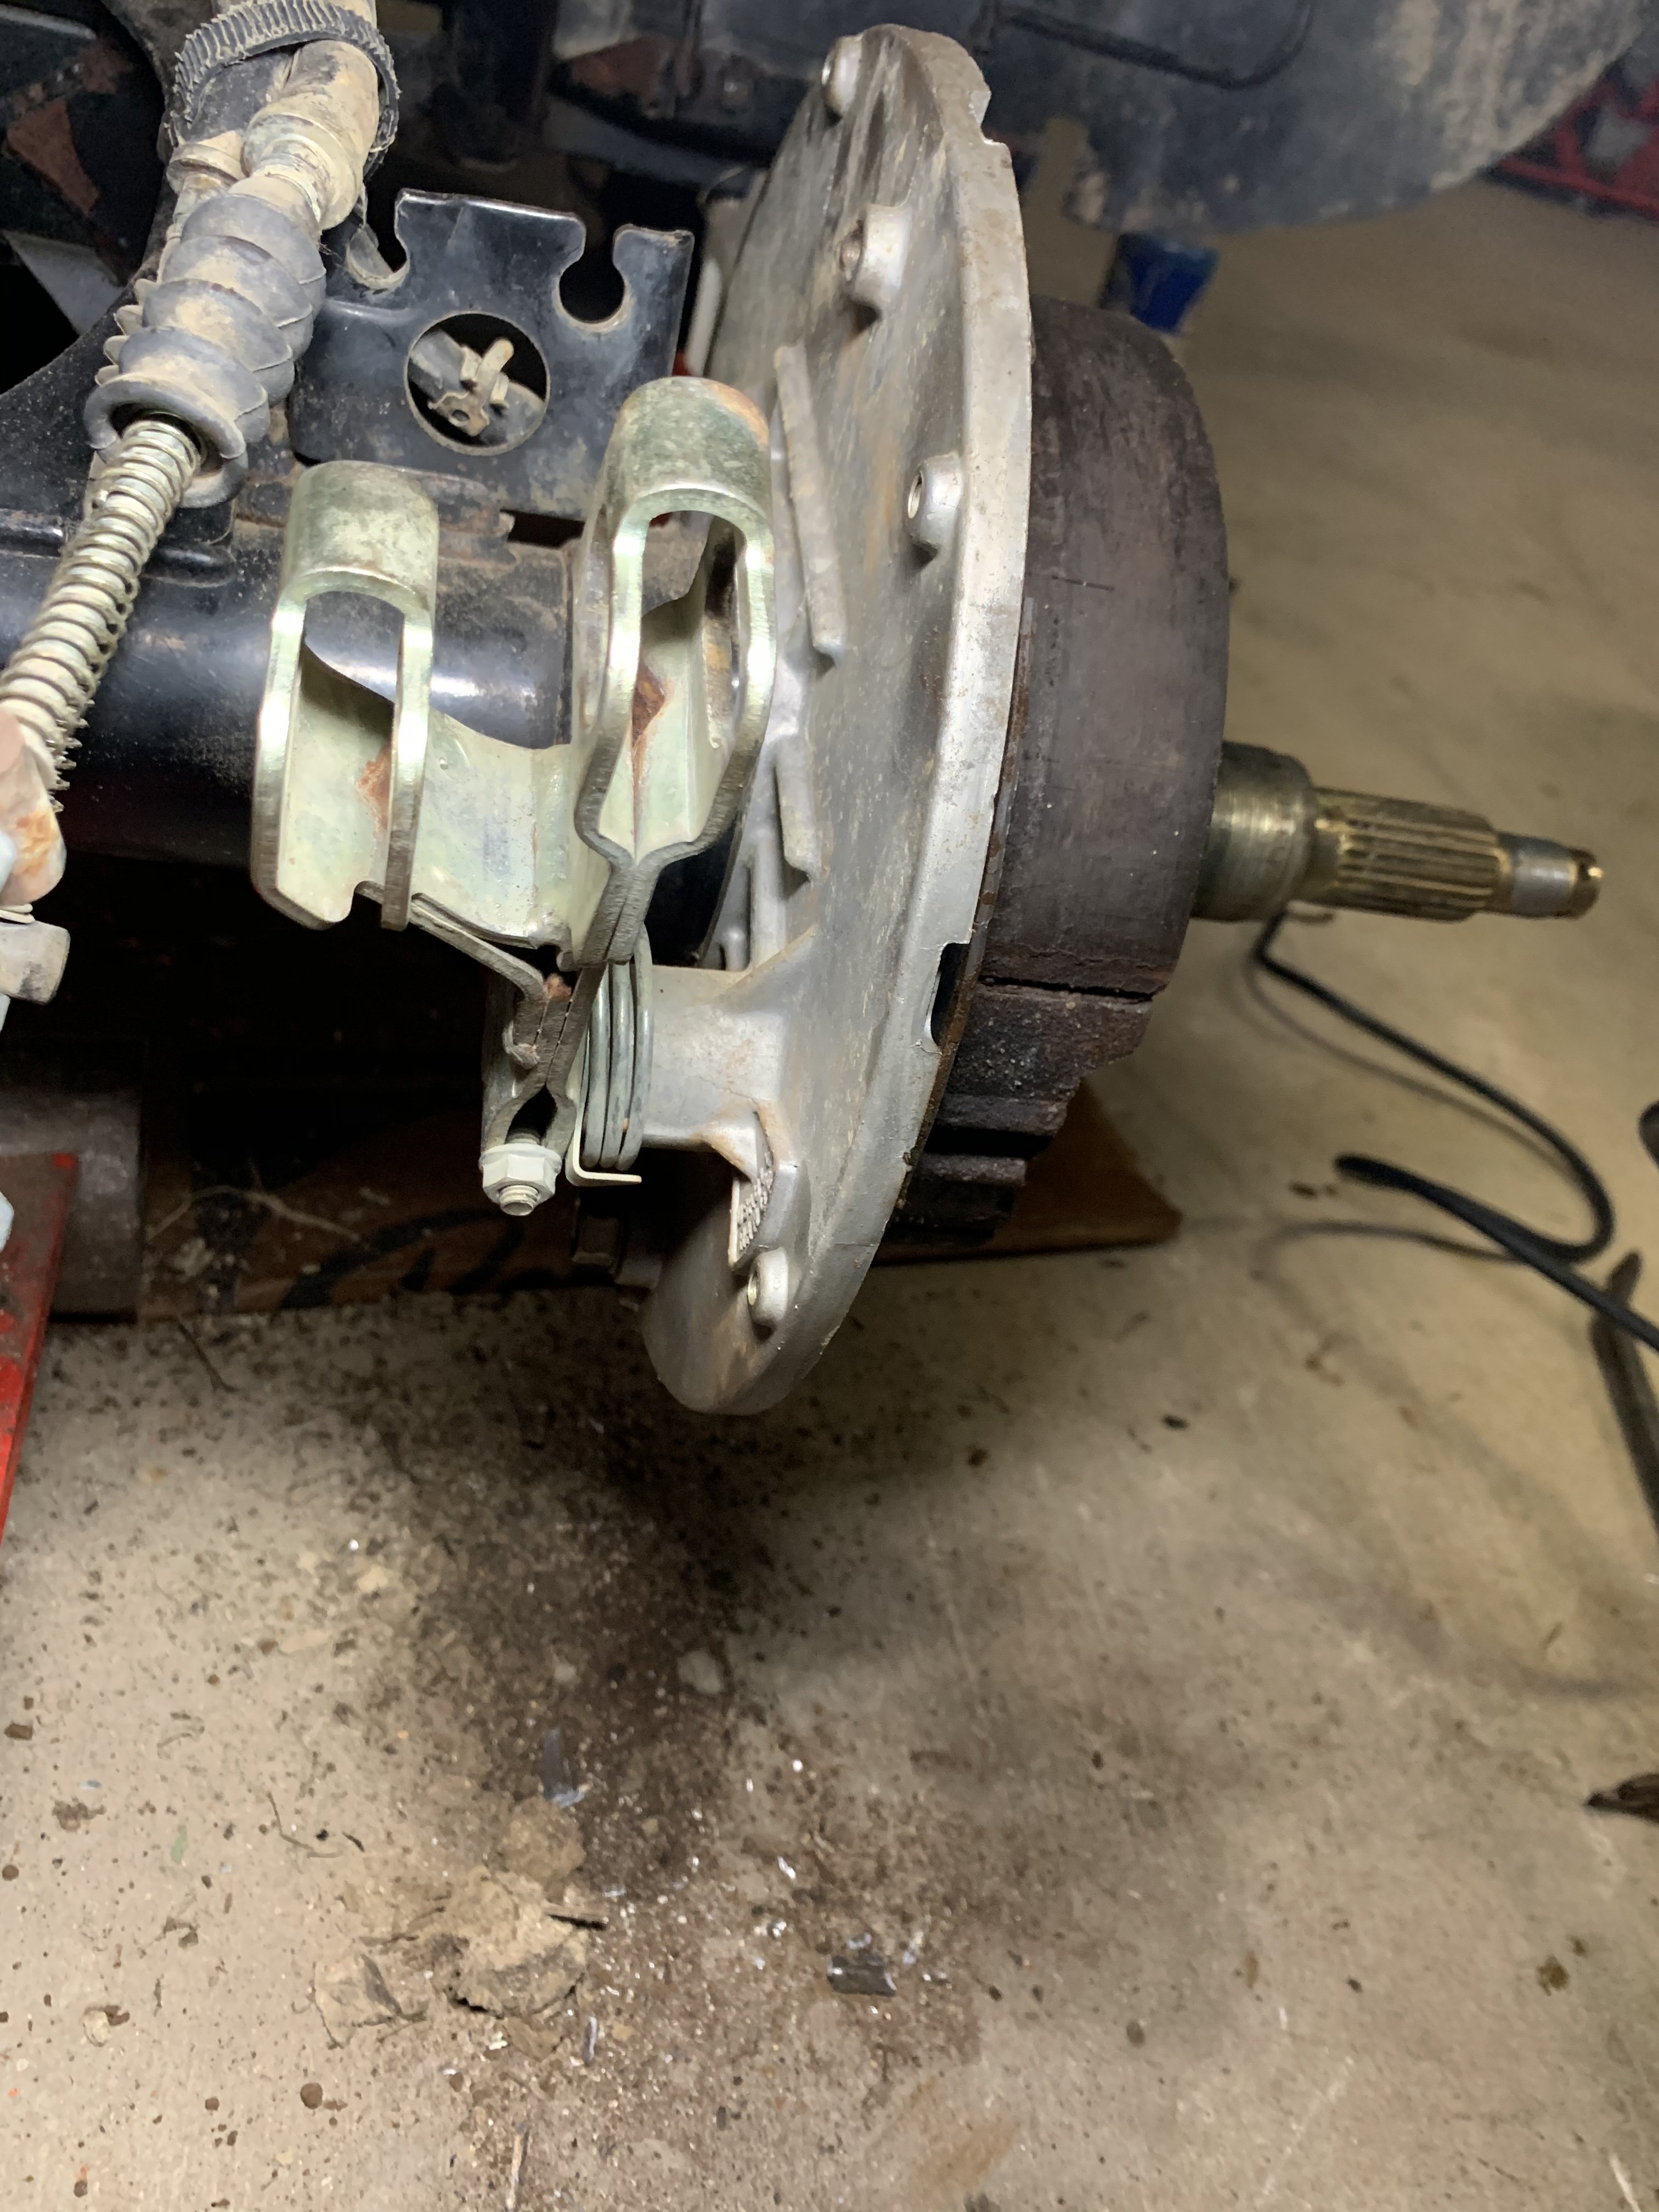
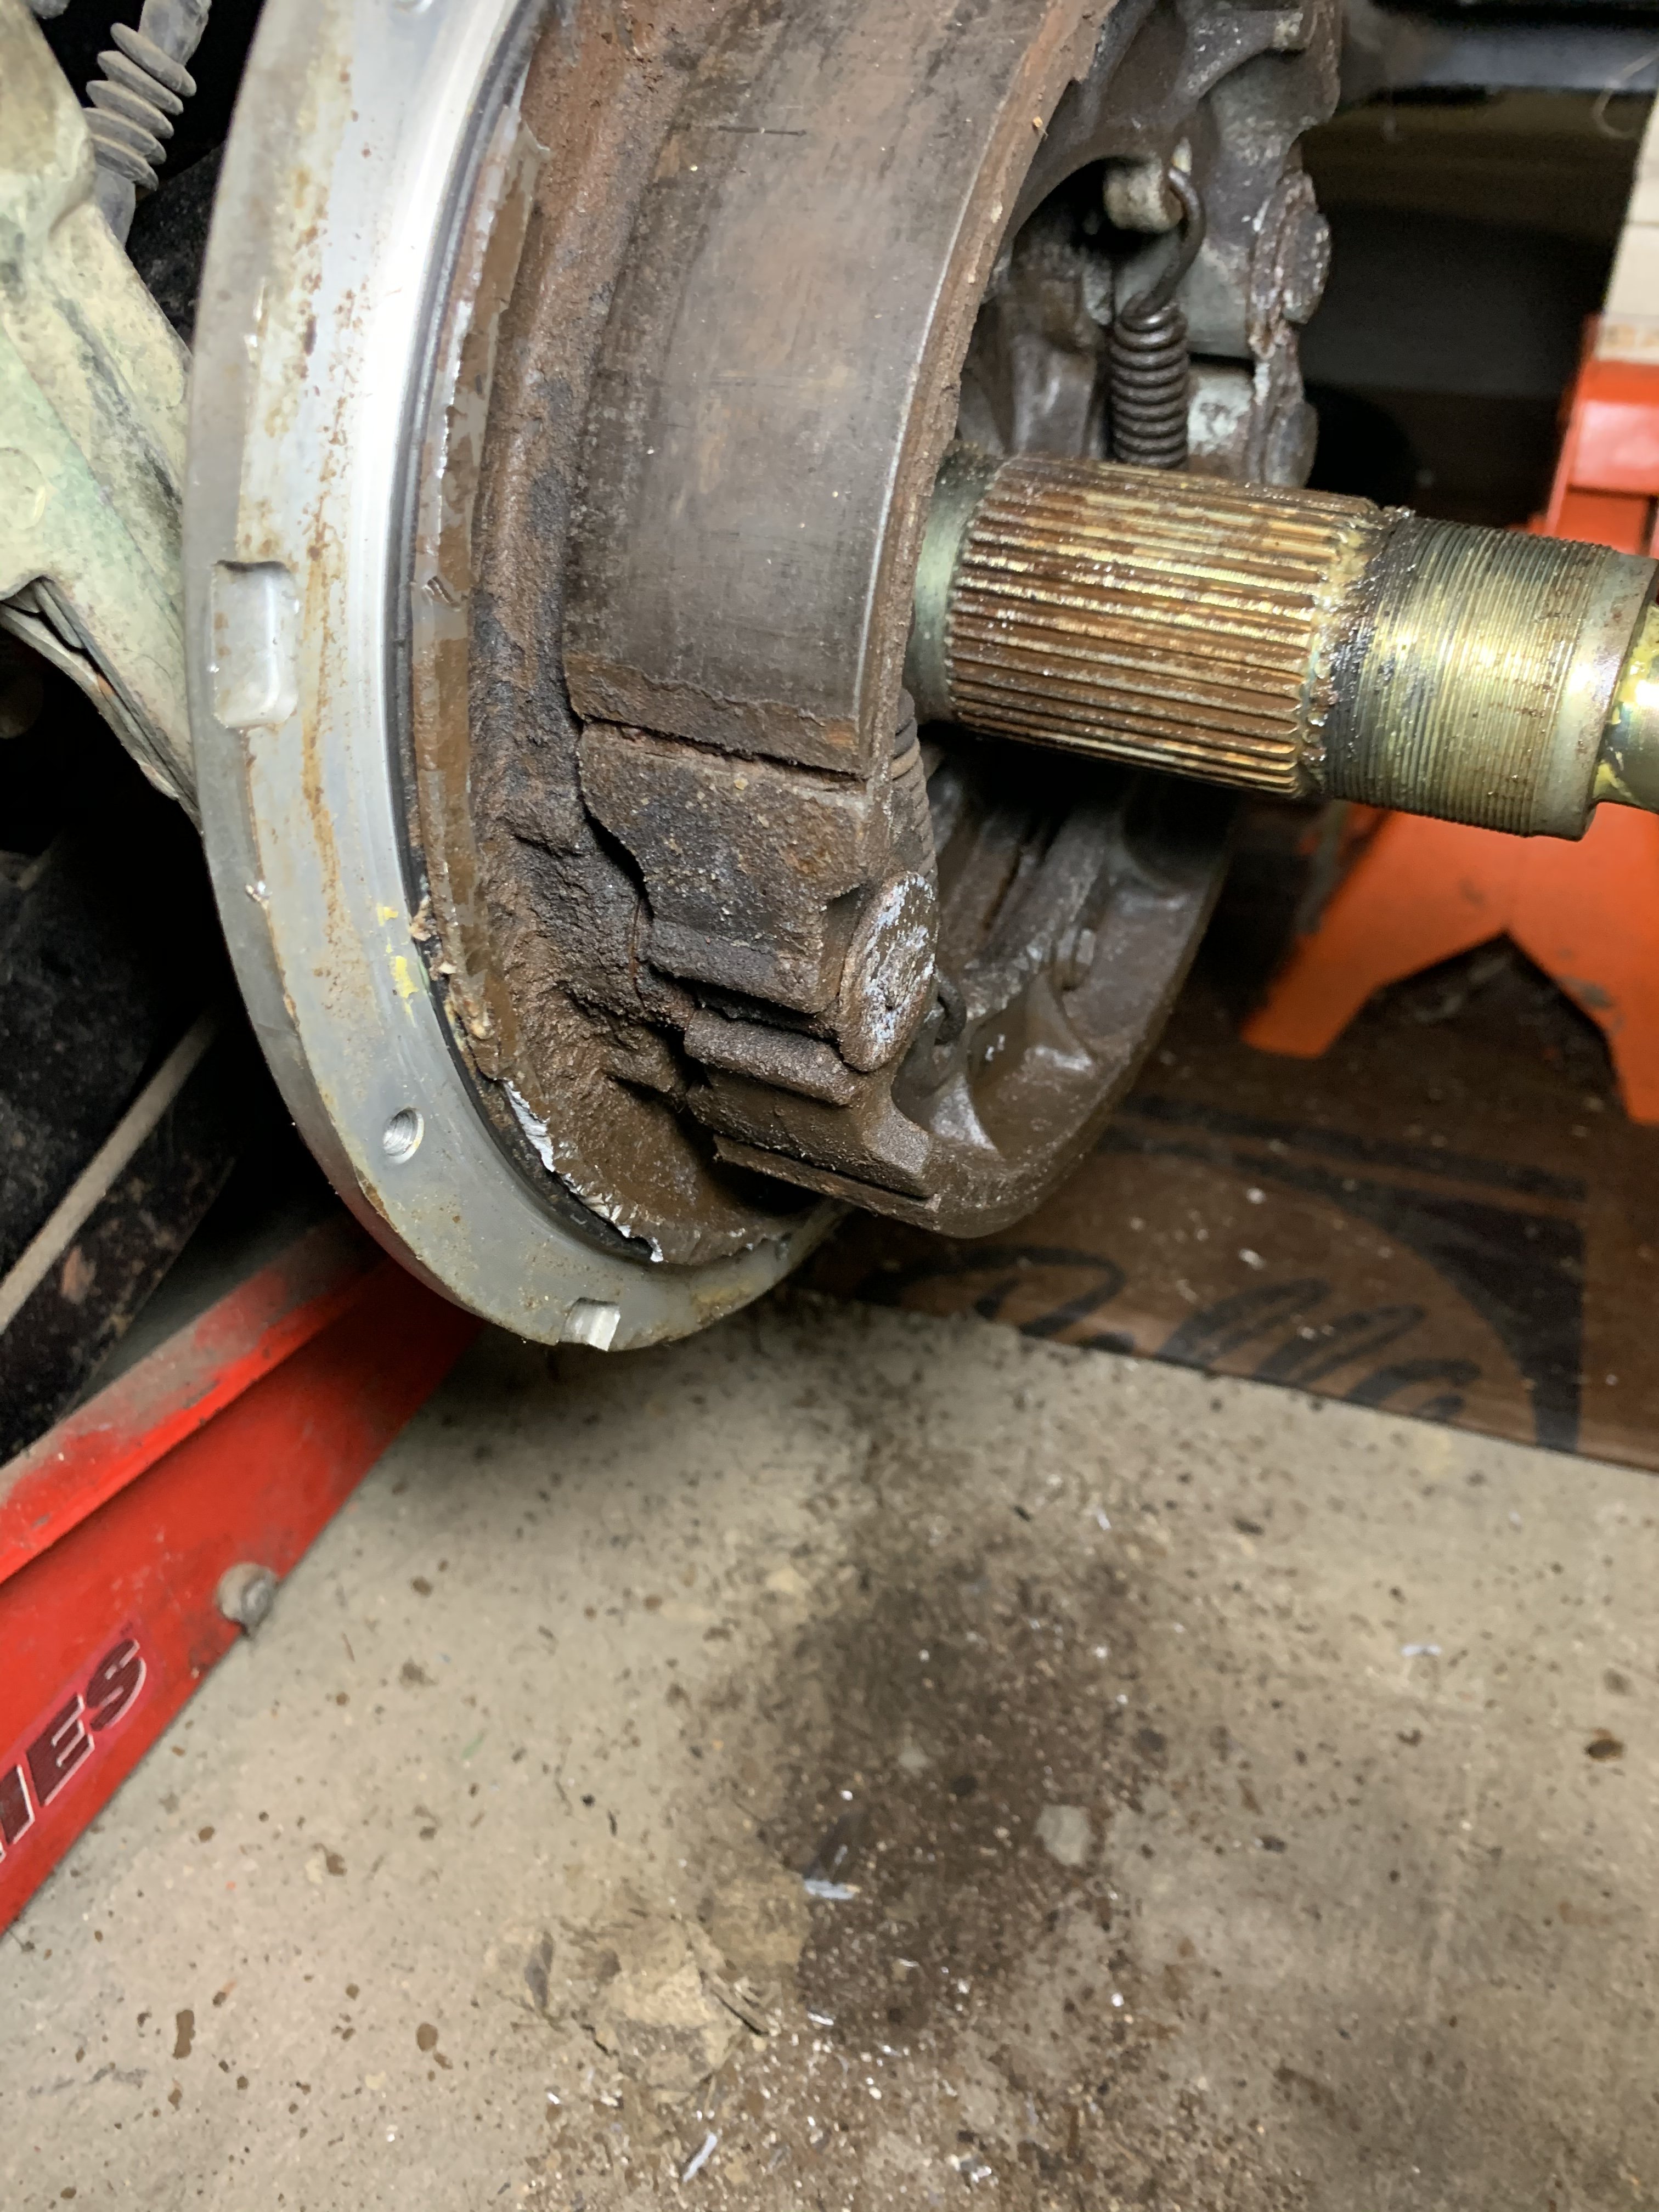
drum just needed to soak I guess. I sprayed it down real well lastnight with lube and tonight it slid right off. The pads look like they have plenty of pad left. Now I don’t know what needs to be done to free the brake up. Does the cam turn pushing the pads out against the drum? Do I just need to lube up the cam and try to work it back and forth? I don’t really see anything else that would move. As you can see from the pics, I messed up a few places of the backing plate. I’m wondering if that matters?
-
Just the pic, it’s not cracked.....yet. Whoops I’ve already smacked on it a bit with 3lb sledge. I also tried heating around the axle a little bit. I tried using a small pry bar to pry around the edges. The edge of the backing plate is looking a little rough now though from prying against it. Hope I didn’t ruin it. Parts diagram list a big O ring that is supposed to go between the drum and the backing plate. If there was one on this bike, it is long gone as I don’t see any remains of one.
-
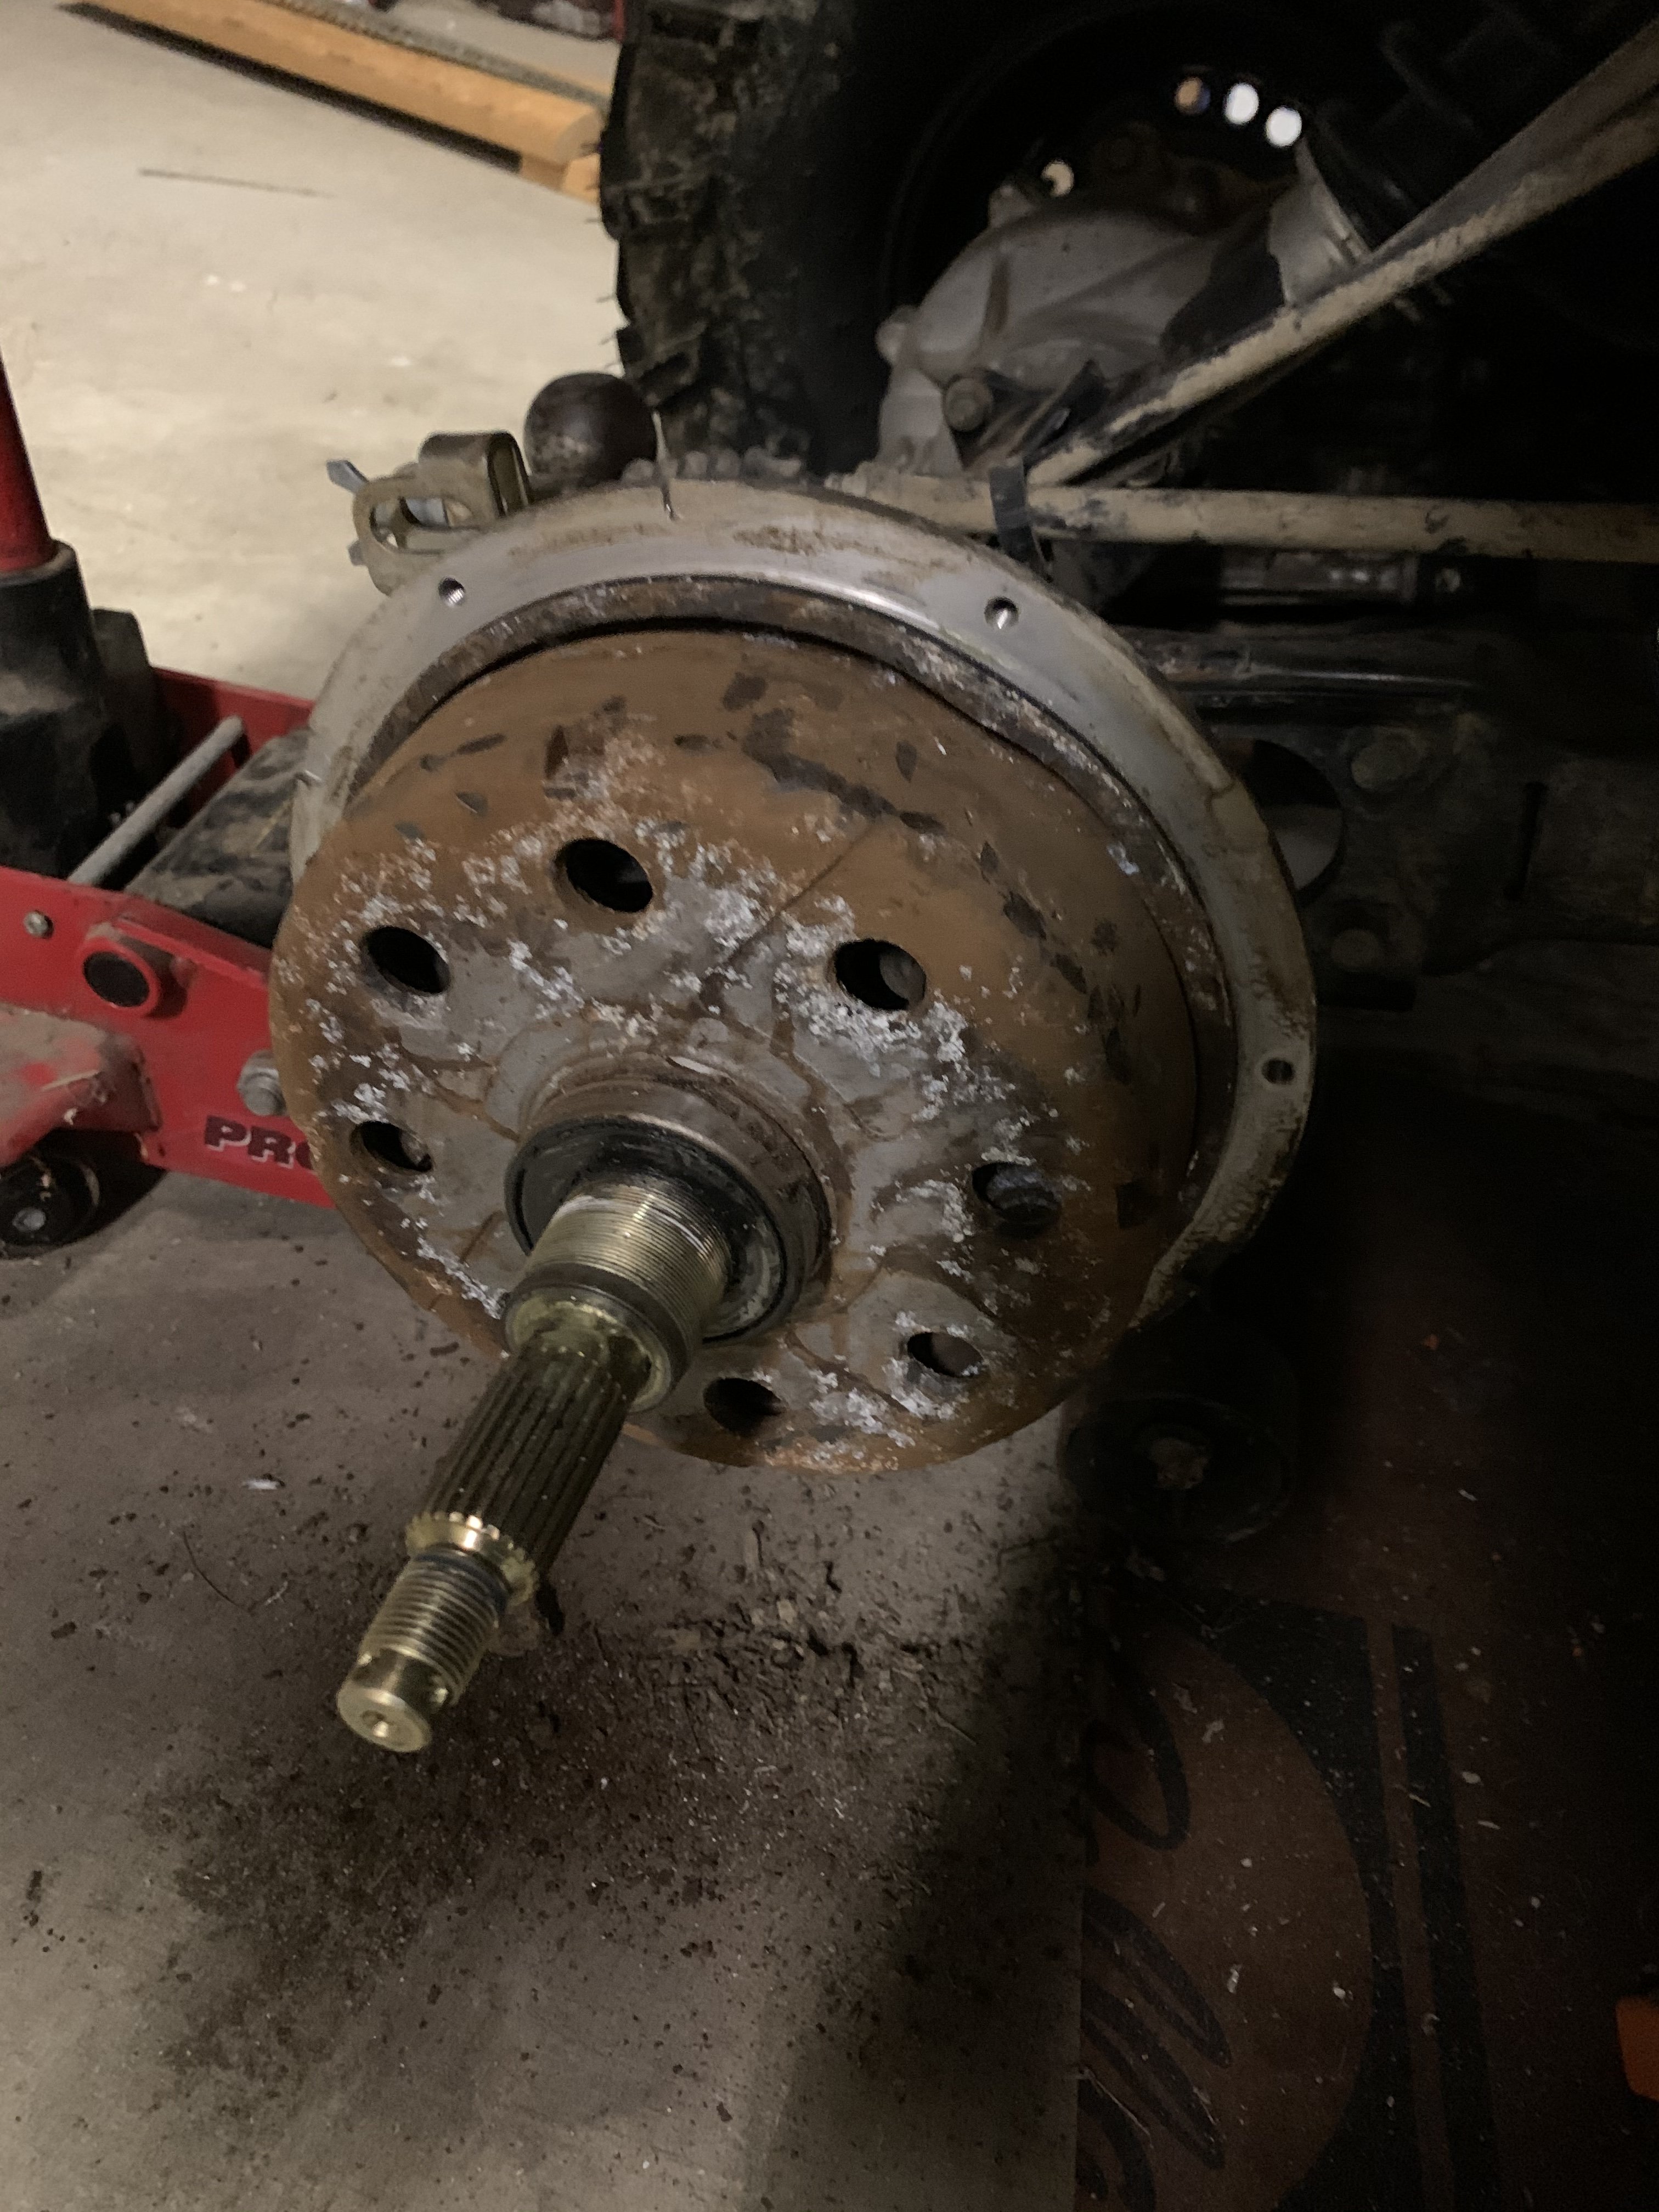
Slowly getting back to action. Took another look at brake assembly and watched a couple YouTube videos on the subject. I can not get the brake drum off. What am I missing? Should it be able to spin around on the axle, or does it only go on in a certain position. I can’t get behind it well enough to get a good hit on it with a bar or anything. What’s the trick?
-
had a little time to work last night. Was able to get the drum all apart. Castlenut was locktited on all threads. Heated it with handheld propane torch and slowly worked it off. Had one stubborn screw of course on bottom side of the drum cover that wouldn't come out and head stripped out; had to use vise grips on it. Nothing is ever easy. Ran out of time to actually do anything once the drum was apart, but it's a start. Feeling like total crap again so who knows when I'll get back out there to do anything else. Stay tuned.
-
Cotter pin for sure came out complete. The cotter pin and castle nut look brand new, so I don’t know what to think. I’ll give er another go tomorrow night and see what happens.
-
was out of commission over the holiday sick so didn't get much time wrenching the past week. I did manage to get seals replaced and swing arm mounted back on lastnight. I attempted to mess with rear drum brake to get it freed up and lubed but didn't get very far. The castle nut that is on the outside of the hub; is it left hand thread or something? I could not get it to budge with my 1/2" impact. I even tried my breaker bar w/ a cheater pipe and all it did was slowly turn the entire axle. Wondering if I need to put a wrench on one of the locknuts that is between the drum and hub to keep the axle from spinning. I need to put some fresh oil back in at messing with drain plug and seals and see if the damn thing will run now.