Matman
-
Posts
20 -
Joined
-
Last visited
-
Days Won
2
Matman's Achievements
")


-
Aha! They are slightly different. Thanks Mech for sending! The ESP switch has to be set to Auto for the initial sequence. Additionally, the Angle Sensor preload installation instructions image was very clear in this 400 manual and really unclear in the other 500 manuals. Great to know I installed the sensor wrong. So this maybe my last update to this thread... and solving the squealing problem.. During the rebuild, forgot to mention that I used new bearings and to ensure snug fit, I firmed up the gap between the roller bearing outer race and case with Loctite 609. Got it all back together, and still had initial setting issues... I just removed the angle sensor and set the preload correctly to the angle sensor, and it was like a new machine! The ECM now recognized the Hondamatic swashplate position and allowed for the shift position. That immediately allowed the shift motor to work, now I can hear the shift motor operating, and immediately there was no more reverse stalling and idling issues. It's running awesome! I took a few hot laps around the neighborhood for the first time on a Hondamatic and I could use the AutoShift and switch over to the ESP selectable shift. The Hondamatic is pretty amazing for it's design and torque transfer to the wheels. Also, take into consideration that this is smooth for a machine that was ran down to black oil and low oil at 16,000 miles on it. I had also replaced the pull start assembly as the other old one was junk. No bearing squealing on drive, neutral or reverse, not a sound on launch, easy shifts from D-N-R, runs full speed, fast and smooth and punchy. I see that i still need to remove the back wheels to complete the initial setting. So... My hunch is that the outer race press fit area of the roller bearing side of the crank bearings started spinning inside the case after the oil got low and dirty enough? The old bearings rolled smoothly during disassembly and inspection, but I noticed an odd shimmer/polish to the bearing press fit area between the outer race and the case half? I can't be sure, but wondering if the engine was so low on oil it somehow slightly started building friction on the rollers and started spinning the roller bearing's outer race in the case half itself? I'm happy to have went through the whole motor to confirm all was good. And it's an awesome machine now! Cheers Mech! Thanks for your contribution and foresight to this thread!
-
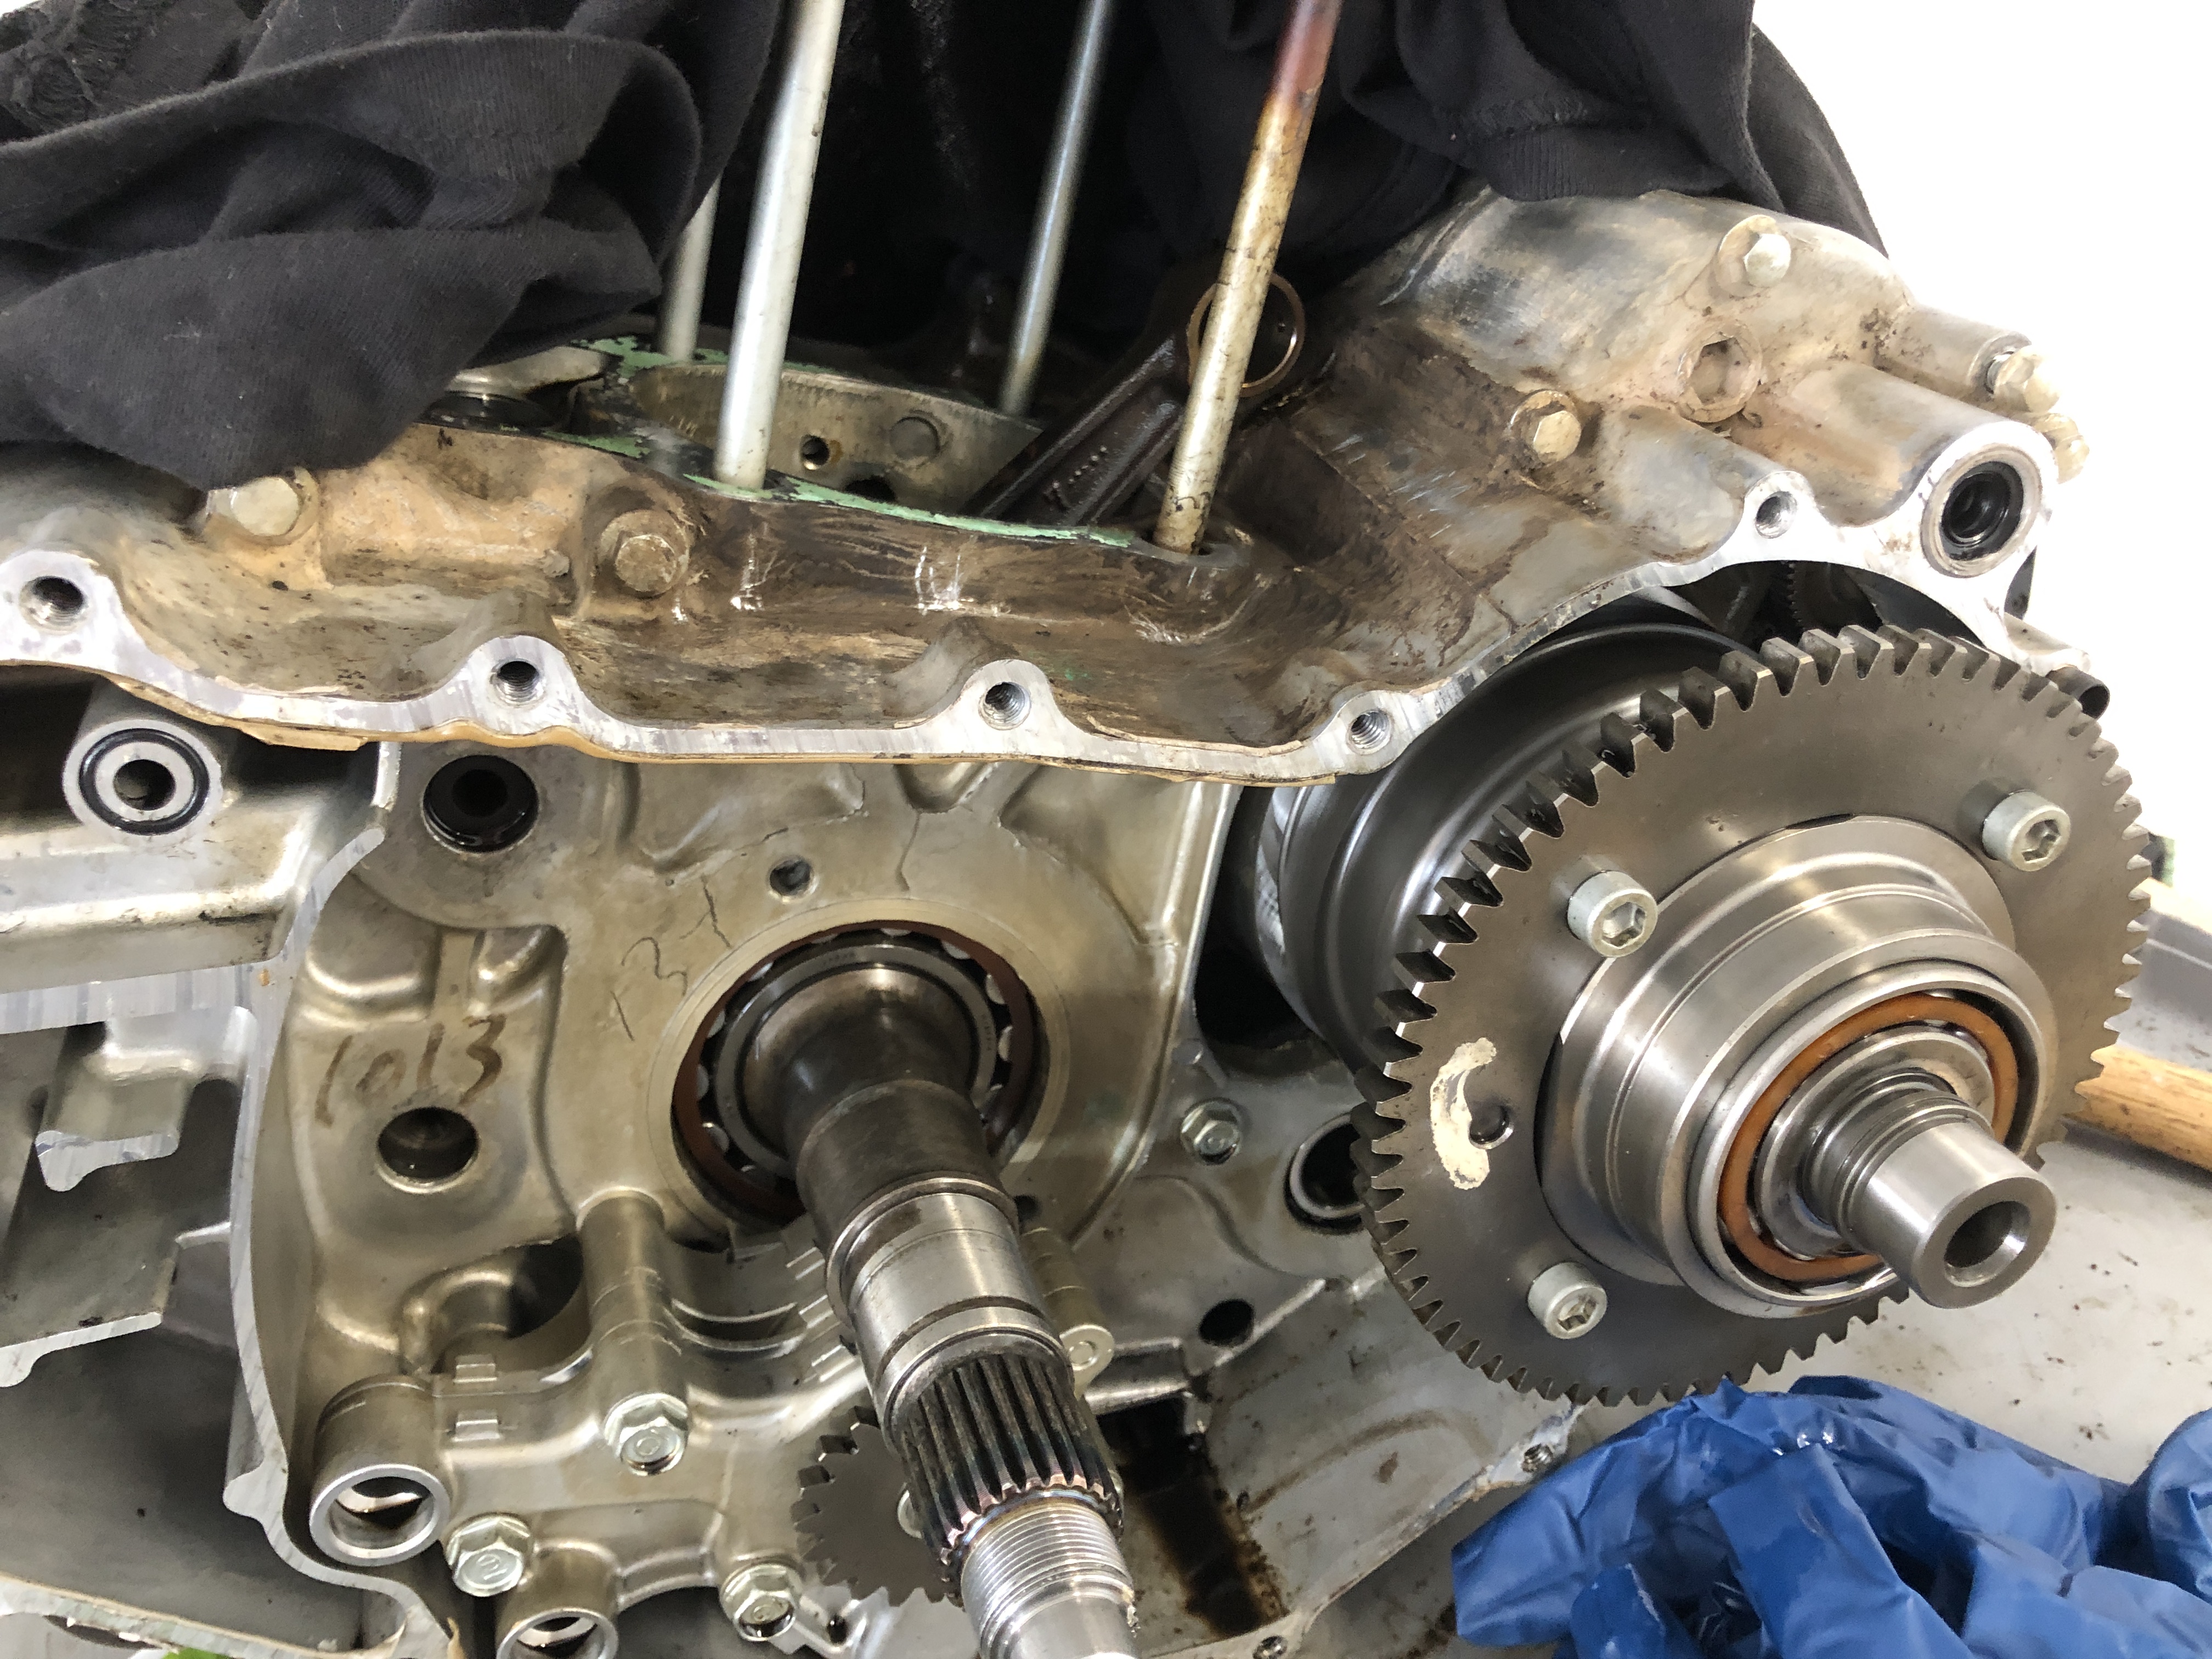
Update: Oil Drain plug and skid plate was packed in with dirt and mud/debris. Wondering if the engine oil was changed at all? Found black oil/low on oil, suspected internal bearings was the cause of the squeal with low oil condition. I split the cases and found excessive clearance between both roller crank bearing and the standard crank bearing's outer race and the engine cases, but otherwise all other internal bearings were surprisingly in good shape. My main concern for the Hondamatic were relieved when it was in great shape with no visible wear, or grinding noises, the ball screw was in great shape with smooth operation and motion, no abnormal noises. Wahoo! Since the 2005-08 TRX400FA AT is aircooled, it's kind of a unique animal in the Honda history it's surprisingly closest to the Rubicon 500 AT. It was difficult to hunt down the original OEM roller crank bearing and standard bearing, but I found them and replaced them while I was in there. I've reassmbled it now put it all back together. I am working from both a TRX420 Rancher 420 manual shift repair manual and a Rubicon 500 Hondamatic repair manual because there was no Rancher 400 AT User's Manual saved to our QuadCrazy resources. I'm noticing slight differences between the models and need advice. Upon first start, the Hondamatic needs to go through an intial setting. This will programmatically set the ECU to recognize each of the system sensor's base setting for operation since they were all unplugged pulling the motor. Most notably are the Hondamatic Angle Sensor(senses the hydraulic awash plate angle that is equivalent to changing gears in a traditional transmission) and the Carb's Throttle Position Sensor. I assembled my Angle sensor according to the manual preload instructions but they didn't clearly explain how much angle to preload the sensor to, so I don't believe I preloaded it as required. I am now working through troubleshooting these first initial settings and sensors. When removing the carb, Throttle Position sensor stays in place, but removing the throttle cable will require re-doing the intial setting.... no problems here. So on first start, Idled immediately and smoothly...great motor! so then test drive it first before going through the initial setting (and potentially having incorrectly installed the Angle Sensor). If you don't do this initial setting, the machine will start up with no problem, but my experience with a potentially incorrectly installed Angle sensor was it will stay stuck in high gear and if shifted into reverse. Additionally, it will have super-rough knocking if shifted into Reverse and anything more than idle will worsen the knock to motor dying on you. You are stuck in high gear and not able not able to shift regardless of mode., or button you push. There is also no noise heard from the shift motor at all during any of these steps. Question: can anyone confirm the diagnostic functions and settings are the same between Rancher's and Rubicon models of the same yars? They appear to be identical, but looking for a confirmation. Does anyone have screen shots of the Rancher TRX400FA AT users manual they can send?
-
I may have found a problem. Most cranks I've worked on, the bearings are an interference fit, so the crank must be pulled into the bearing with a crank puller, or the bearing installed into the case and the crank is pulled into the bearing, etc. I've found upon inspection before splitting my cases that my crank actually spins freely inside of the roller bearing, could this be the problem? Does anyone know the tolerance or clearance of the Roller Bearing to Crank? I should have the cases split for further inspection this weekend and will advise what I learn... See video clip attached. Crank Bearing Tolerance.mp4
-
Exact conditions when I purchased it: bad battery only pull started. Started up, a bit rough on idle, but otherwise is decent running order, put it into fwd and no sounds, put it into reverse, no sounds, fwd again and the squealing started with gas and forward motion between 3-8mph. It was unique enough and alarming enough that I figured it was a bad transmission bearing, like a bearing freezing and the shaft was rotating in the bearing. so I just decided to investigate for something obvious with that much noise. Found the previous owner probably hasn't changed the oil recently as the entire protective pan and drain plug were caked in with debris and dried stuff(Took me good 30-45 min to clear it out and find the drain plug). Oil didn't register on the dip stick, but did have oil in it. Was very black, but not burnt smelling or dirty with shavings. Just looked like it wasn't changed in a long time. When pulling the piston and cylinder, I expected worse, but the piston rings had obvious wear and carbon build up on the exhaust side of the piston rings and oil rings, but nothing was seized. All good questions to ask, but I'm very sure it wasn't a brake rotor, CV joint, or wheel bearing. Ive been studying the posting by MECH(thank you) on the design and operation. Makes me think that with this design, Honda knows the robustness of it, however the design uses the engine oil as the Hydraulic fluid for the Hondamatic unit. I would think this would be a concern for exactly my situation with lack of engine oil maintenance. However, the last section reads: " the Hondamatic is quiet, maintenance-free, rugged, impervious to external contaminants" So I'm not sure exactly how they keep it "impervious to external contaminants" if it's in the engine oil? I'm guessing they must be referring to other transmission belt transmission type technologies? Anyhow, all good thoughts, I still have to get the Hondamatic transmission out of the cases and look further/closer at it. I'll post my findings. if anyone has any diagnostic info aside from what's in the manual, I would appreciate the suggestions.
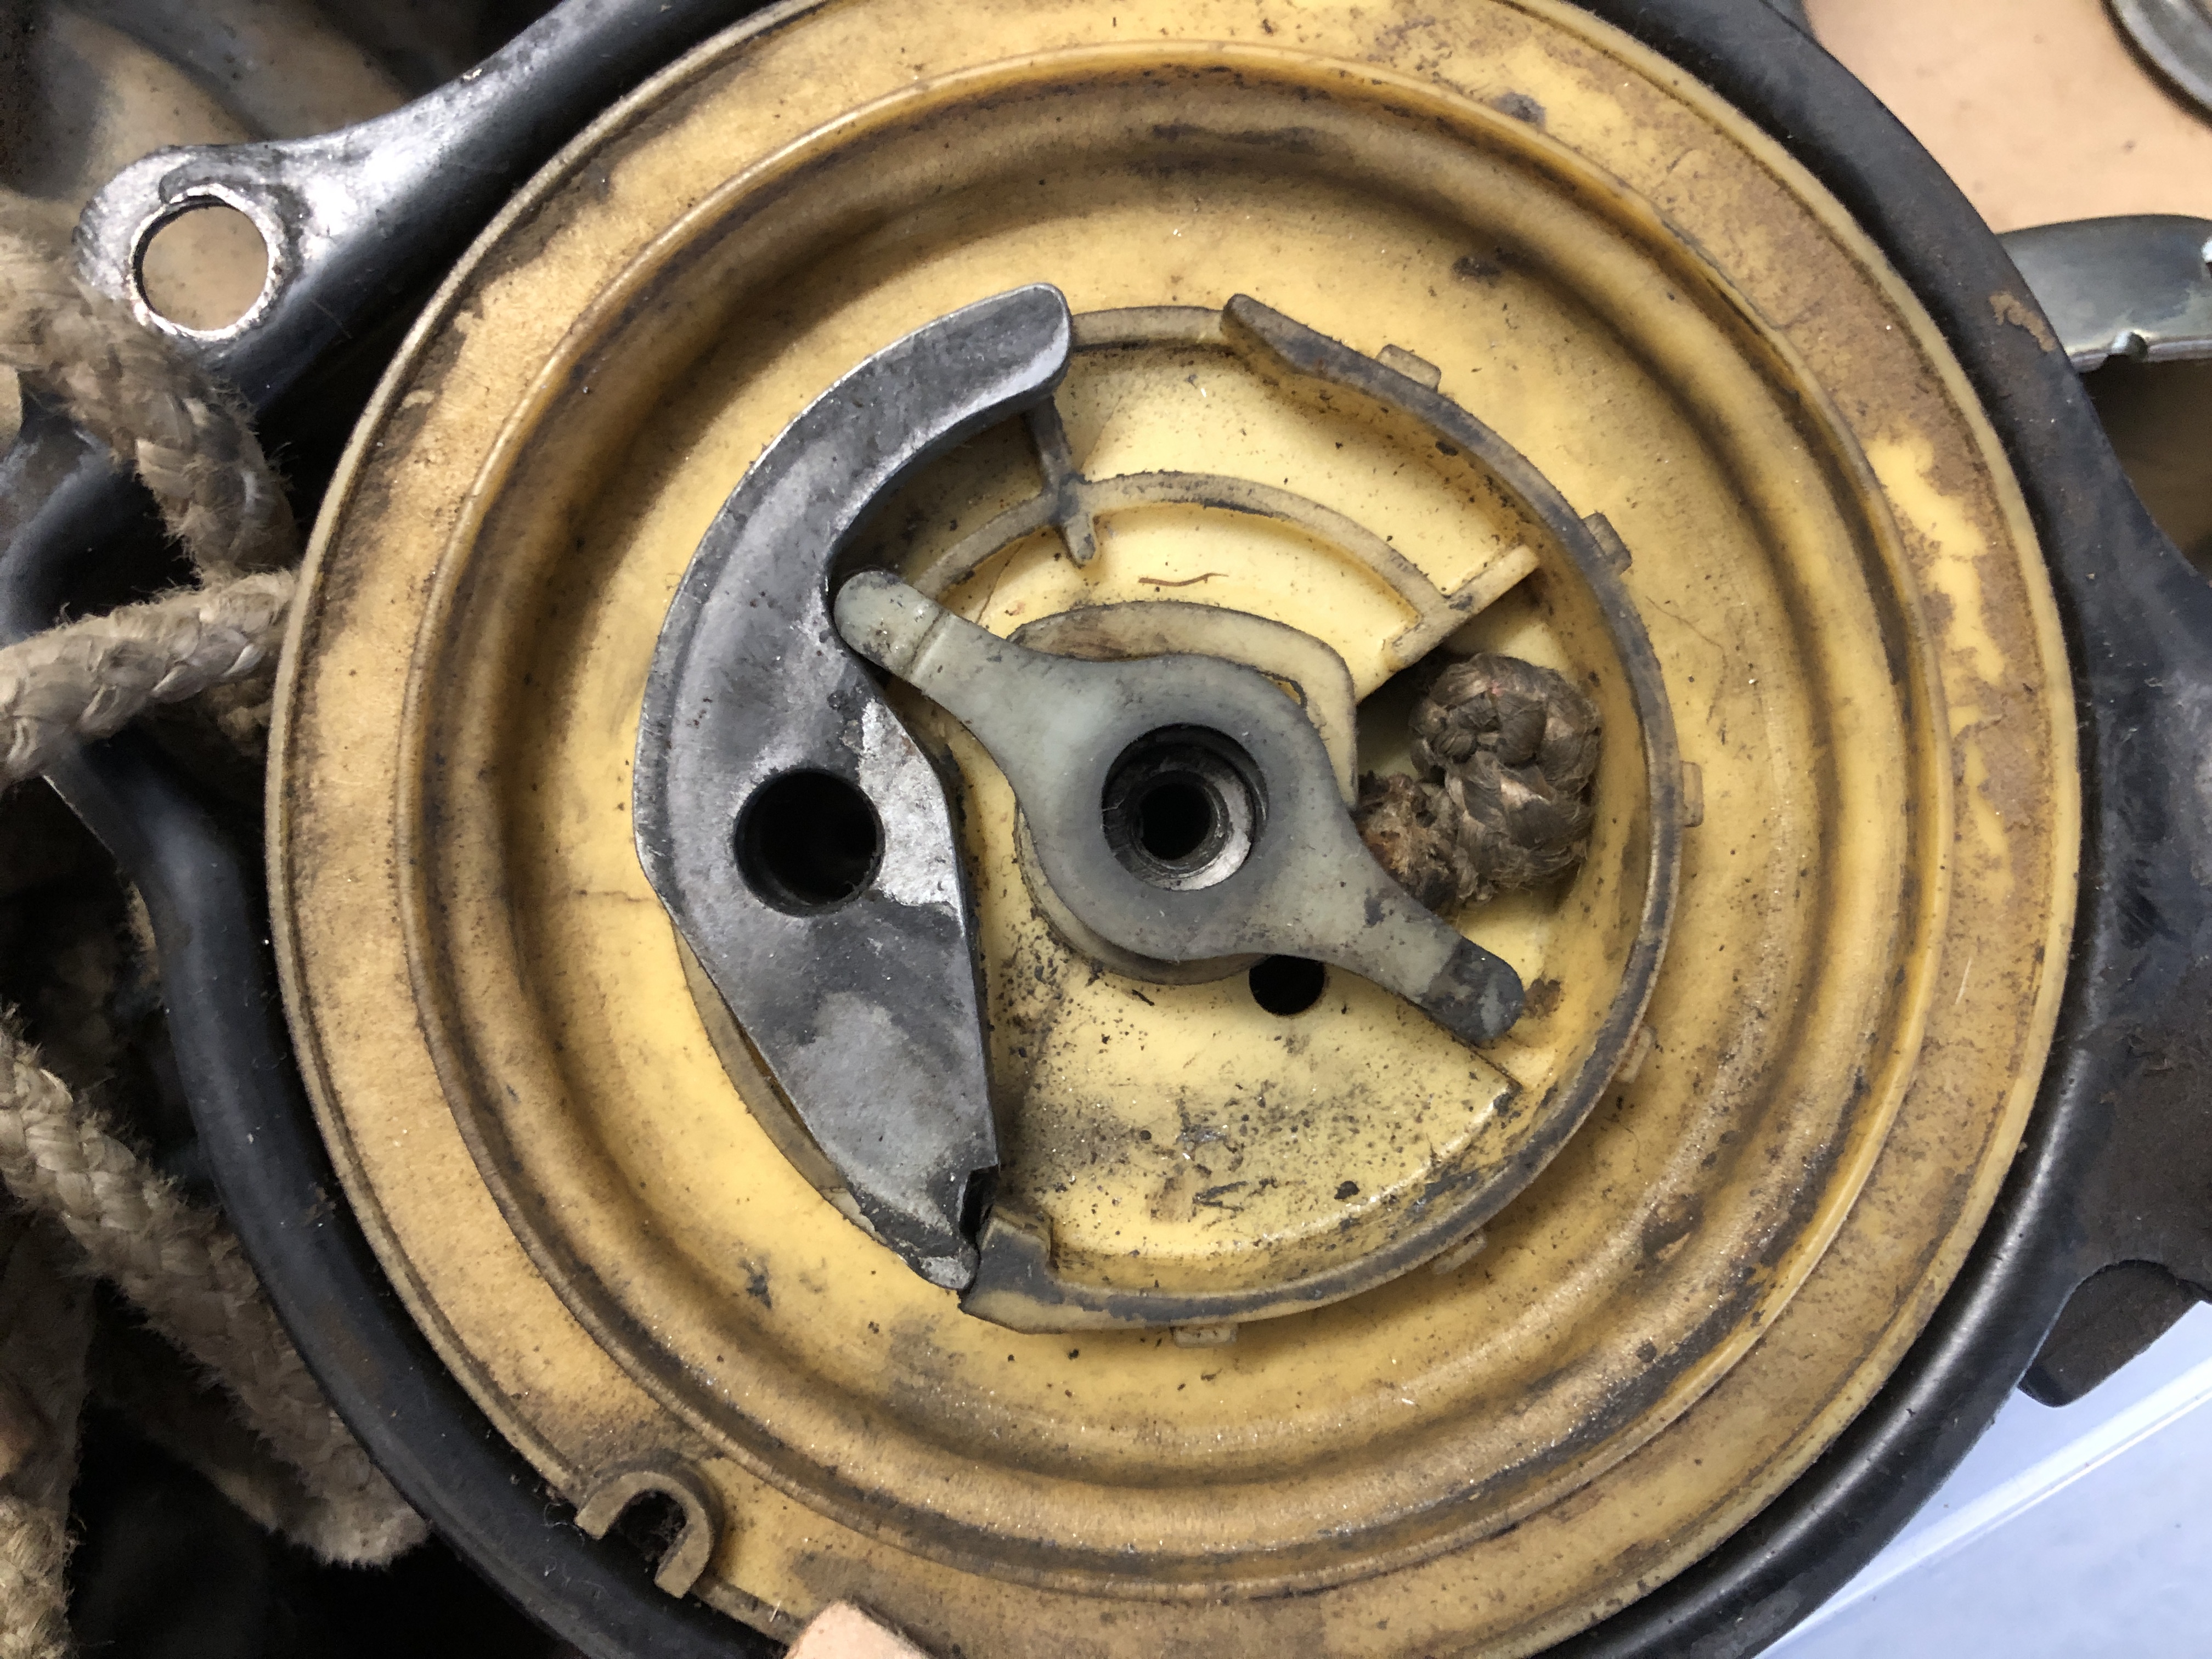
-
First time working with a Honda-Matic transmission. I didn't even know what I was getting into when I purchased this running beat up farm workhorse quad with black oil. I was thinking I could tear the cases apart and find the bad bearing, causing the random squealing noise when you put it into gear and give it gas. Upon opening the engine covers, I Learned about the Honda Matic automatic transmission and realized there's more than just an electronic shift motor going on in these quads. With my learning curve in major education mode, I'm now wondering two possible culprits to the squealing as I've torn the motor down and am staring at the Honda Matic transmission. Two possible issues: 1. The bearing that is squealing is unfortunately inside the hondamatic unit hydraulic transmission which is apparently not serviceable? A new unit is $1,900 to replace it! Yikes! 2. The pull starter rope snapped and someone replaced with the wrong pull starter rope that eventually became severely worn out and the centrifugal lever/catch shows signs of wear from rubbing against the housing. Thinking now the pull starter has nothing to do with a squealing that loud, so my attention is now on the Hondamatic unit, Has anyone gotten inside their cases to inspect the Honda Matic transmission? There's a only 1or 2 videos out there that are not helpful for tear down and inspection. I understand it can't be rebuilt but wondering if anyone has looked deep enough into one to clean it out from running dirty oil? Possible identify bad parts. I refuse to believe Honda is engineeering these as completely non-serviceable? Thinking I will try to disassemble the Hondamatic unit m. Hopefully get into it and get all the dirty oil out and replace with fresh? Any special tools needed? Any and all thoughts/experiences with Hondamatic units would be great conversation for me..

-
Thanks! Yes, Got the Recon running great, even without an oil filter! Note to all those new to 2000 era and newer quads.....change your oil regularly.
-
Is it still running good?
-
help Polaris 7 digit vin decoding.
Matman replied to timberwolf357's topic in General Talk - Anything Goes!
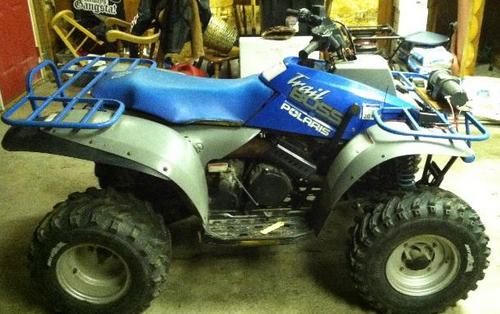
Is this something like what you have? Attach a photo and we can confirm.
-
help Polaris 7 digit vin decoding.
Matman replied to timberwolf357's topic in General Talk - Anything Goes!
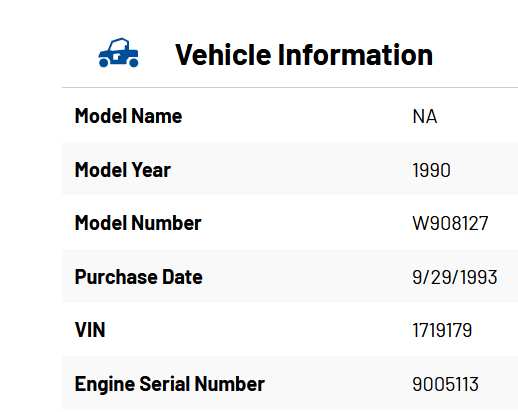
https://www.polaris.com/en-us/vin-search/ It's a 1990 something What do the stickers on it say? Looks like the Model Number reveals info when searching the web.... W908127 is a 1990 Trailboss 250 4x4 https://www.genuinepolarisparts.com/oemparts/l/pol/5033ed7cf870023468a7261b/1990-trail-boss-4x4-w908127-parts https://www.partzilla.com/catalog/polaris/atv/1990/trail-boss-4x4-w908127/engine-muffler-mounting
-
Can you get it to shift if the motor is off and you are pushing the ATV forcing the gears to move and engine to rotate? Can you confirm the clutch is releasing and engaging by pushing the quad with the motor off? Revisiting and wondering if I'm overlooking this EX model is an electric shift? Wondering if the EX model is electric shift or manual?
-
How low is the oil that needs to be topped off? There is a min/max to all oils. I'd highly recommend just replacing your oil and filter.
-
help Polaris 7 digit vin decoding.
Matman replied to timberwolf357's topic in General Talk - Anything Goes!
The VIN's on these era Polaris' are only 7 digits. They went to a full VIN around 1998 from what I recall. You can look up the VIN you have and identify the year make and model. I had a Blue 1995 Polaris 300 2x4 VIN 2563837 and the VIN record showed it was a 1995 Polaris 450 4x4 with a generic picture of a green 4x4. The summary was that the VIN couldn't be used to order parts, only the make, model and displacement info. The motor Serial number didn't help either. With a 7-digit VIN, there just isn't enough characters to identify much about the vehicle. You can't include many details other than mfg, year model. As a matter of fact, just getting it Titled and registered was overkill because the VIN didn't clearly identify the year, make and model. -
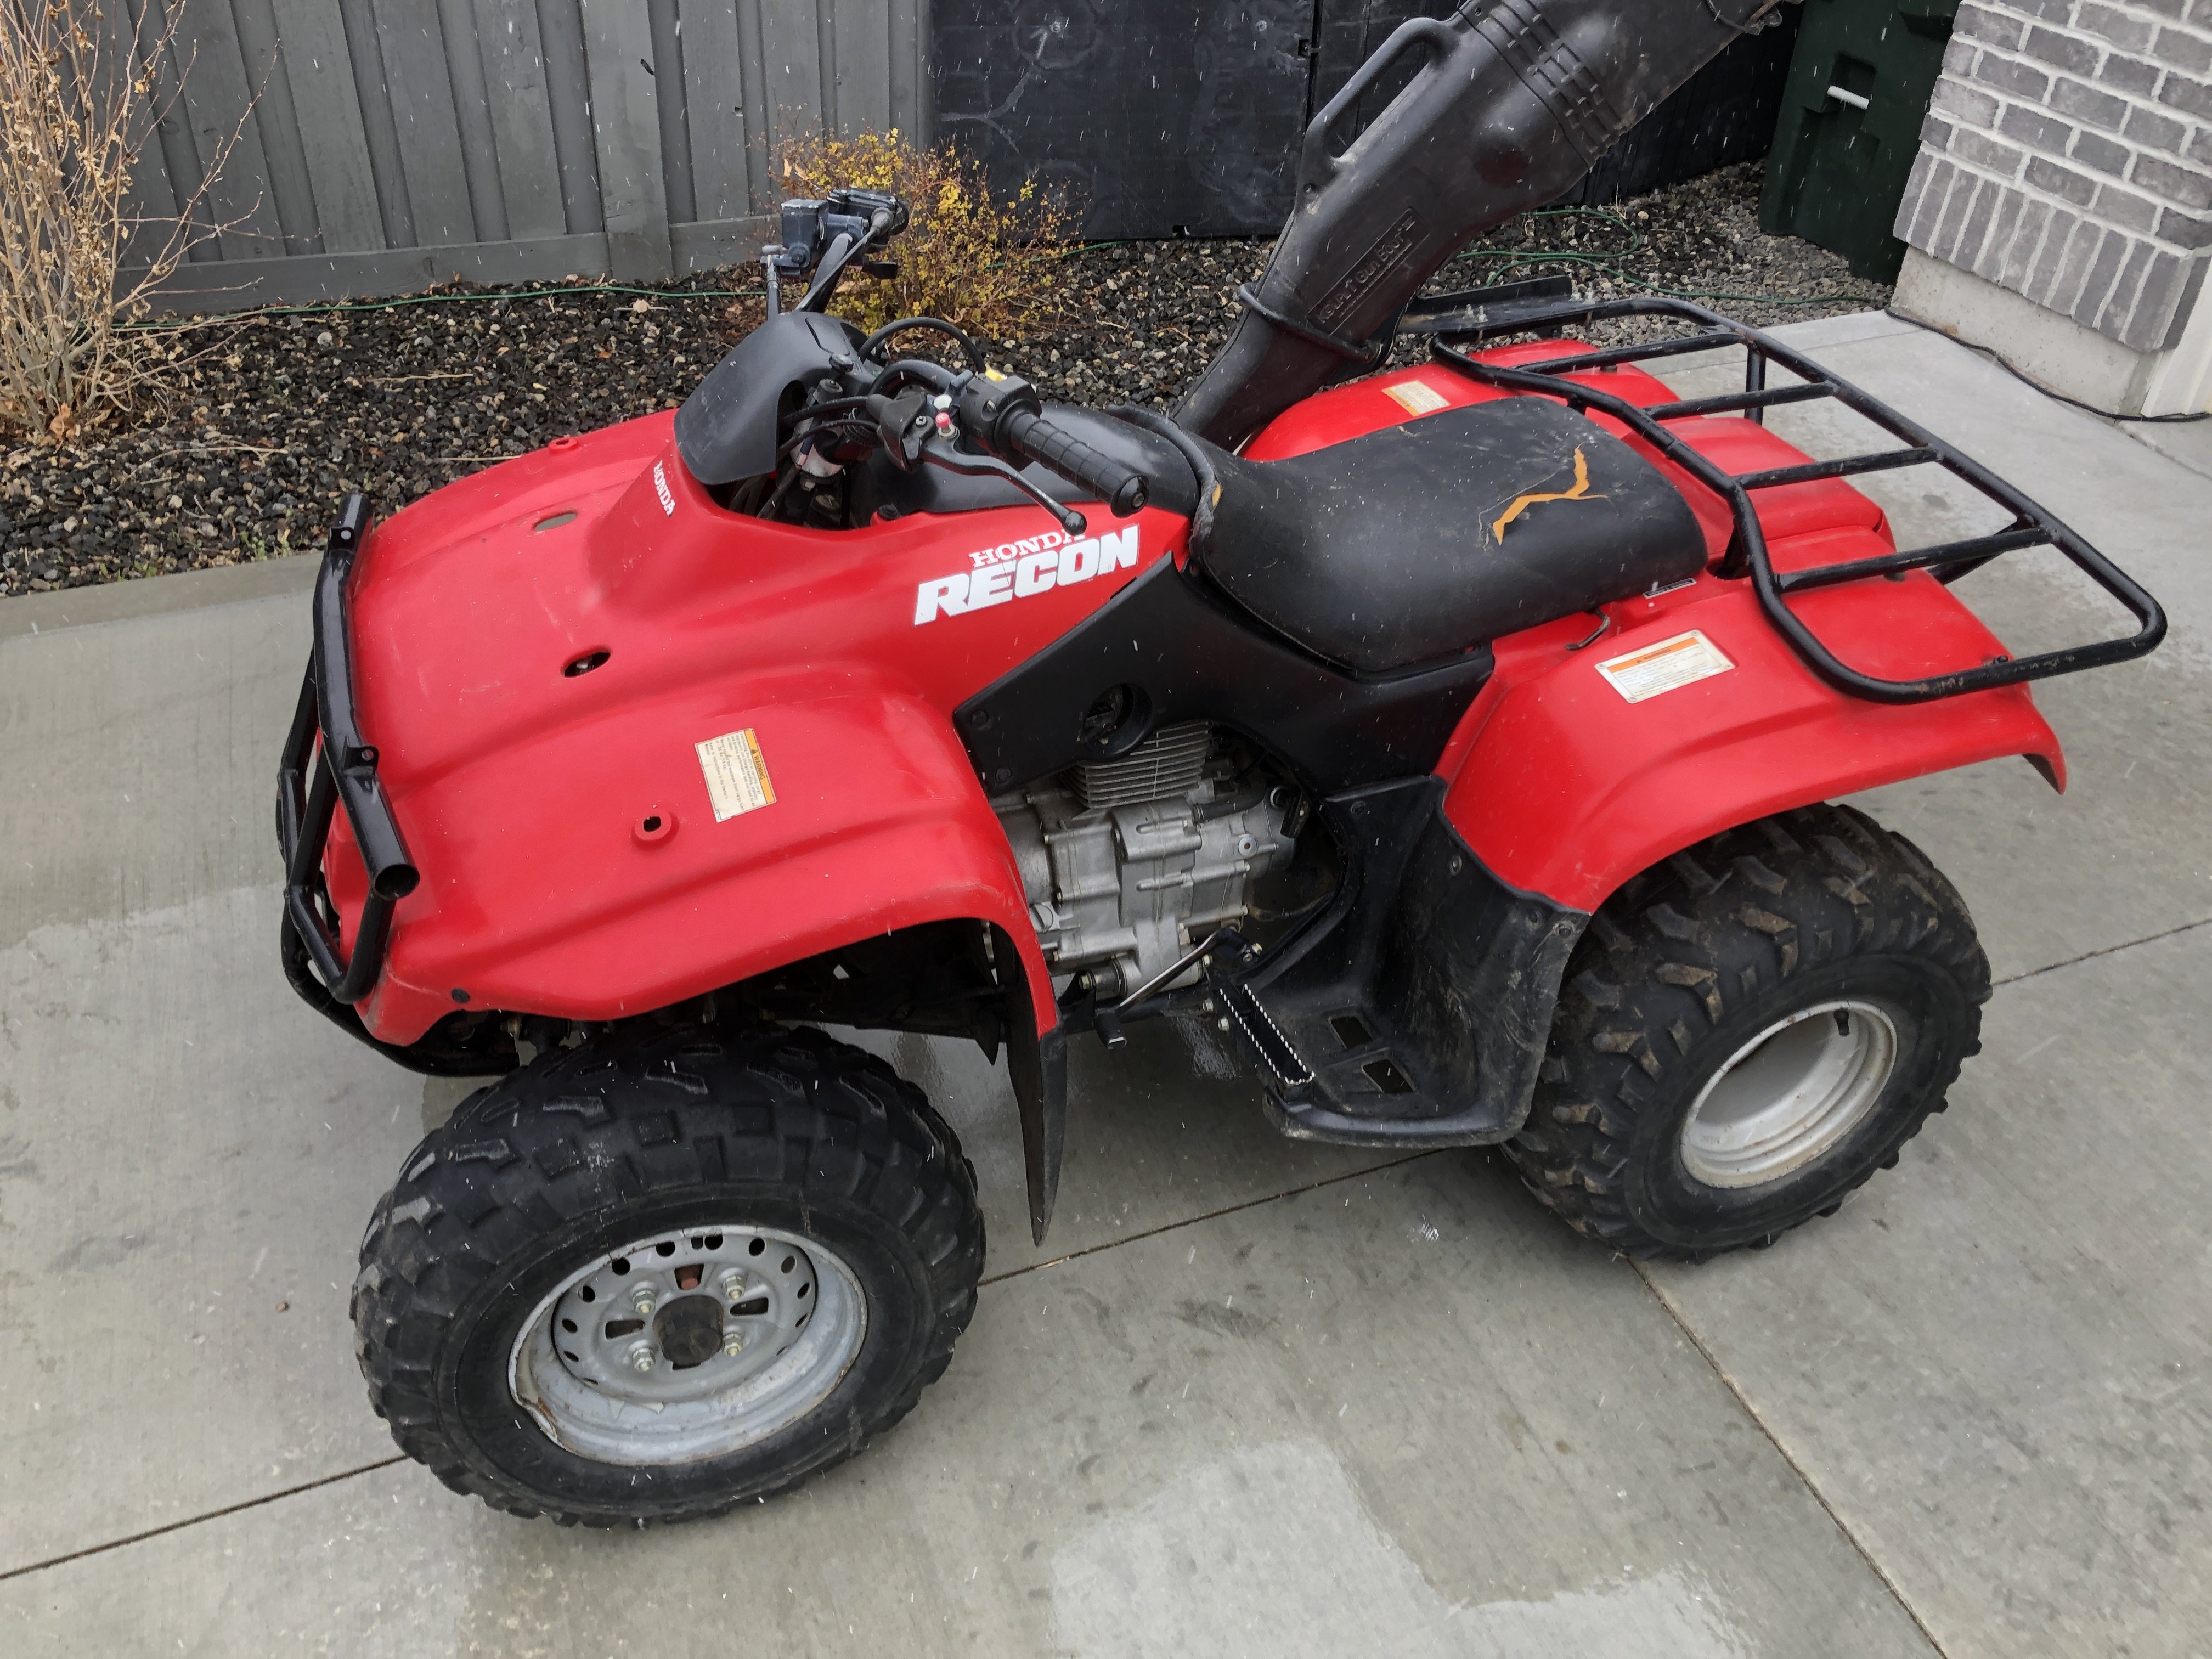
Do these have Oil Filters? Just picked up a new Recon and excited to work on it. Here's the list: 1. Oil /Filter change 2. Gas Drain/refill with Fresh 3. Carb cleaning / Air filter cleaning 4. Troubleshooting: why reverse isn't engaging 5. Troubleshooting: why tail light isn't working. 6. Buy a new seat or cover. 7. Straighten bent front left fender(rollover?) 8. Buy a new battery hold-down strap
-
I had a little trouble following your information, so I simplified your questions to break some possible answers: 1. Put the piston back in.....and ring orientation is a bit confusing....I need layman's terms on the orientation of all the rings 2. My engine stopped sucking through the carb. Can it be the valve is not seated on intake/exhaust? Should I reopen the head and redo the rings on the piston or can it be the valve spring gap? Answer 1. In general, the most important step is to install the rings facing up or down, ring gap position around the piston is secondary. Rings can have chamfer or a bevel or other features on the inside diameter of the ring to improve performance.....which requires you to install them facing up or down. These are always have a stamped markings in the ring. Follow your installation instructions that come with the new rings. There is usually a mark on the top of the rings if there is an up-facing side. Keep in mind however, I've also seen some rings that don't have a mark, but they are clearly not symmetrical, and that visible difference is how you identify the up-facing side to install them. Some simple motors don't matter if they're facing up or down, but make sure you follow the directions. For ring end gap locations in 4-strokes specifically, the simple answer is count the number of rings to install and split them evenly around the piston. This is the simple answer. There are longevity and performance additions to this thought.... The more complicated answer is avoid installing gaps on the exhaust side of the piston. As the piston fires on a compression stroke, the piston's "exhaust side" sees the hardest work and most heat on that side when running, so for longevity, do not leave any end gaps on the exhaust side wall. Lot's of videos exist on locating gaps....search videos on the web for "4 Stroke Piston Rings From A to Z || Identify, Install and Orient Gaps CORRECTLY!" Answer 2. Ring end position will not be related to no more vacuum being pulled through the carb. My hunch is your timing chain and Cam are very off, maybe even 180degrees off. Most engines these days are designed with interfering valves meaning if your cam is off 180degrees the Piston will likely clip your valves and break things. If you are seeing the cam gear break or sheared off... or other broken parts, this may have been what happened. Others may have better suggestions for troubleshooting?
-
Suzuki 2007 KingQuad 700 LT-A700 4x4 Rebuild to replace rod
Matman replied to Matman's topic in Suzuki ATV Forum
Found the local shops didn't have the special tools either. I invested in both Wet Clutch Puller tool($75) and 52mm long socket special tool($200). I'll post pictures when they arrive.