
Kenneth Obando
-
Posts
12 -
Joined
-
Last visited
Kenneth Obando's Achievements
")


-

2004 Polaris 700 headgasket repair
Kenneth Obando replied to Kenneth Obando's topic in Polaris ATV Forum
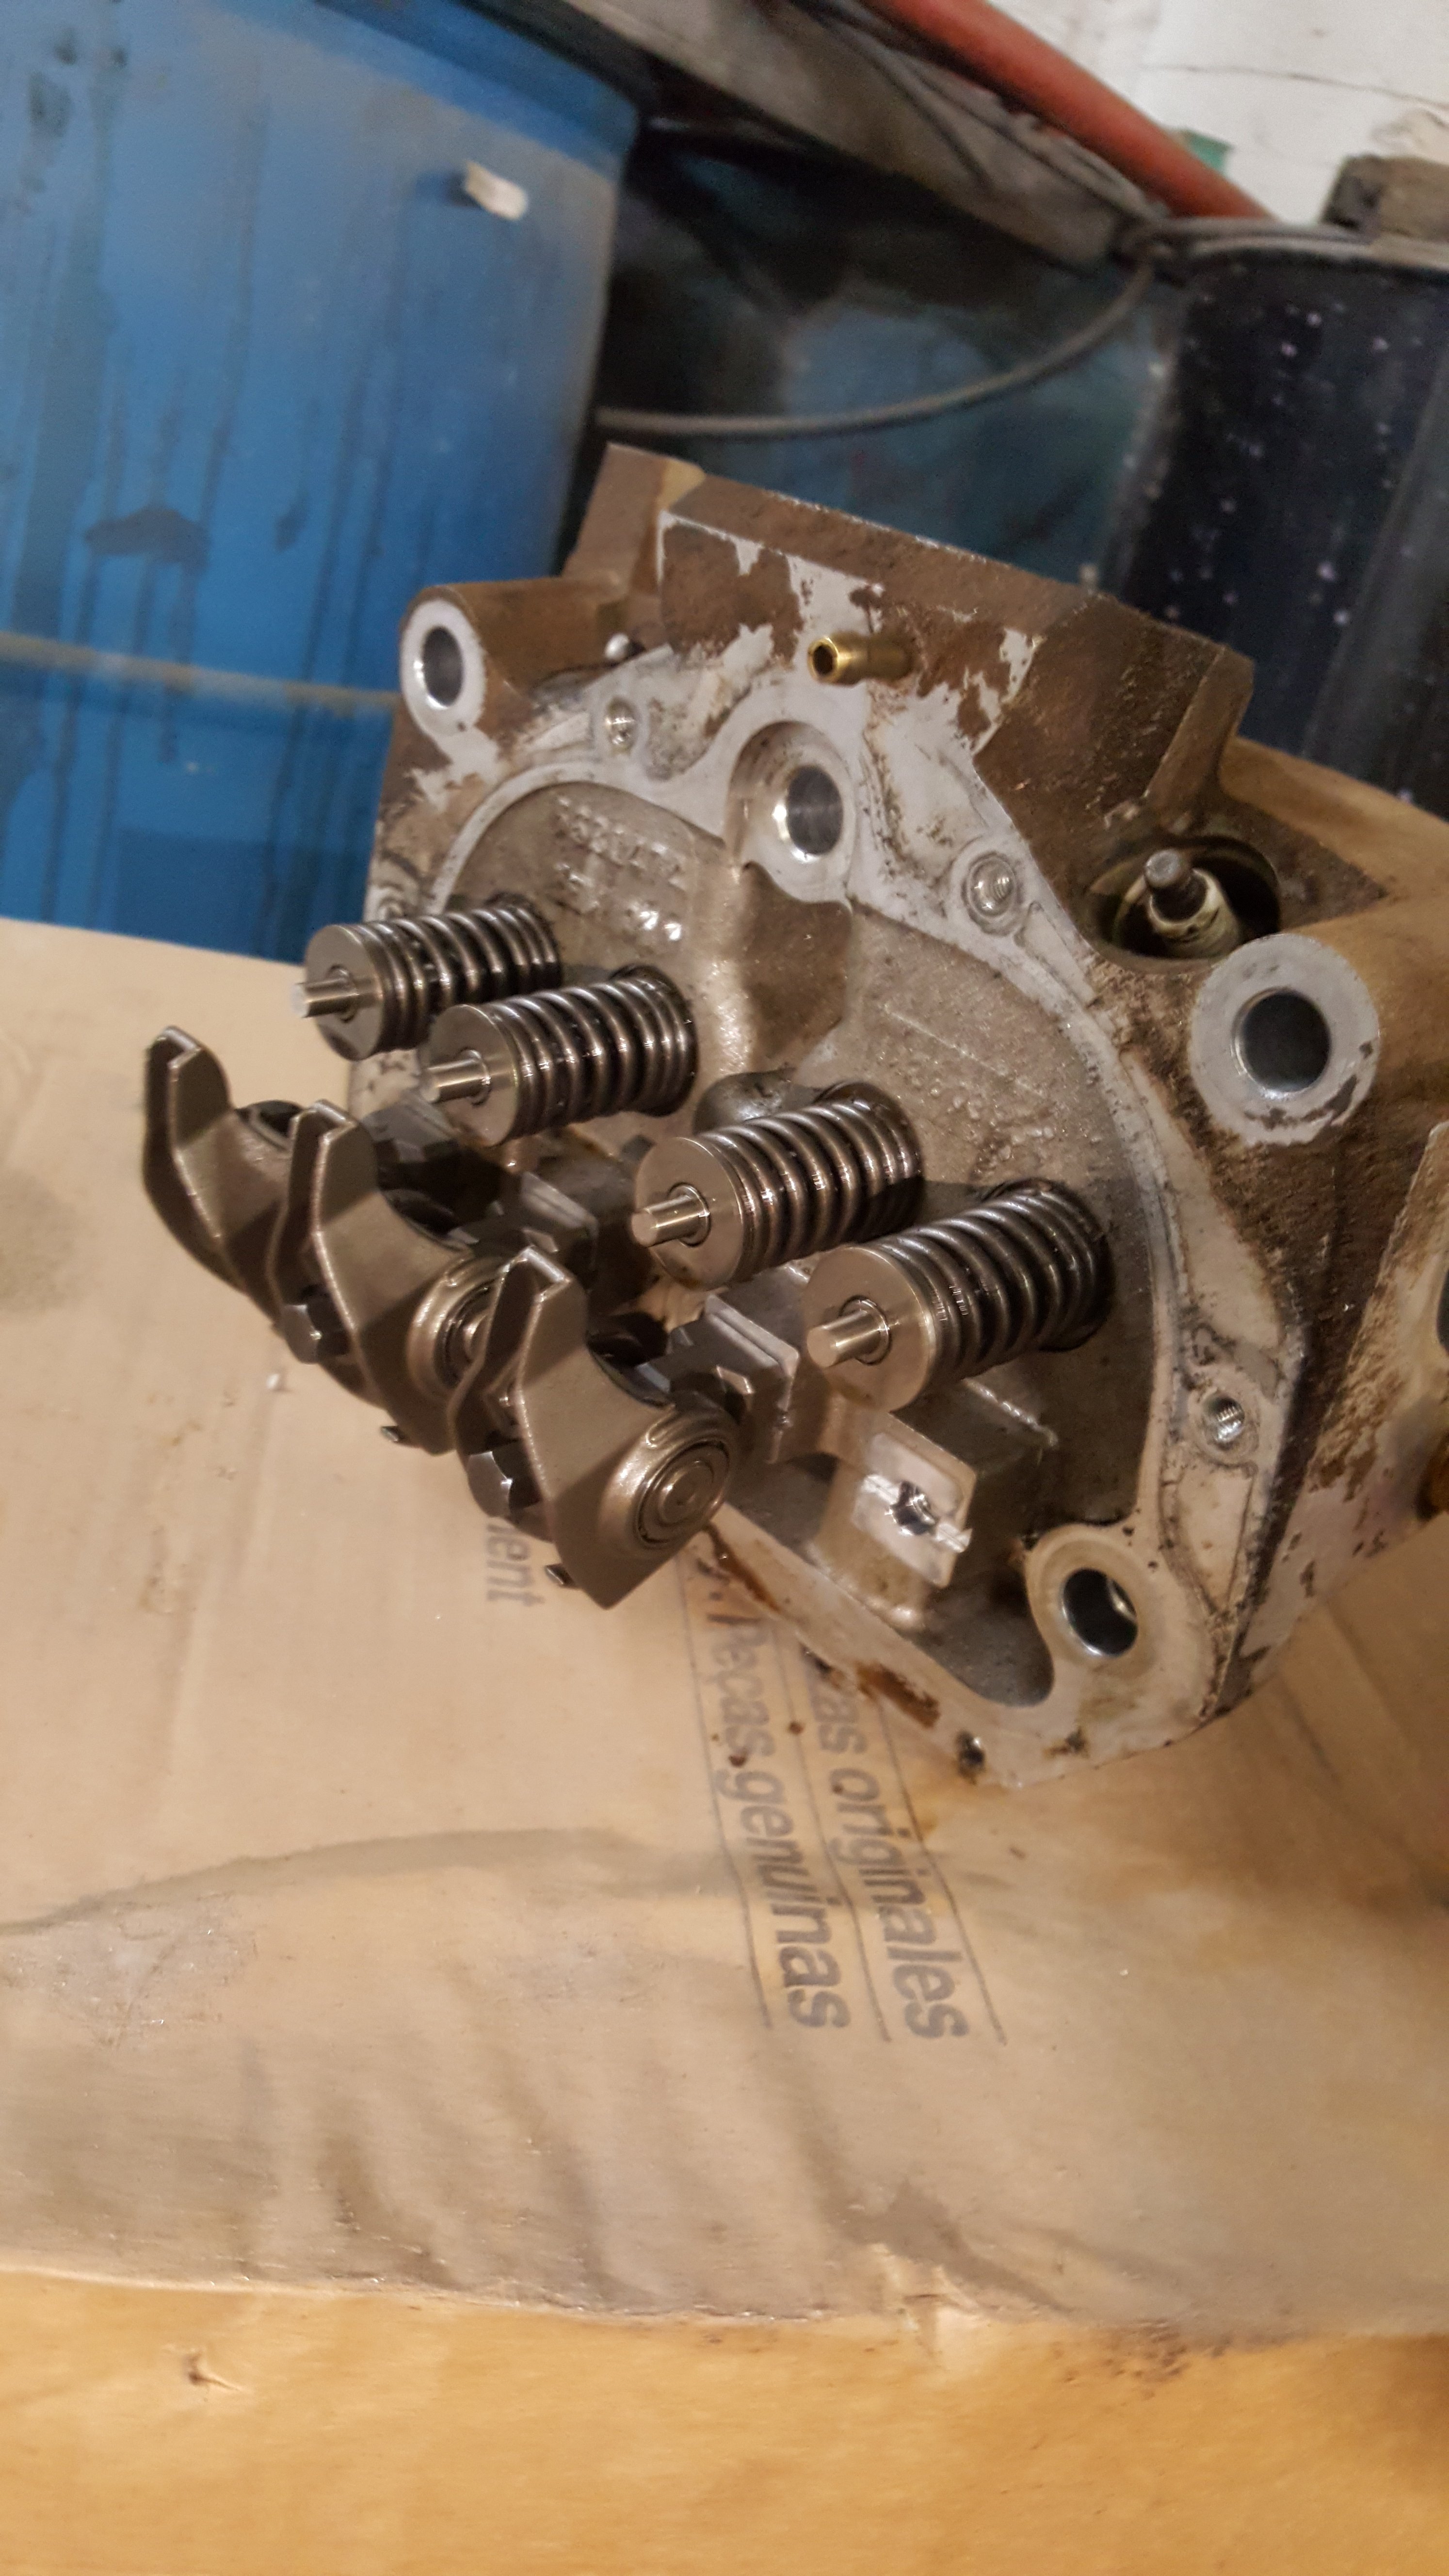
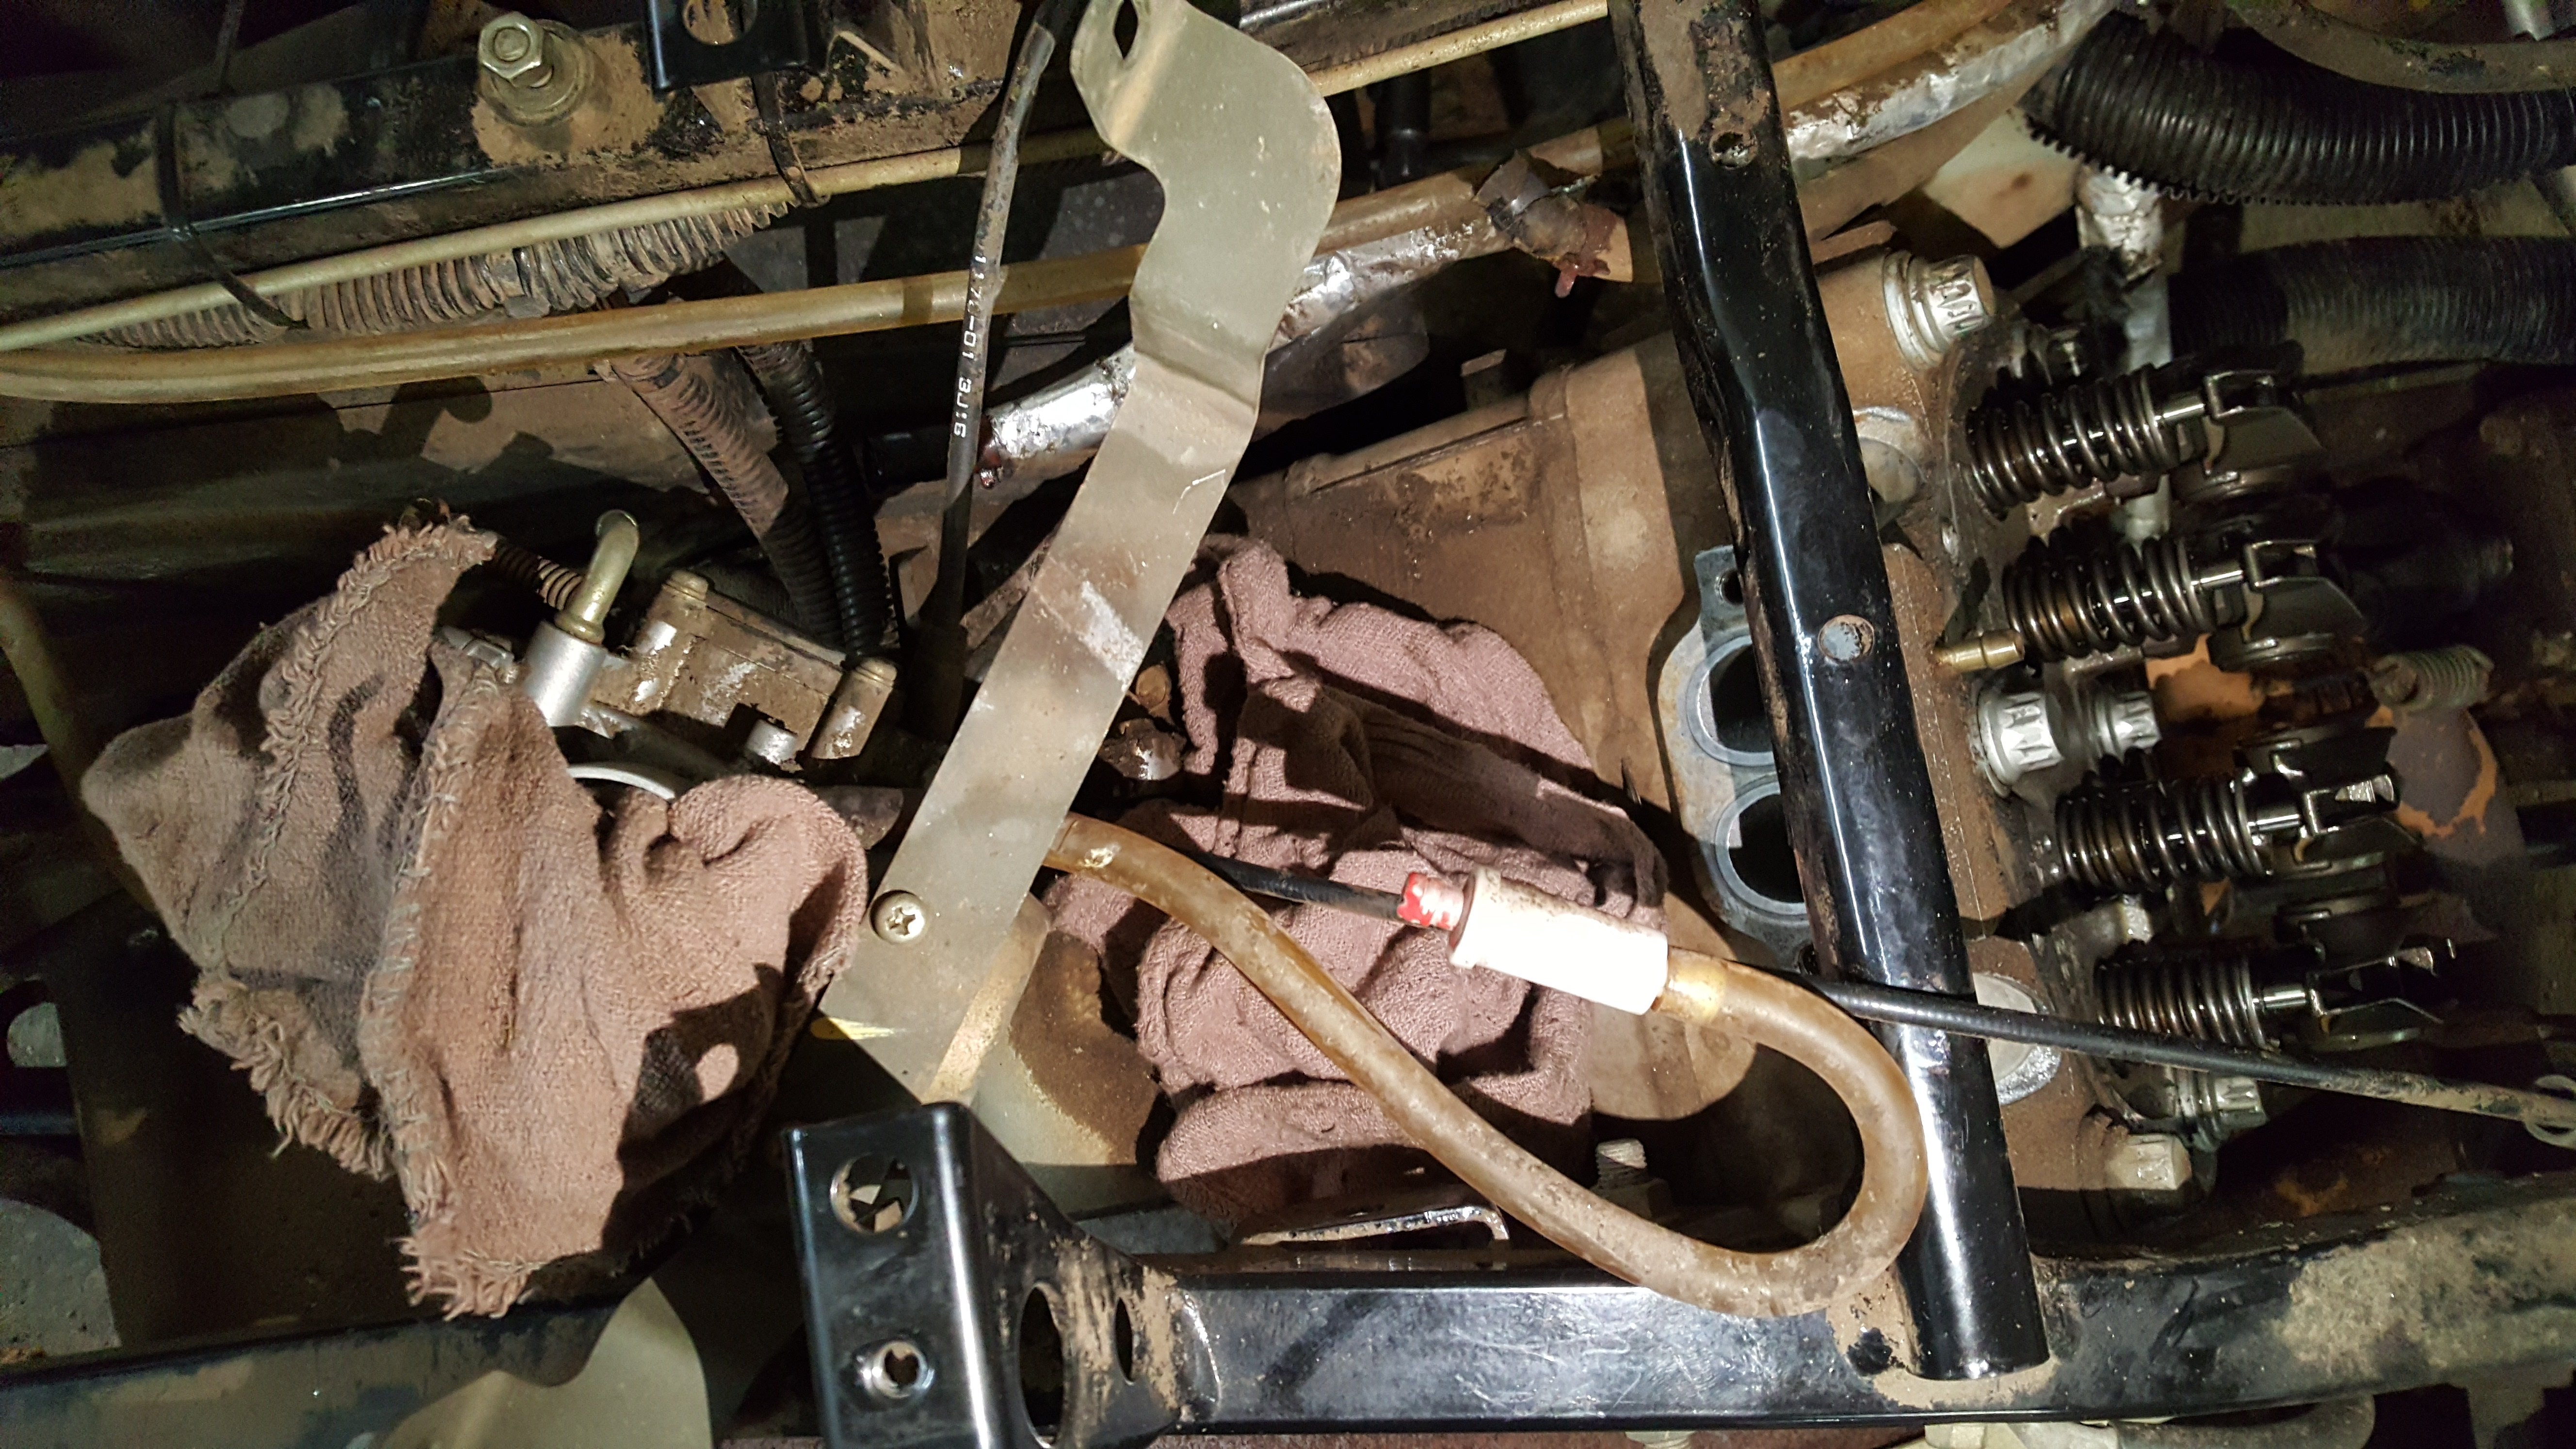
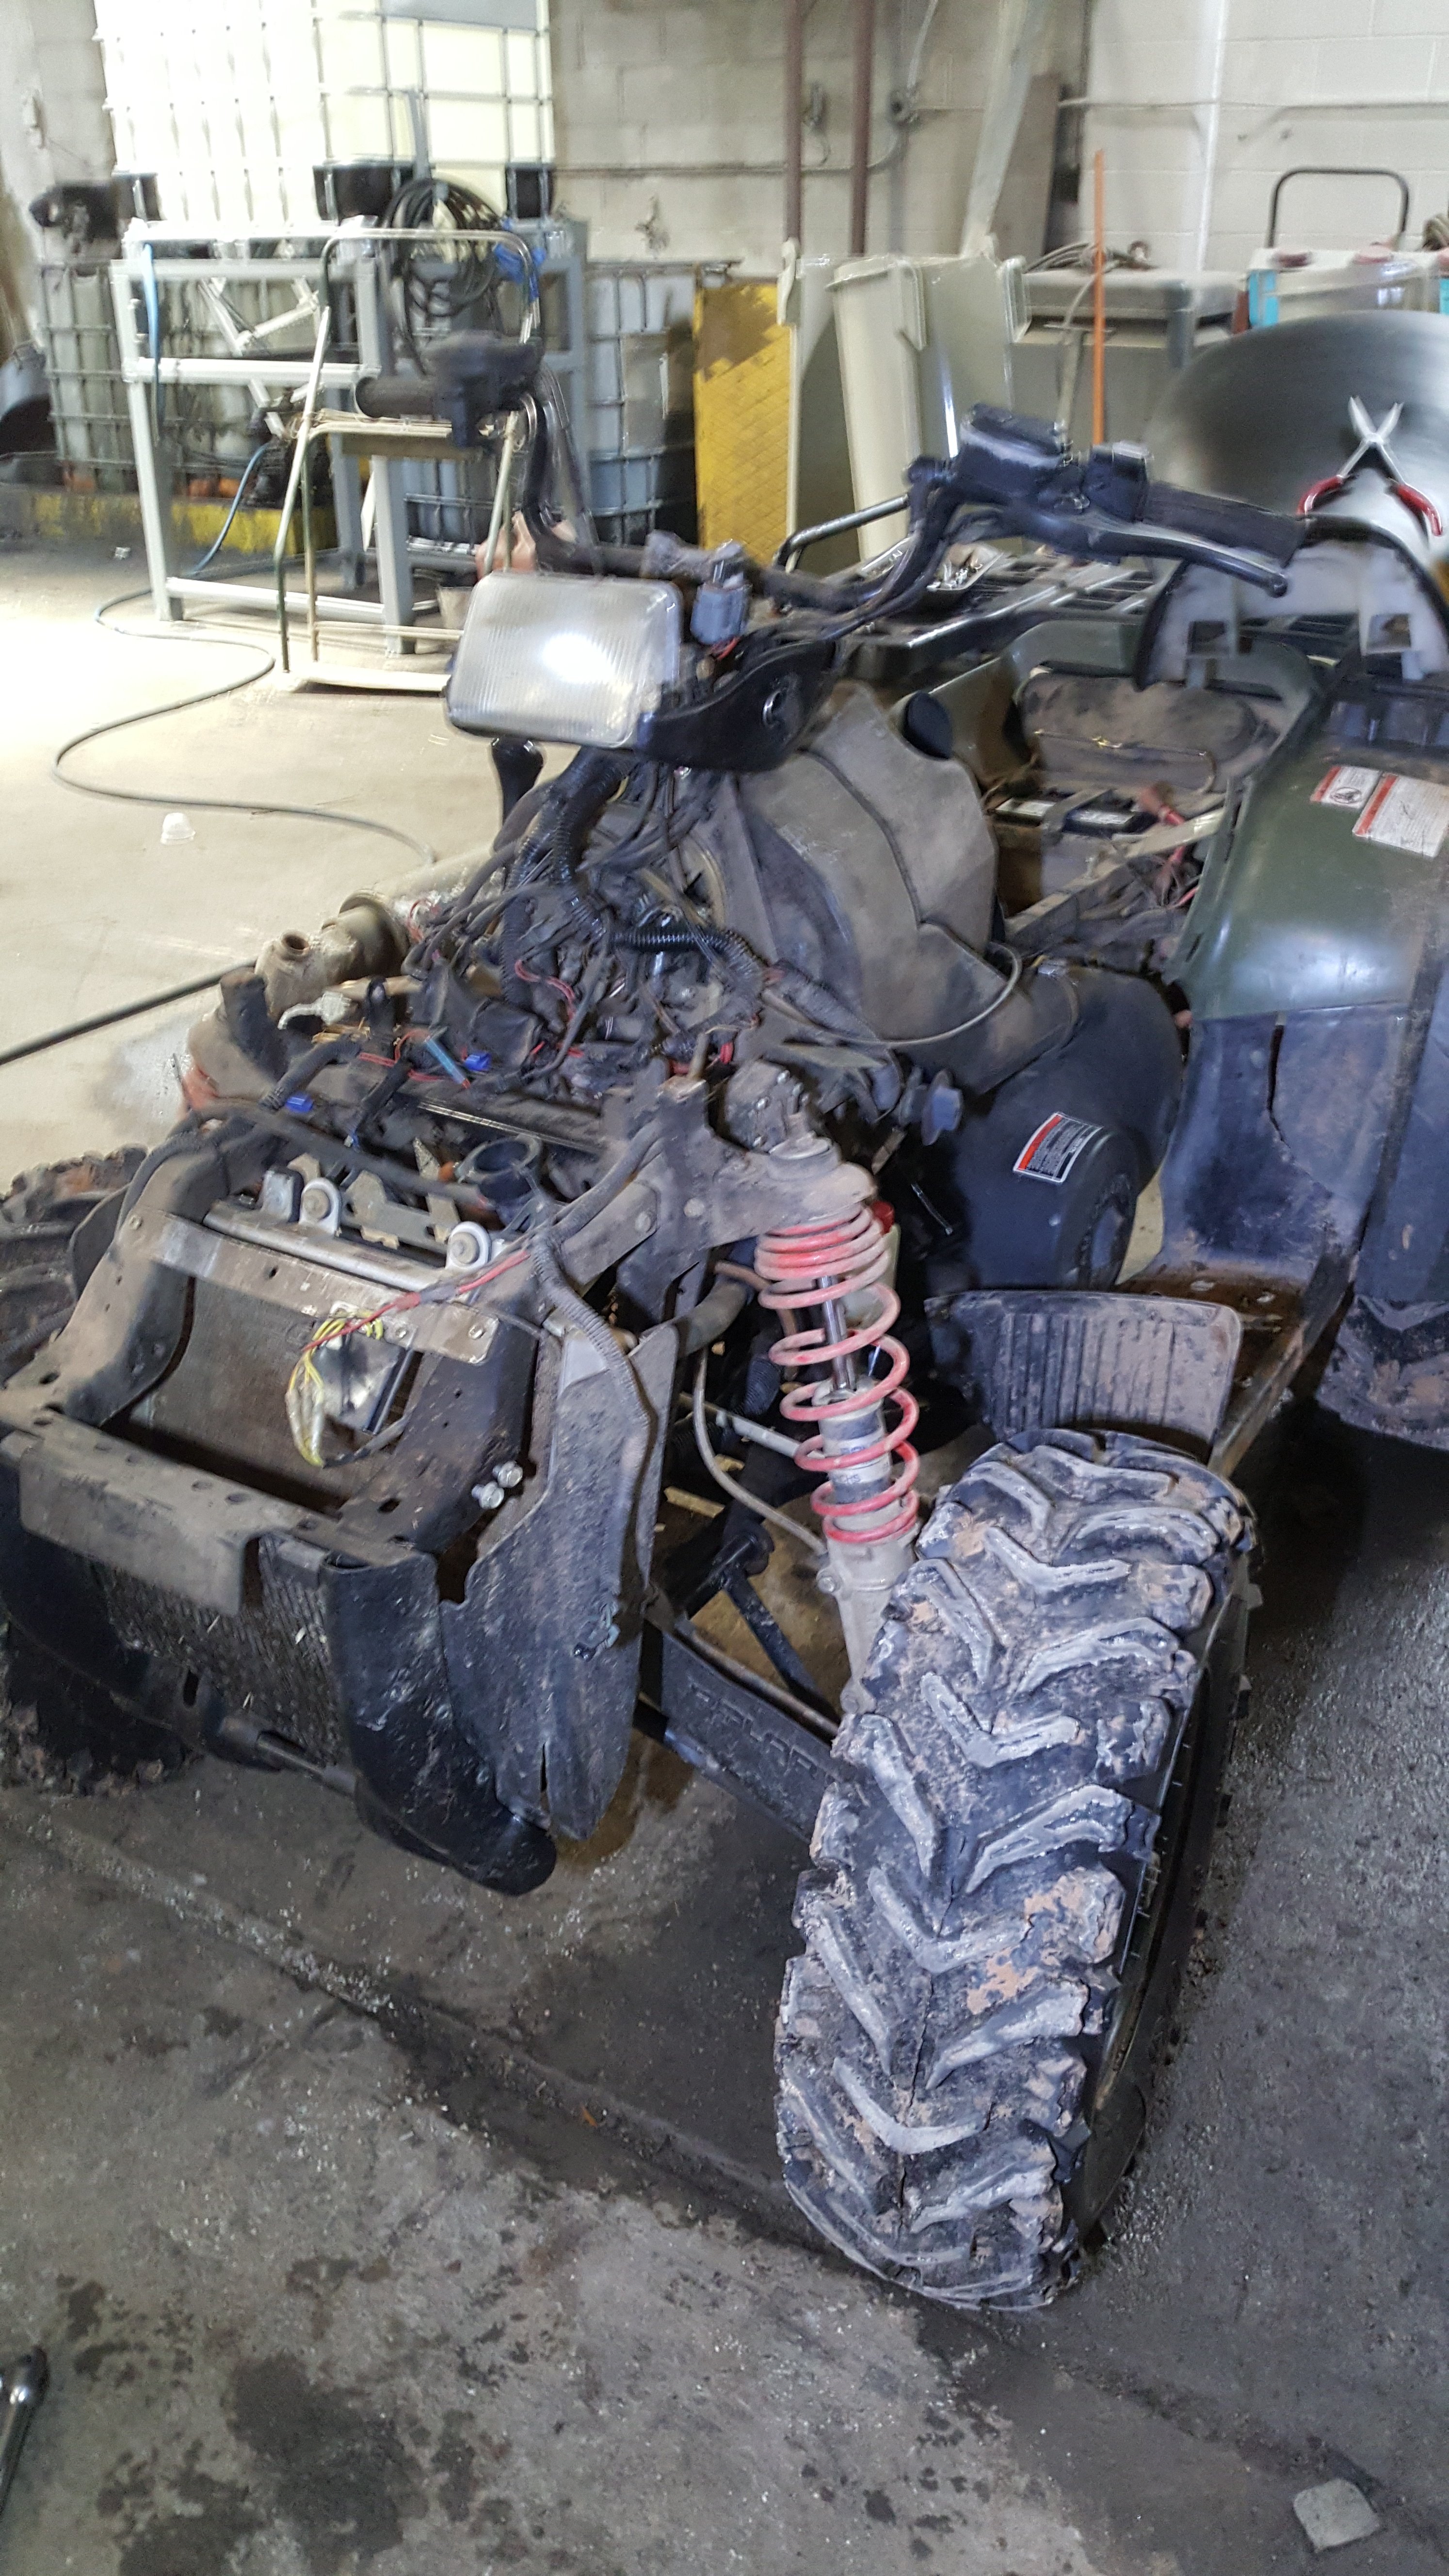
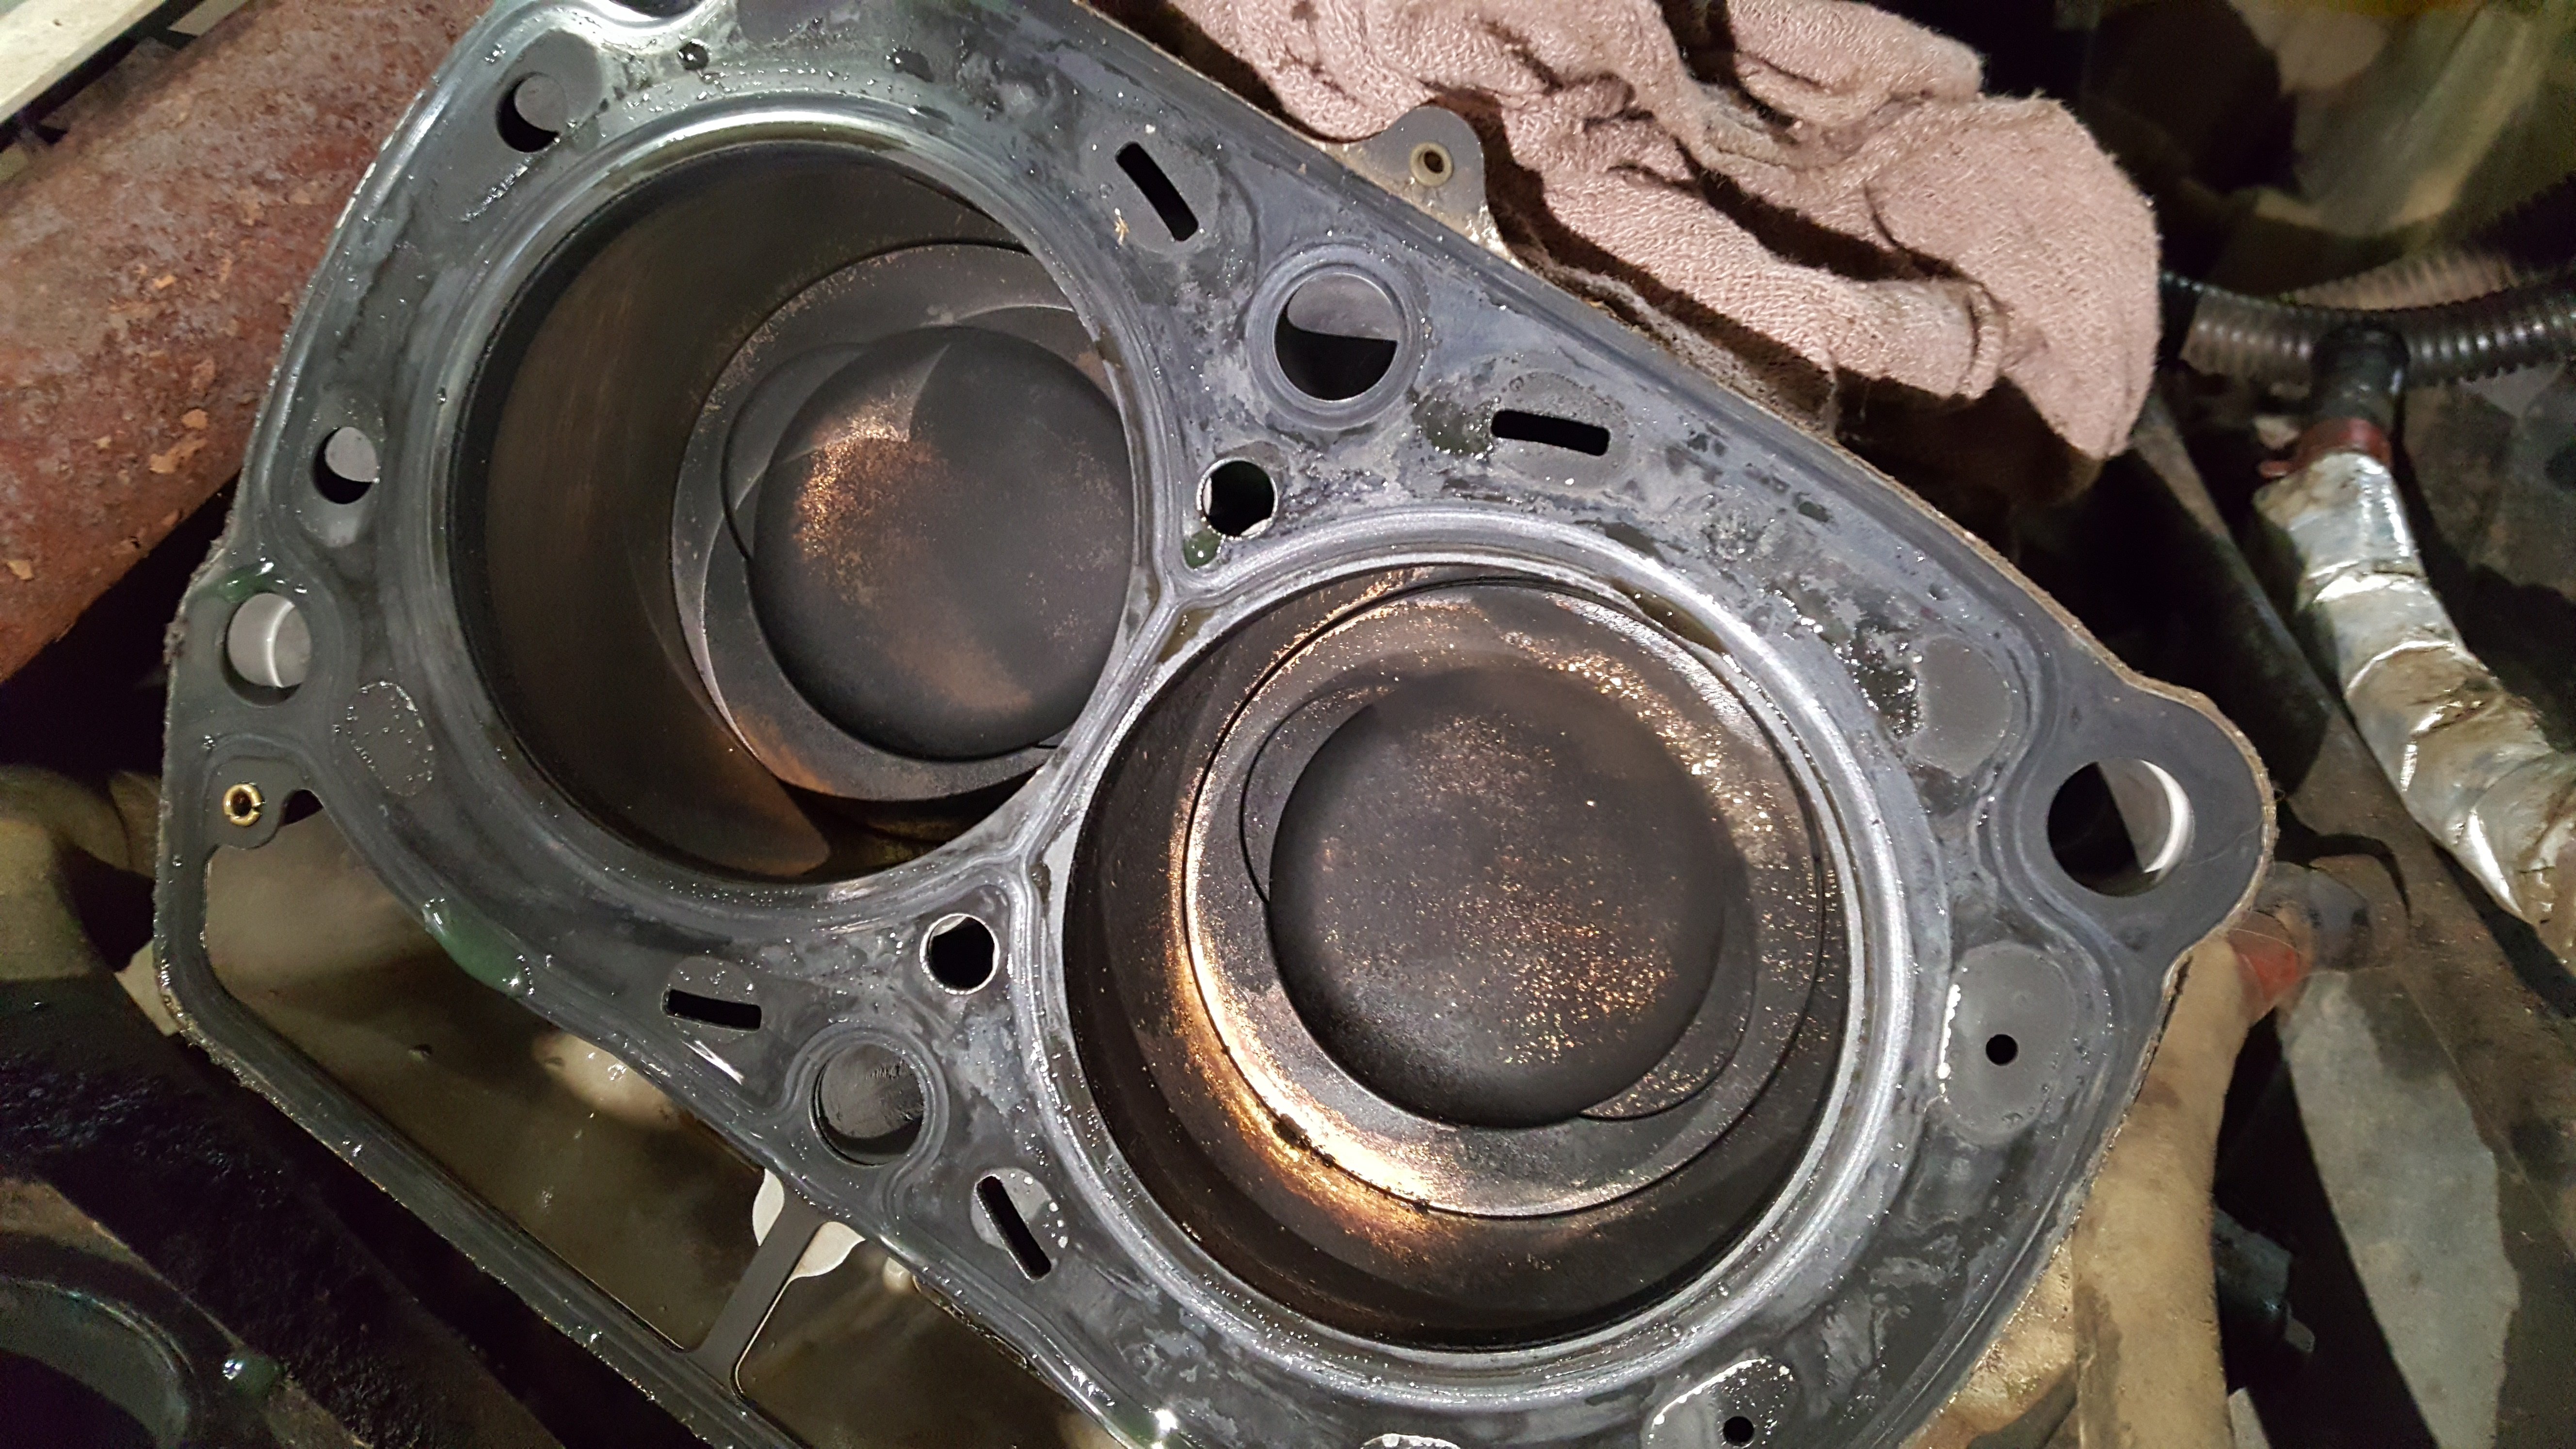
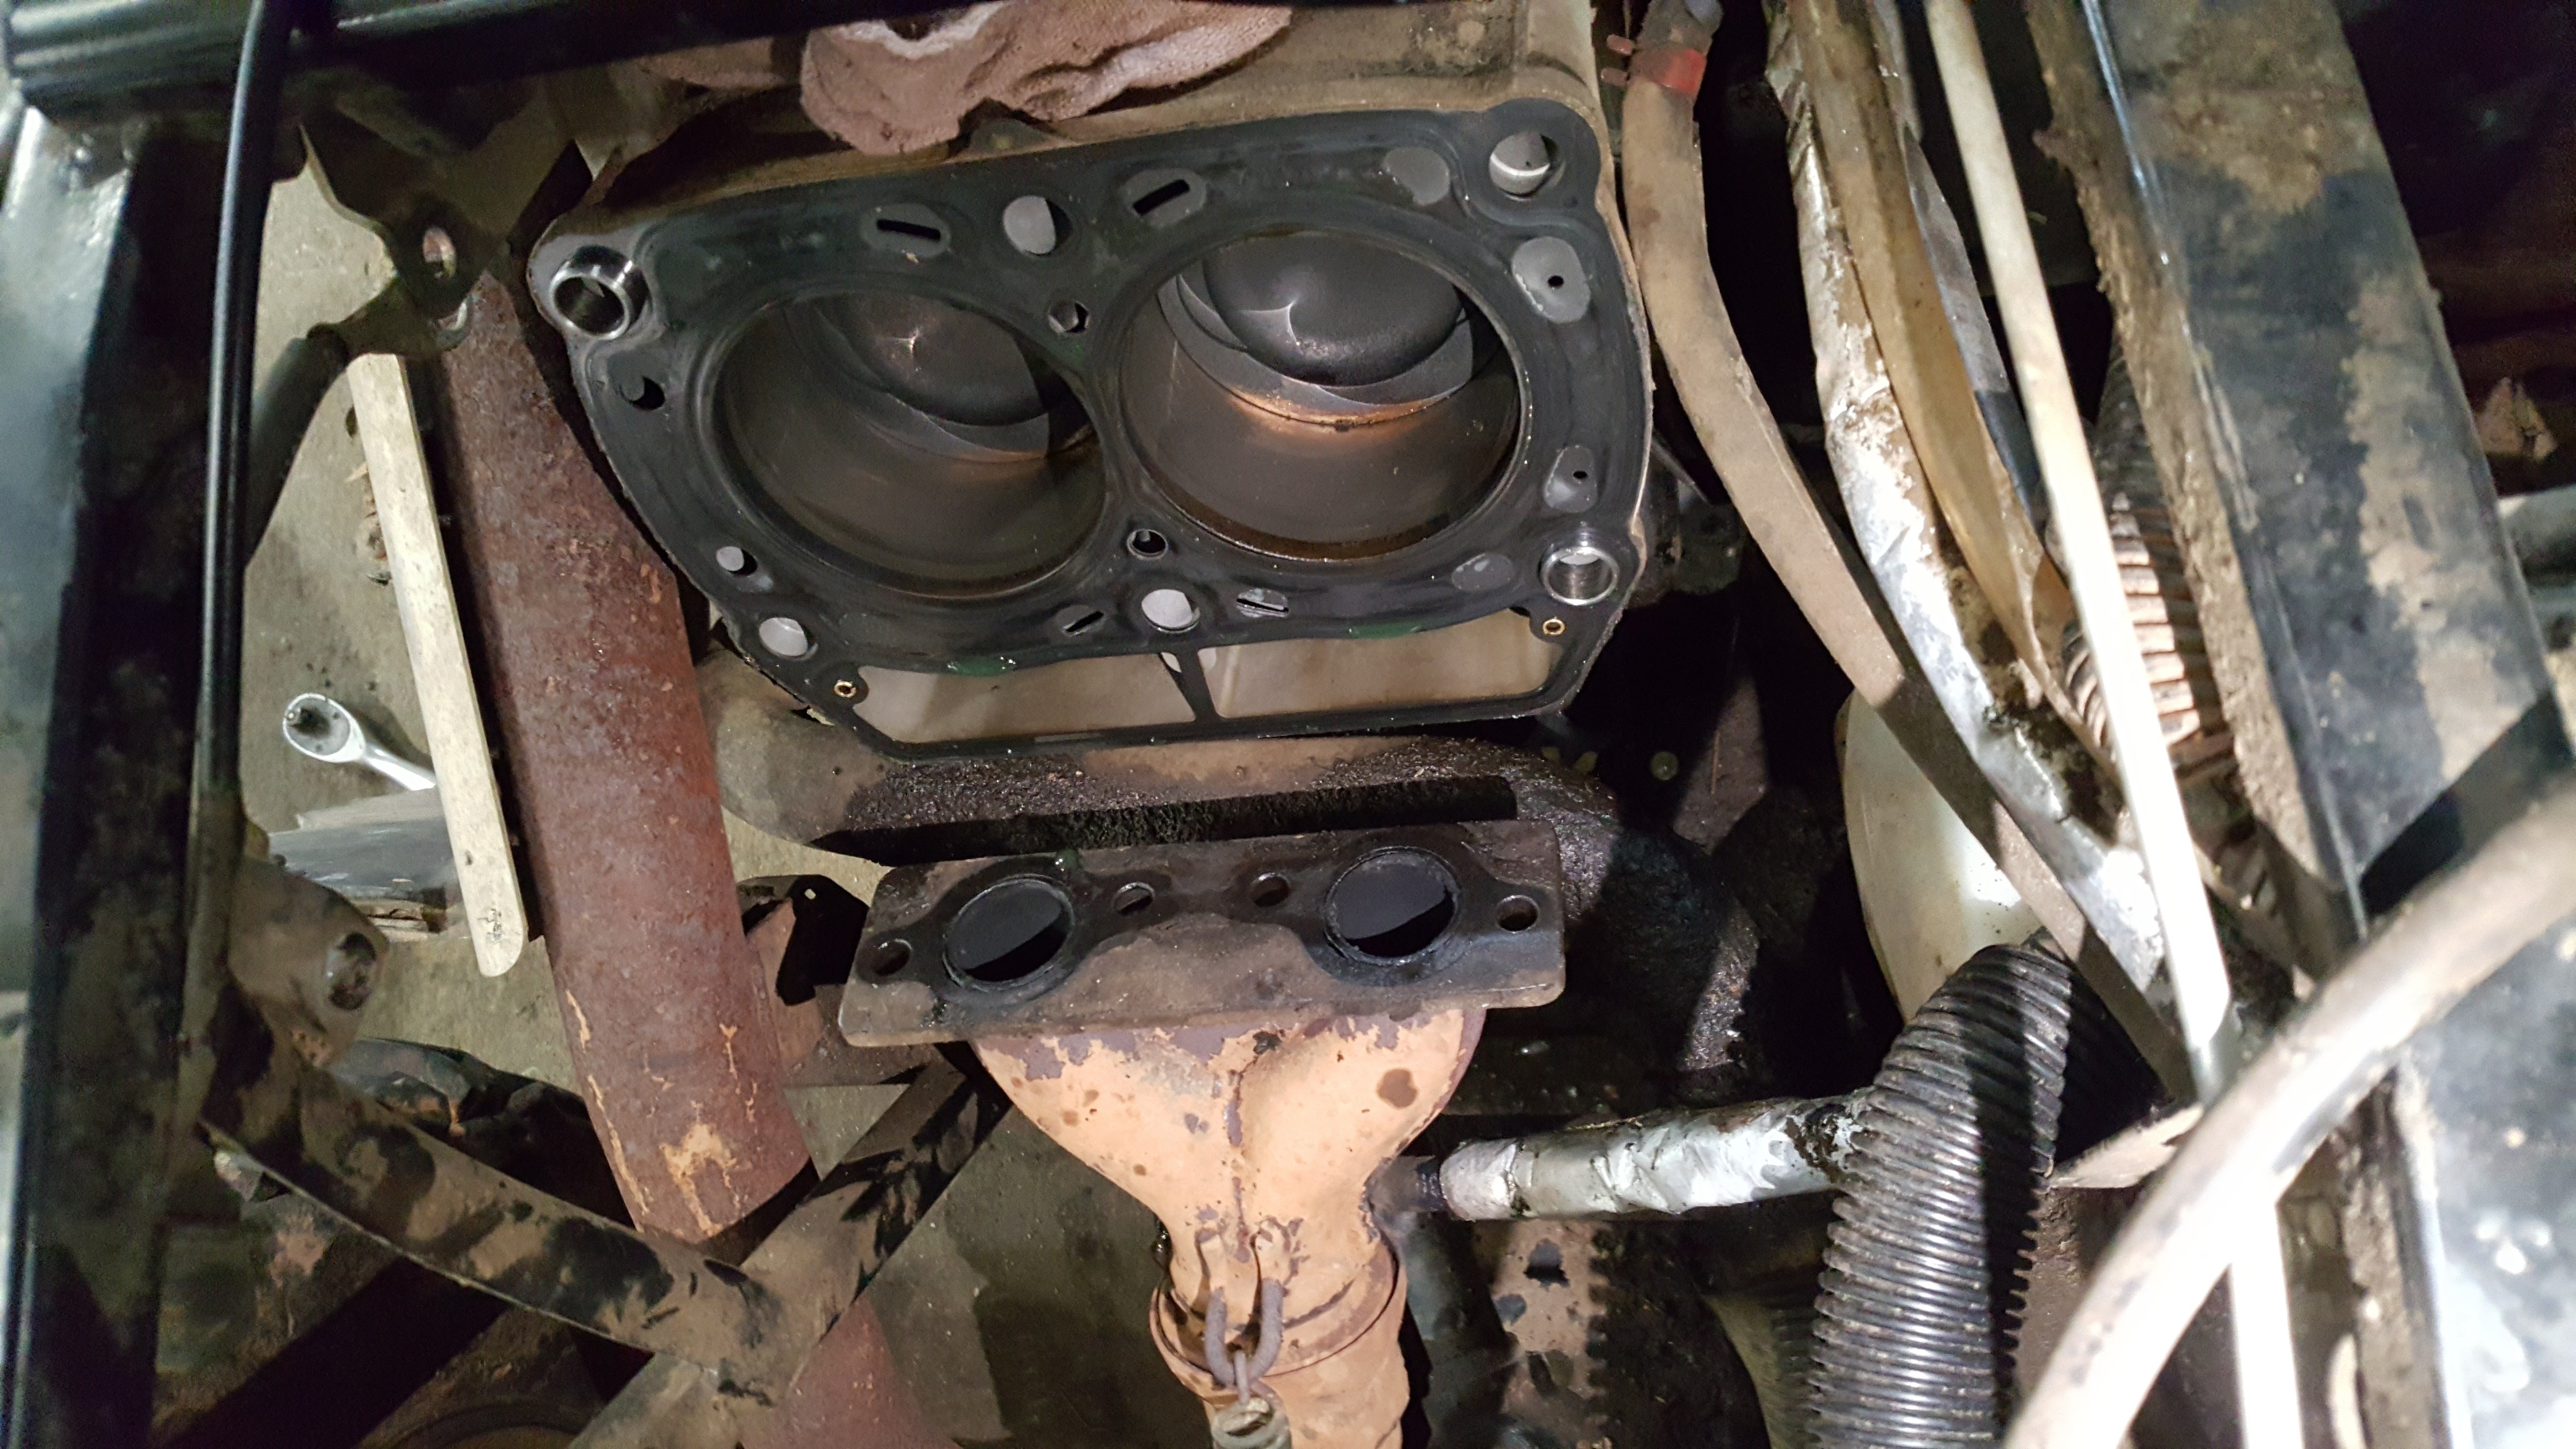
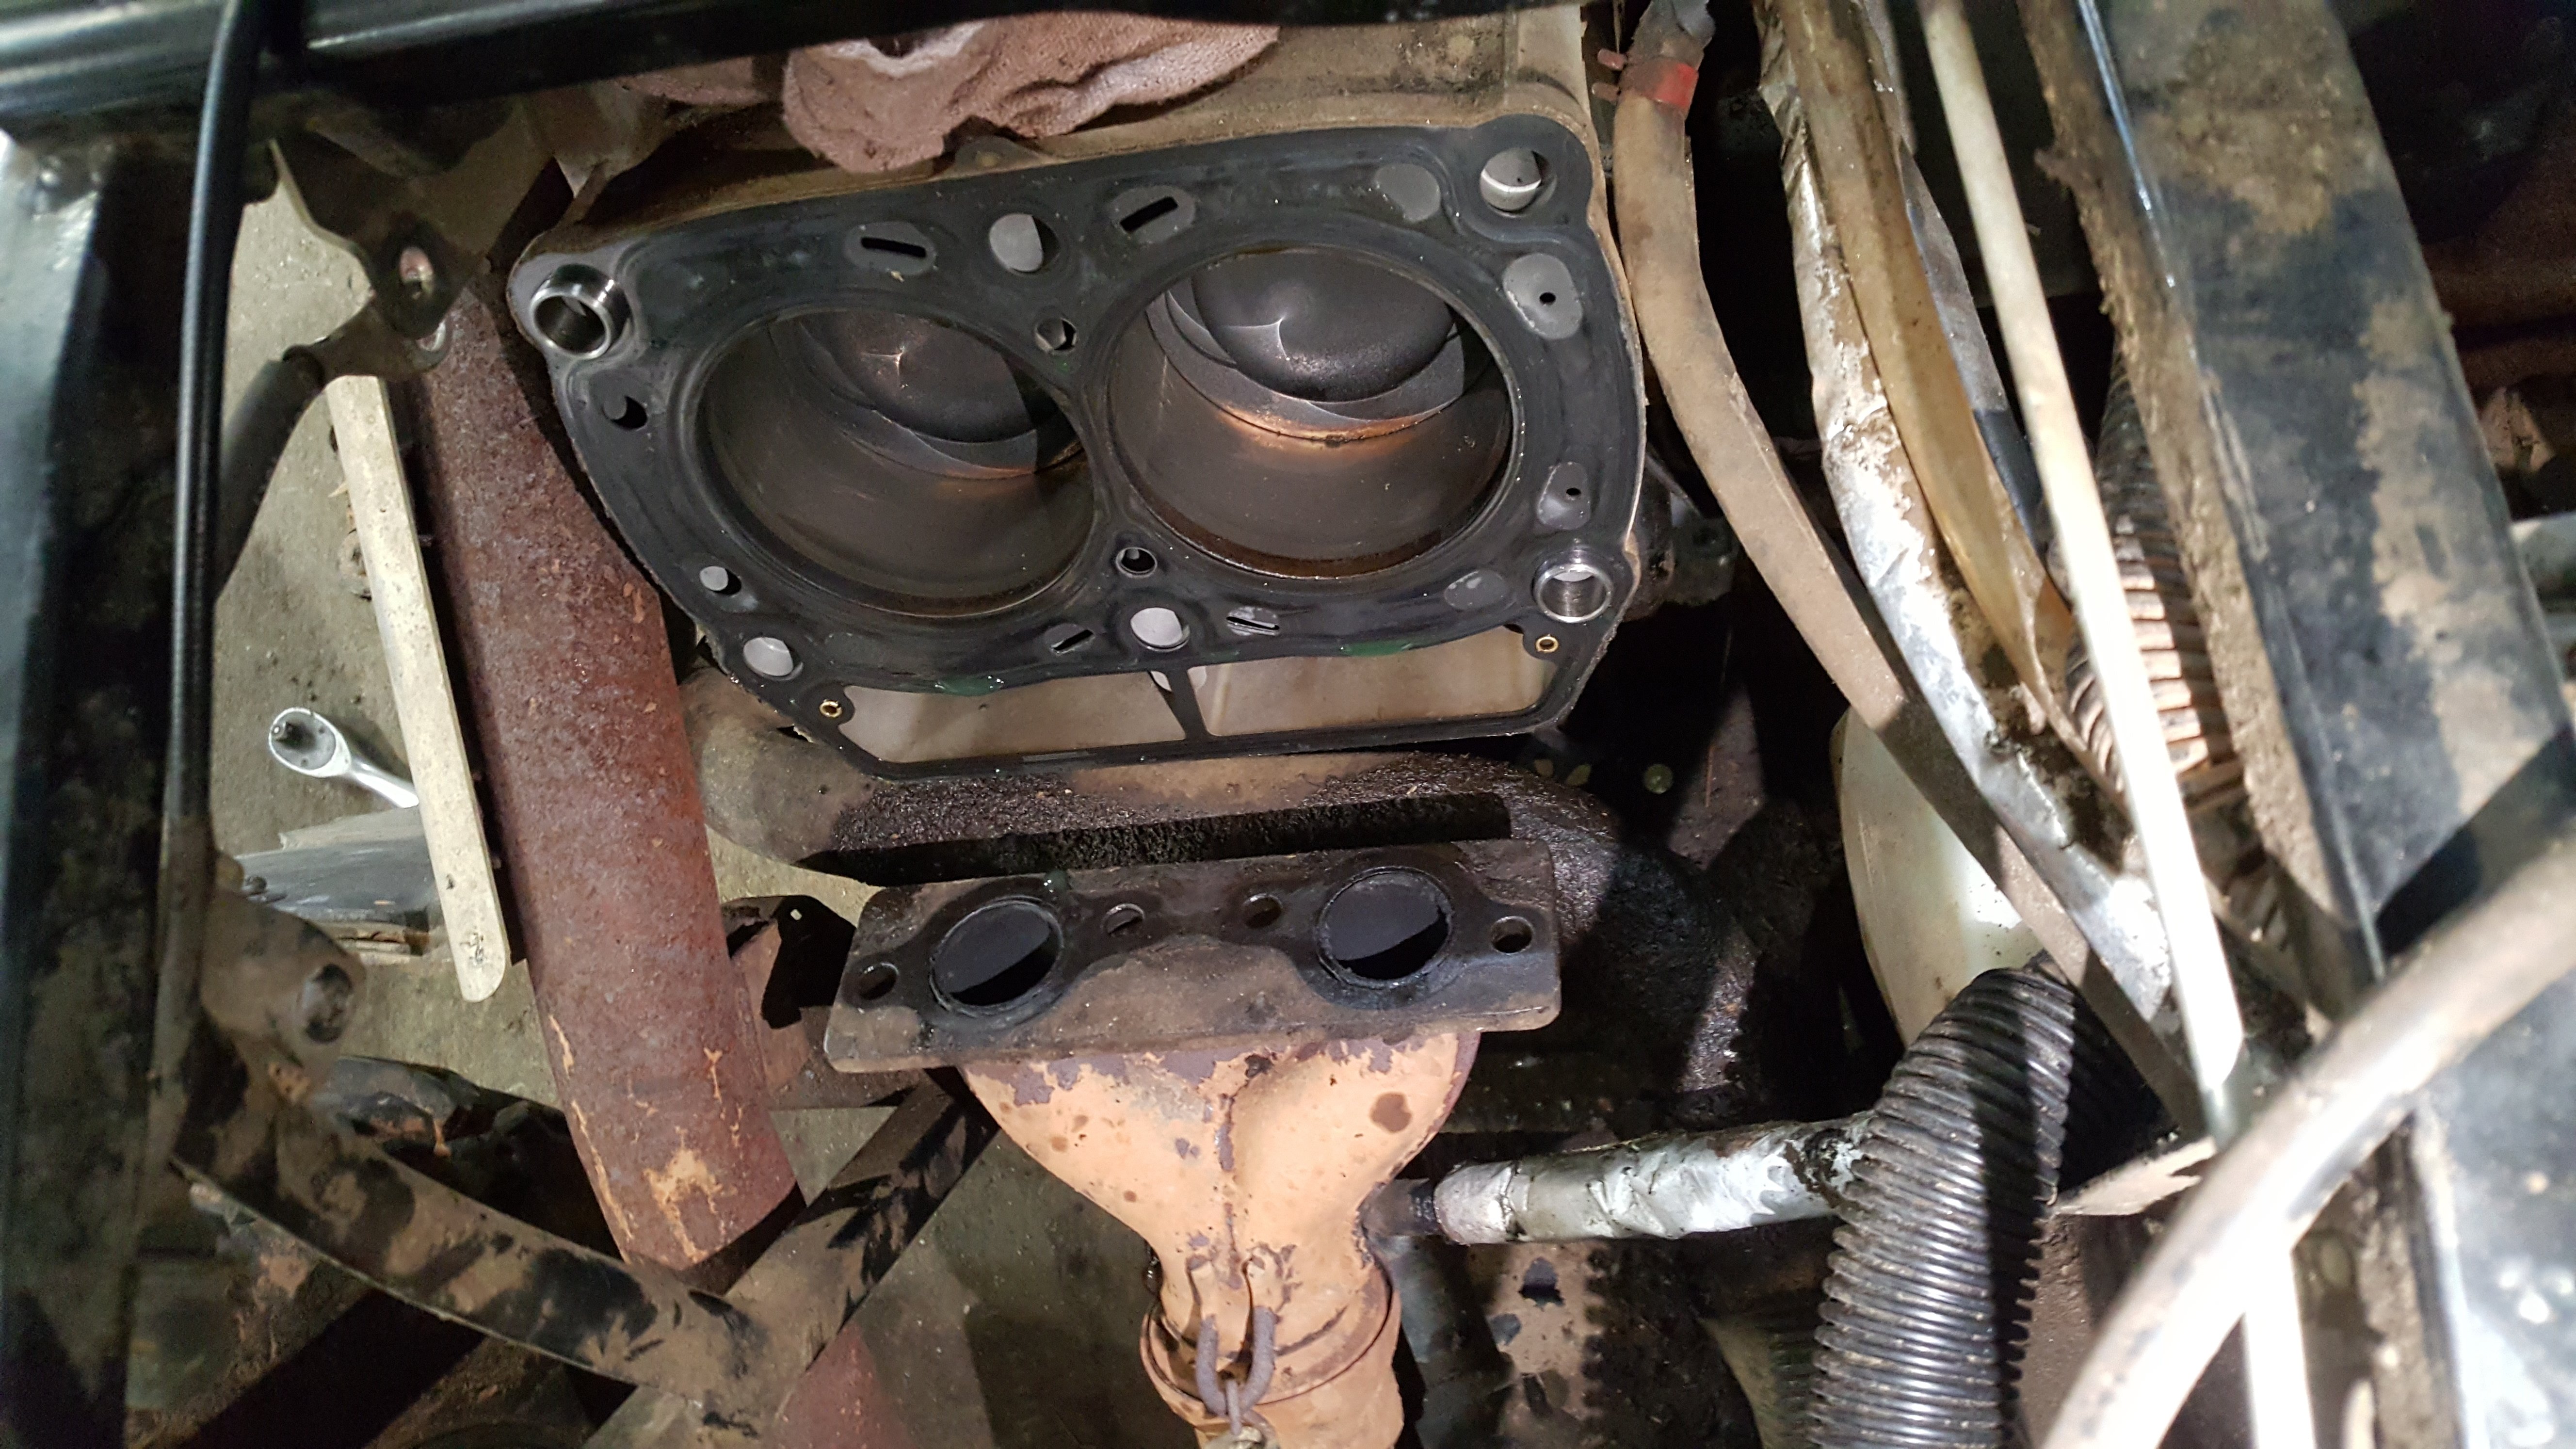
12. Remove exhaust manifold 4 hex bolts top ones are easy to see bottom ones are not. -
2004 Polaris 700 headgasket repair
Kenneth Obando replied to Kenneth Obando's topic in Polaris ATV Forum
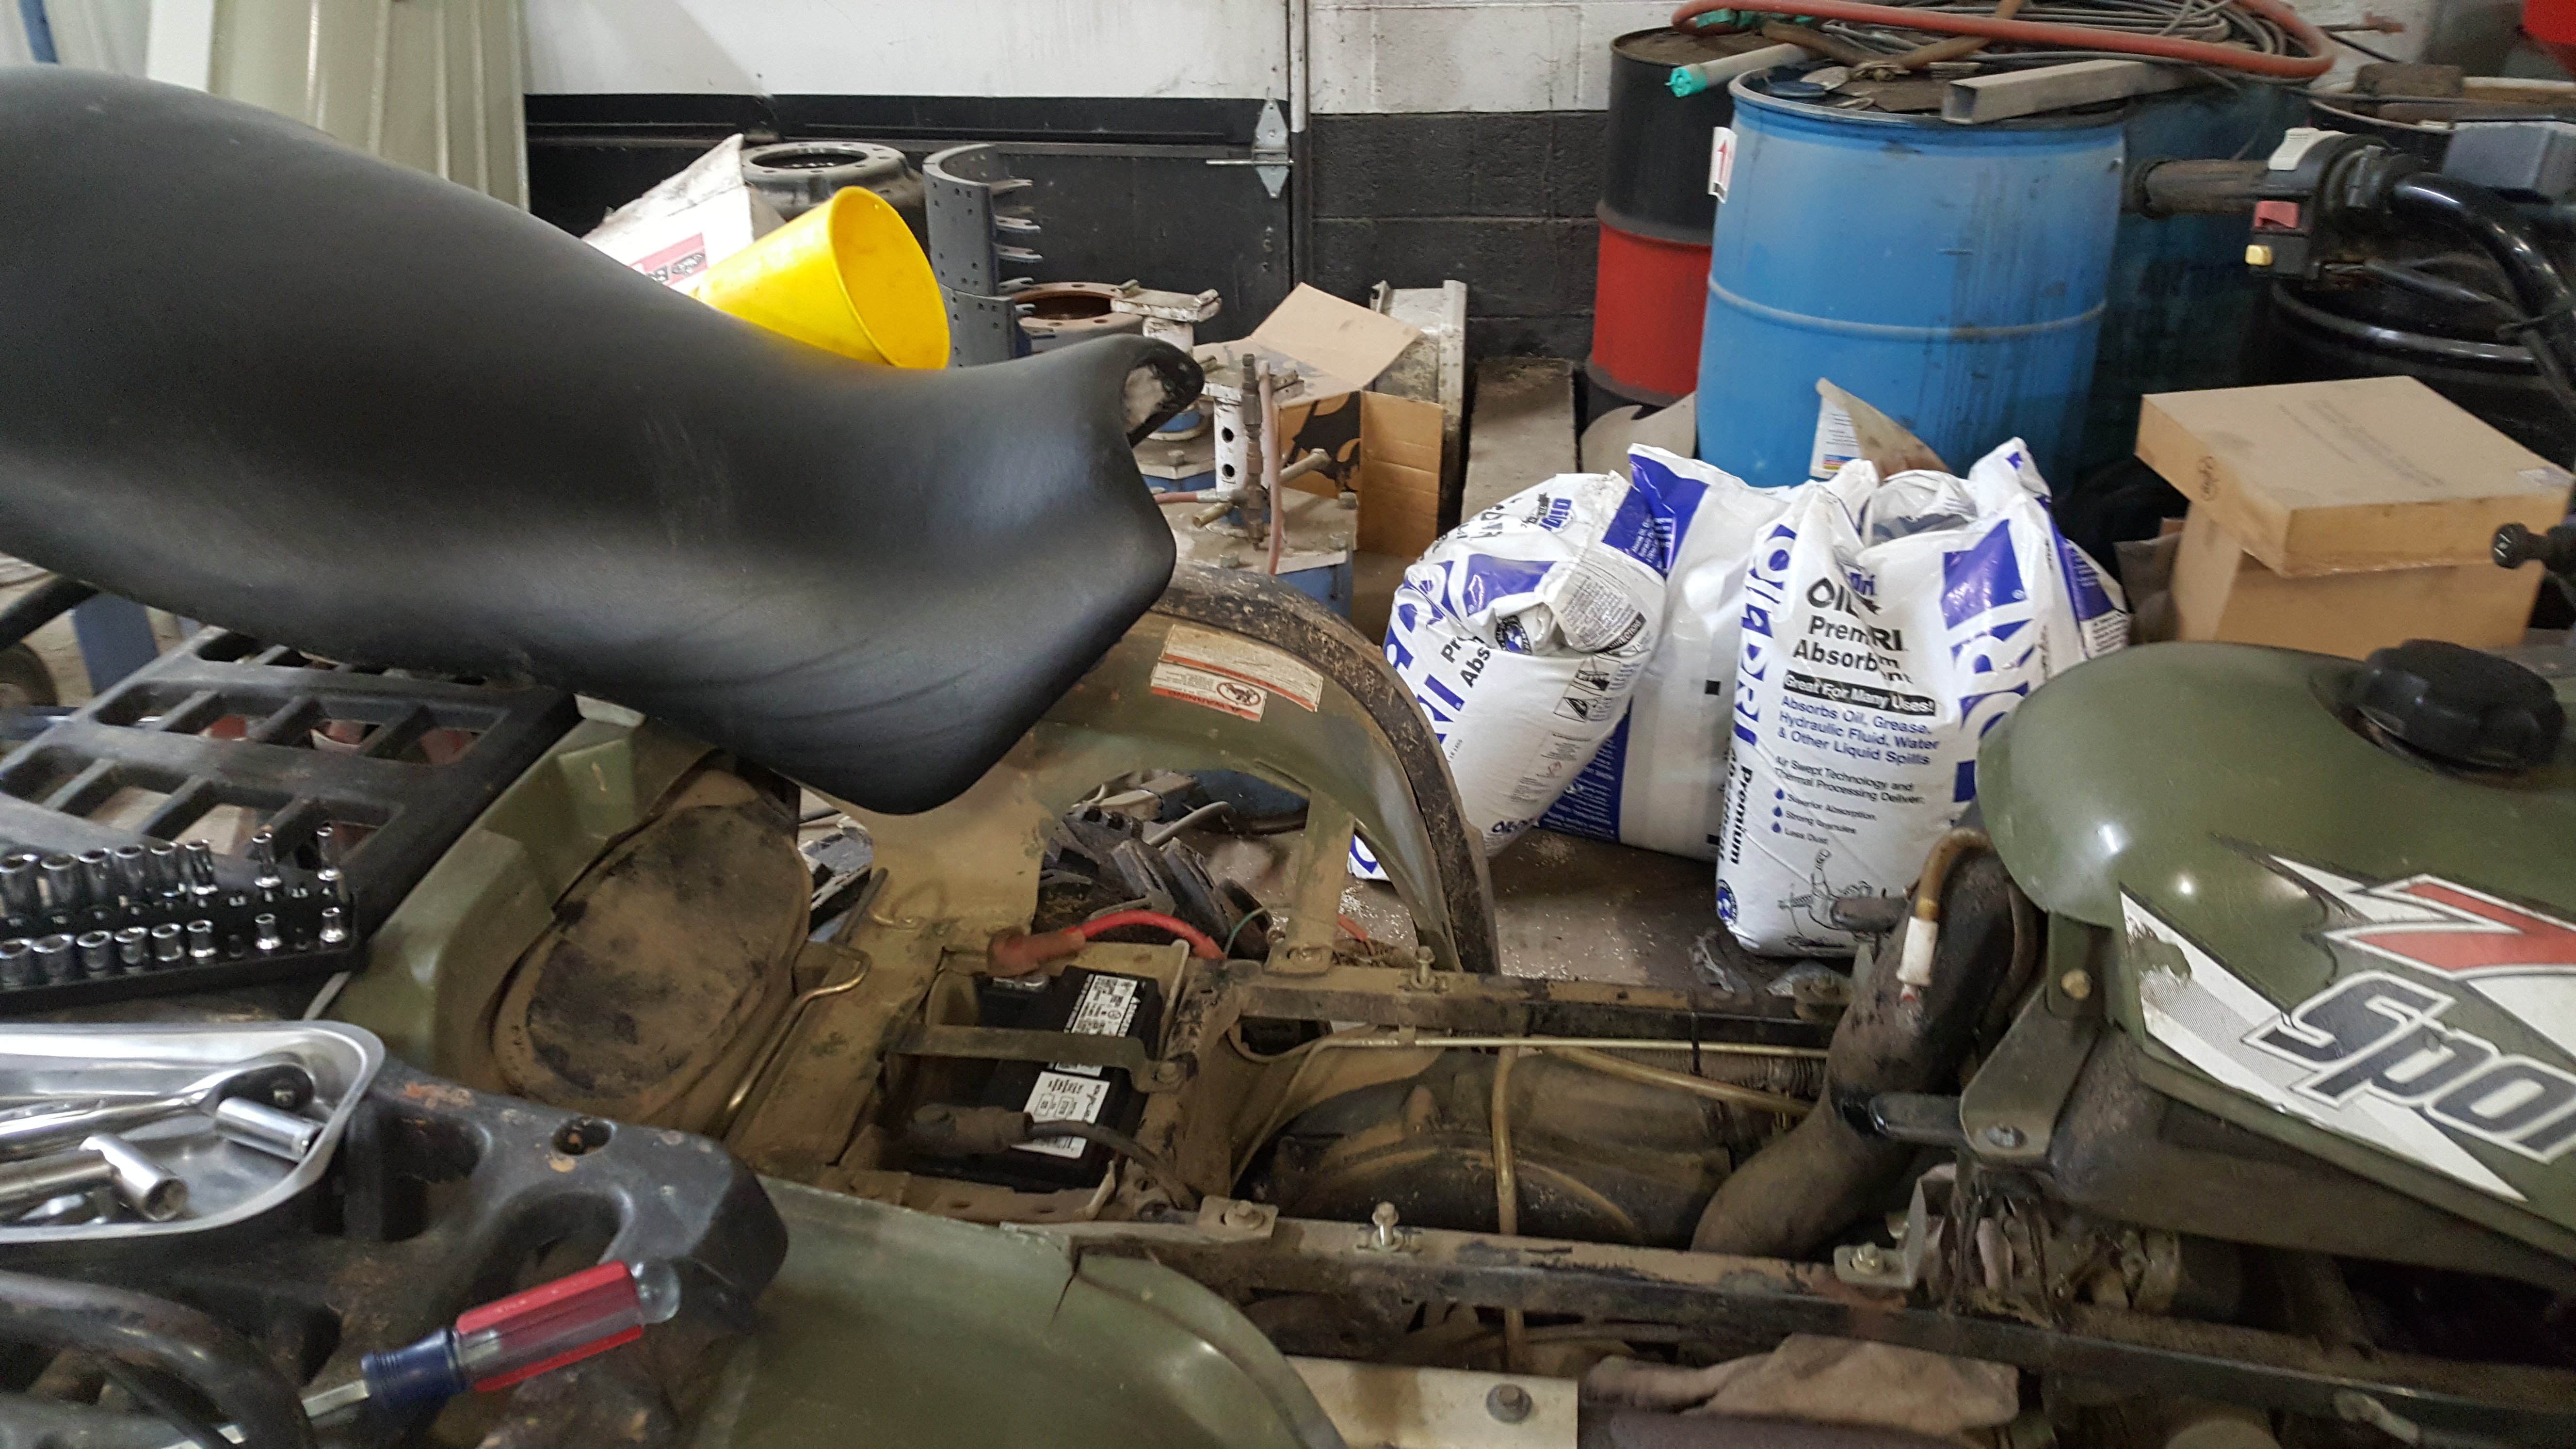
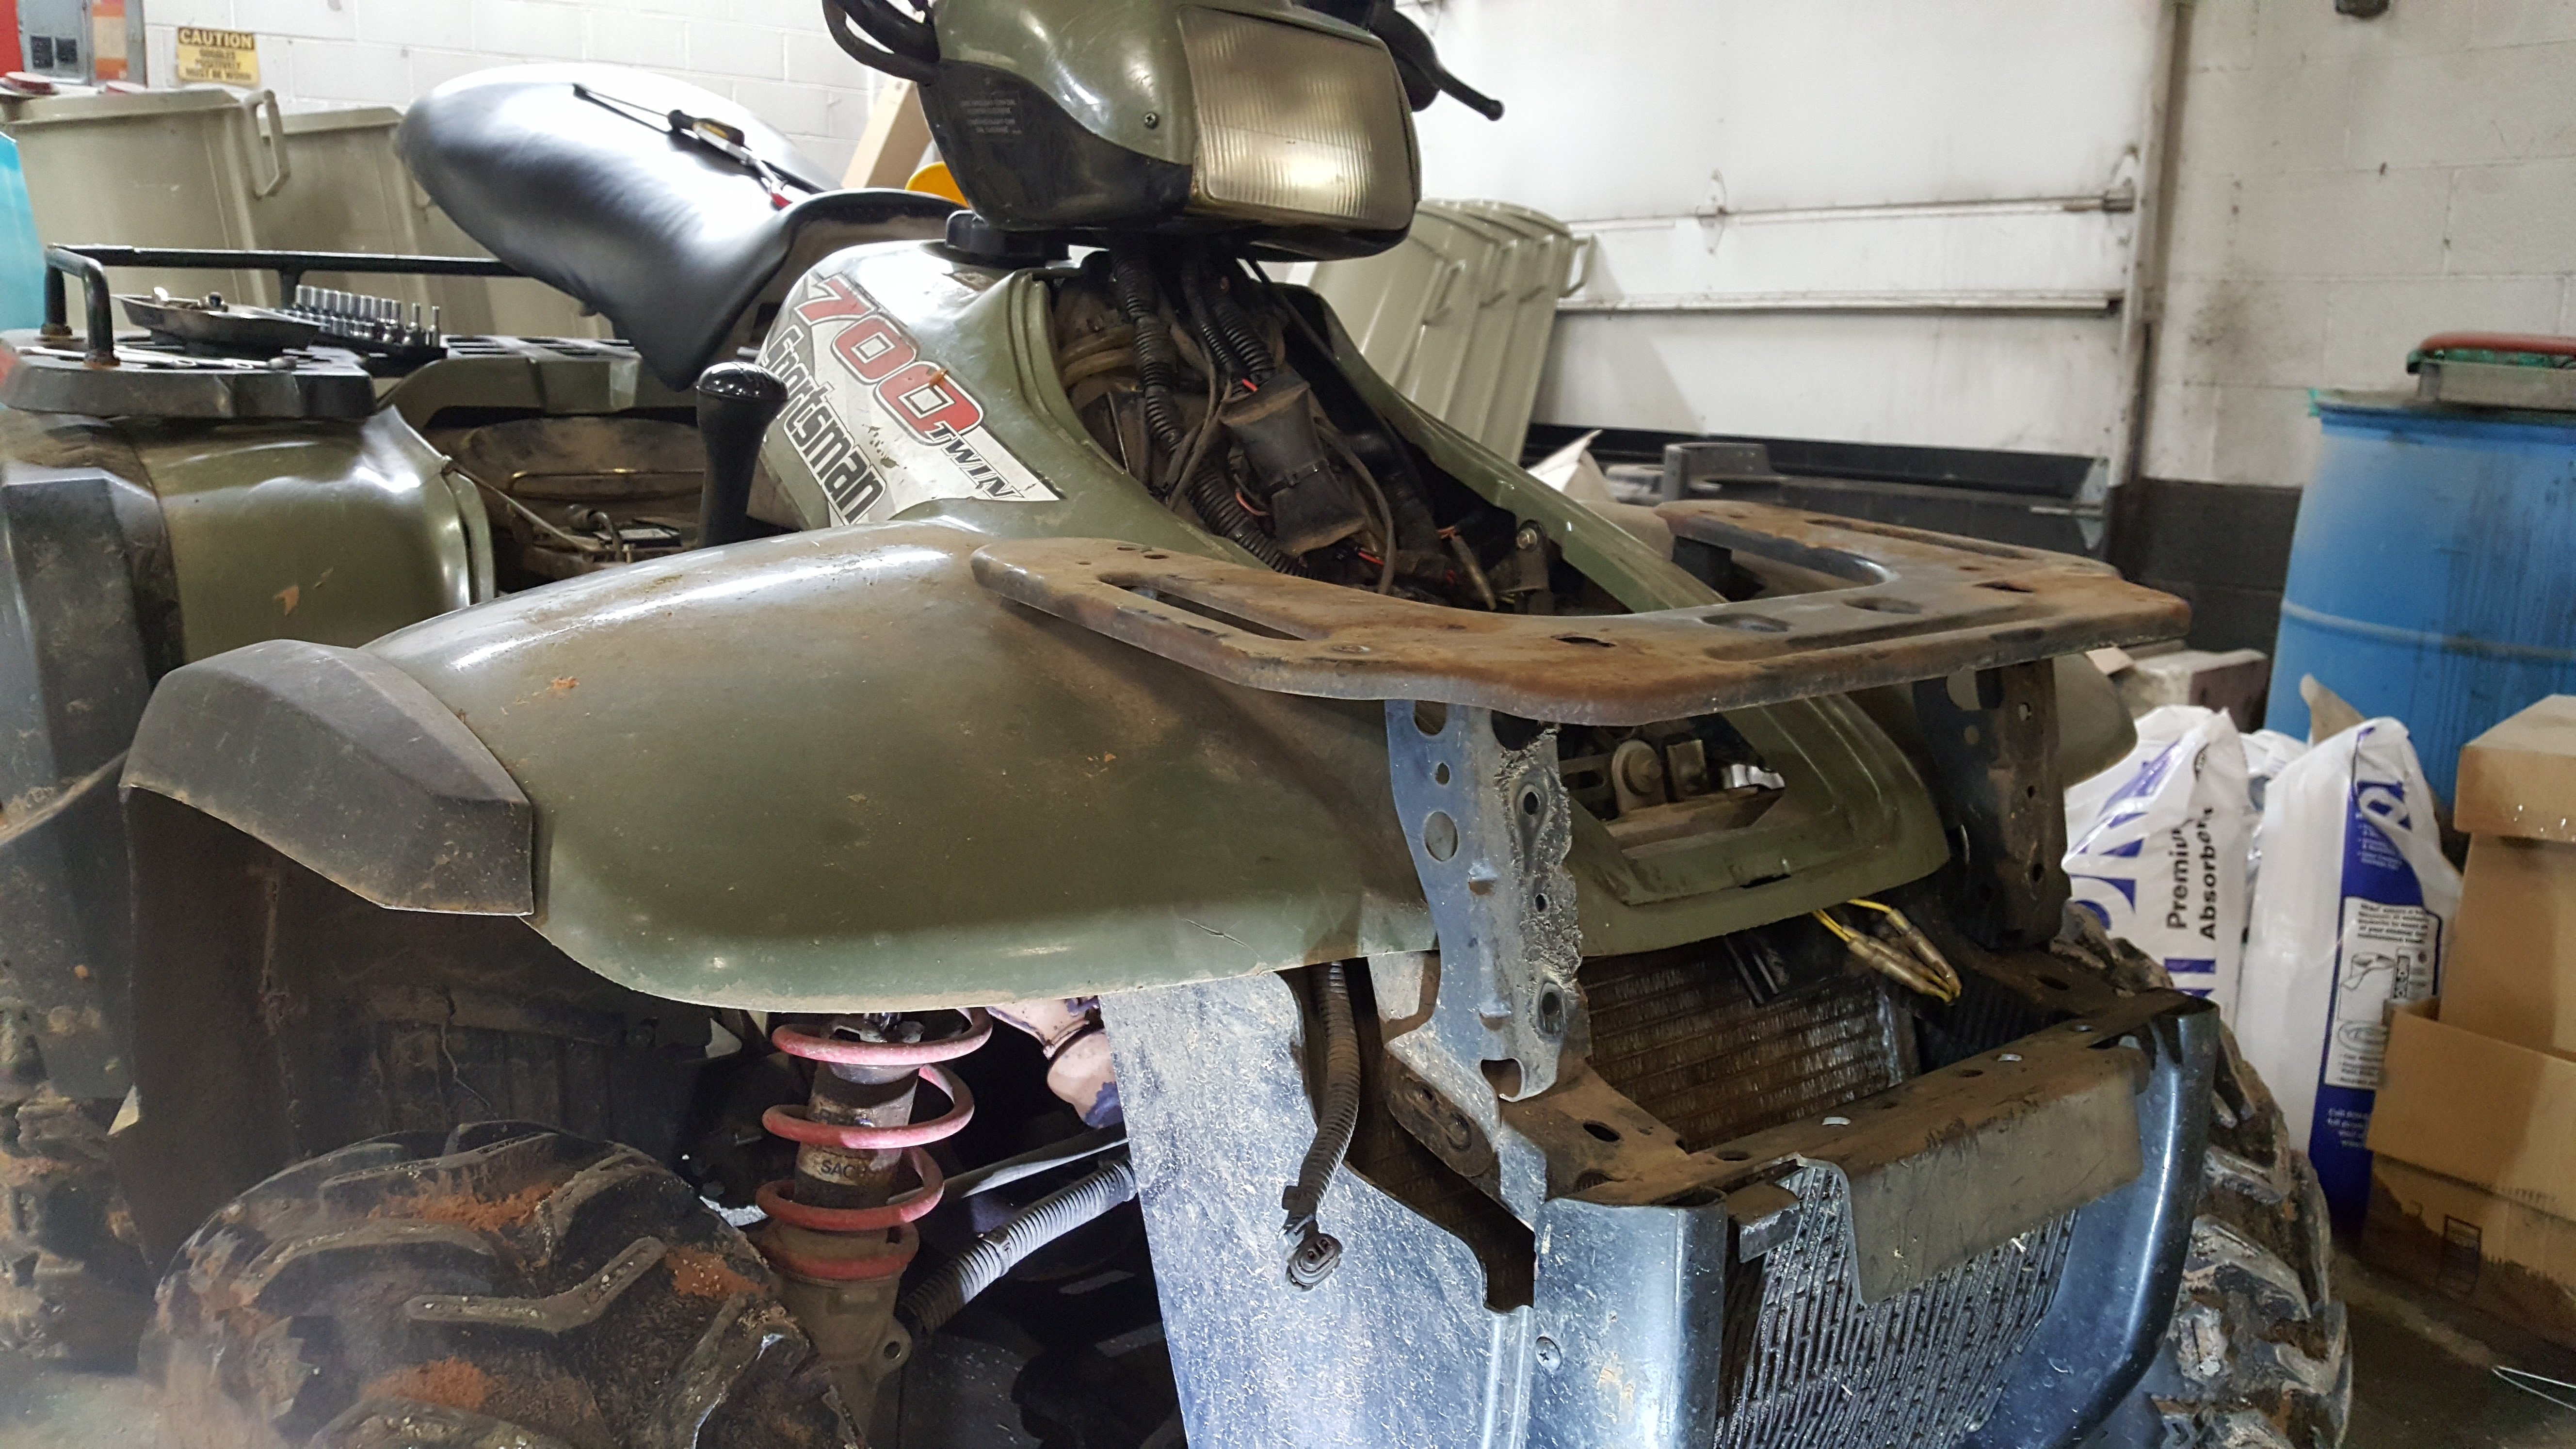
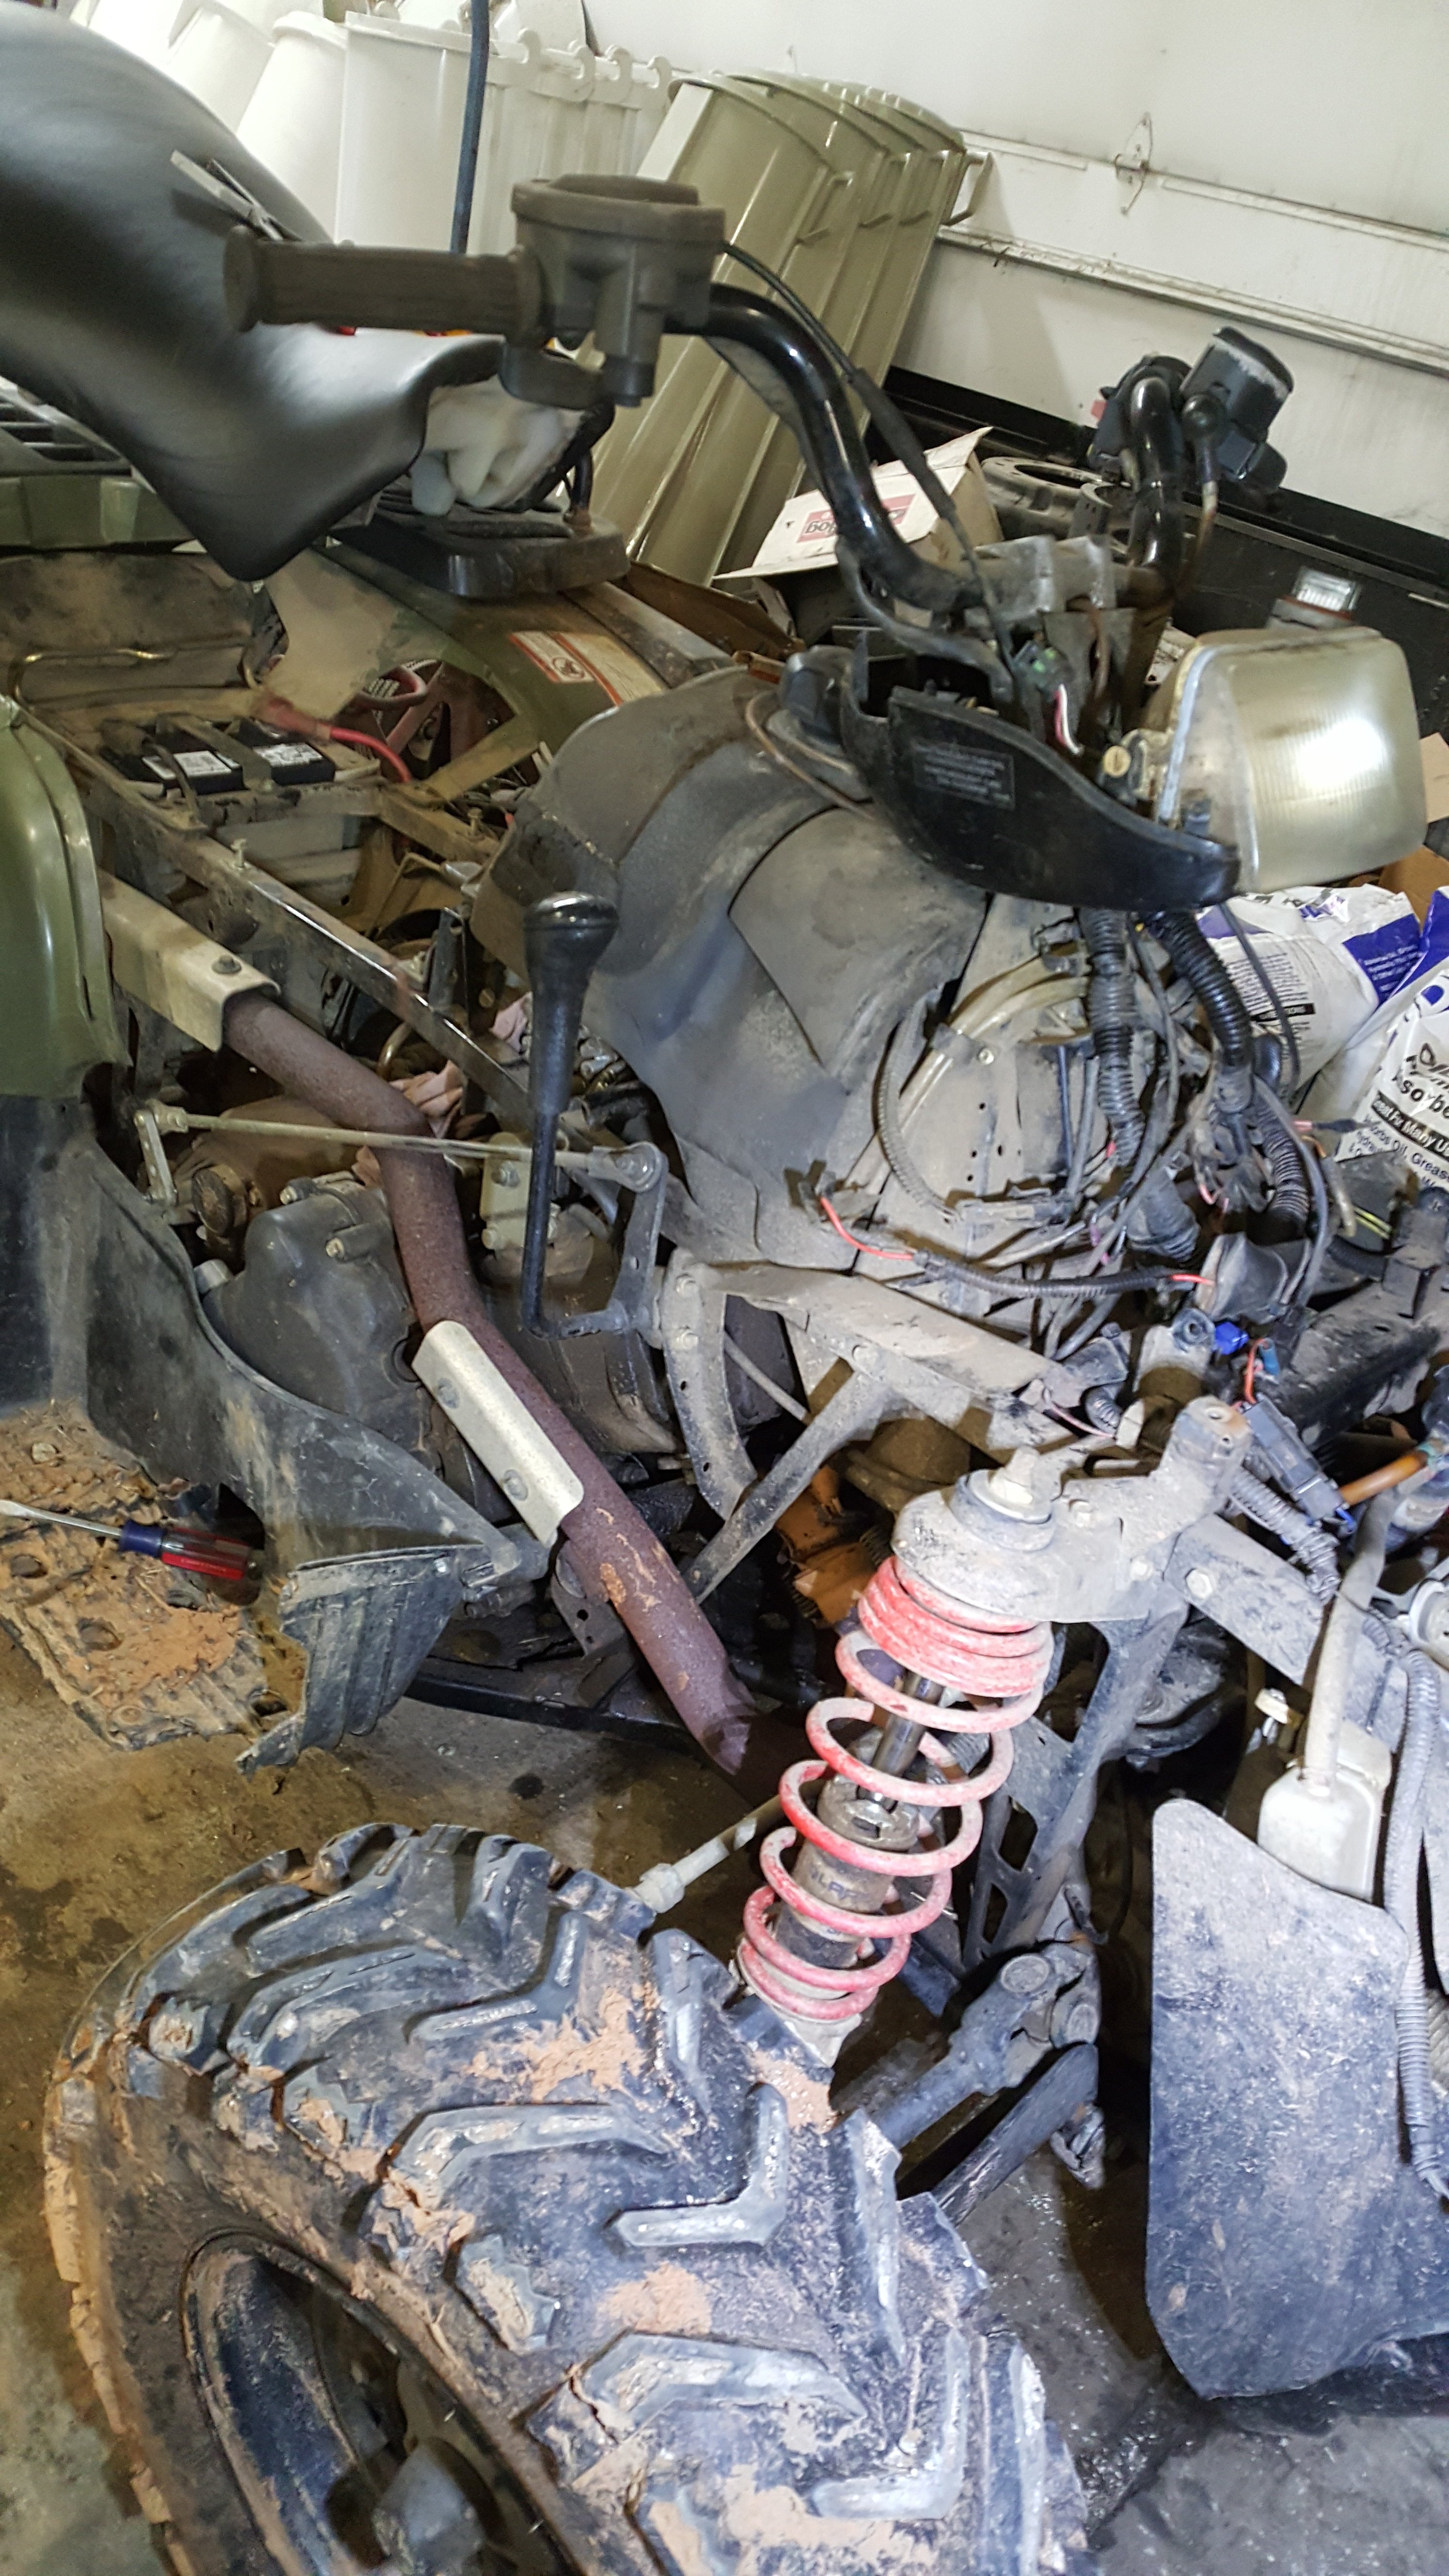
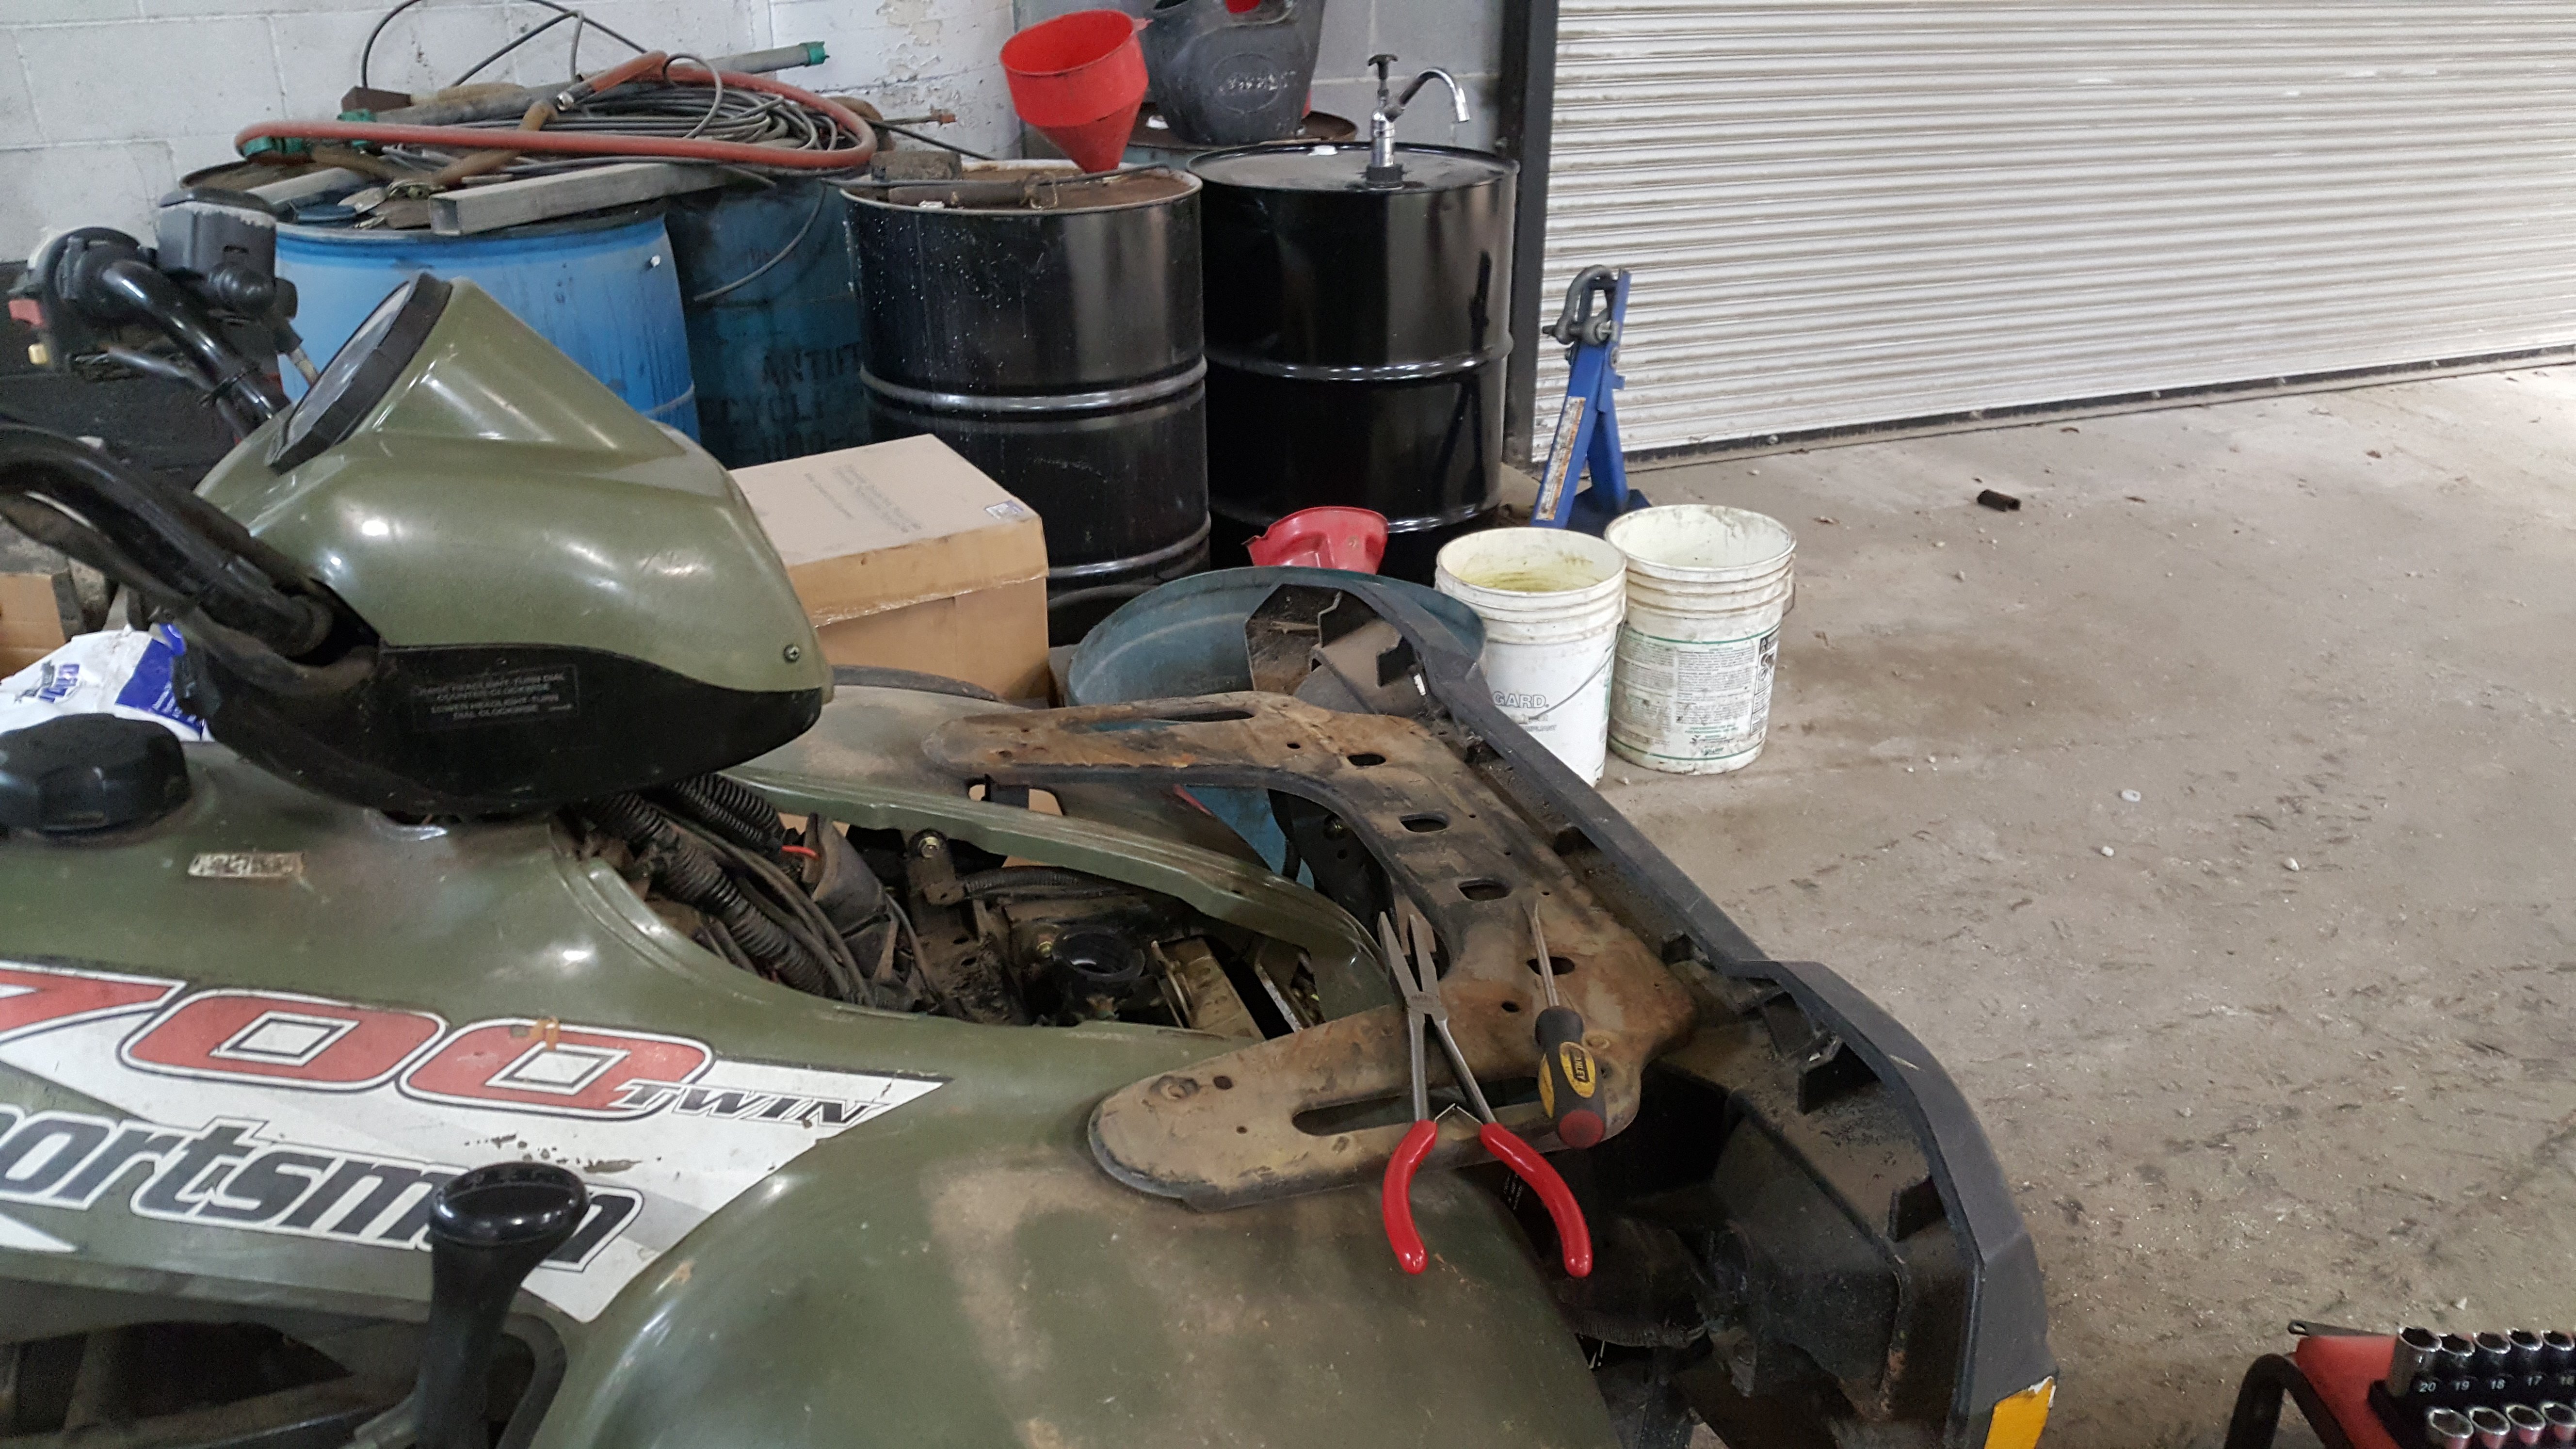
9. Remove fuel tank put cap back on first pull it out as much as possible before removing fuel lines less mess this way and save the gas. After all loose pour in container. Only 2-4 scres/bolts hold it on. 10.Then remove airbox start remove upper lid (if not done already). Will see now see bare filter, loosen clamps from carberautor side rubber boot and the airbox including filter will come out. 11. Next it to remove carberator with intake as one piece.unloosen bolts that hold intake to the head. Then unloosen bolts bolts that hold carberator bracket to frame. Carb will then have room to slide back I didn't undo cables or anything just slide it back out of the way. -
2004 Polaris 700 headgasket repair
Kenneth Obando replied to Kenneth Obando's topic in Polaris ATV Forum
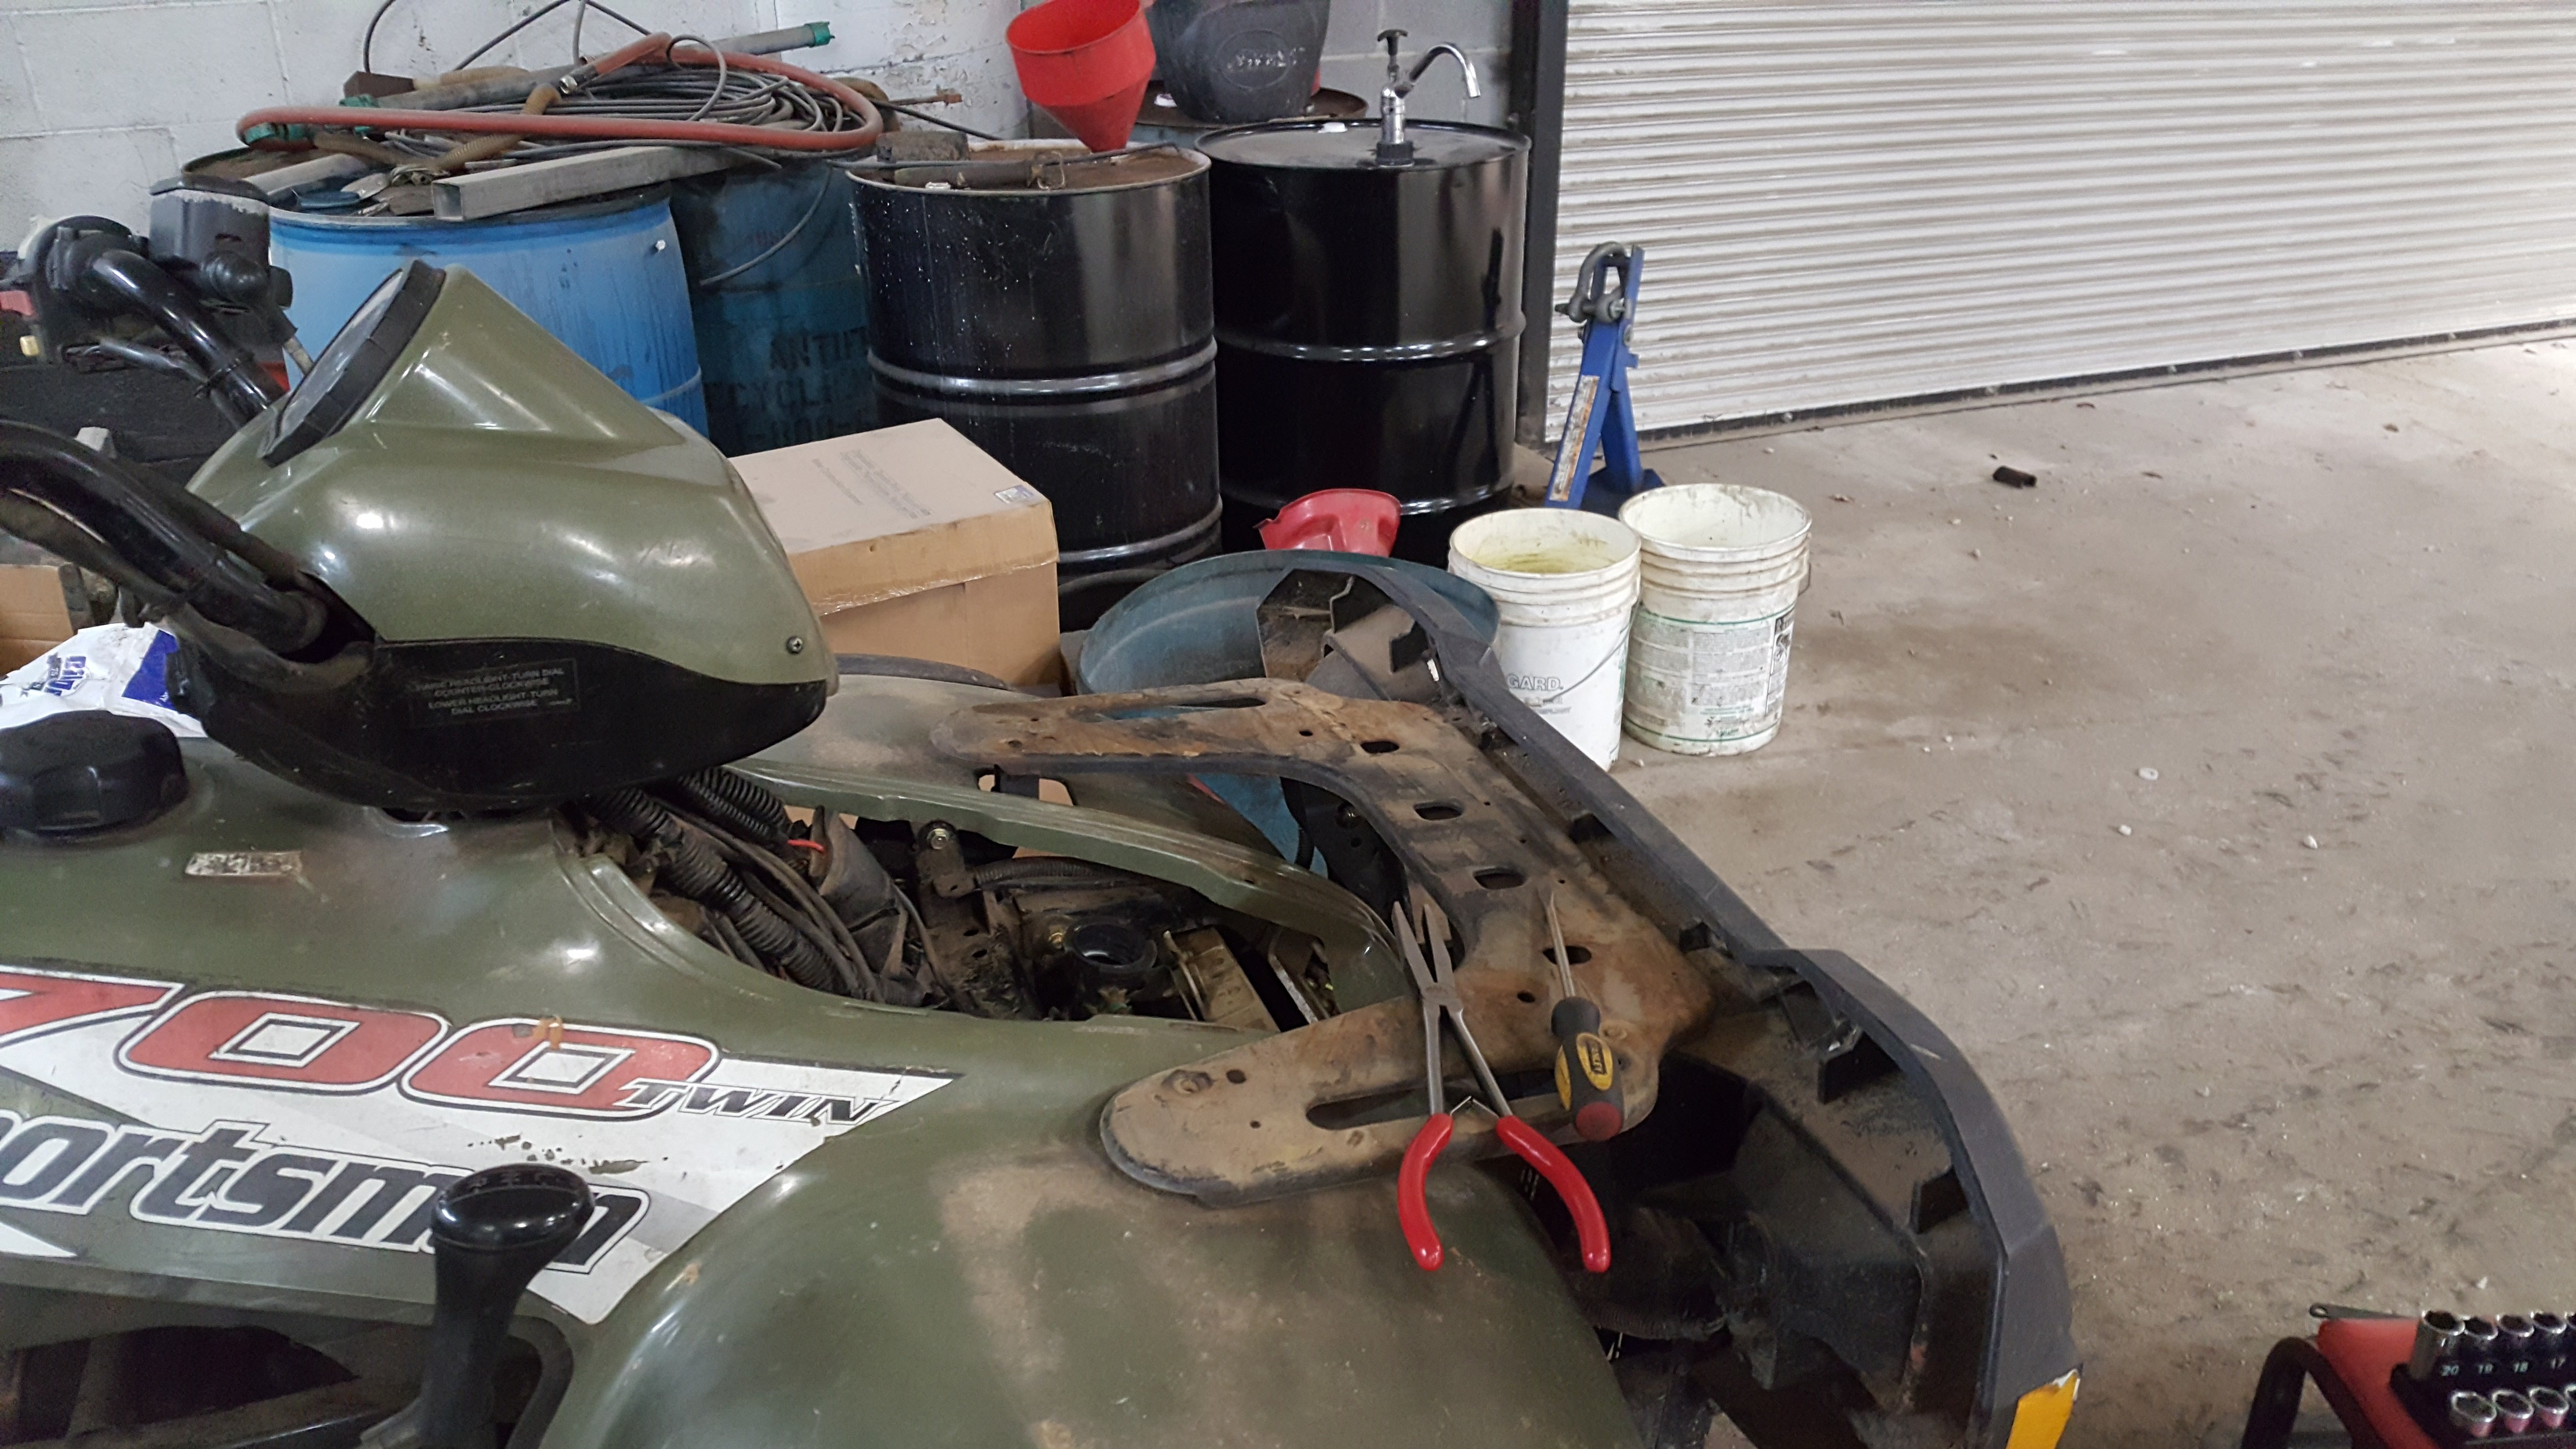
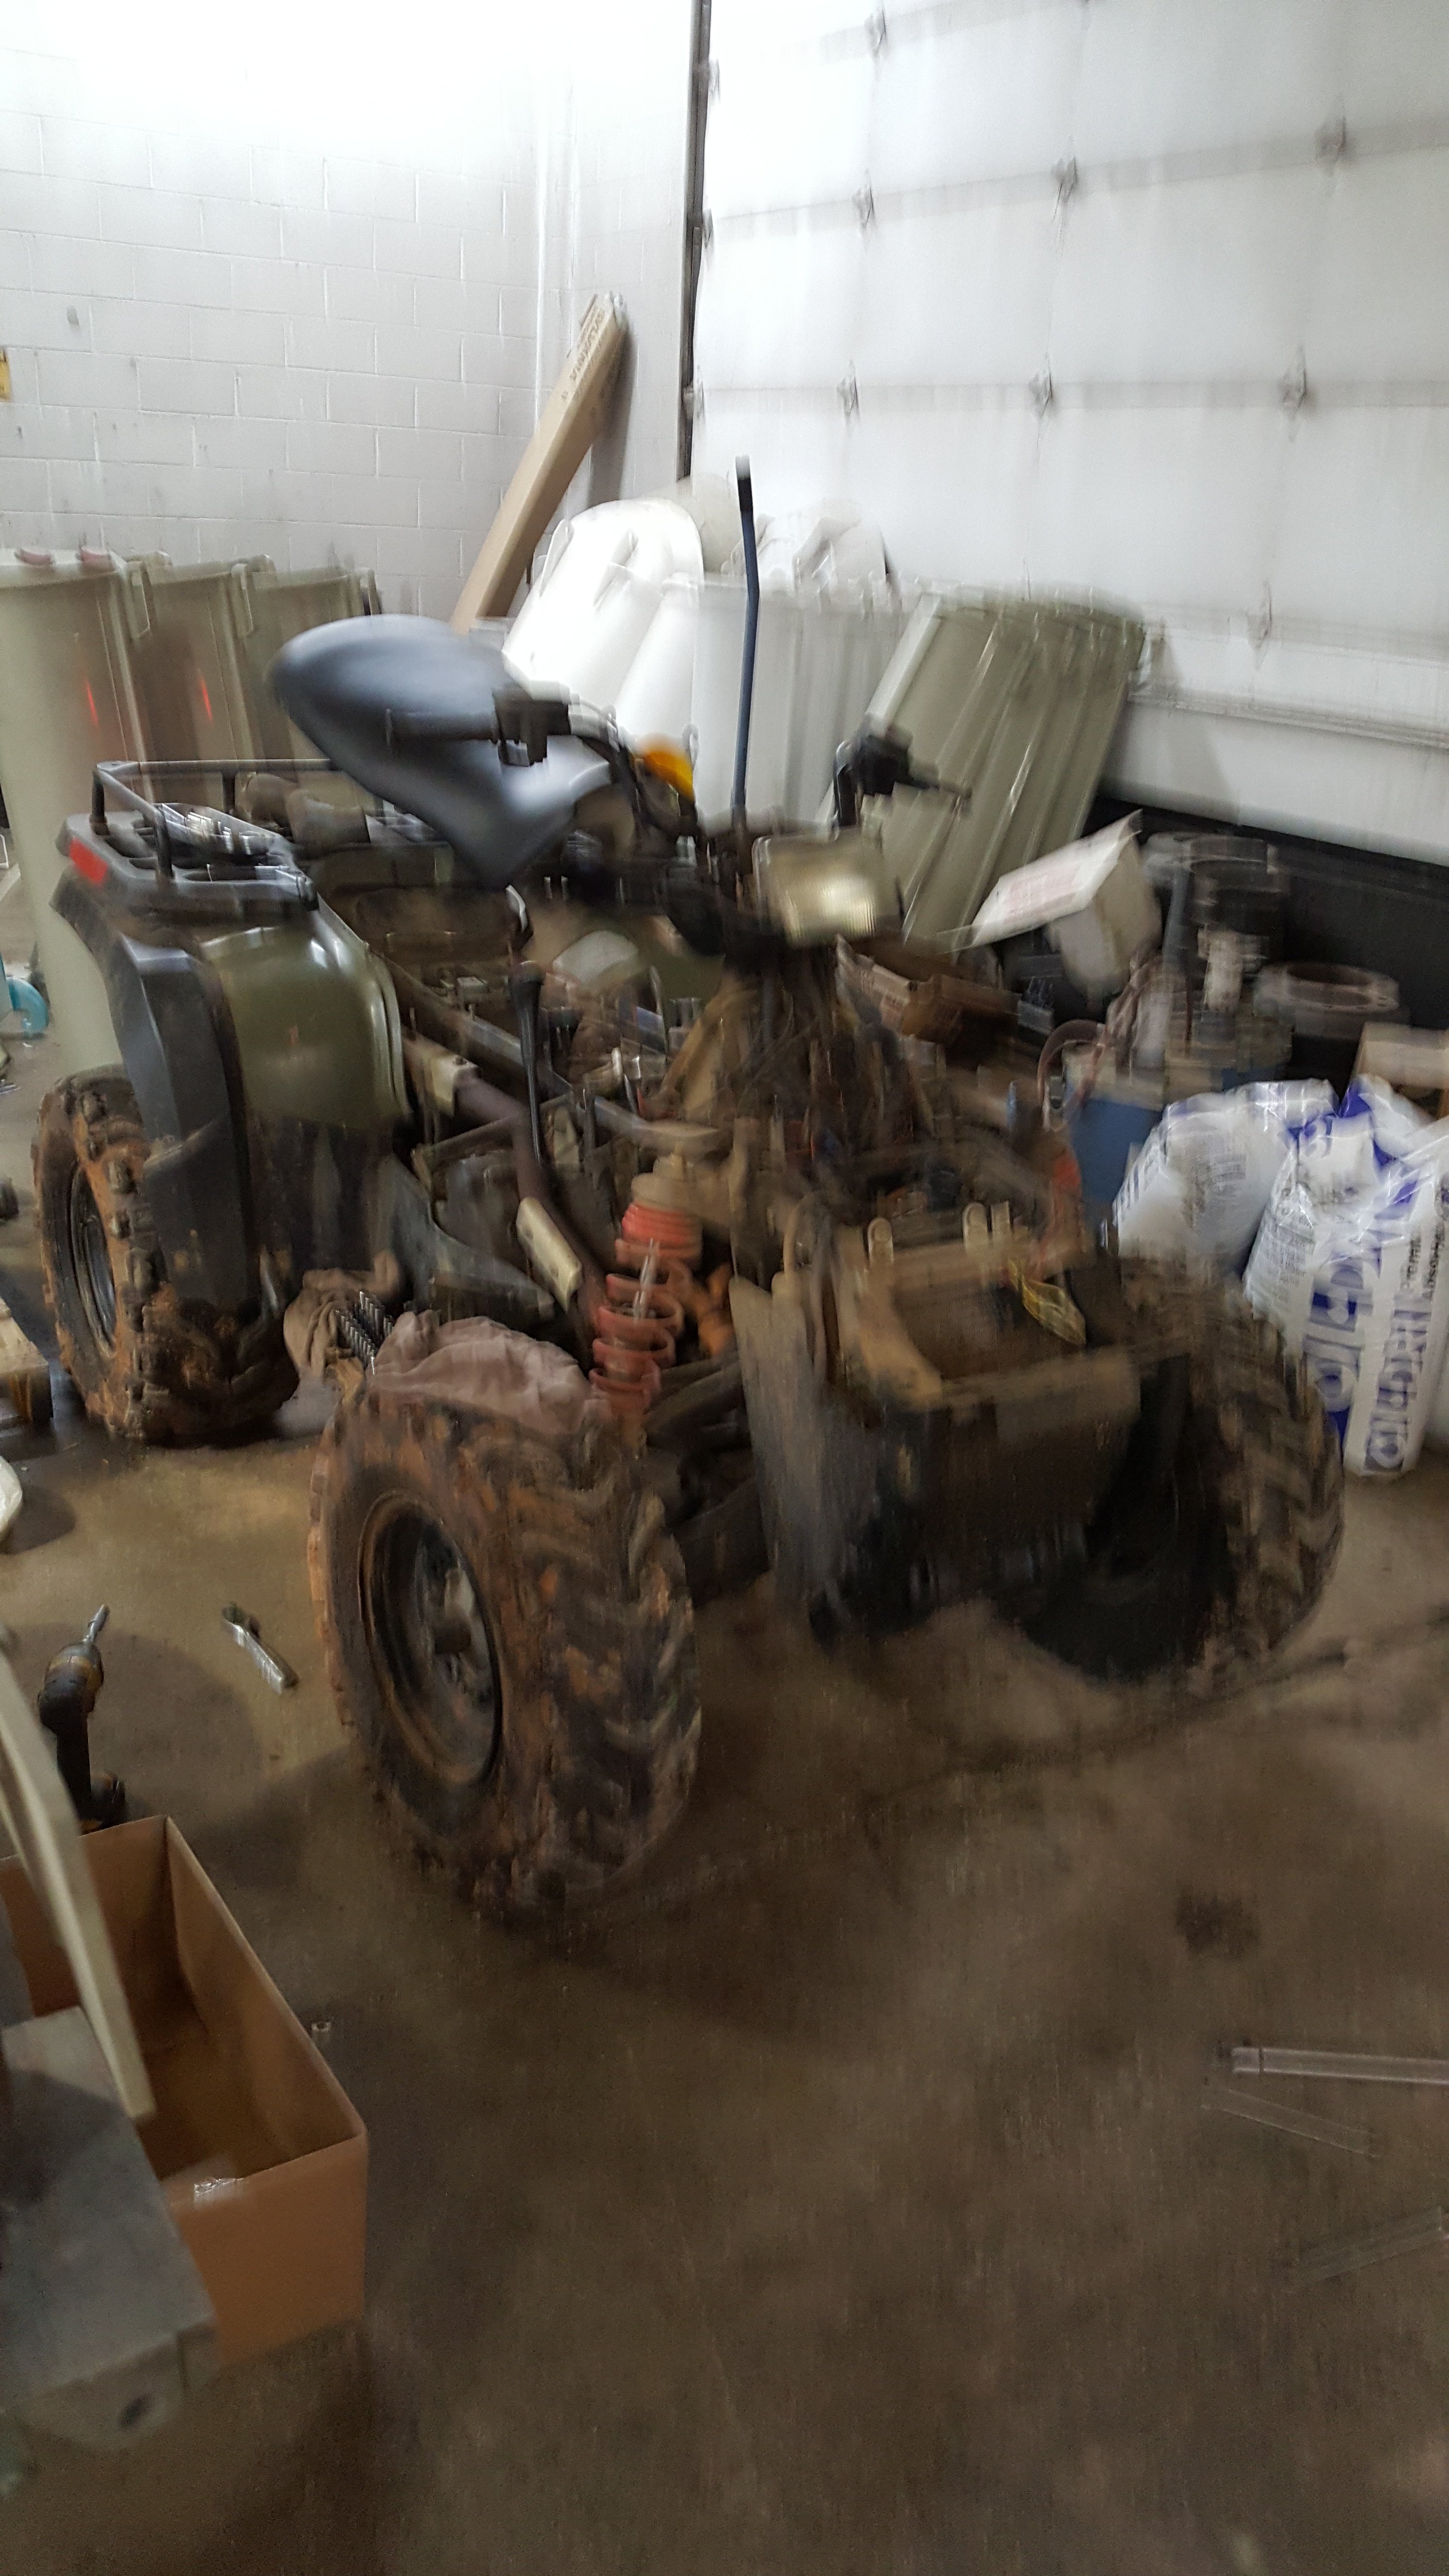
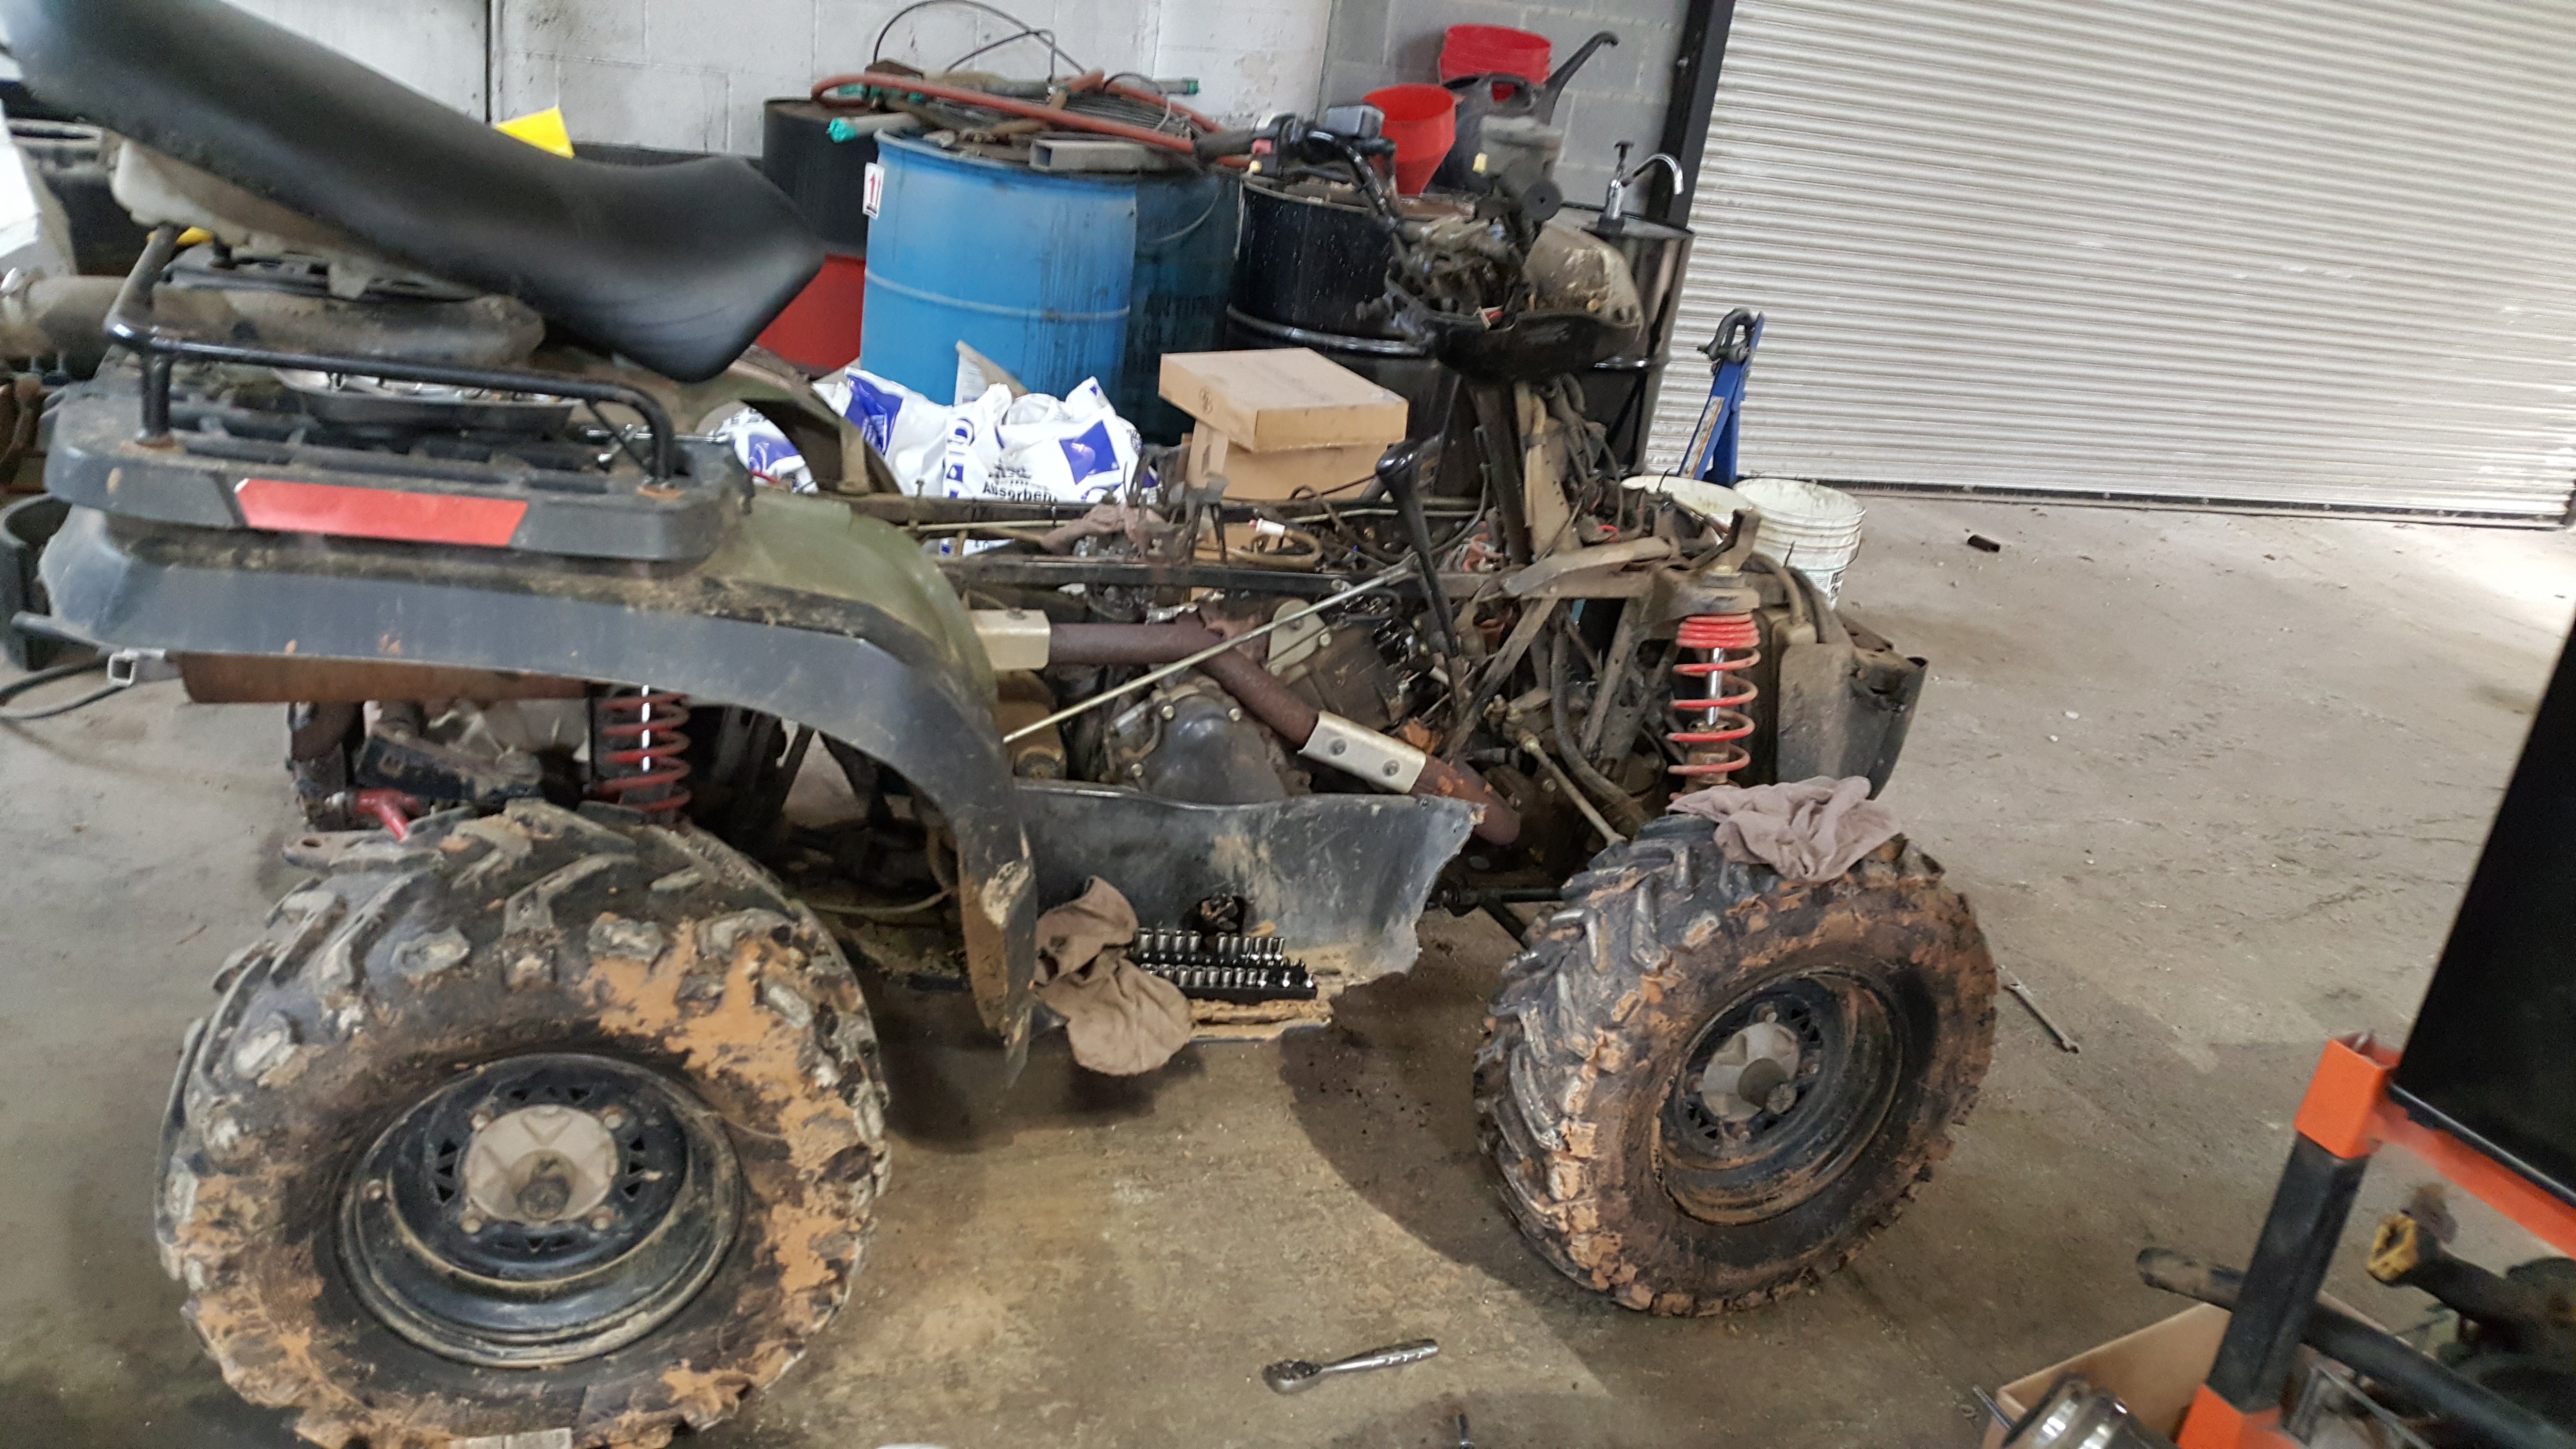
Alright I'm am going to explain this teardown. 1. Remove upper rack 4 t27 star bolts. 2. Remove front grill piece says polaris brand on it. 3. Remove plastic that covers the fuse brr. ( right under handle bars). 4.remove the metal part of the rack. 5. Remove the front grille held in by few bolts. steps 4 and 5 are actually in wrong order do 5 first than 4. 6. Renove the seat really easy. 7. Statt removing the front fender/ all front plastics as one assembly simply loosen about the bottom 3 screws per side. Where fender meets with footrest plastic. Fender flares can stay on. Then remove gas cap, and screws on front fascia( fuse panel area -2 screws). 2 screws on plastics right under the seat as well. Then remove the cvt breather right near gas tank. Unlosen clamps and gently pull out. Might have to pull loose the airbox for this. Removal is needed anyways. 8. Remove upper assembly for headlight and loosen lower plastic of headlight assembly too so it can move easier. Then fight and semi gently pull plastics around handle bars with fenders and all. With it loose access will be radical. -
2004 Polaris 700 headgasket repair
Kenneth Obando replied to Kenneth Obando's topic in Polaris ATV Forum
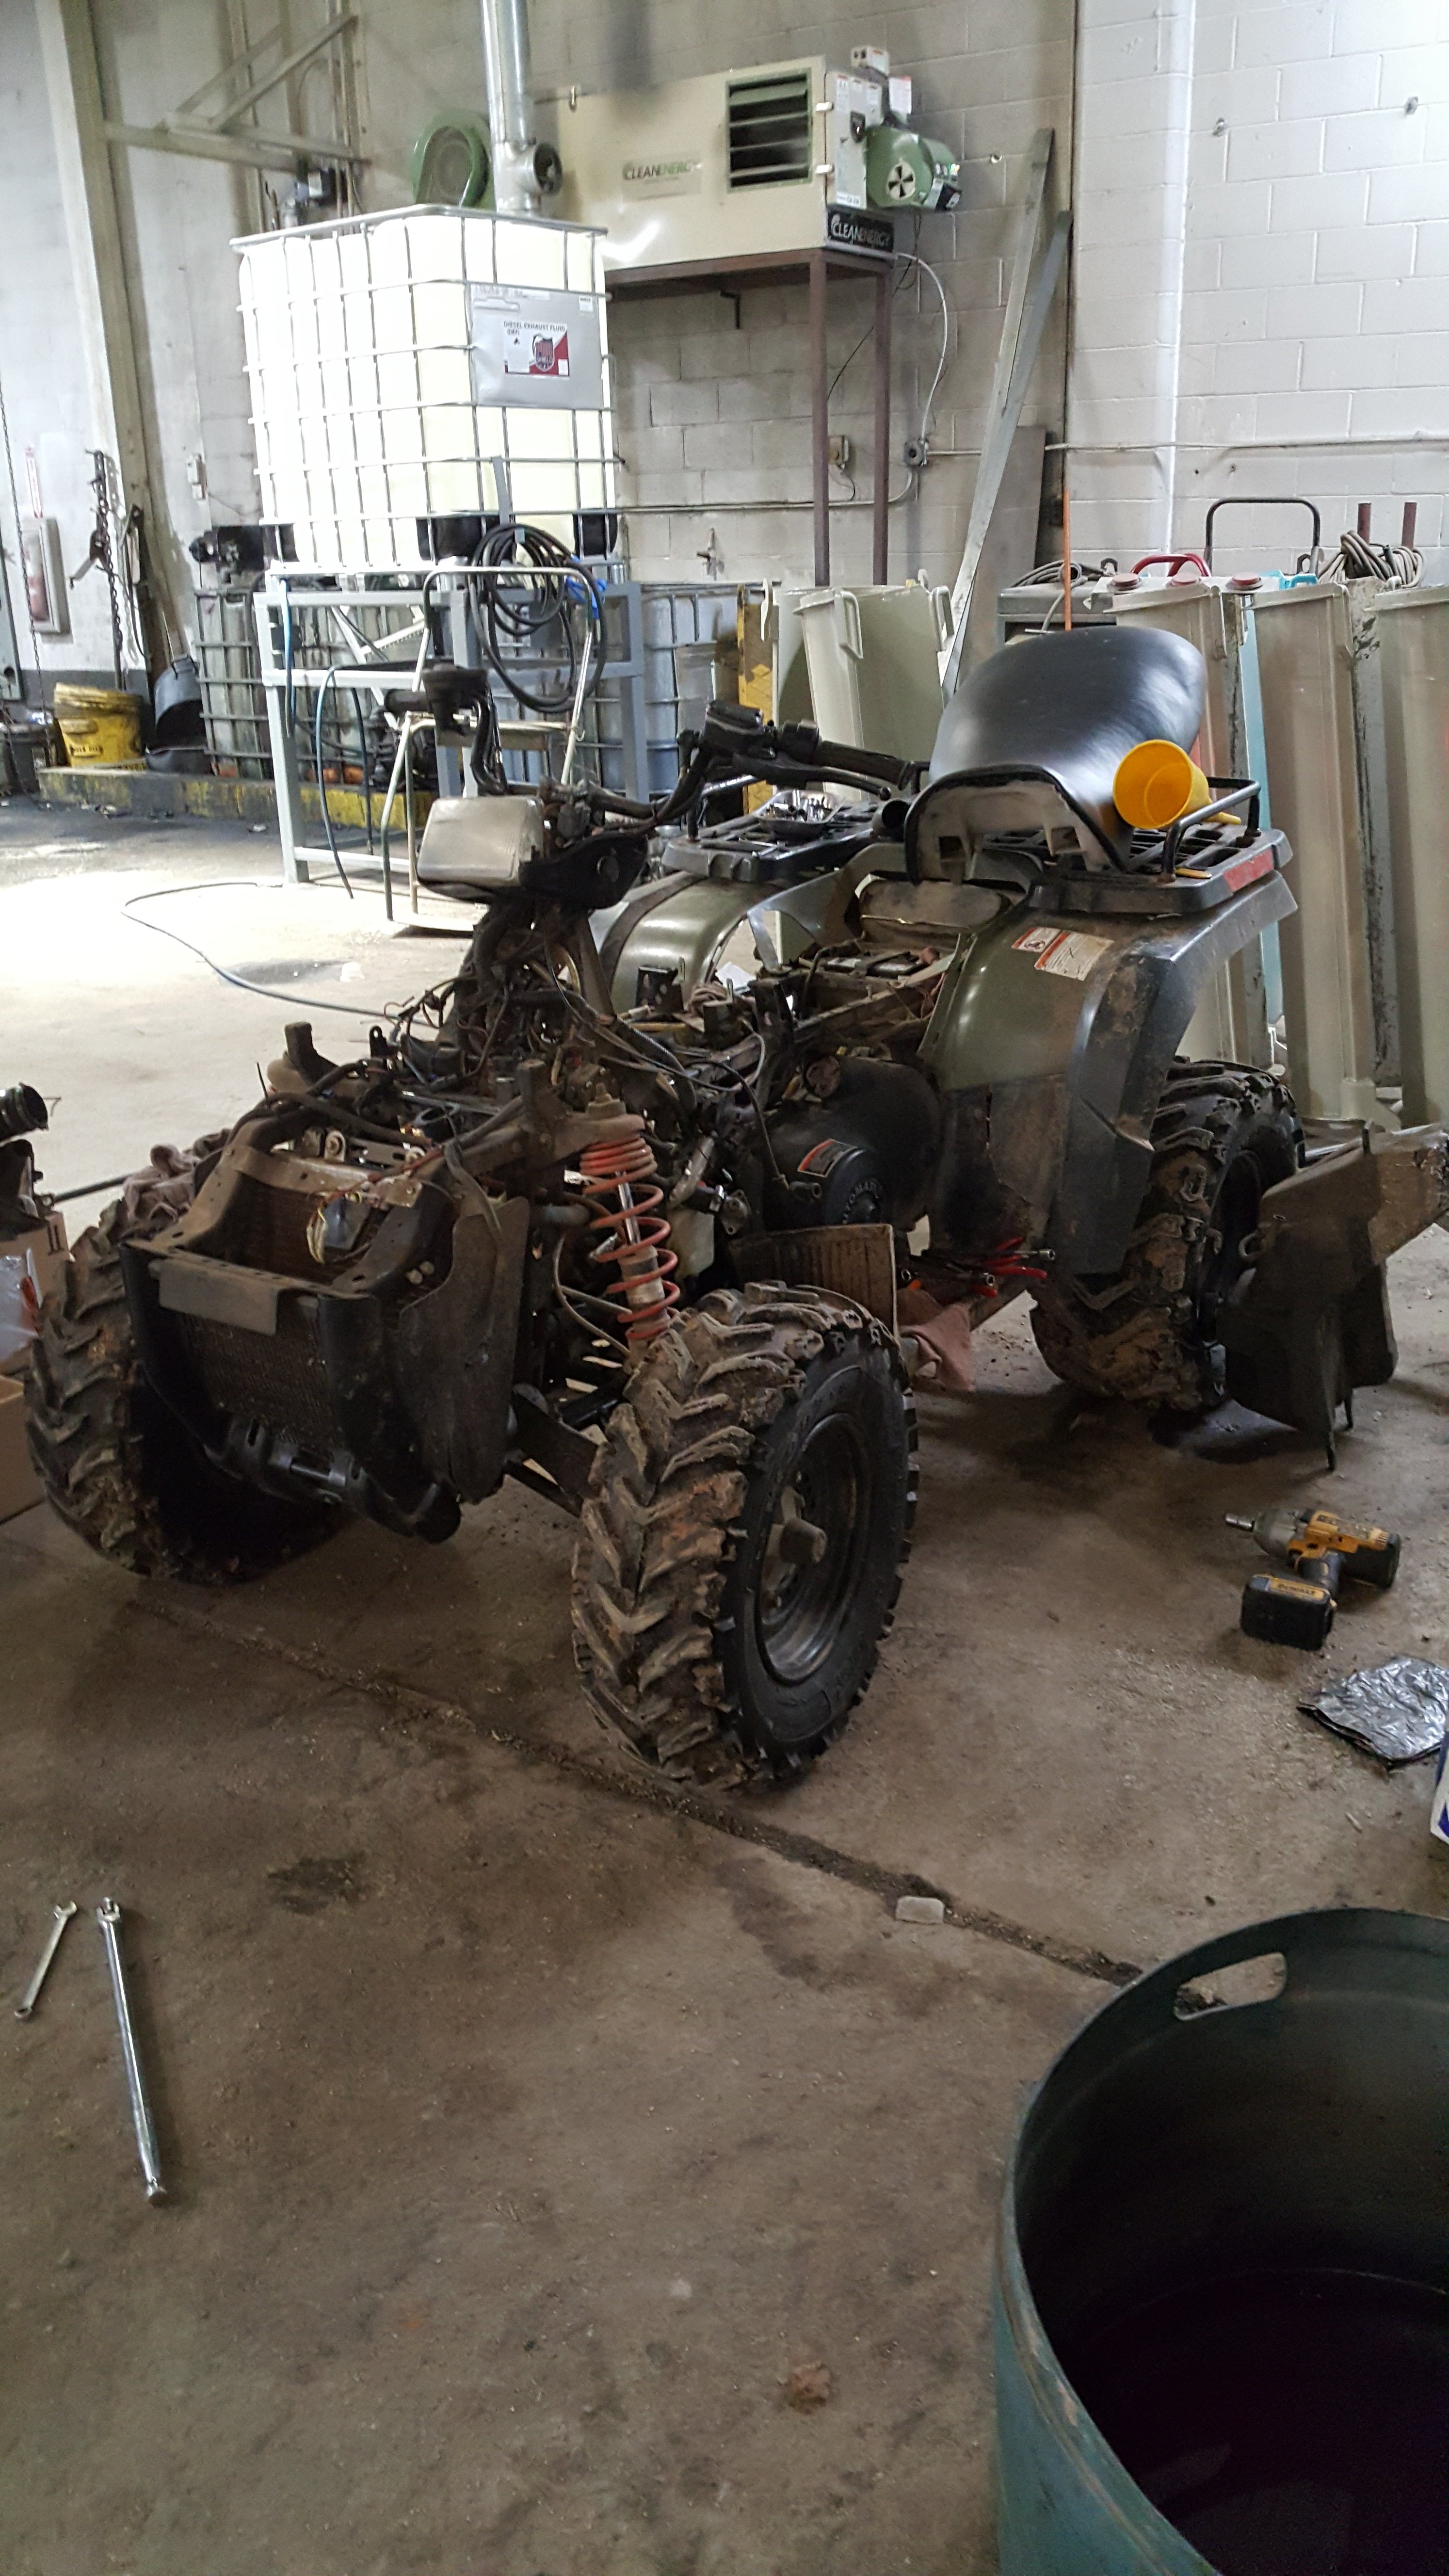
Not in order but I will post tomorrow the tear down process, accompanied by these photos.
-
2004 Polaris Sportsman 600/700 Service Manual
Kenneth Obando replied to Maggie Hall's topic in Polaris ATV Forum
thanks will help me on my next project -
2005 Polaris Trail Blazer 250 won't start
Kenneth Obando replied to TheJester517's topic in Polaris ATV Forum
I've wrenched on a few things and recommend brake cleaner over starting fluid, it aint so hard on the motor. And if you wrench any stuff you also have some laying around. -
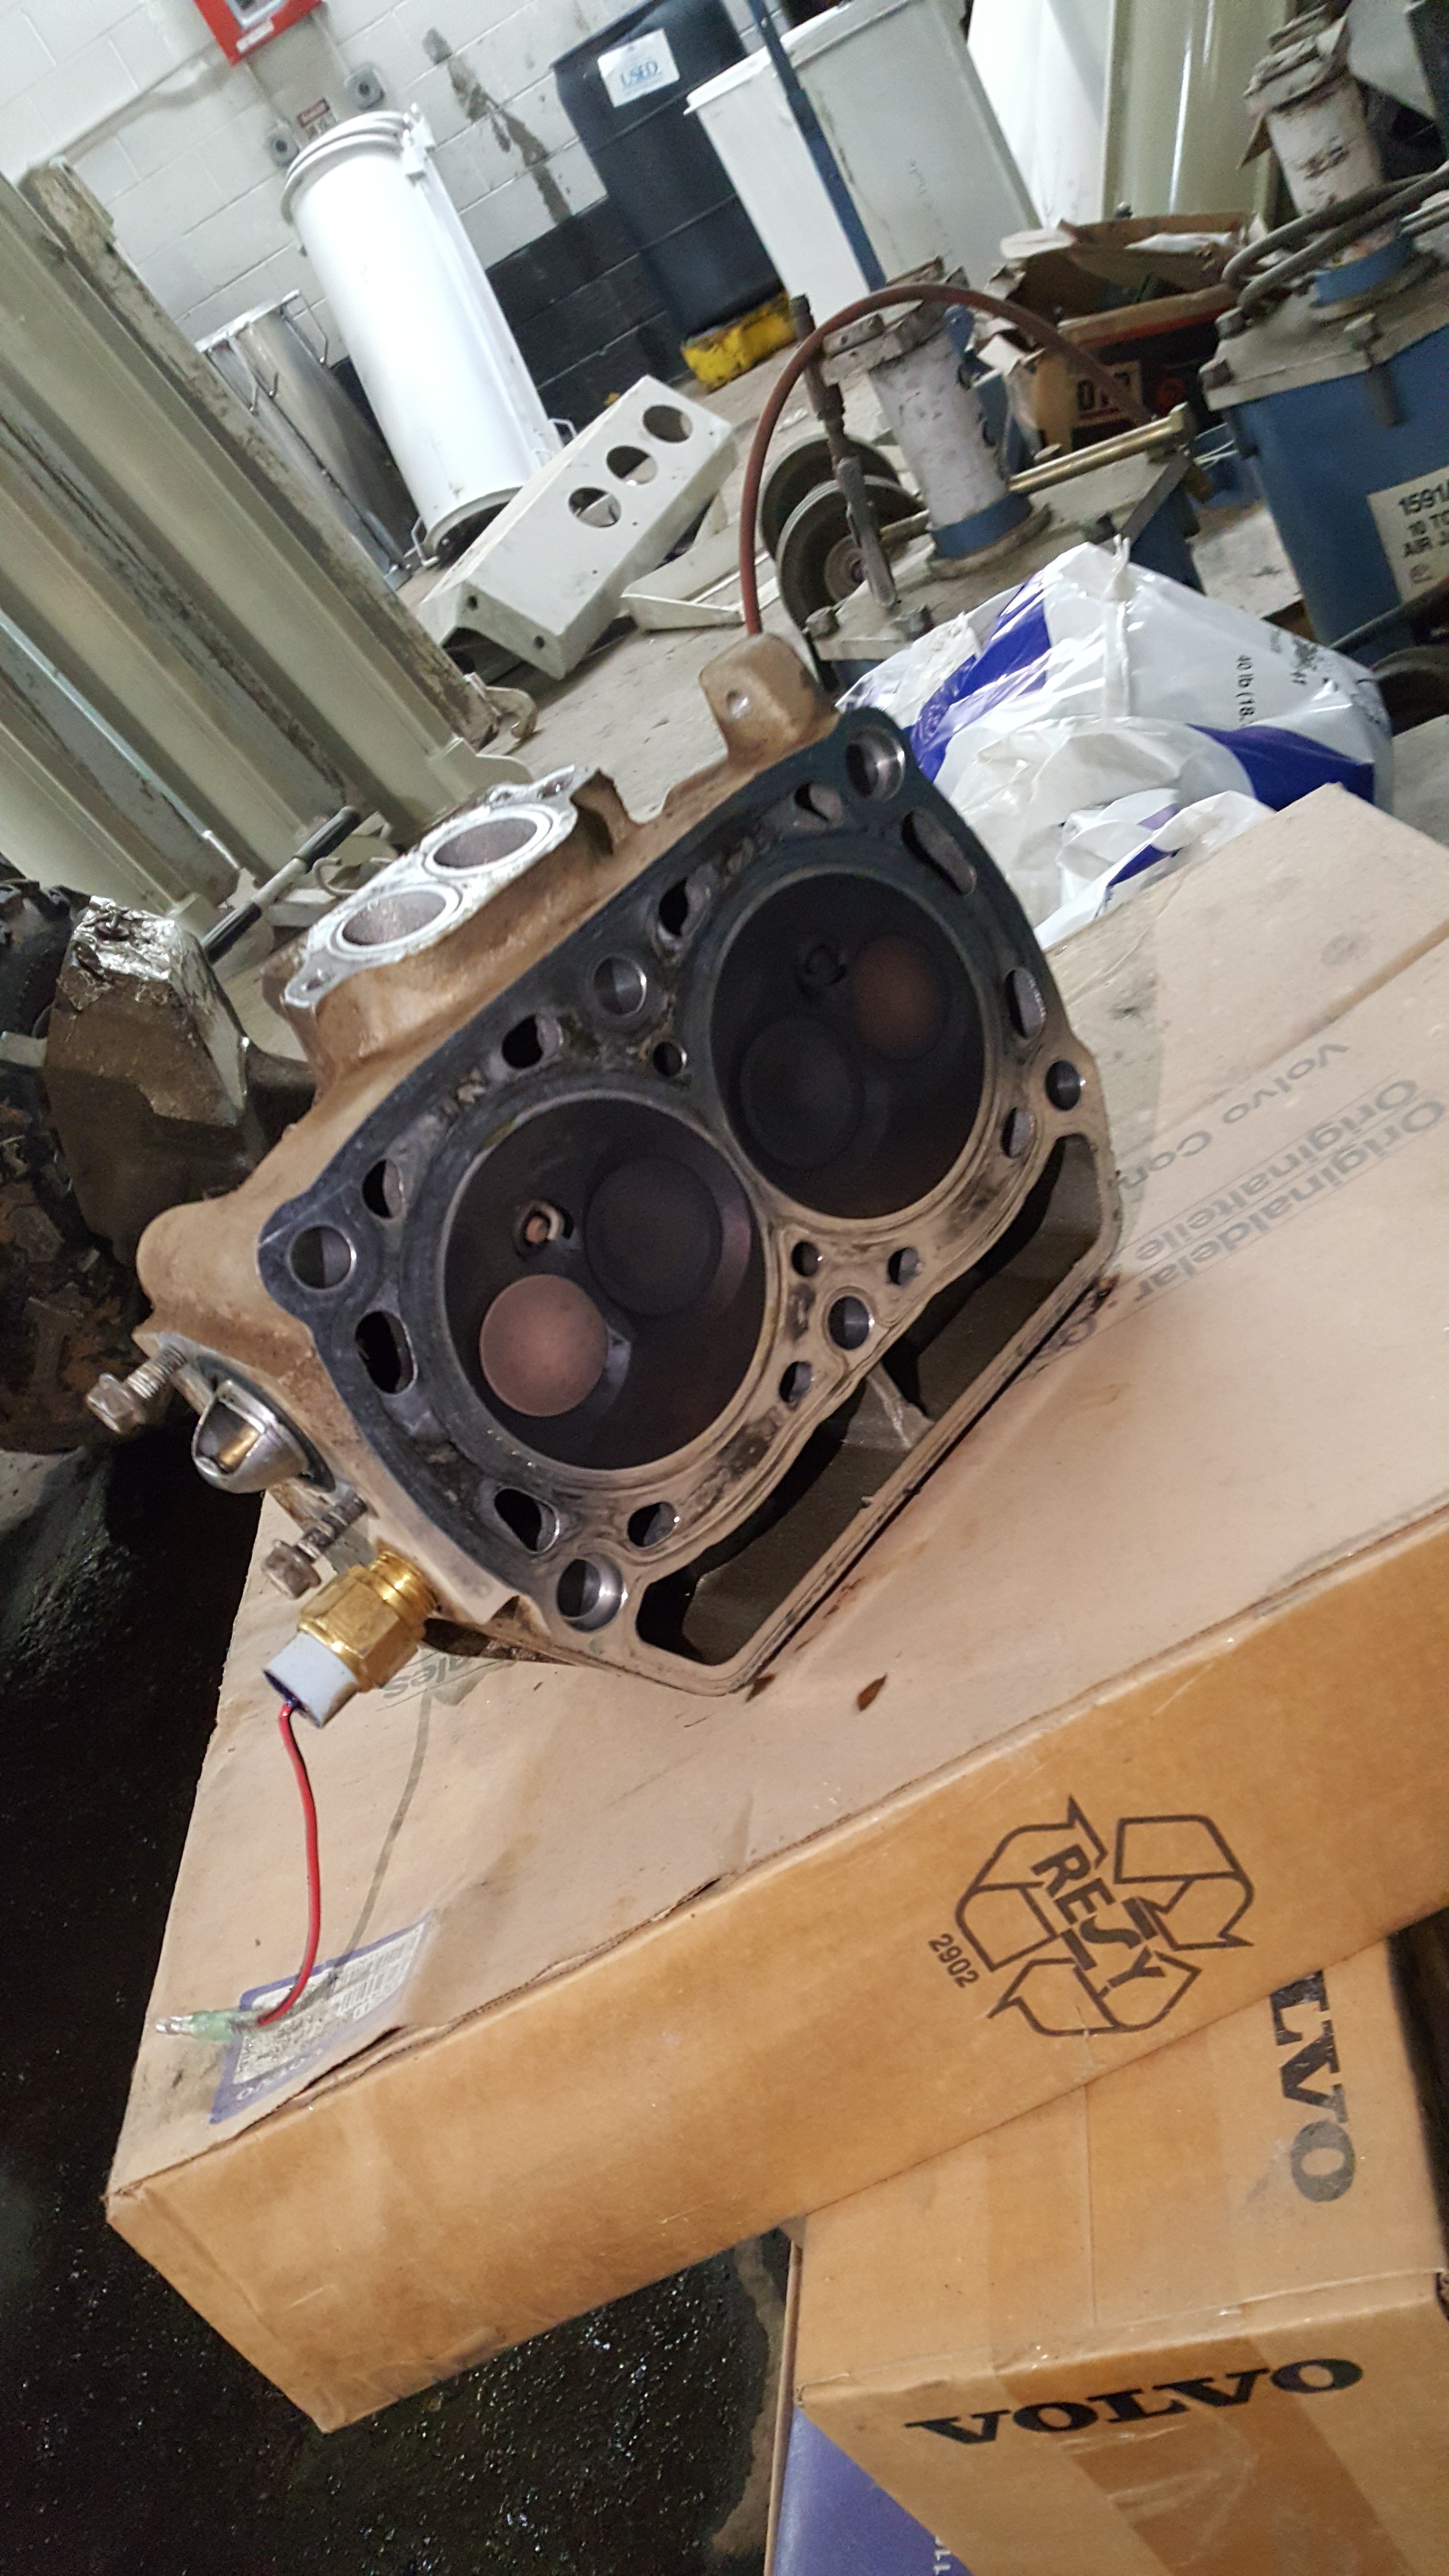
2004 Polaris 700 headgasket repair
Kenneth Obando replied to Kenneth Obando's topic in Polaris ATV Forum
Traced the problem to bad fan switches and faulty thermostat which I thought would fix it, but it was overheated by previous owner and my brother was riding and didn't shut it off with the light, not till it gave a cloud of steam. -
2004 Polaris 700 headgasket repair
Kenneth Obando replied to Kenneth Obando's topic in Polaris ATV Forum
Thanks for the info on the gasket. It overheated and that, blew the head gasket over pressurizing the coolant system and cant run very long without overheating. -
2004 Polaris 700 headgasket repair
Kenneth Obando replied to Kenneth Obando's topic in Polaris ATV Forum
I ordered the parts and will be uploading pictures soon. Any tips will be appreciate. Also if anyone knows is a genuine Polaris head gasket necessary. Im using a Namura top end gasket kit. -
I will be posting some updates on my head gasket repair on a Polaris 700 sportsman. Hopefully this will help some of you guys with you own repair.
-
Is part availability pretty good I blew up my Polaris and was wondering about kymco, or CFmoto. Got local dealers but the long term parts availability is my cocern
-
CFMOTO 800 Cforce, ODES 800 Assailant same thing?
Kenneth Obando replied to technofarmer's topic in CFMOTO ATV Forum
i was looking at a some CFMotos a local dealer sells them. Are they reliable long term and have good part availability as they age. would like to hear from someone that owned one.