
Yamahahahaha
-
Posts
37 -
Joined
-
Last visited
-
Days Won
3
Content Type
Profiles
Forum
Gallery
ATV Magazine
Events Calendar
Downloads
Store
Community Map
Everything posted by Yamahahahaha
-

Chain guard solution 1987 Quadrunner LT230E
Yamahahahaha replied to Yamahahahaha's topic in Suzuki ATV Forum
Yeah, it helps when you drop the O-ring 15 times 🤣 -
Riding trip to Wyoming !!
Yamahahahaha replied to quadnut20's topic in ATV Picture and Video Sharing
Looks like a blast! I didnt realize how much sand is in Wyoming, is that near a lake or anything? -
Chain guard solution 1987 Quadrunner LT230E
Yamahahahaha replied to Yamahahahaha's topic in Suzuki ATV Forum
Ok, update time. I finally got all the parts in (had to wait forever for the last O-ring to get shipped) and everything went together great! I used some silicone grease to hold the largest o-ring to the crankshaft opening while i assembled it so it would stop falling onto my garage floor. The oil seal is a bit tricky, if you push the spacer into it hap-hazardly you will knock out the spring retainer that holds the seal tight. I actually put the spacer into the retainer plate and then slid both on at the same time so that i knew the spring was good. 1x of the 2mm thick washers was needed to push the front sprocket outward for alignment to the rear sprocket.
-
The Official Good morning thread!
Yamahahahaha replied to BuckBilly's topic in General Talk - Anything Goes!
Good Morning! Beautiful Tuesday after Memorial Day here in MI. Hope everyone had a great weekend! 😎 -
Chain guard solution 1987 Quadrunner LT230E
Yamahahahaha replied to Yamahahahaha's topic in Suzuki ATV Forum
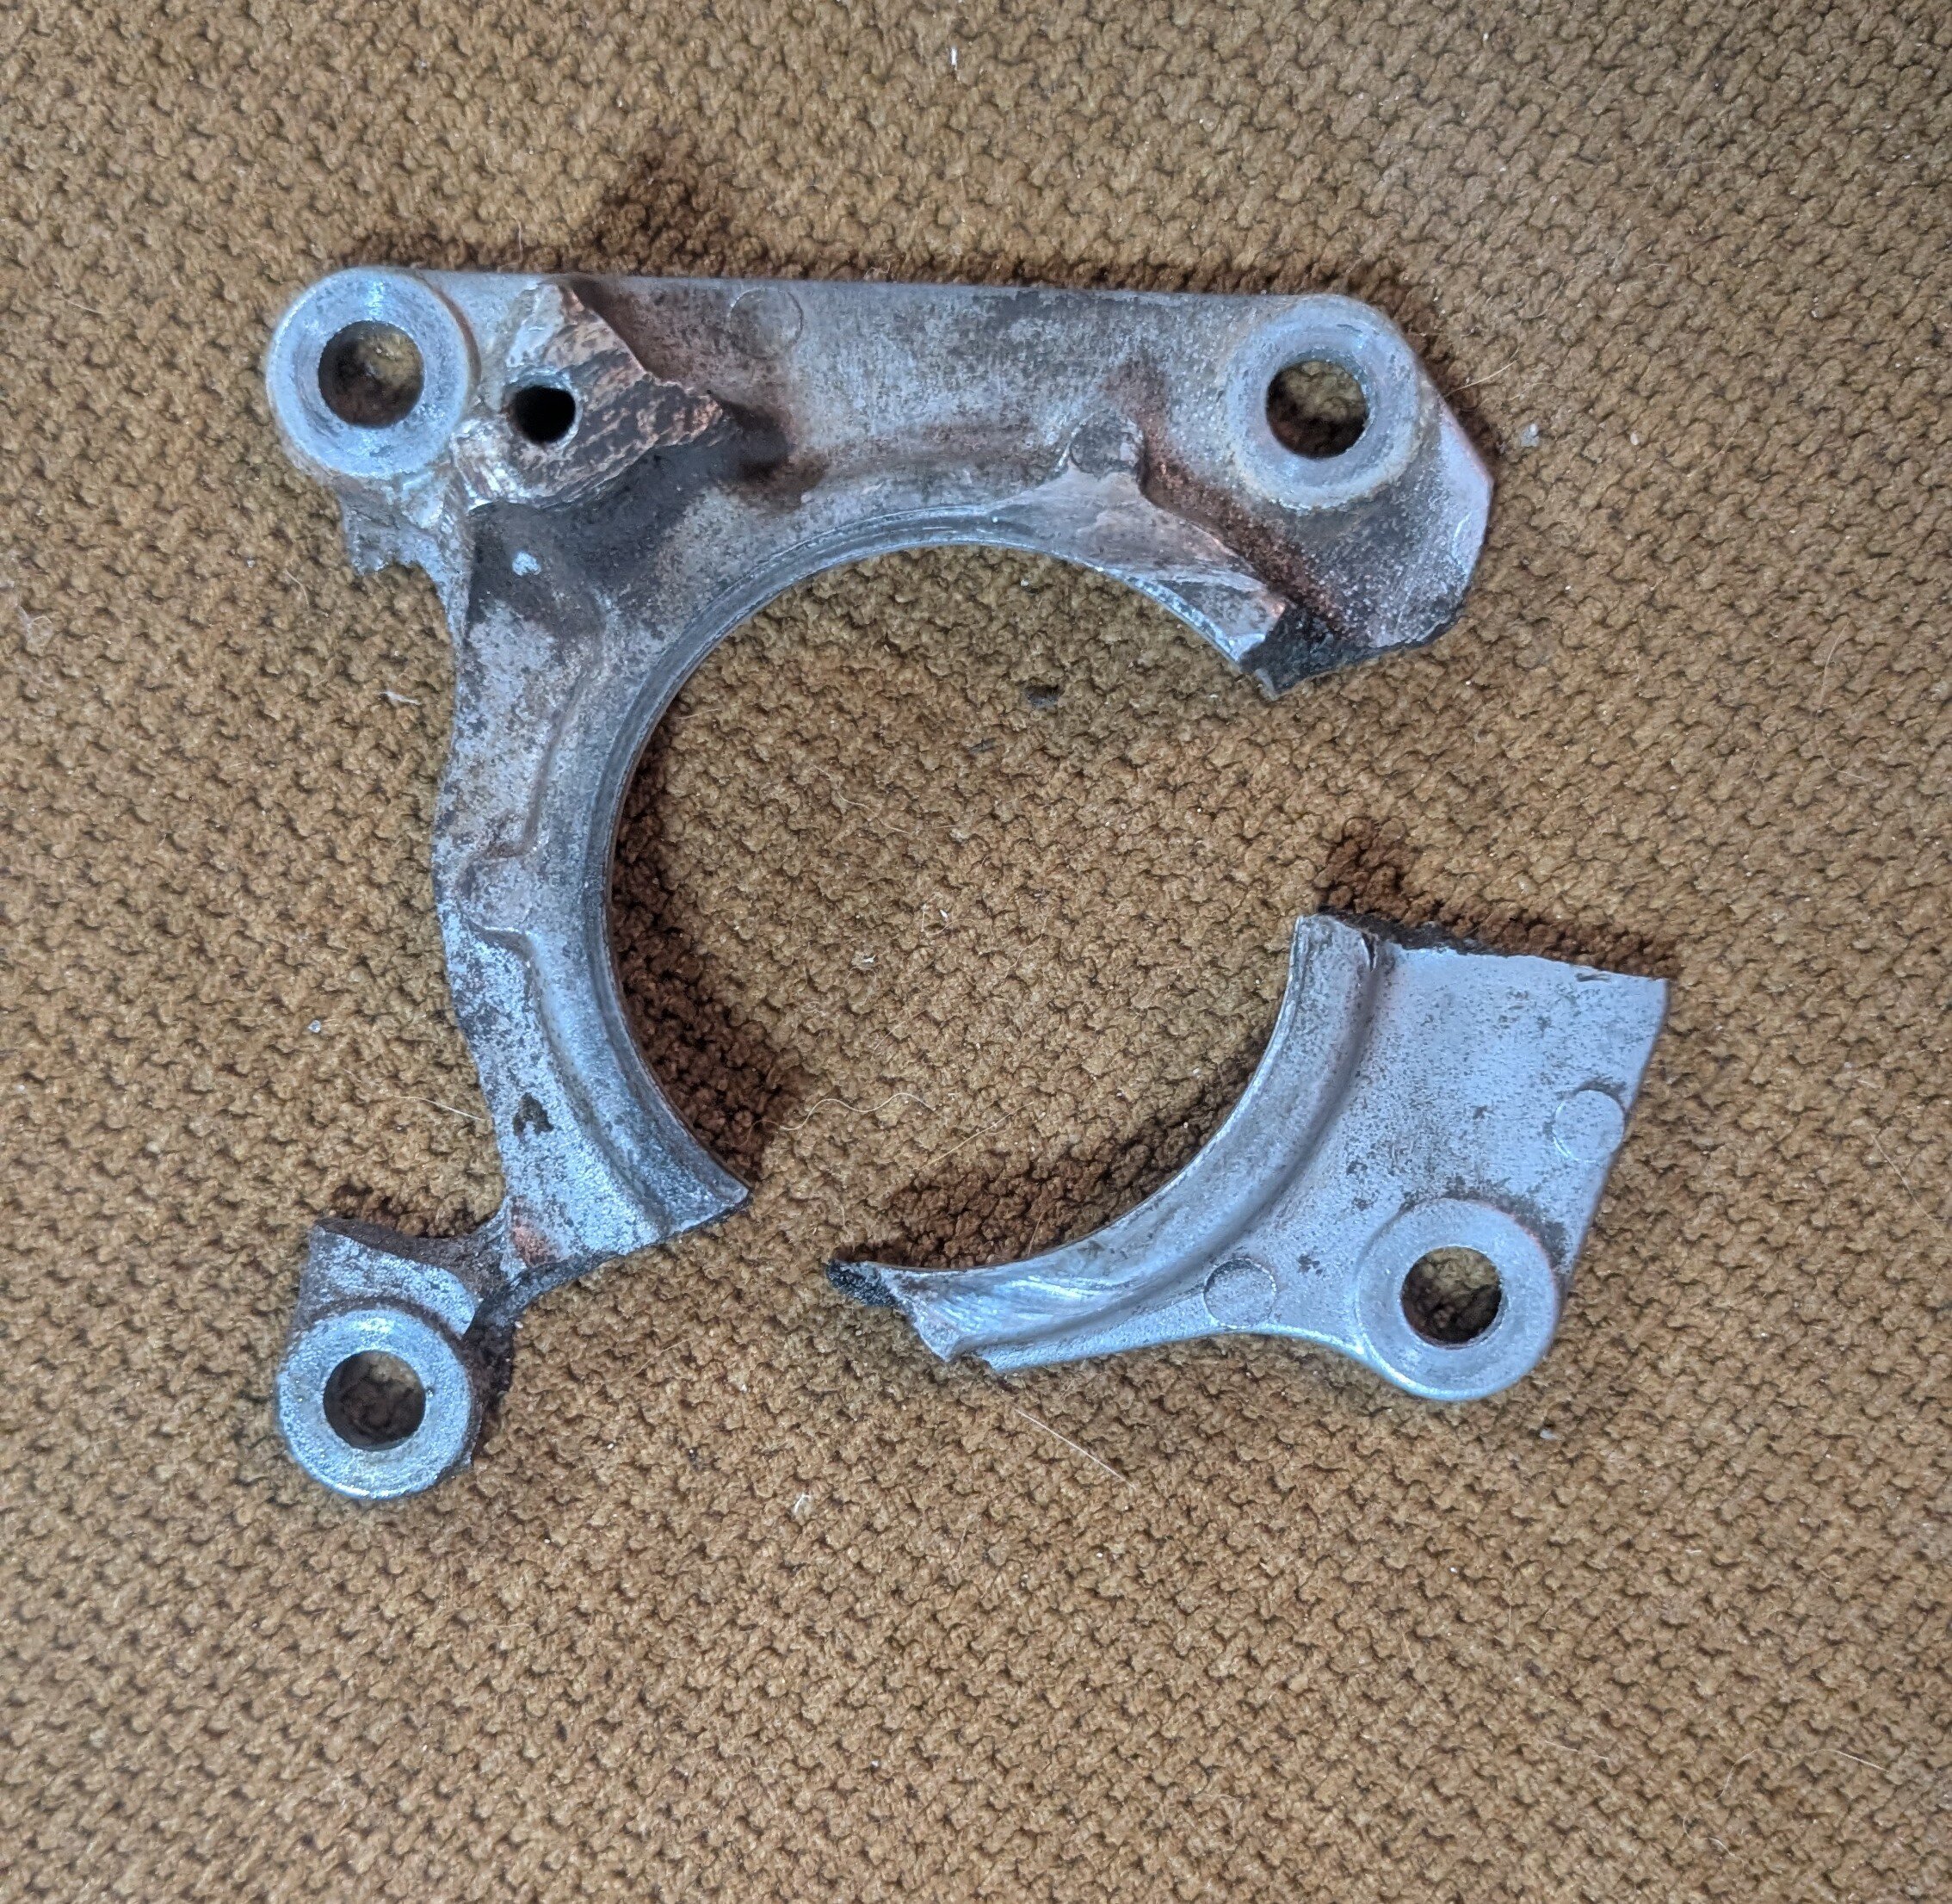
Here is the old plate, easier to see with it off the quad. It was barely hanging on 🫣
-
Chain guard solution 1987 Quadrunner LT230E
Yamahahahaha replied to Yamahahahaha's topic in Suzuki ATV Forum
Ok, so after contacting 2 junk yards, scanning eBay, weighing my options, and reading the previously shared thread from this forum, I decided to buy the only available type of retainer plate and move forward. Retainer plate part number: 24751-35B10 (branded on part as S2B-35B1-RD) ordered from link below https://www.partzilla.com/product/suzuki/24751-35B10?gad_source=1&gad_campaignid=17883222394&gbraid=0AAAAADro4HsbmVHHTMFPG7M0M6QiIC6IH&gclid=CjwKCAjwqazPBhALEiwAOuXqdI1Cqfwv6ijcXwLtsuFOGwt4qMvNMgcmUNhCKUZ7o5VCGib2S2fpZhoCbTAQAvD_BwE&titan_sku=24751-35B10 It was delivered and as expected is unfortunately not for a model H. So i will be updating the required parts to make the quad a "not model H" 😄 After some thourough research, diagrams, parts lists, and back and forths, here is what I will be ordering to update the quad to the new retainer so no machining is required: (1x) 22mm ID x 2mm thick steel washer (7/8" ID will work, but couldnt easily find one that is 2mm / .08 inches thick, needed to space sprocket properly) (1x) 21mm ID 2.5mm width O-ring (1x) 71mm ID 2.65mm width O-ring (closest I could find to the required 71.9mm x 2.5mm) (1x) Oil Seal 40mm x 52mm x 8mm (1x) 6206 30mm Bore 62mm OD 16mm thick Bearing Going this route will make it easier to replace parts in the future by eliminating the obsolete Model H parts and also saves a lot of money not buying suzuki branded parts. Just use the info above for sizes. It took my cost from $107 suzuki cost to $37 and I was able to find it all on Amazon. I will also have extra O-rings since they come as a pack. I will update back when i have all the parts in hand 🫡 -
The Official Good morning thread!
Yamahahahaha replied to BuckBilly's topic in General Talk - Anything Goes!
Crazy the amount of free therapy you get from these machines 😄 Good Morning Quad Crazy members! -
The Official Good morning thread!
Yamahahahaha replied to BuckBilly's topic in General Talk - Anything Goes!
Good morning er'body. Happy Taco Tuesday 🌮 -
2002 Xpedition 325 start relay/solenoid
Yamahahahaha replied to HeWasRidinDirty's topic in Polaris ATV Forum
Sounds like fun! 😅 They make everything more fun. Even chores. -
2002 Xpedition 325 start relay/solenoid
Yamahahahaha replied to HeWasRidinDirty's topic in Polaris ATV Forum
Awesome man, Im glad you figured it out. Have fun on it and be safe! -
Chain guard solution 1987 Quadrunner LT230E
Yamahahahaha replied to Yamahahahaha's topic in Suzuki ATV Forum
So a quick update on this topic: I have replaced the front sprocket with a 12T, however the retainer plate is snapped in 4 pieces and is missing a few chunks that hold the bearing and seal in for the transmission 🫥 (#46 in the link shown below's diagram) So i will have to purchase a new old one. I found a few sites I can order them from, but I have heard people having to add a back plate and get it machined due to model year differences. Im trying to avoid this if I can. Has anyone had this issue or ordered a new retainer plate? Where did you order it from? How did it fit? I have read this post from 2021 where a member repaired their ride with an off year part and new bearings and spacers, so that gives me hope. -
Its definitely not easy, it took me awhile to get the hang of reading them. It wasnt untill i did it for work that it finally clicked.
-
2002 Xpedition 325 start relay/solenoid
Yamahahahaha replied to HeWasRidinDirty's topic in Polaris ATV Forum
Gotcha, yeah hopefully those parts do it for you, if not just report back and we will take the next steps. Its fixable. -
 This is the complete manual in black and white without the covers. Easy to read and thourough.
 -
The Official Good morning thread!
Yamahahahaha replied to BuckBilly's topic in General Talk - Anything Goes!
Today Michigan gets the rain, good morning QC members -
The Official Good morning thread!
Yamahahahaha replied to BuckBilly's topic in General Talk - Anything Goes!
Looks like we got your leftover storm weather this morning Indiana, Good morning from overcast Michigan. -
2002 Xpedition 325 start relay/solenoid
Yamahahahaha replied to HeWasRidinDirty's topic in Polaris ATV Forum
When i said "ring out" I meant test continuity to ground with a volt meter, just to clarify. -
2002 Xpedition 325 start relay/solenoid
Yamahahahaha replied to HeWasRidinDirty's topic in Polaris ATV Forum
If the green wire doesnt ring out to ground, then you may have another coil or something. Do you have a wire diagram for your particular model? Im not seeing anything online that is exact to your post title. Another valid question; does your neutral light come on? Most of these machines dont allow power to the solenoid unless it knows its in neutral. -
2002 Xpedition 325 start relay/solenoid
Yamahahahaha replied to HeWasRidinDirty's topic in Polaris ATV Forum
If this is your machine it looks like white is hot from your key and green is ground. (They dont show the wire for green, just that the other side of the coil is grounded with the ground symbol.) -
2002 Xpedition 325 start relay/solenoid
Yamahahahaha replied to HeWasRidinDirty's topic in Polaris ATV Forum
Thats a fair assumption honestly. the supply side of your wire that plugs into would have the hot guarded. Double check this against a wiring diagram before playing with voltage on it. -
A lot of times when these machines sit, a mouse decides to chew one of your wires in a super tucked away spot. If you arent making progress it might be worth it to remove the harness, open it up and inspect for damage. I recently had a neutral wire that got crushed in half by the chain coming off stop me from starting mine for while until i finally got out my volt meter and measured resistance. I suggest taking a pictures when its off the quad, then another one when its opened up. If you are patient and determined youre going to get this machine running for your boys. We are all here to assist if able 🤜🤛
-
Starter circuit cut out relay 1997 Yamaha Big Bear 350 4x4
Yamahahahaha replied to crankin's topic in Other ATV Brands Forum
https://www.yamahapartshouse.com/oemparts/p/yamaha/123-83516-21-00/-bulb-12v-3-4w I think this is it, maybe verify with the diagram in case i was looking at the wrong model. -
2002 Xpedition 325 start relay/solenoid
Yamahahahaha replied to HeWasRidinDirty's topic in Polaris ATV Forum
Unless size, shape, or mounting pattern matters to you, It shouldnt matter much. A starter solenoid works by the smaller 2 wires energizing a coil, that coil pulls the contact up and connects the 2 larger wires together until the coil is de-energized. If you are seeing some with only 1 wire I would assume they are using the machine as a the gound for the other side of the coil. A coil requires 2 point of connection, so Im assuming the second point is probably the frame in that situation. -
Welcome to the forum! There is quite a bit of useful information on here. Im happy i found it.
-
Hello! Yes wiring can be quite the headache. It helps if you have a wiring diagram so you know what is what, but honestly I have been able to replace partial sections without them. I tend to acquire a lot of old projects or barn finds, with mouse damage to the wiring. If i cant find a good diagram online, I will mark the front (headlight) with some tape, and then just take the harness off the bike completely. Take a picture of the harness laid out with all connectors visible, then very carefully open up the tape and casing from the harness, then take another picture. At this point you will be able to assess melted wires, mouse damage, corrosion, pinched or rubbed wires, etc. Measure the total length of the harness, and then determine the wire gauge required for the repairs (If you cant, you can take a small piece of the damaged wire section with you and compare. It is best to replace as much of the wire as possible in the event of Corrosion or melted wires. Any exposed copper should always be heat shrinked, and protected, and dont stress about the factory connectors, Most of them have the terminals clipped into them, it is possible with a small pick or flat blade to release the finger holding the terminal in place. I was able to do this on all of my previous harnesses. Remember, TAKE PICTURES before pulling out your terminals from the connectors. If a repair was needed close to or at the connector, i would remove the terminal and try to solder the connection to the old copper and metal terminal, then heat shrink and clip back into the connector. If you are patient, organized, and meticulous with your connections you will have a perfect harness in no time, and probably save yourself a lot of money too! I just finished my 1987 Quadrunner harness that had melted itself together from a short circuit, which created more short circuits, which ultimately was what got it into my possession. It took me about a week, after work when i had time in my garage with a solder gun, heat gun, heat shrink tubing, wires, and some crimp connectors for less than $30. I also replaced the casing with a new one since it had caught on fire previously. 👨🚒 Let me know if you have general electrical questions. Ive done 4 harnesses previously, and spent about 8 years as an industrial electrician making harnesses for robots. I dont know much about your particular machine, but we can repair or replace anything we put our minds to. 🤙