
Frank Angerano
-
Posts
3,925 -
Joined
-
Last visited
-
Days Won
209
Content Type
Profiles
Forum
Gallery
ATV Magazine
Events Calendar
Downloads
Store
Community Map
Everything posted by Frank Angerano
-

Yamaha Warrior clutch/carb/exhaust issues
Frank Angerano replied to JacobSlabach's topic in Yamaha ATV Forum
Nice work kiddo. Ok going to loose WiFi again. Be back later. -
Honda Fourtrax bring back from the grave
Frank Angerano replied to JacobSlabach's topic in Honda ATV Forum
This is a big thing here in my state with batteries now they charge you to take the old one away it’s a recycling fee. The same has happened with the tires now. You get a tire change they charge you $5 bucks a tire for recycling now. -
Honda Fourtrax bring back from the grave
Frank Angerano replied to JacobSlabach's topic in Honda ATV Forum
Your right @davefrombc I didn’t word that correctly jumping from a car is the point I wanted to get across. I agree the voltage is the same but the regulated amount of voltage could change going to the pump since a higher cca battery can throw the regulator and any other components on an atv into a tailspin if you would. This is why stator coils burn can burn up as well when jumped from a car. So yes I agree if it were a stand alone battery it would be ok. -
2001 suzuki quadmaster clutch issue
Frank Angerano replied to mrfartsalot's topic in Suzuki ATV Forum
Have you gotten the nut off of the clutch shaft? The best thing I would say is let it sit for a few hours with penetrating oil. Then take a torch and warm it up. NO CRAZY HEAT! Just enough to expand the metal. If nothing else works you may have to get a wheel puller and grab it. Keep in mind the torch used the wrong way could burn up seals. So be careful. -
New atv mechanic mom in training
Frank Angerano replied to Jade Dockery's topic in New Members Area!
Welcome to Quadcrazy @Jade Dockery You will find tons of helpful info here as well as juts some cool posts of members doing some cool stuff. So even after the bikes are ready to roll we love to see pics of everyone having fun. So ask away post as many pics as you need and remember the only stupid question is the question that’s not asked. -
New member | DFW | 99 Bayou 220
Frank Angerano replied to frostyflammable's topic in New Members Area!
Welcome to Quadcrazy, chances are unless you see burnt or melted wiring then the harness is probably fine. The only way one would burn up a harness is by installing a battery in backwards. Very possible but it’s a far and few thing to see. But even at that most of the time it’s a fuseable link or main fuse that goes. We have had plenty of bayous come thru here in a past few months and all were salvageable and the outcome was good. Including one of mine. I picked one up where the previous owner said the same thing. Big electrical problems. Turned out it was a safety switch that was bad. So get familiar with the bike, take some of the basic stuff off to expose some of the wiring and start looking for anything burnt. My guess is it will be the usual suspect which is the (neural safety switch) or a faulty kill switch. Order a new battery if needed and try to avoid jumping it with a car or a crazy strong jumper pack. The bike looks great otherwise so for the price 🤭hey you cant complain! The plastics alone are worth a few hundred bucks if the bike was beyond repair. -
Honda Fourtrax bring back from the grave
Frank Angerano replied to JacobSlabach's topic in Honda ATV Forum
When you jumped the bike what do you use to jump it ? If you use a car battery the amperage is extremely high for something like that. You can cause damage to the pump. Aside from that that if it were another atv you jumped it with then I would check all the gaskets on the pump , it’s possibly a defective pump. -
Ok that would make sense. I was wondering about maybe possibly spacer. But did the spacer come with it ? Also how thick was the spacer ? I know that the shaft coming out of the throttle body is only so long? Lastly did the new sensor have any paper work that mentions anything about the spacer? I would reach out to the Polaris via email and let them know about this problem and the aggravation it’s caused. Pain and suffering damages of not being able to ride!!!!! Lol. Nice work brother, ride safe.
-
1988 Kawasaki KLF 300 BAYOU NEED HELP
Frank Angerano replied to Tyler Autry's topic in Kawasaki ATV Forum
Hey Tyler welcome to Quadcrazy. So your having shifting problems on the bayou and you changed friction and steel plates? I’m a little confused. What parts exactly did you change? There’s also a centrifugal clutch inside the right side engine cover that’s part of the clutching system. When you opened the cover did you inspect that clutch? Also how as the engine oil? Have you changed it and looked for any metal shavings inside the oil? -
2000 Yamaha warrior 350 boiling gas
Frank Angerano replied to goldeneagle's topic in Yamaha ATV Forum
Is the head of the engine painted or the entire engine painted ? A lot of people paint the head or engine trapping in heat which causes a overheating problem. Check the exhaust that its clear and not packed with sh** causing to much back pressure. Lastly is an engine covered in mud or excessive dirt build. These things add up and cause excessive heat along with a hotter plug and even a high octane fuel cause this condition. I would wash the engine down good. If the engine is painted then a pressure wash may be in order. -
Great job Mike. Keep us posted. Ride safe!
-
Enjoying a few days off
Frank Angerano replied to mikeexplorer's topic in ATV Picture and Video Sharing
That is a good dealer and to be honest it’s worth the money to drop it off and not worry about tearing it apart yourself if you can trust someone and it sounds like you have a trustworthy guy. Did you have to rejet the carb due to the bore? As far as the rubbing wires I’ve come across that. Right around the front end of the frame where the harness is against the frame due to turning. I also feel bikes with plows generally have a greater amount of wear and tear on not only the front end but the engine as well. So additional maintenance is required. You have machines with high mileage on them. It’s great to see bikes go that long and it’s great to see the upkeep that you and some of the other members here do. You also do a lot of the poker runs it sounds fun and we would like to join you on one of them so keep me posted if you don’t mind us joining you for a day. Minus the mud hole 🥴! Myself I like to do the engine work and have taught my son along the way so that’s been fun. We recently picked up a really nice snow blower that was left behind on a house I was renovating, practically new but left full of old gas. So I pulled the carburetor off and handed it to my son, 30 min later it was rebuilt and back on the blower running like a champ. He is 15 and well versed on gas engines and tearing them down and rebuilding etc. I want him to know how to do this sort of stuff. We always get into something with a motor and always looking to pick up an older bike to fix up or work on to keep us busy while we keep our newer machines maintained and always doing upgrades. Keep up the good posts and great input and photos you always provide brother. -
The Official Good morning thread!
Frank Angerano replied to BuckBilly's topic in General Talk - Anything Goes!
Good morning Quadcrazians! One more day to vacation ! 🏝 Happy Sunday! -
Your welcome mike. But are you sure it’s the switch ? It would suck for you if you wasted time and money on the switch if it’s not bad. I was only pointing you in possible directions of what the problem could be. So unless you positively identified that as a problem you may be disappointed when you install it. I just want to throw that out there brother. Like @JacobSlabach said maybe a kill switch etc ? You can do some testing before buying parts to positively diagnose the problem. Just want to let you know.
-
Hi from Texas - new member with download question
Frank Angerano replied to benwheeler's topic in New Members Area!
Hey Ben welcome to Quadcrazy! You have come to the right place. You will find all the help you need here. -
I think your right but there should be a lock out of some sort ? I have to take a second look at the diagram. I would be surprised that it would be able to start in gear.
-
I was talking about the neutral safety switch but as always @JacobSlabach you bring good direction to the table! The Polaris guy!
-
Wiring for my 2002 Polaris Scrambler 90
Frank Angerano replied to Brian Simmons's topic in Polaris ATV Forum
No what you needed is the right relay. The plug you can use steak on connectors for the relay. You need to order the right oem relay and the plug if possible but not necessary! -
Wiring for my 2002 Polaris Scrambler 90
Frank Angerano replied to Brian Simmons's topic in Polaris ATV Forum
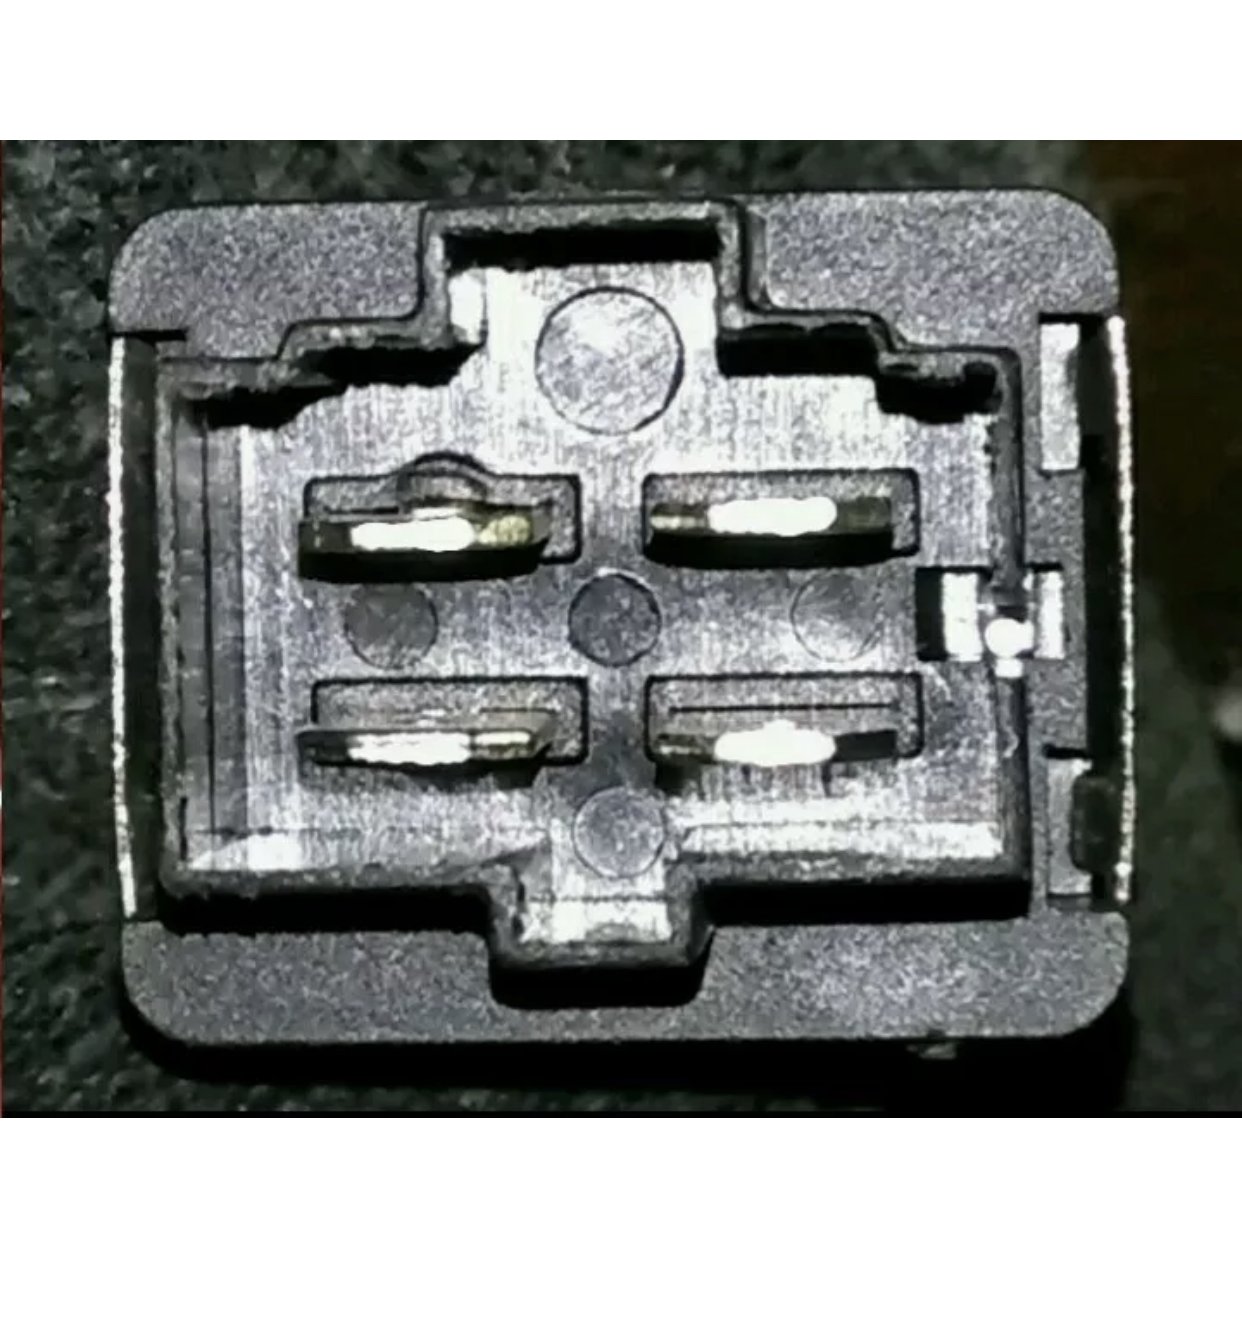
Hey was that relay used it looks burnt up?? Those prongs should not look like that. I would not use that relay. It looks all wrong. The relay looks distorted and burnt up. -
Wiring for my 2002 Polaris Scrambler 90
Frank Angerano replied to Brian Simmons's topic in Polaris ATV Forum
What I don’t understand here is I sent you a direct link to the original equipment manufacturer part and you got a different relay ? All you needed was that relay and some steak on connectors for it. I’m sure that relay will work but it’s not necessary and could be avoided. -
Wiring for my 2002 Polaris Scrambler 90
Frank Angerano replied to Brian Simmons's topic in Polaris ATV Forum
Relay ? Can you possibly take a picture of the relay. Just like the one I sent you and post it?? Can’t see the first two -
Wiring for my 2002 Polaris Scrambler 90
Frank Angerano replied to Brian Simmons's topic in Polaris ATV Forum
Here’s what you do. Hook all the wires up except for that green wire and turn the key on. That relay should click. You can hear and feel it. If so then you can touch the green wire to the red momentarily!! See what happens. If you get an arc or heavy spark when you do that take it right off. I just can’t be sure due to the wiring not matching but it’s a relay and they are pretty simple. -
Wiring for my 2002 Polaris Scrambler 90
Frank Angerano replied to Brian Simmons's topic in Polaris ATV Forum
Brian you can’t just connect the wires if they don't match. You have to make sure it’s the right relay first of all. Where did you get it?????? What makes you think it’s the right relay? That last red wire that should be a green and white should match what you have on the bike. So please like I said snap a pic of the relay without the plug and post it. This way we can look at the relay and see that it matches. Then you can go from there. If it matches then I would say yes you can connect that red. I’m not just going to say yes or no to something that could possibly burn the entire harness. i have posted a pic of the relay and what it should look like without the plug in. Also please respond within this topic so we can keep a constant thread and follow up properly.
-
Enjoying a few days off
Frank Angerano replied to mikeexplorer's topic in ATV Picture and Video Sharing
Wow TPI that was a good set up. I still have one of them engines from a trans am gta tucked away in the back of my garage on a dolly. But agreed, one stupid connector or plug can wreak havoc on a person! -
Any luck ?