-
Popular Now
-
-
Similar Forum Topics
-
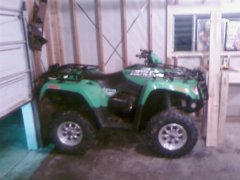
 By tepin
Здравствуйте, нужна помощь по ремонту багги Arctic Cat 700 EFI, пропала искра, датчик коленвала импульс есть, Самодиагностика показывает две ошибки AC99,AC96. все провода проверил на целостность, все датчики блоком определяются, не включается топливный насос. Провода от ECU до реле насоса и от реле до насоса исправны. Поставил подменный ECU, ничего не изменилось.
-
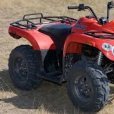
 By Shorty51
Good morning, I am new to the forum. I'm 75 years old and love getting ATVs back to usable condition. I particularly like the 2006-2009 Arctic Cat 250 Utility. I currently own 6. The 2006 I am working on only has reverse and low gear. The "drive shaft" in the transmission is completely stripped where the high gear would mesh. Has anyone on here replaced the shaft. I'm told I have to split the case. I was hoping that someone on here could let me know how hard it will be. I already have it stripped down to where the shaft coming in from the clutch side is the only thing left. I was hoping I could just remove the driven clutch and drive it out from there. Directions say different. Any help would be greatly appreciated.
-

-
 By spigmef
I bought a 2008 arctic at 366 with 120hrs. When i red line it in neutral is smokes blue a lot. When I put it in high range it has problems getting over 35km/h. I bought it and had to clean the carb. It ran ok after i cleaned it. Not I have this problem.
-
 By ath1981
Got a 2011 425 EFI. It eat 2 belts, so I replaced the drive clutch assy, rollers, spacer and movable face. Put on a new belt and after 30 min of riding, it eat another belt. any clue what can be causing this?
-


COMMUNITY SECTIONS
ATV FORUMS
QUADCRAZY MEMBERSHIP
Be a part of best online community of ATV riders and join thousands of people who love ATVs! Share your ATV photos, videos, ATV rides, get help with your ATV and more. Not a member?
Recommended Posts
Join the conversation
You can post now and register later. If you have an account, sign in now to post with your account.
Note: Your post will require moderator approval before it will be visible.