
wanrep
-
Posts
89 -
Joined
-
Last visited
-
Days Won
7
Content Type
Profiles
Forum
Gallery
ATV Magazine
Events Calendar
Downloads
Store
Community Map
Everything posted by wanrep
-
View File 2019-2024 Yamaha YFZ 50 Service Manual 2019-2024 Yamaha YFZ 50 Service Manual Submitter wanrep Submitted 05/04/2025 Category Yamaha ATV
-
View File 2017-2018 Yamaha YFZ 50 Service Manual 2017-2018 Yamaha YFZ 50 Service Manual YFZ05YYXH YF05RH Submitter wanrep Submitted 05/04/2025 Category Yamaha ATV
-

9 downloads
2017-2018 Yamaha YFZ 50 Service Manual YFZ05YYXH YF05RH -

Oil filter cover leak and oil draining 2021 TRX520
wanrep replied to nblain's topic in Honda ATV Forum
No, you don't have to drain the oil. You'll lose very little oil removing the filter cover. -
I know Suzuki made the KFX50 for Kawasaki from '03-'05. Same as the LT-A50. In '06, Suzuki came out with the LT-Z50 and I don't know if Kaw was still using them or not.
-
Those are the wires for the charging system or stator, behind the flywheel. On the EFI Sportsman's, if the ECM/computer isn't getting a signal from the stator, it won't run. Sounds like one of the yellow wires has a break. The tan wire is a ground wire. Polaris wiring is bad about breaking inside the insulation so finding which wire is broke is a little tricky. If you can check each yellow wire for continuity while someone jiggles the wires, you may be able to find it. The alternative is buying a whole new stator.
-
I use Partzilla.com Find the part you're looking for. Click on the part number and the page for that part will have all the different models that used that part. There were several big bears, wolverines & kodiaks that used that particular rear diff. Not so many on the axle. Buying a used diff. & axle is going to be your cheapest route. Trying to rebuild it will cost you 2-3 times more.
-
I was thinking of the later model Big Bears with a vacuum slide carb. The early models did indeed have a dual cable. One operated the butterfly and the other lifted the slide. The choke is a manual, plunger type. If I remember right, you adjust both cables so the butterfly and slide start to open at the same time.
-
Not likely. Most likely...the ring gear in the diff. AND the axle splines are stripped. It's caused from the diff. seals going bad allowing water to get inside. Seen it too many times.
-
I guess it's worth $100 IF you've heard it run and it sounds ok. If it doesn't run, tell him you'll give him scrap price ($25) and get it out of his way. That way if it turns out to be a total mess, you can get your money out of it. From what you said, it'll need at least a rear diff. ($200), rear axle ($100), front axles ($50 each), maybe a front diff. ($200). Those a used prices. From the picture, it looks like it needs tie rods. Then you've got the unknown....brakes, transmission, clutch, etc. It could be a money pit. Then again, it could be worth sinking $500-1000 in. One thing it has going for it, it's a Yamaha 350. Those engines are like the Energizer bunny.
-
You were right in getting a new carb. If it's the same style as oem, the one cable operates the throttle valve/butterfly and the other cable is the choke/enrichener. Oil temp light is supposed to do that. I guess just to show you it's working...????
-
Those covers can be a real bugger getting off and on. It's a tight fit. I like to grease that o-ring that the cover slips over. Makes it easier going on. Your seal looks correct. Grease those splines and the seal lips before you put the hub back on.
-
If you have just 10% leakage, I wouldn't bother pulling the heads. It's a p.i.t.a. anyway. If any of the valves were bent, you'd have 100% leakage. I think I'd just replace the chain. Retime the cams and call it good.
-
Behind the flywheel, there's a chain from the crank to a shaft that the cam chains are connected to. This shaft drives both cams. I'd venture a guess that lower chain broke. You've probably got some bent valves now also.
-
94 Polaris Xpress 300 2x4 shuts off when put in reverse
wanrep replied to ezduzit's topic in Polaris ATV Forum
I think you pulled the wrong black wire. Find the reverse limiter and follow that black wire and disconnect. Here's what you're looking for.
- 19 replies
-
- 3
-

-
- polaris 300
- xpress
- (and 1 more)
-
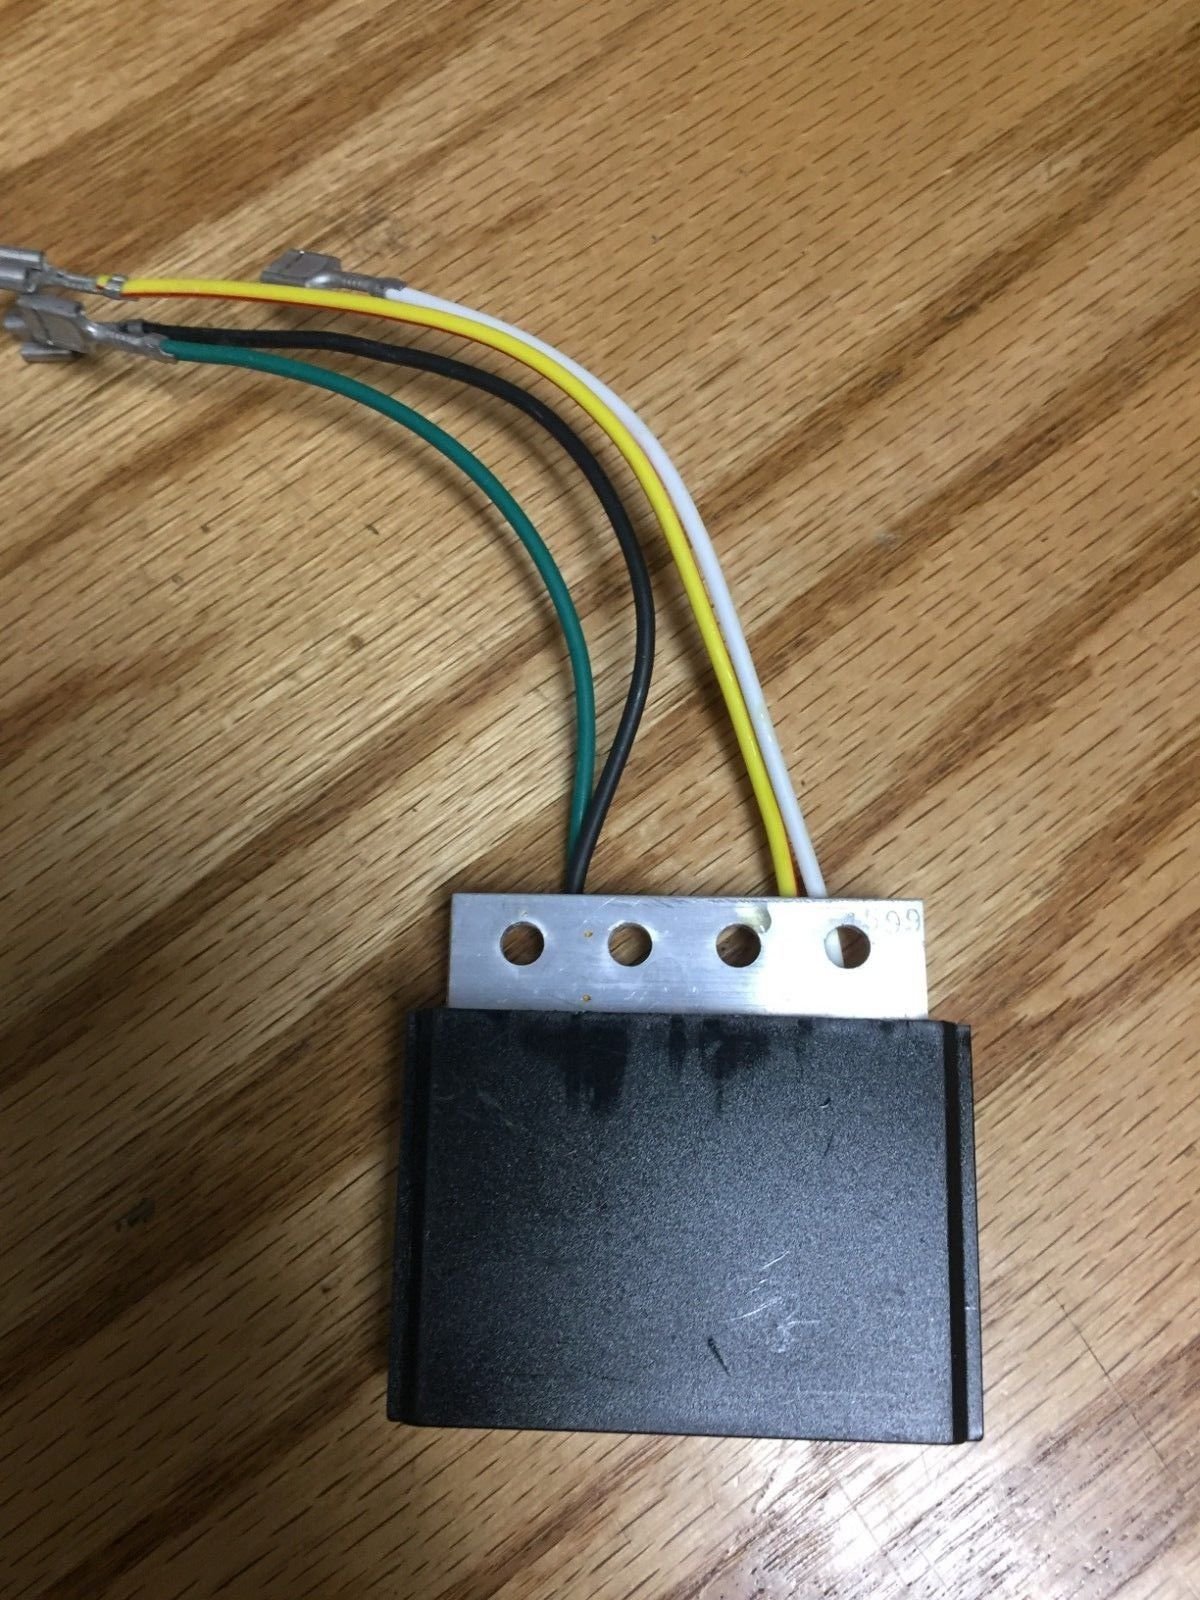
Sounds like the regulator/rectifier is bad. That will cause a no spark issue on those old 300's. I'd get a new battery also. Not a good idea to jump it with your truck ESPECIALLY a running truck. Too many amps will reek havoc with the cdi and regulator.
-
Not that hard to do. You'll need to remove the right hand engine cover and the 2 clutches in order to pull it out. There's a few washers and springs you need to watch for so a service manual is needed to make sure everything goes back together correctly. An air impact is helpful getting those clutch nuts off. The shaft and a new cover gasket should be all the parts you'll need. A Kawasaki or Clymer manual walks you through the process.
-
2000 Yamaha Big Bear lots of play in shifter
wanrep replied to Wesley Floyd's topic in Yamaha ATV Forum
Take the shifter mechanism out of the side case and put it in the engine. The hooked piece at the top of the shifter should grab those pins on the star shaped piece when you operate the shifter. That star shape piece is screwed to the shift drum. The torsion spring at the bottom of the mechanism looks fine. They never wear out and rarely break. When you put the shifter mechanism in the engine, there's a pin that fits between the 2 legs of the spring. -
Don't know the length you'll need but go to any hardware store and buy a 1/2" x 36" piece of all-thread or threaded rod. It'll cost about $5. Cut however much you don't need off. A piece of rebar will also work.
-
The only danger is messing up the end of the axle. Do you have a large deep well socket that would slide over the splines on the axle end and butt up to wheel hub stop? If not use a socket that just slides over the threads on the axle end and butts up to the splines. Try to avoid having those threads on the end of the axle take all the force.
-
Sounds like a bigger hammer is in order. I've had to use a sledge hammer on some to get out.
-
I'd say it's entirely possible but I have no clue which model that'd be.
-
I checked 2 sources and both said those wheel cylinders were only used on '86-'88 TRX200. Honda has discontinued the cylinders and the seals to rebuild them. I didn't see any aftermarket kits available either.
-
No brake calipers on your Honda. All drum brakes. If you mean the master cylinder on the handlebars, the only models that used that particular master cylinder was '86-'88 TRX200.