
Frank Angerano
-
Posts
3,925 -
Joined
-
Last visited
-
Days Won
209
Content Type
Profiles
Forum
Gallery
ATV Magazine
Events Calendar
Downloads
Store
Community Map
Everything posted by Frank Angerano
-
Ok great so you have options! Something will turn up.
-
 Nope. I just kept playing with it until I found the happiest place. I got it to 95% and left it at that. Ran good the only issue was at full throttle for a good run she couldn’t stay there that long with out bogging down. After I let up off the throttle a little bit she cane right back.
 -
Ok well I have a guy in PA he has a ton of sh**. I am going to shoot him an email see what he has He ships everywhere.
-
https://rover.ebay.com/rover/0/0/0?mpre=https%3A%2F%2Fwww.ebay.com%2Fulk%2Fitm%2F232887280184 Nott sure if this fits your bike but worth a shot to compare.
-
The axle itself is not bad as far as cost. The diff is a pricier part however.
-
It will fire right up most likely but the as you try to ride you may come across a point in the throttle that the bike bogs (flat spot)or slows down. It’s just a mixture set up on the carburetor that takes time and testing to get right.
-
Ok great. Worst case you can send it back but I think it will fit. Just keep in mind what I said about the adjustment issues. Good luck
-
2006 Sportsman X2 500EFI electric problem
Frank Angerano replied to gregorio's topic in Polaris ATV Forum
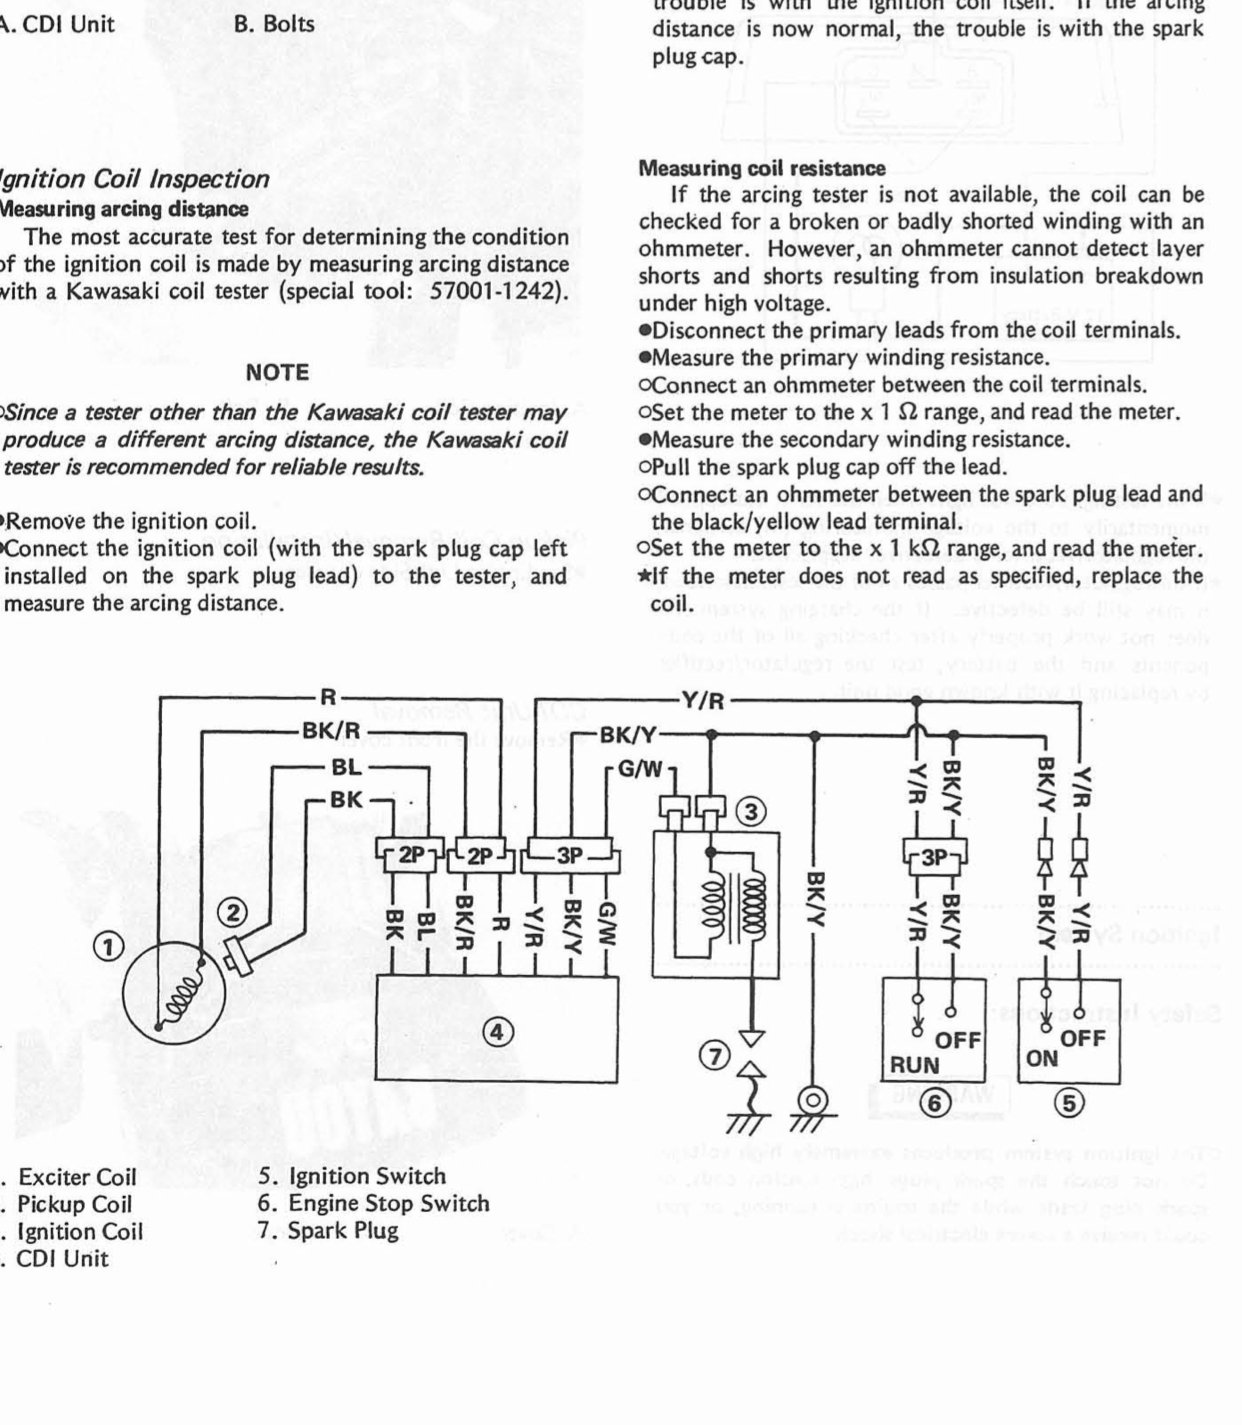
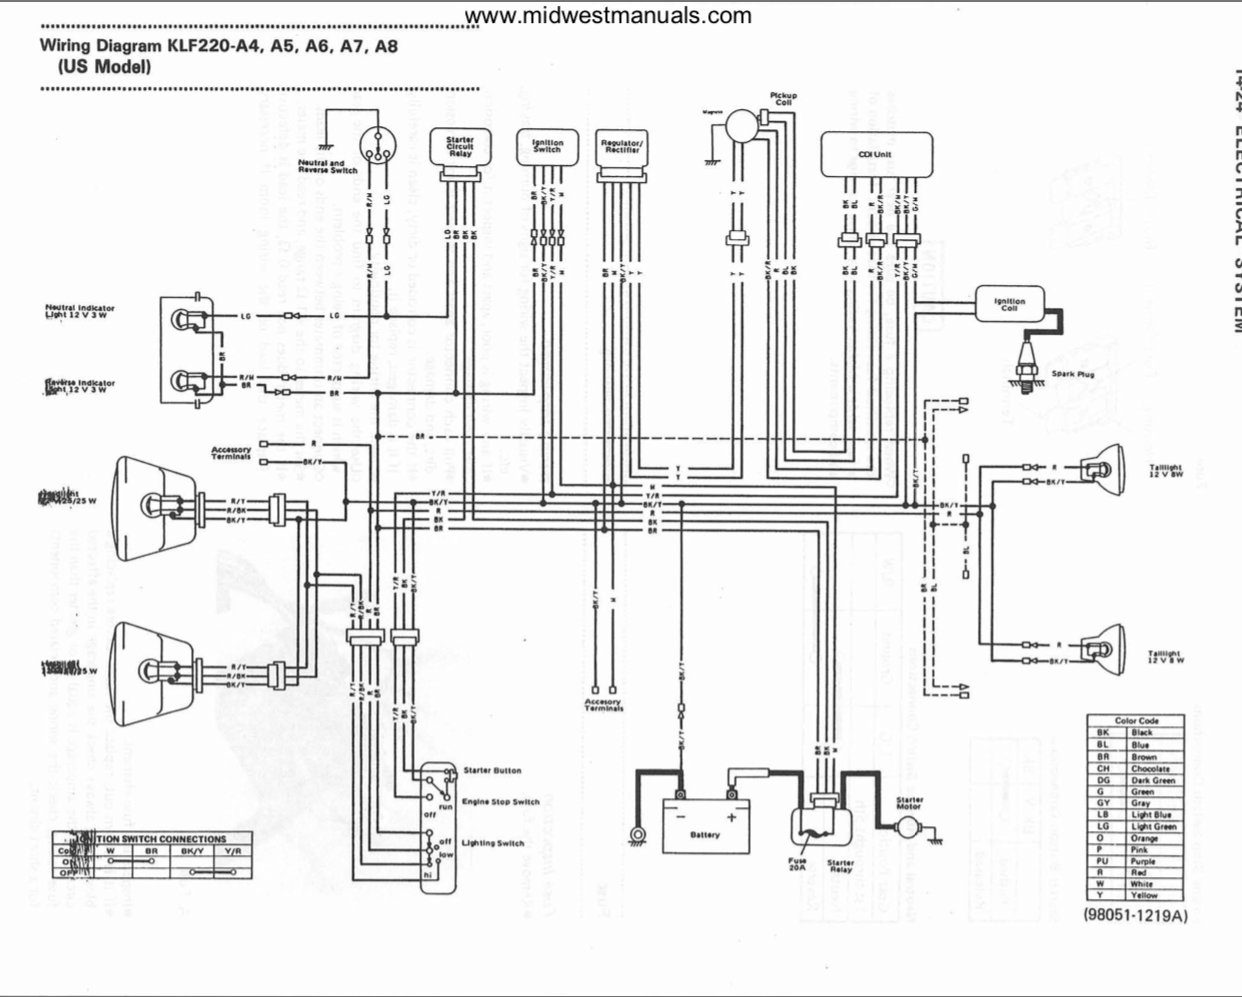
That would most likely be the wires going to your stator coil. I’m only guessing without looking at your diagram but there are very few wires that come form inside the engine. The stator coil, the pick up coil and maybe a neutral safety switch. If your moving the wires around and they kill the engine my guess would be they’re shorting out right at the entry fitting where the wires enter the engine. It’s a plastic collar that’s fitted for the engine case cover. Post a picture of where the wires are coming from. -
Welcome to Quadcrazy!
-
Help me choose my first atv?
Frank Angerano replied to Joe5858's topic in General Talk - Anything Goes!
A men Honda! -
You have to check the part number for your year and look up the part number for that year and see if they match.
-
I would think yes. But!! Whenever a decade passes into the next there may be a change. You have to look up part numbers unfortunately to be sure.
-
No way. Are the splines in the diff shot as well?
-
Holy sh**!
-
That’s great. Put up some pics when you can I’m curious to see what everything looks like and the condition it’s all in.
-
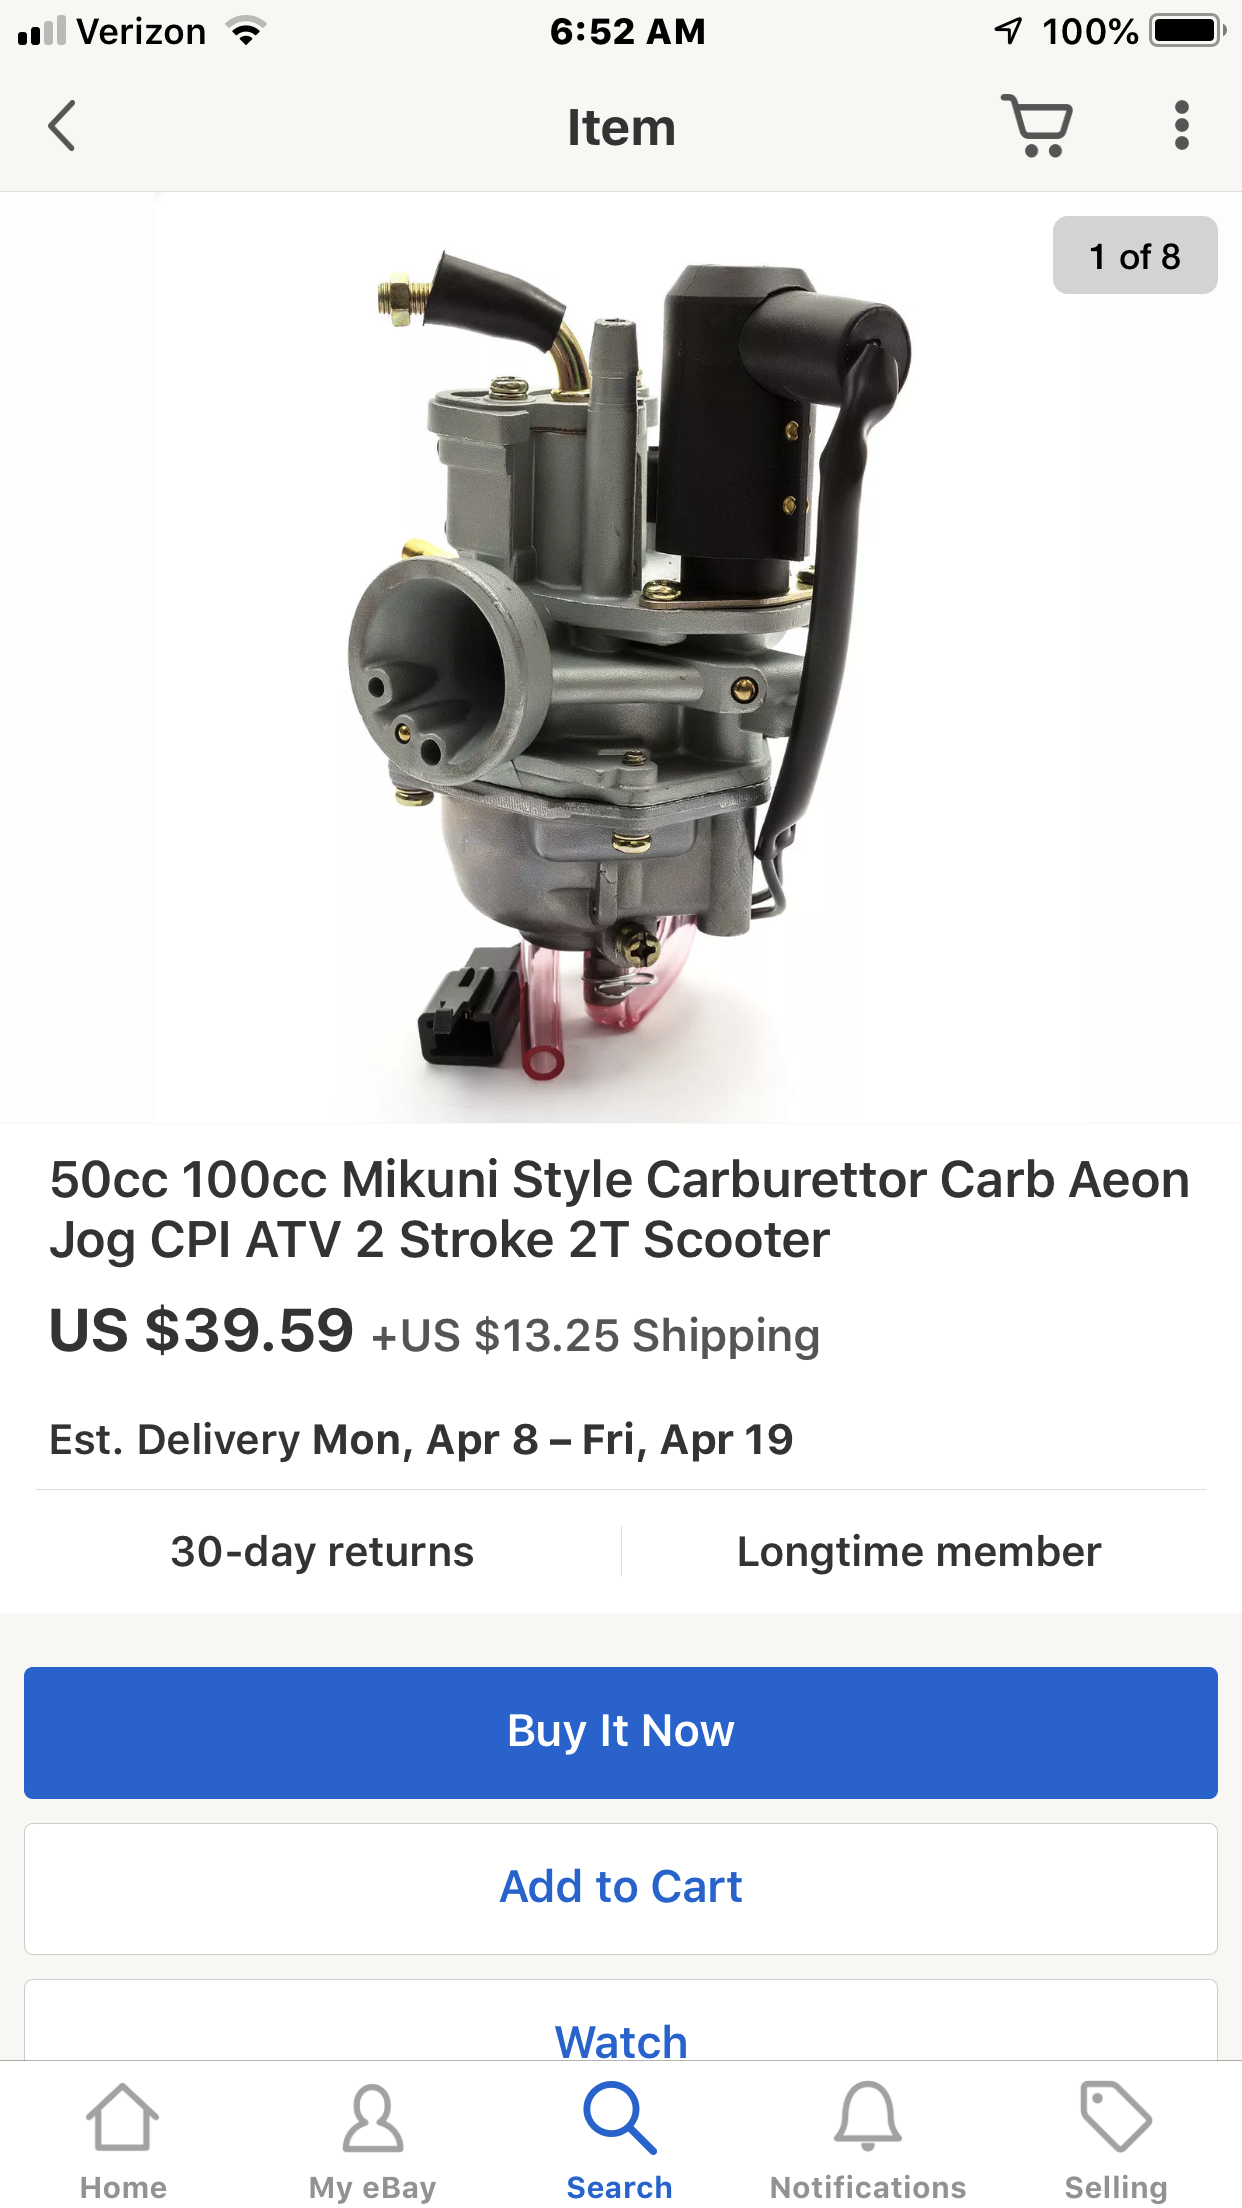
That is the right carb for the bike I also found the extra vent line. I was not sure what it was for since the old one on the bike didn’t have that line. So I bought it anyway and plugged that line. Just a small piece of hose with a screw in the end. The oil injection lobe was perfect and the everything else matched up. The only issue I had was it took me a long time to tune it and dial it in. But it worked. Here is one on e bay

-
In order to test the start button you have to unplug the clip at the handle bar. The two wires in the start button yellow and red stripe and black with the yellow stripe are the start button. Put a tester on those two wires and press the button. You should get a continuity reading.
-
i can explain it but this will show you exactly
-
The differential has to come off. There is a clip holding the axle. It’s a clip with two holes at the end. A payor of pointy needle nose can spread the clip apart. They have a tool for it also.
-
-
The white and the black/yellow stripe is auxiliary.
-
That’s great ! Take some pics for the reassemble process.
-
I would replace the carburetor. It’s a simple carb and cheap enough. eBay has them posted for about $40 bucks.
-
Bayou 220 no power at ign. switch or coil, lights etc
Frank Angerano replied to Arizona's topic in Kawasaki ATV Forum
Those two wires don’t go anywhere. On my bike they were neatly tied up onto the harness. I’m assuming an auxiliary connection. If you look at the black with yellow stripe you will see there is one of the same going to the ground terminal on the battery. The white when I tested it gets 12v when the key is on. -
Yep no choice. You keep trying that drain plug and it will crack so you have to do what you have to do.