
Frank Angerano
-
Posts
3,925 -
Joined
-
Last visited
-
Days Won
209
Content Type
Profiles
Forum
Gallery
ATV Magazine
Events Calendar
Downloads
Store
Community Map
Everything posted by Frank Angerano
-

2000 Yamaha 400 Big Bear, dies off idle
Frank Angerano replied to MarkinAR's topic in Yamaha ATV Forum
That’s some good stuff brother. Its also possible your losing a drop of vacuum where the main needle goes through the diaphragm slide so double check that the needle is seated properly and there is no openings at that point. -
Thanks brother I have the manual already and I think I’m good. It’s going to be a fun bike for my oldest guy he’s 15 to he can play around with it. He as the 4x4 you obviously know so it’s going to be a bit different to say the least for him. But it’s not hanging around long. I want to sell it after he gets his kicks in.
-
Polaris 500 sportsman give it gas stalls
Frank Angerano replied to Flipper Tiffany Roper Jones's topic in Polaris ATV Forum
Me too! -
Polaris 500 sportsman give it gas stalls
Frank Angerano replied to Flipper Tiffany Roper Jones's topic in Polaris ATV Forum
Ok brother. Good luck I’m really hoping this works out, you have a lot of time invested with this machine. -
Polaris 500 sportsman give it gas stalls
Frank Angerano replied to Flipper Tiffany Roper Jones's topic in Polaris ATV Forum
Yep I think you dodged a bullet. So now what ? Have you located a new cap and what’s your thoughts on the cam assembly? Maybe a whole new set up, cam and all? -
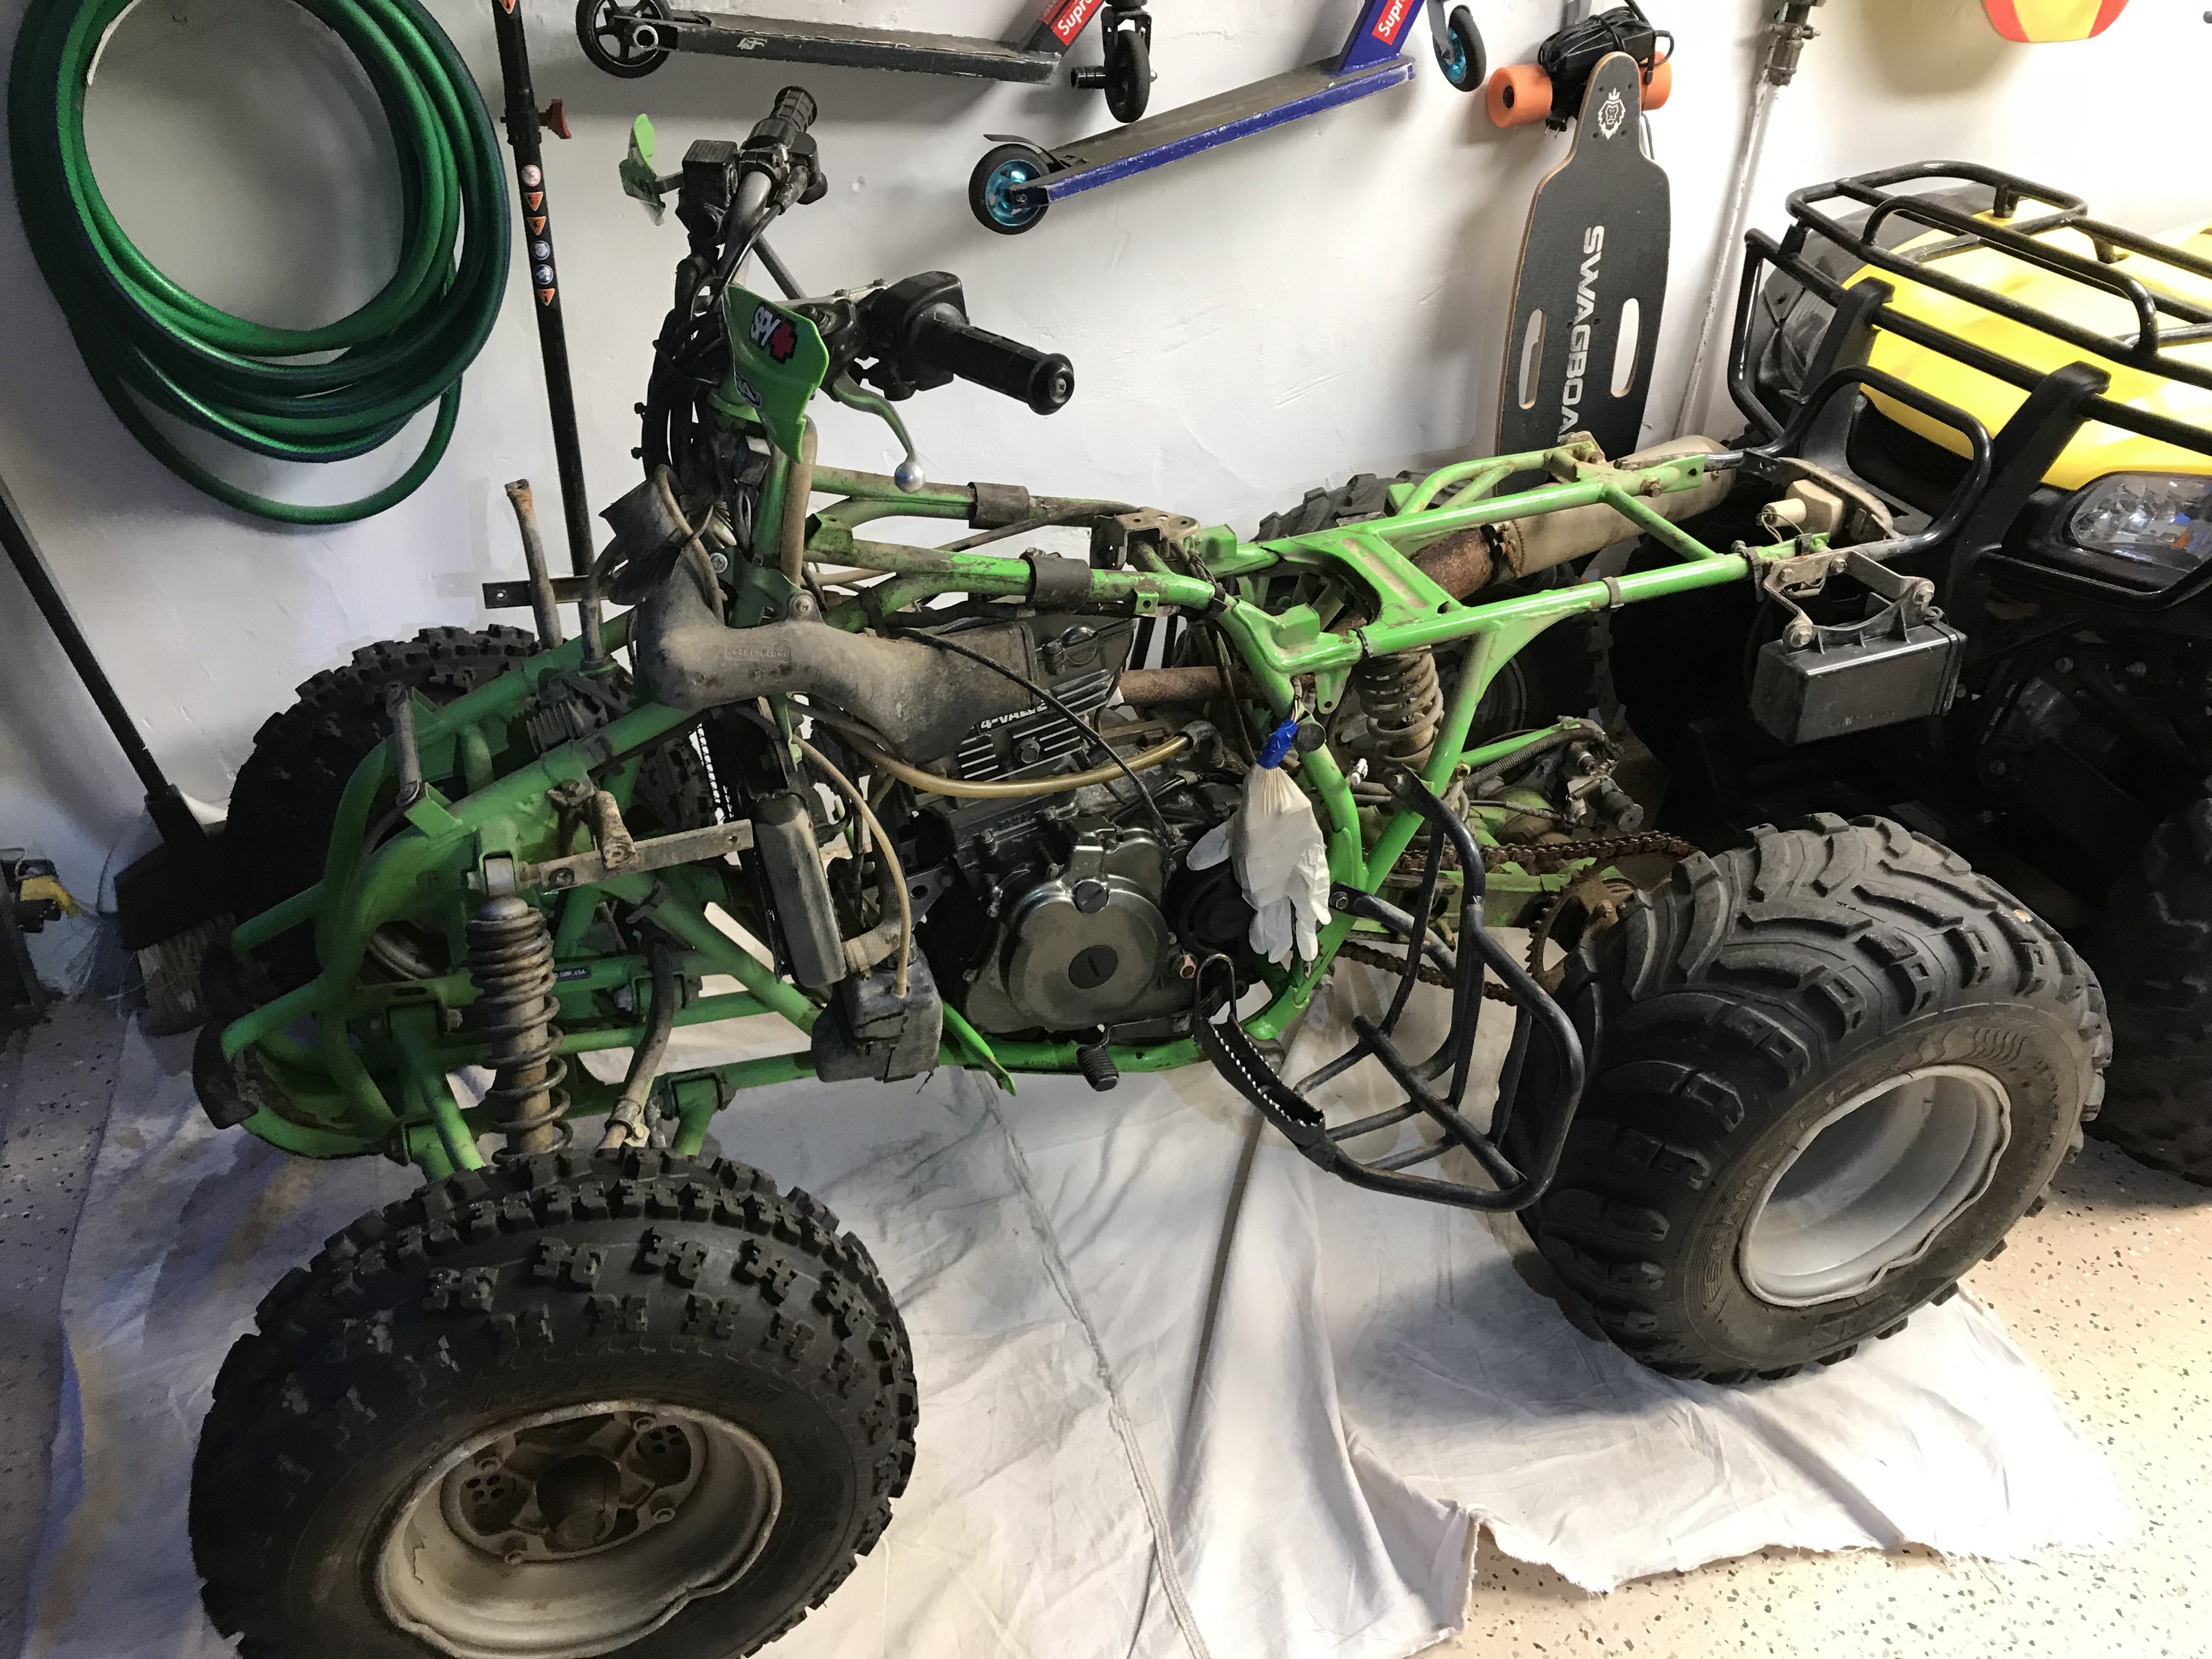
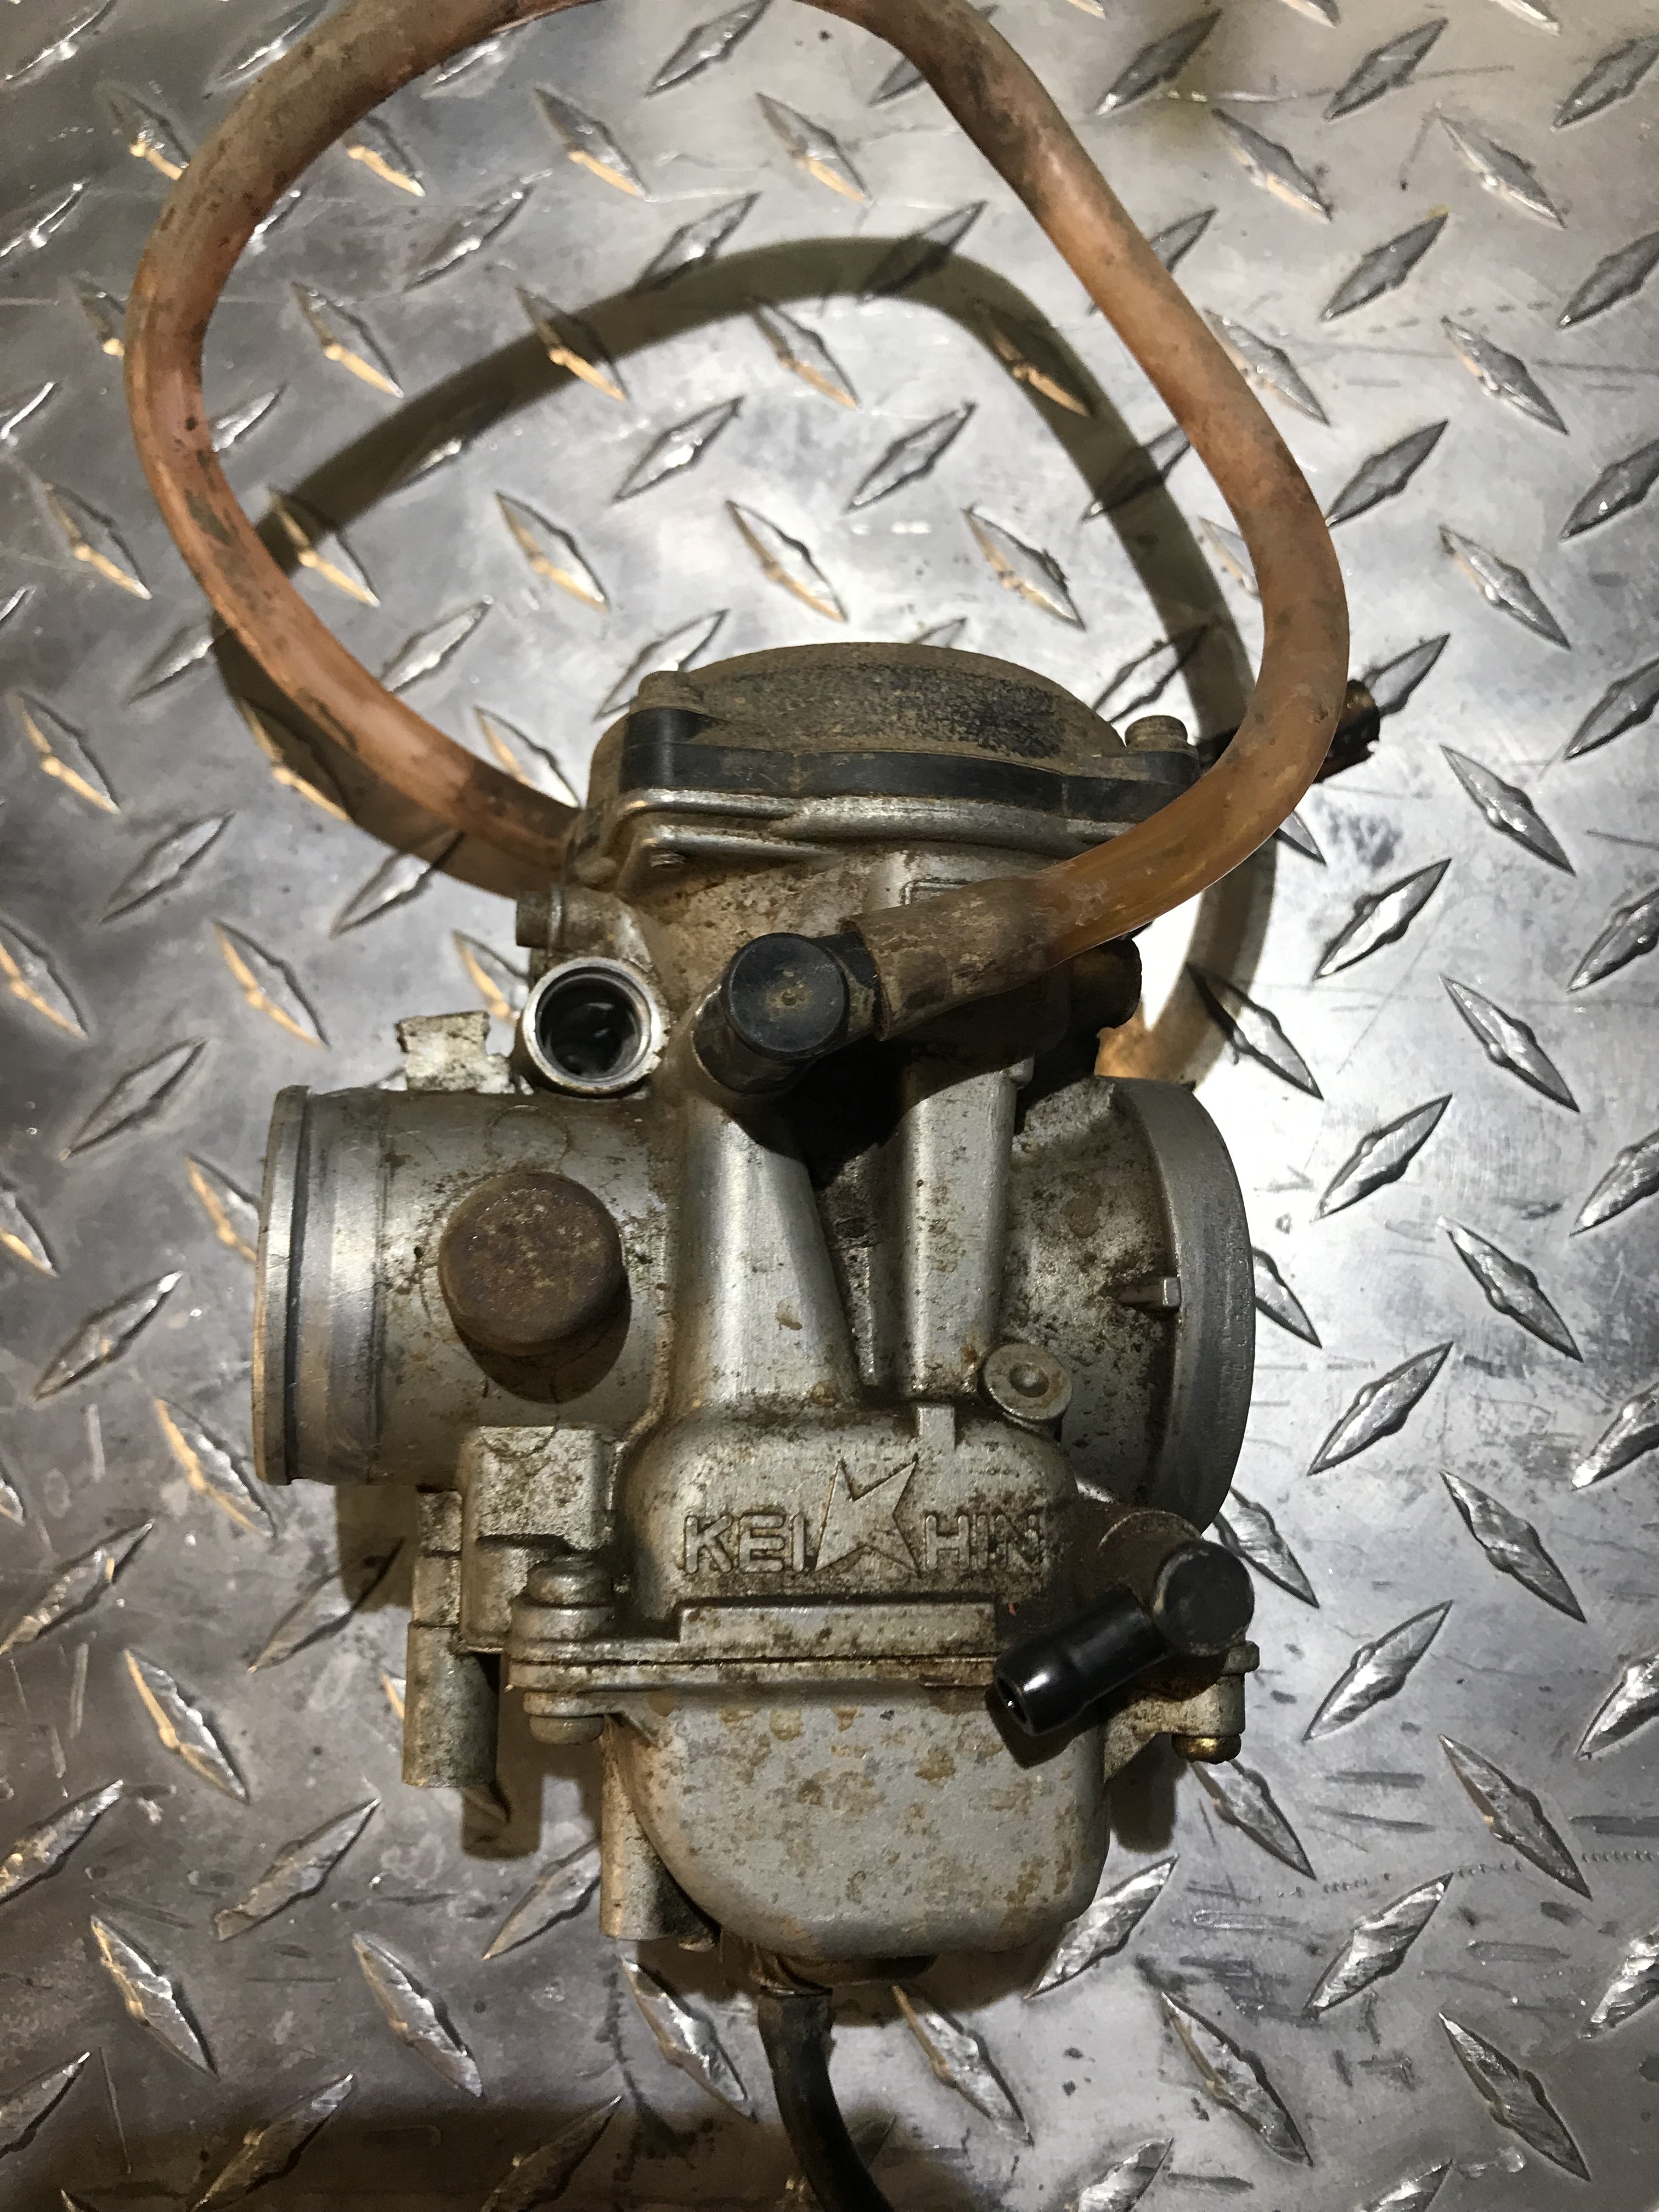
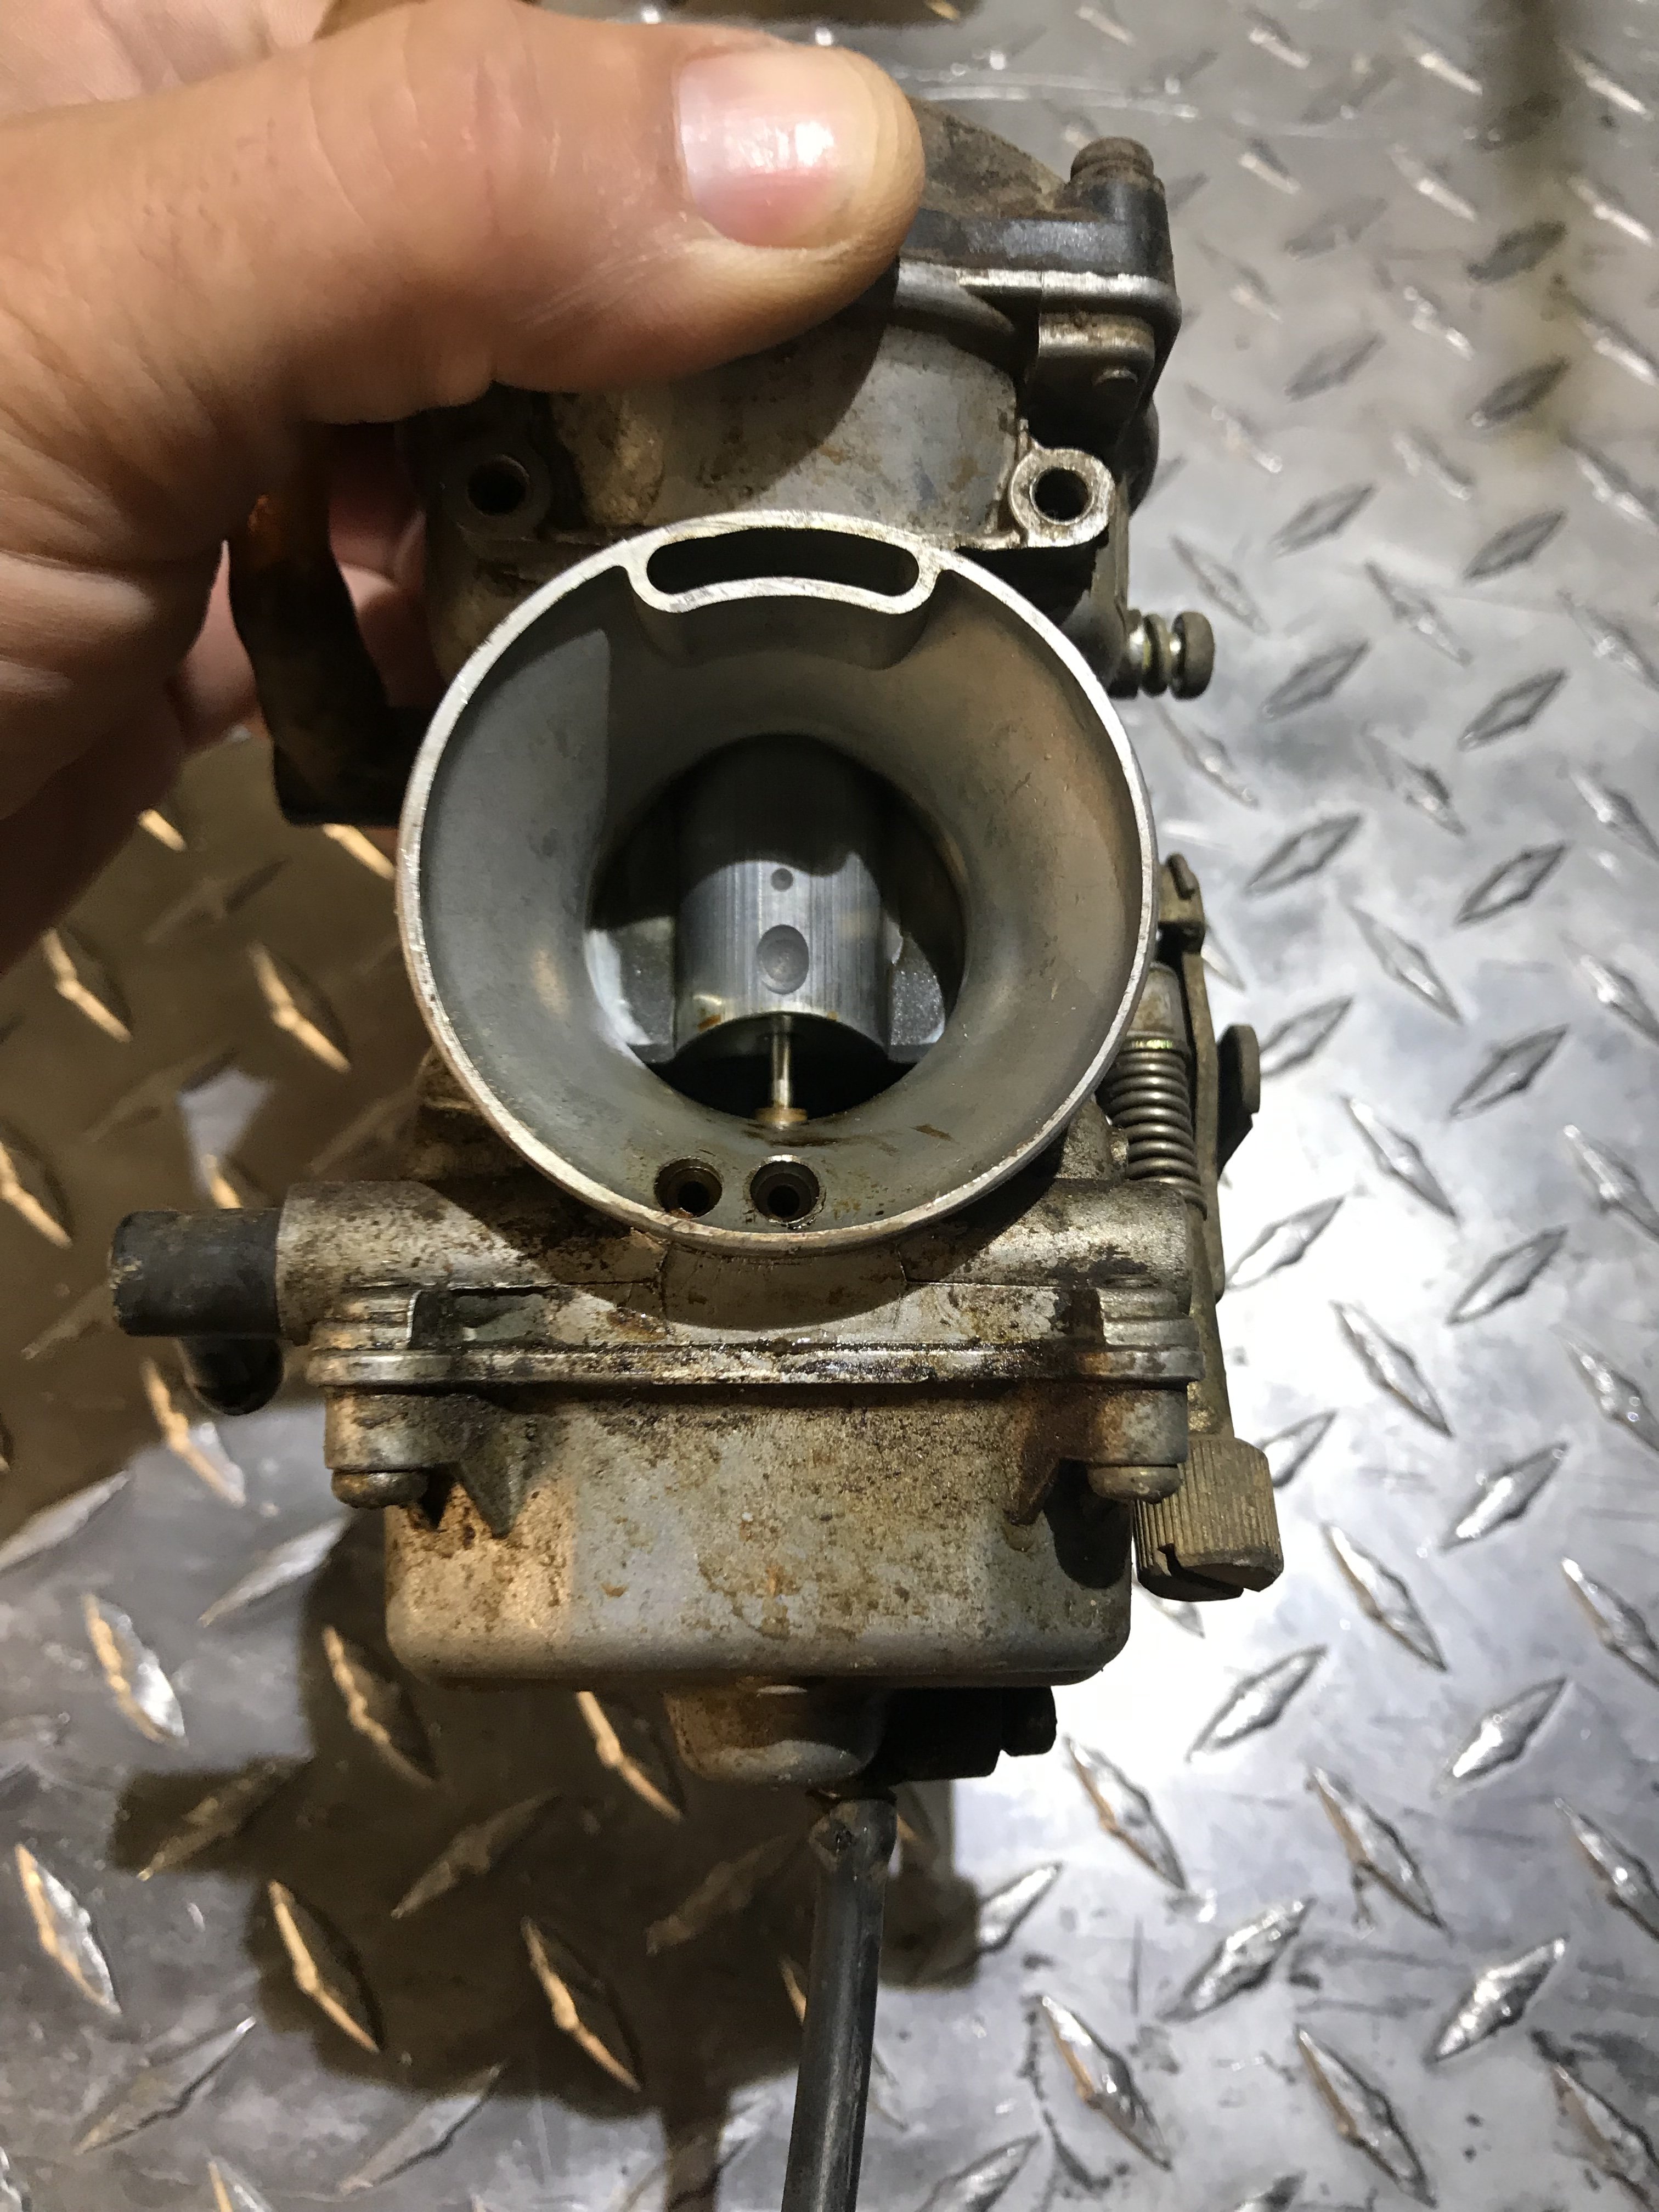
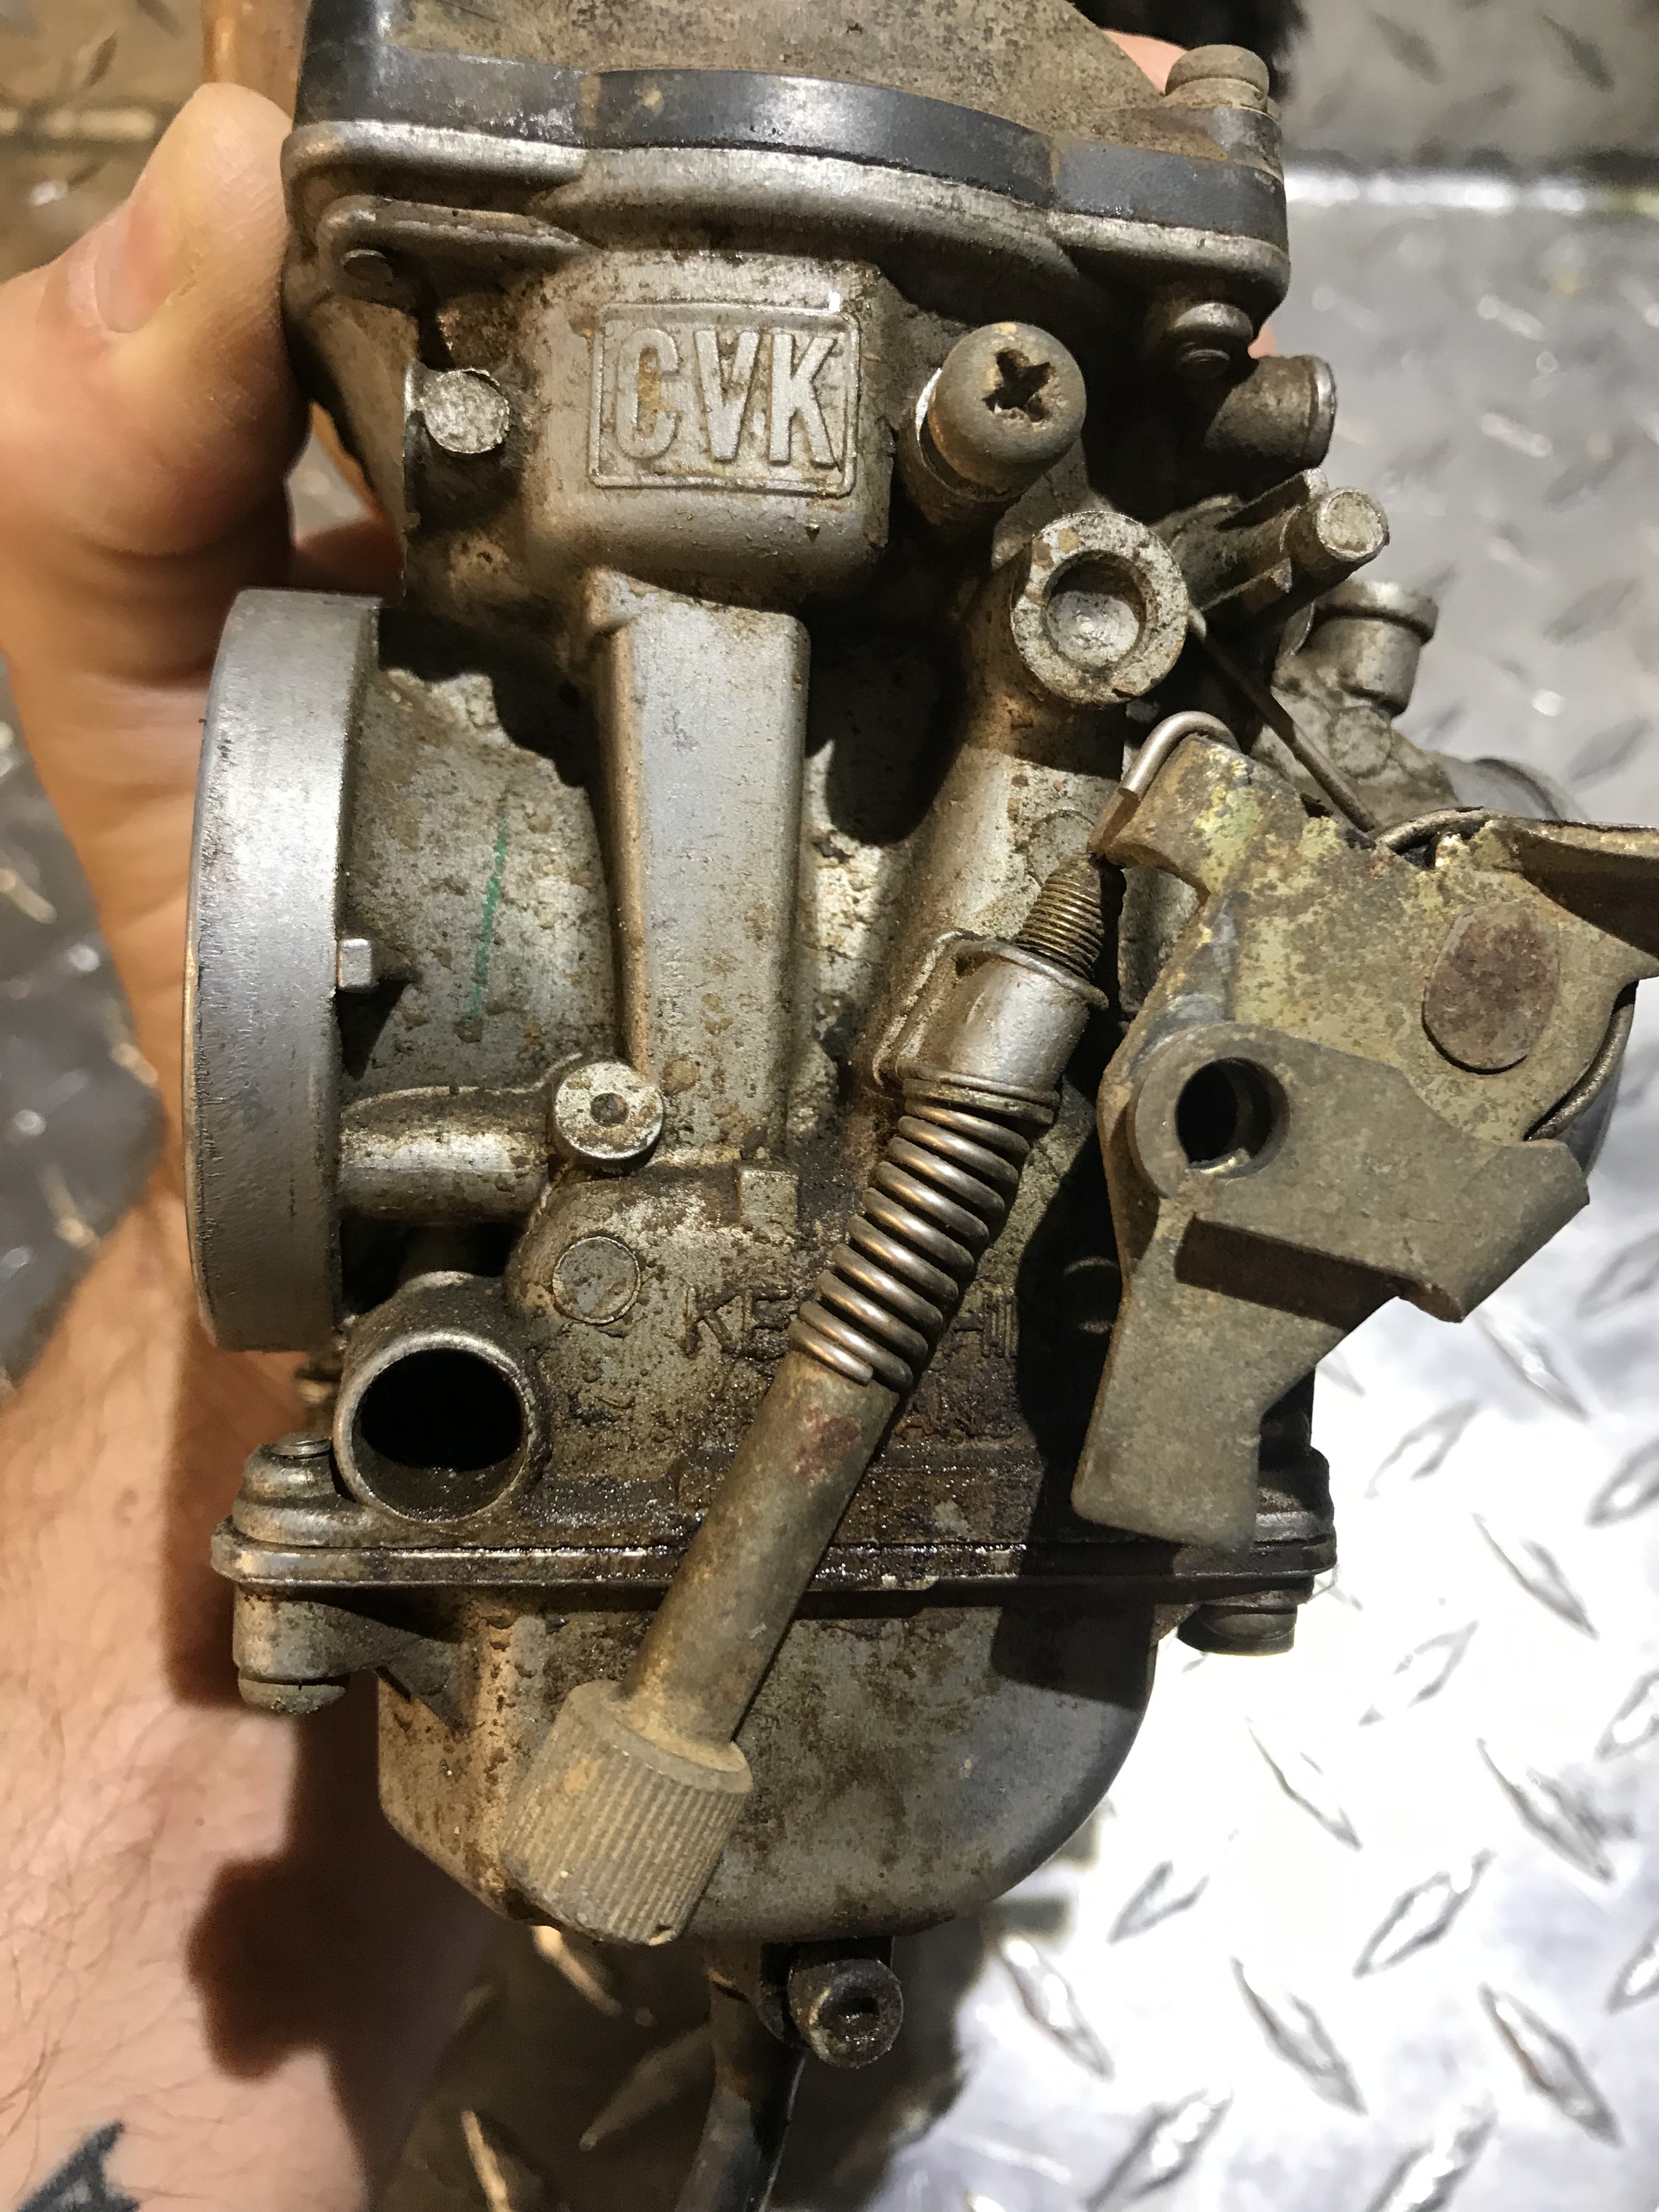
So here’s some updates. After a few months I finally got around to getting this thing into my garage. I was in the middle of giving my garage a little makeover and needed some time to make some room, clean up and throw some old sh** away. The bike is in great shape just super dirty and in need of a what I like to equate it as a colonoscopy! Lol. New parts are ordered and on the way. Clutch, chain, plugs, paint and a new bulb for the headlight. I found that the carburetor has 100% been opened up and tampered with. I can’t read the jetting so I’m assuming they are the oem stock jets 🙏🏻 However the air fuel mixture screw was set at 2-3/4 turns out. The specifications call for 1-3/4 so I guess we will have to see after it’s all back together. I’m going to set it at the spec and go from there. The machine has an aftermarket exhaust and I think that’s it for upgrades. I’m not opening the head up to see the cams or anything else because it seems to be in time as far as I can see and compression is good with a smooth turnover and the head bolts as well as all other engine bolts and nuts don’t appear to have any wrenching marks on them so I’m guessing it’s all stock. More to come soon!

-
Polaris 500 sportsman give it gas stalls
Frank Angerano replied to Flipper Tiffany Roper Jones's topic in Polaris ATV Forum
Wow and it’s the same shape as the decompression lobe too. Something was not put back right would be my guess because even with the spring off or bad that part should still stay seated. Whats your thoughts ? -
Polaris 500 sportsman give it gas stalls
Frank Angerano replied to Flipper Tiffany Roper Jones's topic in Polaris ATV Forum
Holy crap ! What do you mean it busted through the case ? -
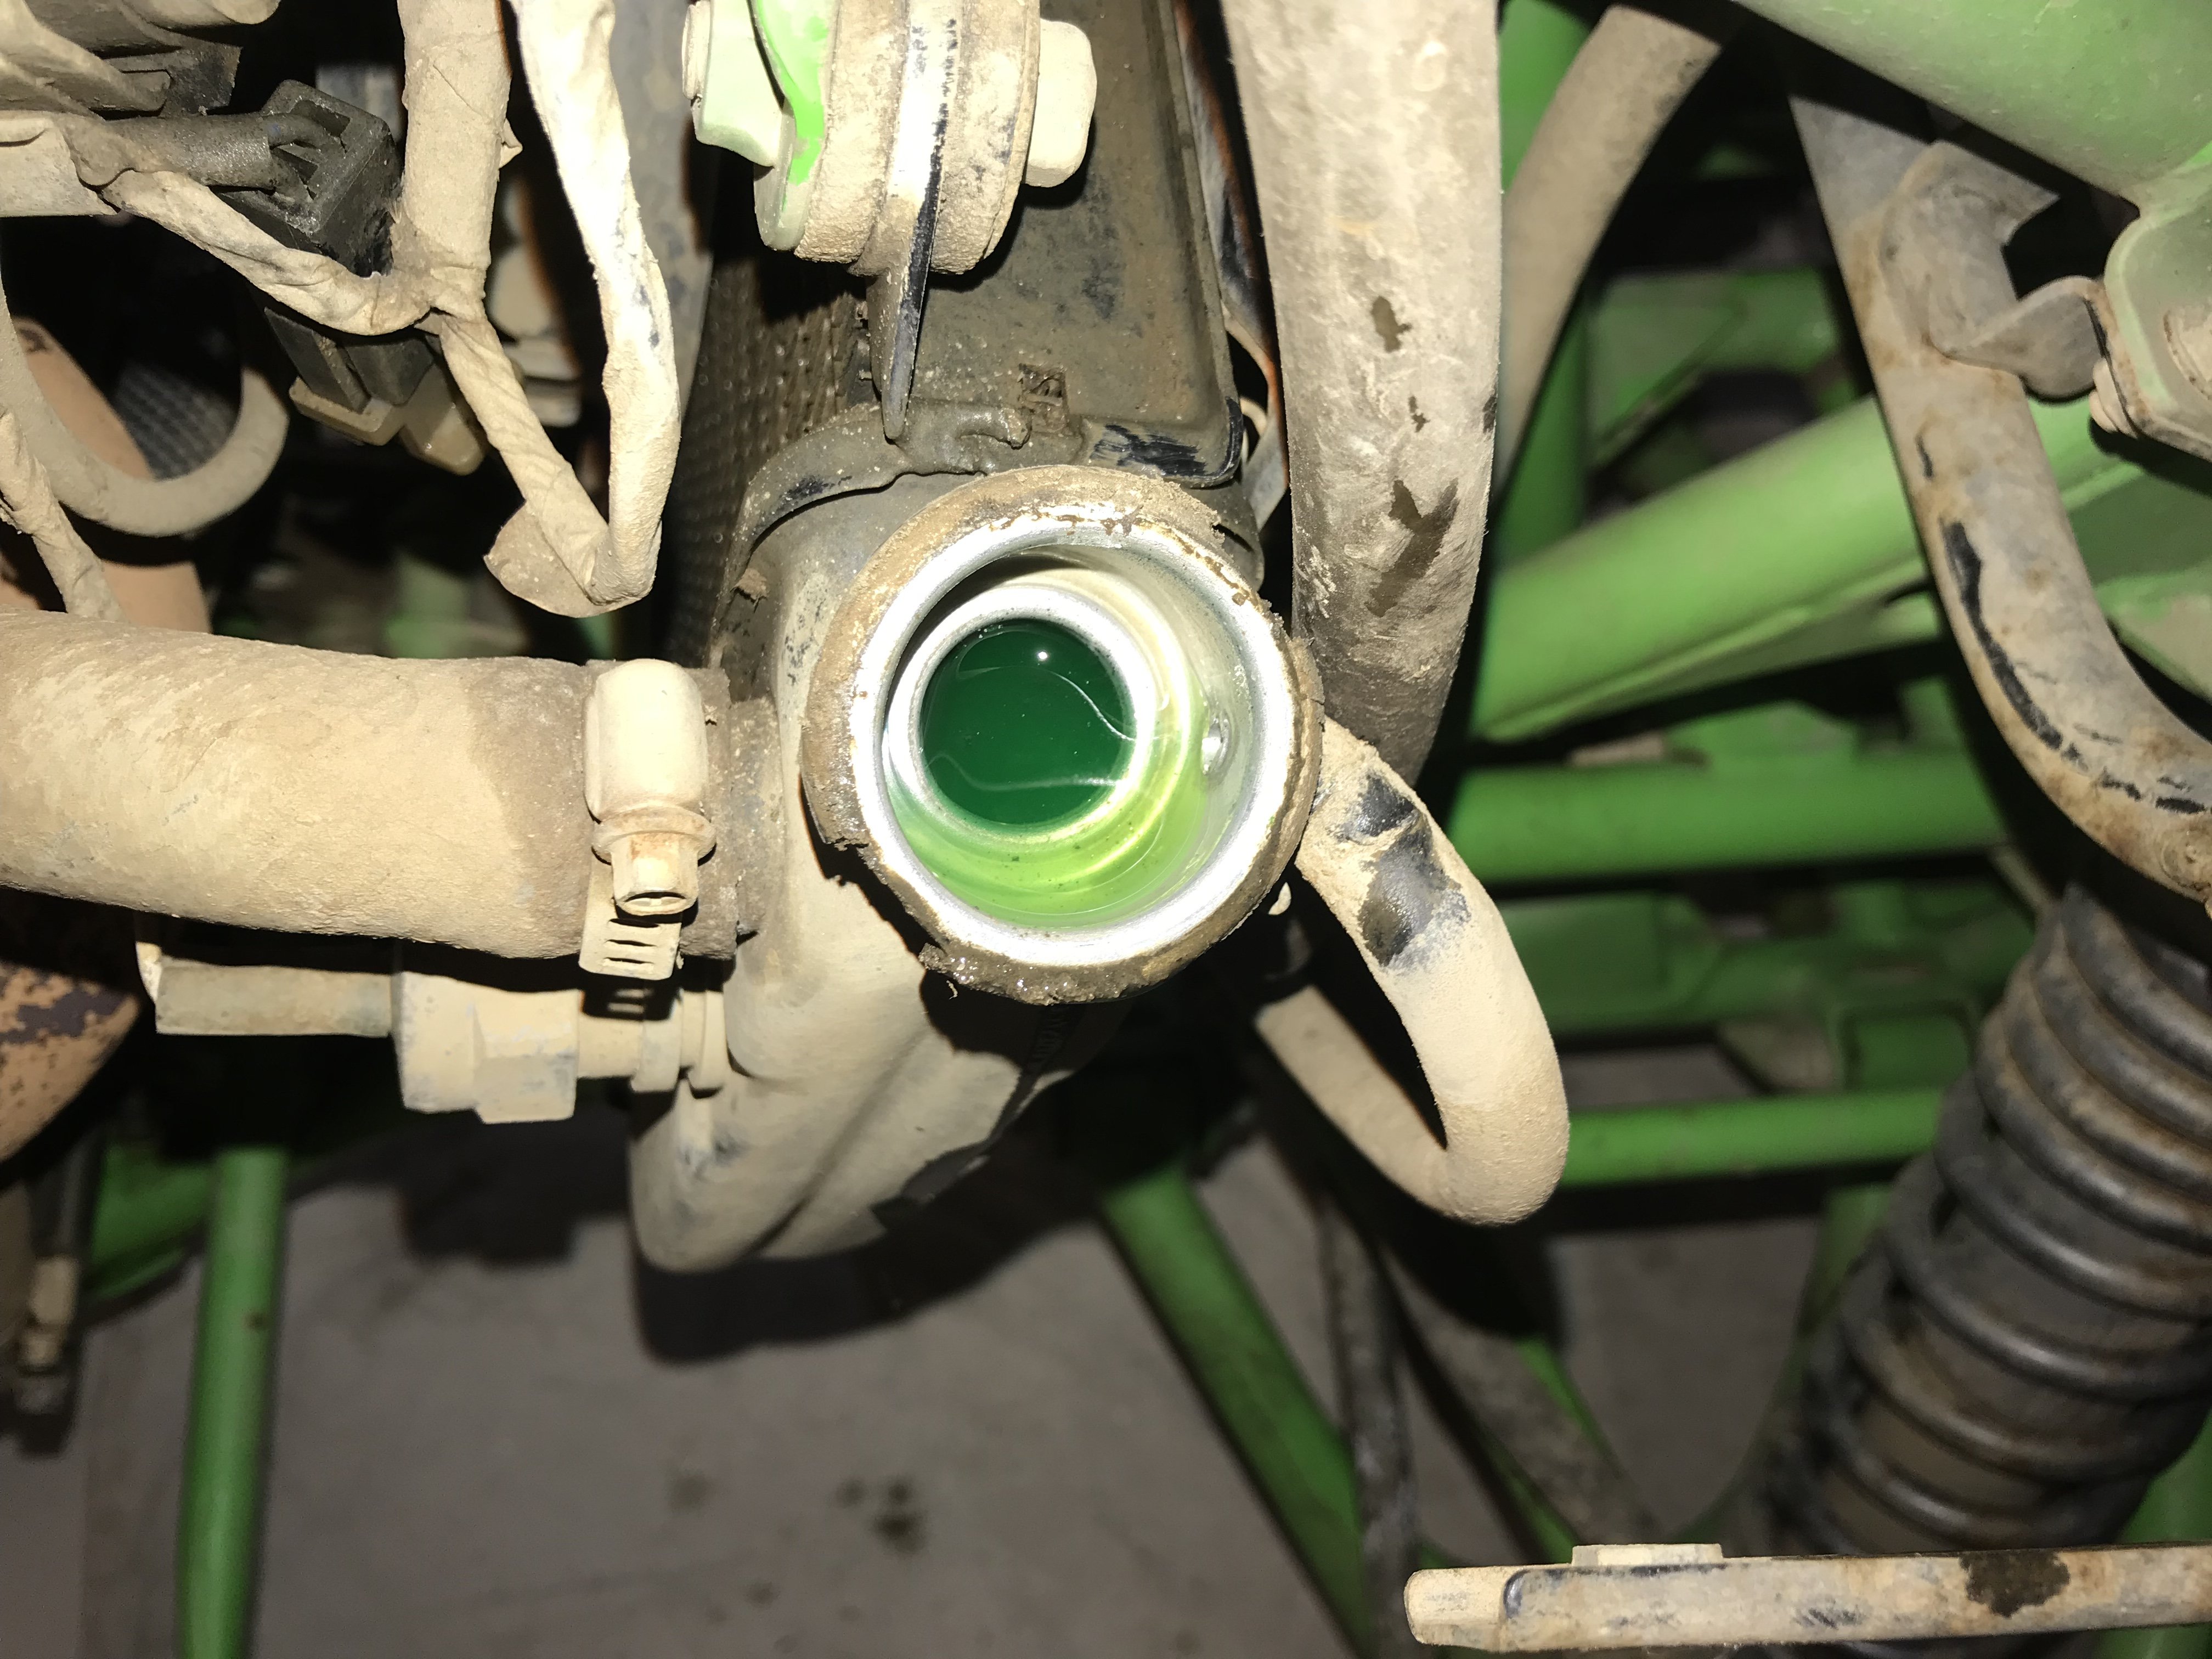
They have bikes already so we will see. My son want to ride a quad with a clutch for a change so maybe he can have some fun for a little while. It’s all torn down already. Antifreeze looks to be a good healthy green. I opened the bowl on the carb to see what’s going on, looks good but def a little varnish in there and stinks to high heaven of some nasty old fuel. Mu gut tells me pull the engine and properly clean and paint and put it back together but I’m going to sleep on that decision for now. It’s just more dirty then anything, I mean filthy!!! Plastics are in perfect condition aside form the stickers all over it. Tomorrow the carb will get an overhaul and the rest of the bike will get a hot steam pressure wash and maybe that will make my mind up on pulling motor or not. I ordered the paint today for touch up and a new chain and a clutch. I don’t want to get into it to far so we will see. Keep the forum posted but I will start a new topic for that later.
-
2000 Yamaha 400 Big Bear, dies off idle
Frank Angerano replied to MarkinAR's topic in Yamaha ATV Forum
Don’t let it get to you. It could be an internal failure on the carb that you can’t clear. It’s almost impossible to see everything. Is it a CV carburetor? If so have you checked the diaphragm for any leaks? It could be a vacuum blockage inside the carb and not a fuel delivery. The vacuum blockage can be restricting the main needle from coming up ? That vacuum chamber I’m sure you know runs up through the top of the carburetor. It’s worth a look -
2000 Yamaha 400 Big Bear, dies off idle
Frank Angerano replied to MarkinAR's topic in Yamaha ATV Forum
Have you checked the top of the air fuel screw to make sure it’s not damaged ? Try something stupid and run the bike, have a can of starting fluid handy and ready to go. Hit the throttle until the 10% and starts to die off and spray some starting fluid in and see if it revs higher. If so then it’s clearly a fuel delivery issue in the carb. If not then there could be an issue with the flywheel or pick up coil once the engine rpms come up?? Long shot but maybe your looking in the wrong spot ? -
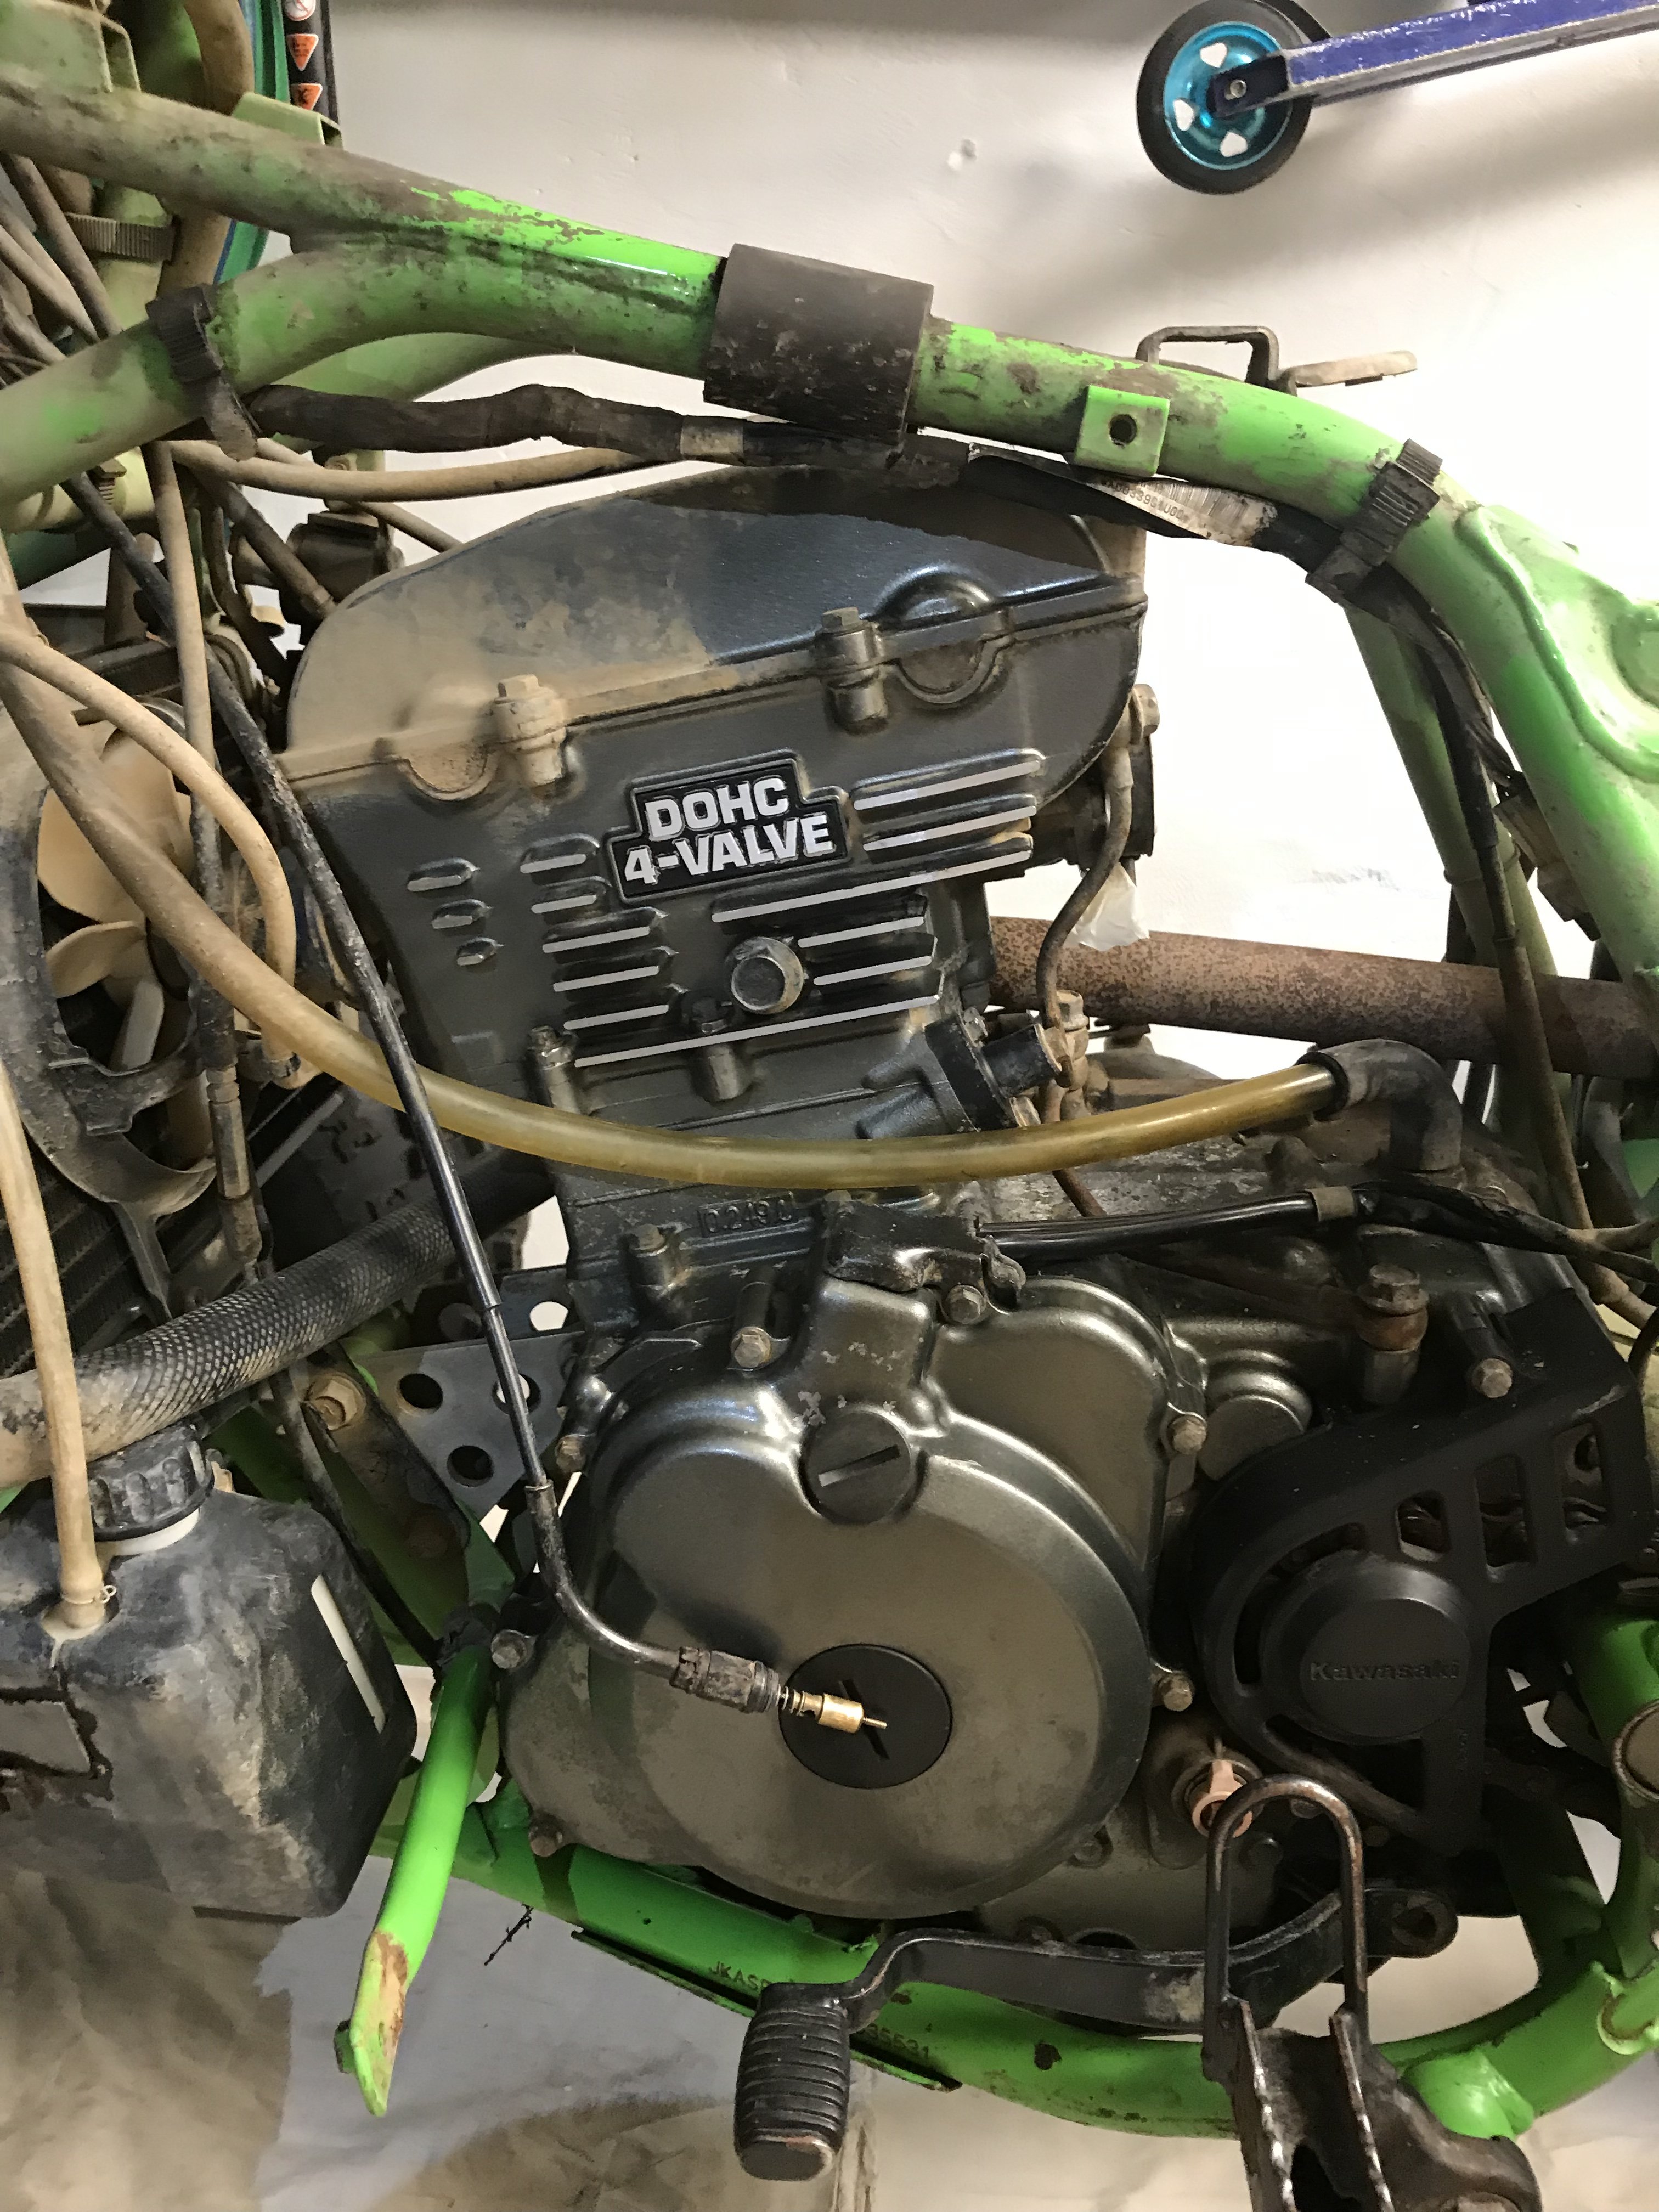
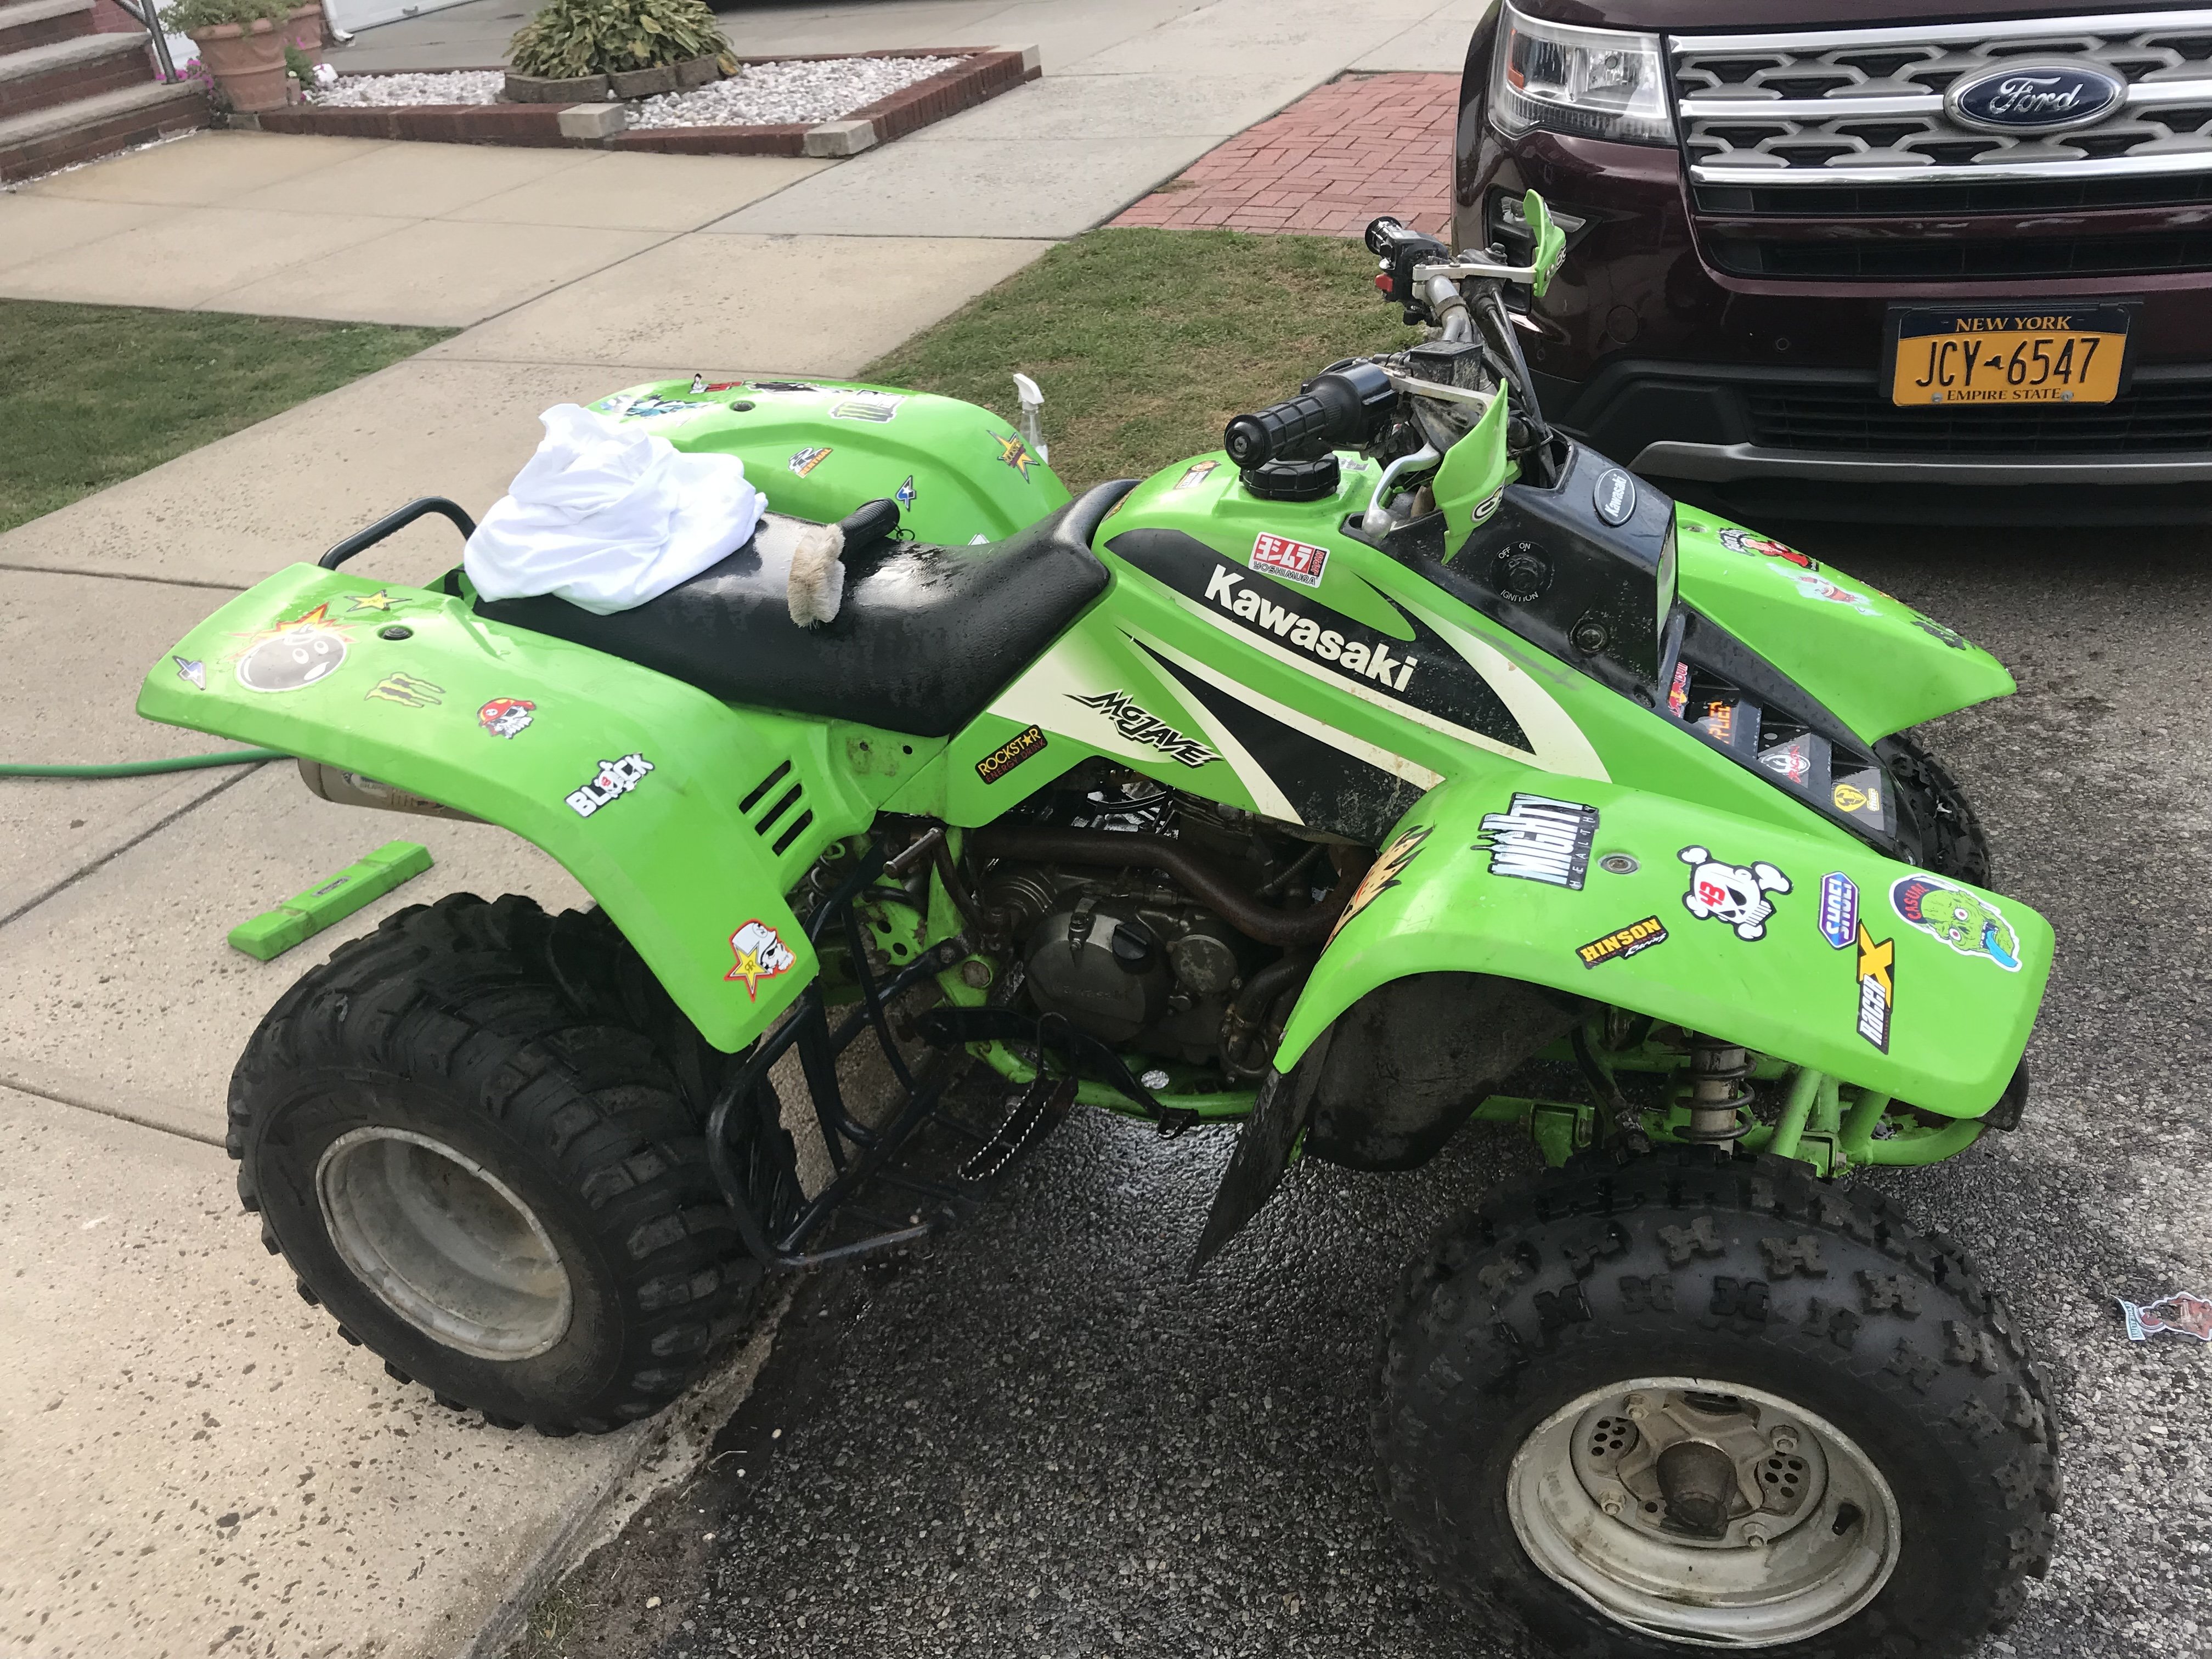
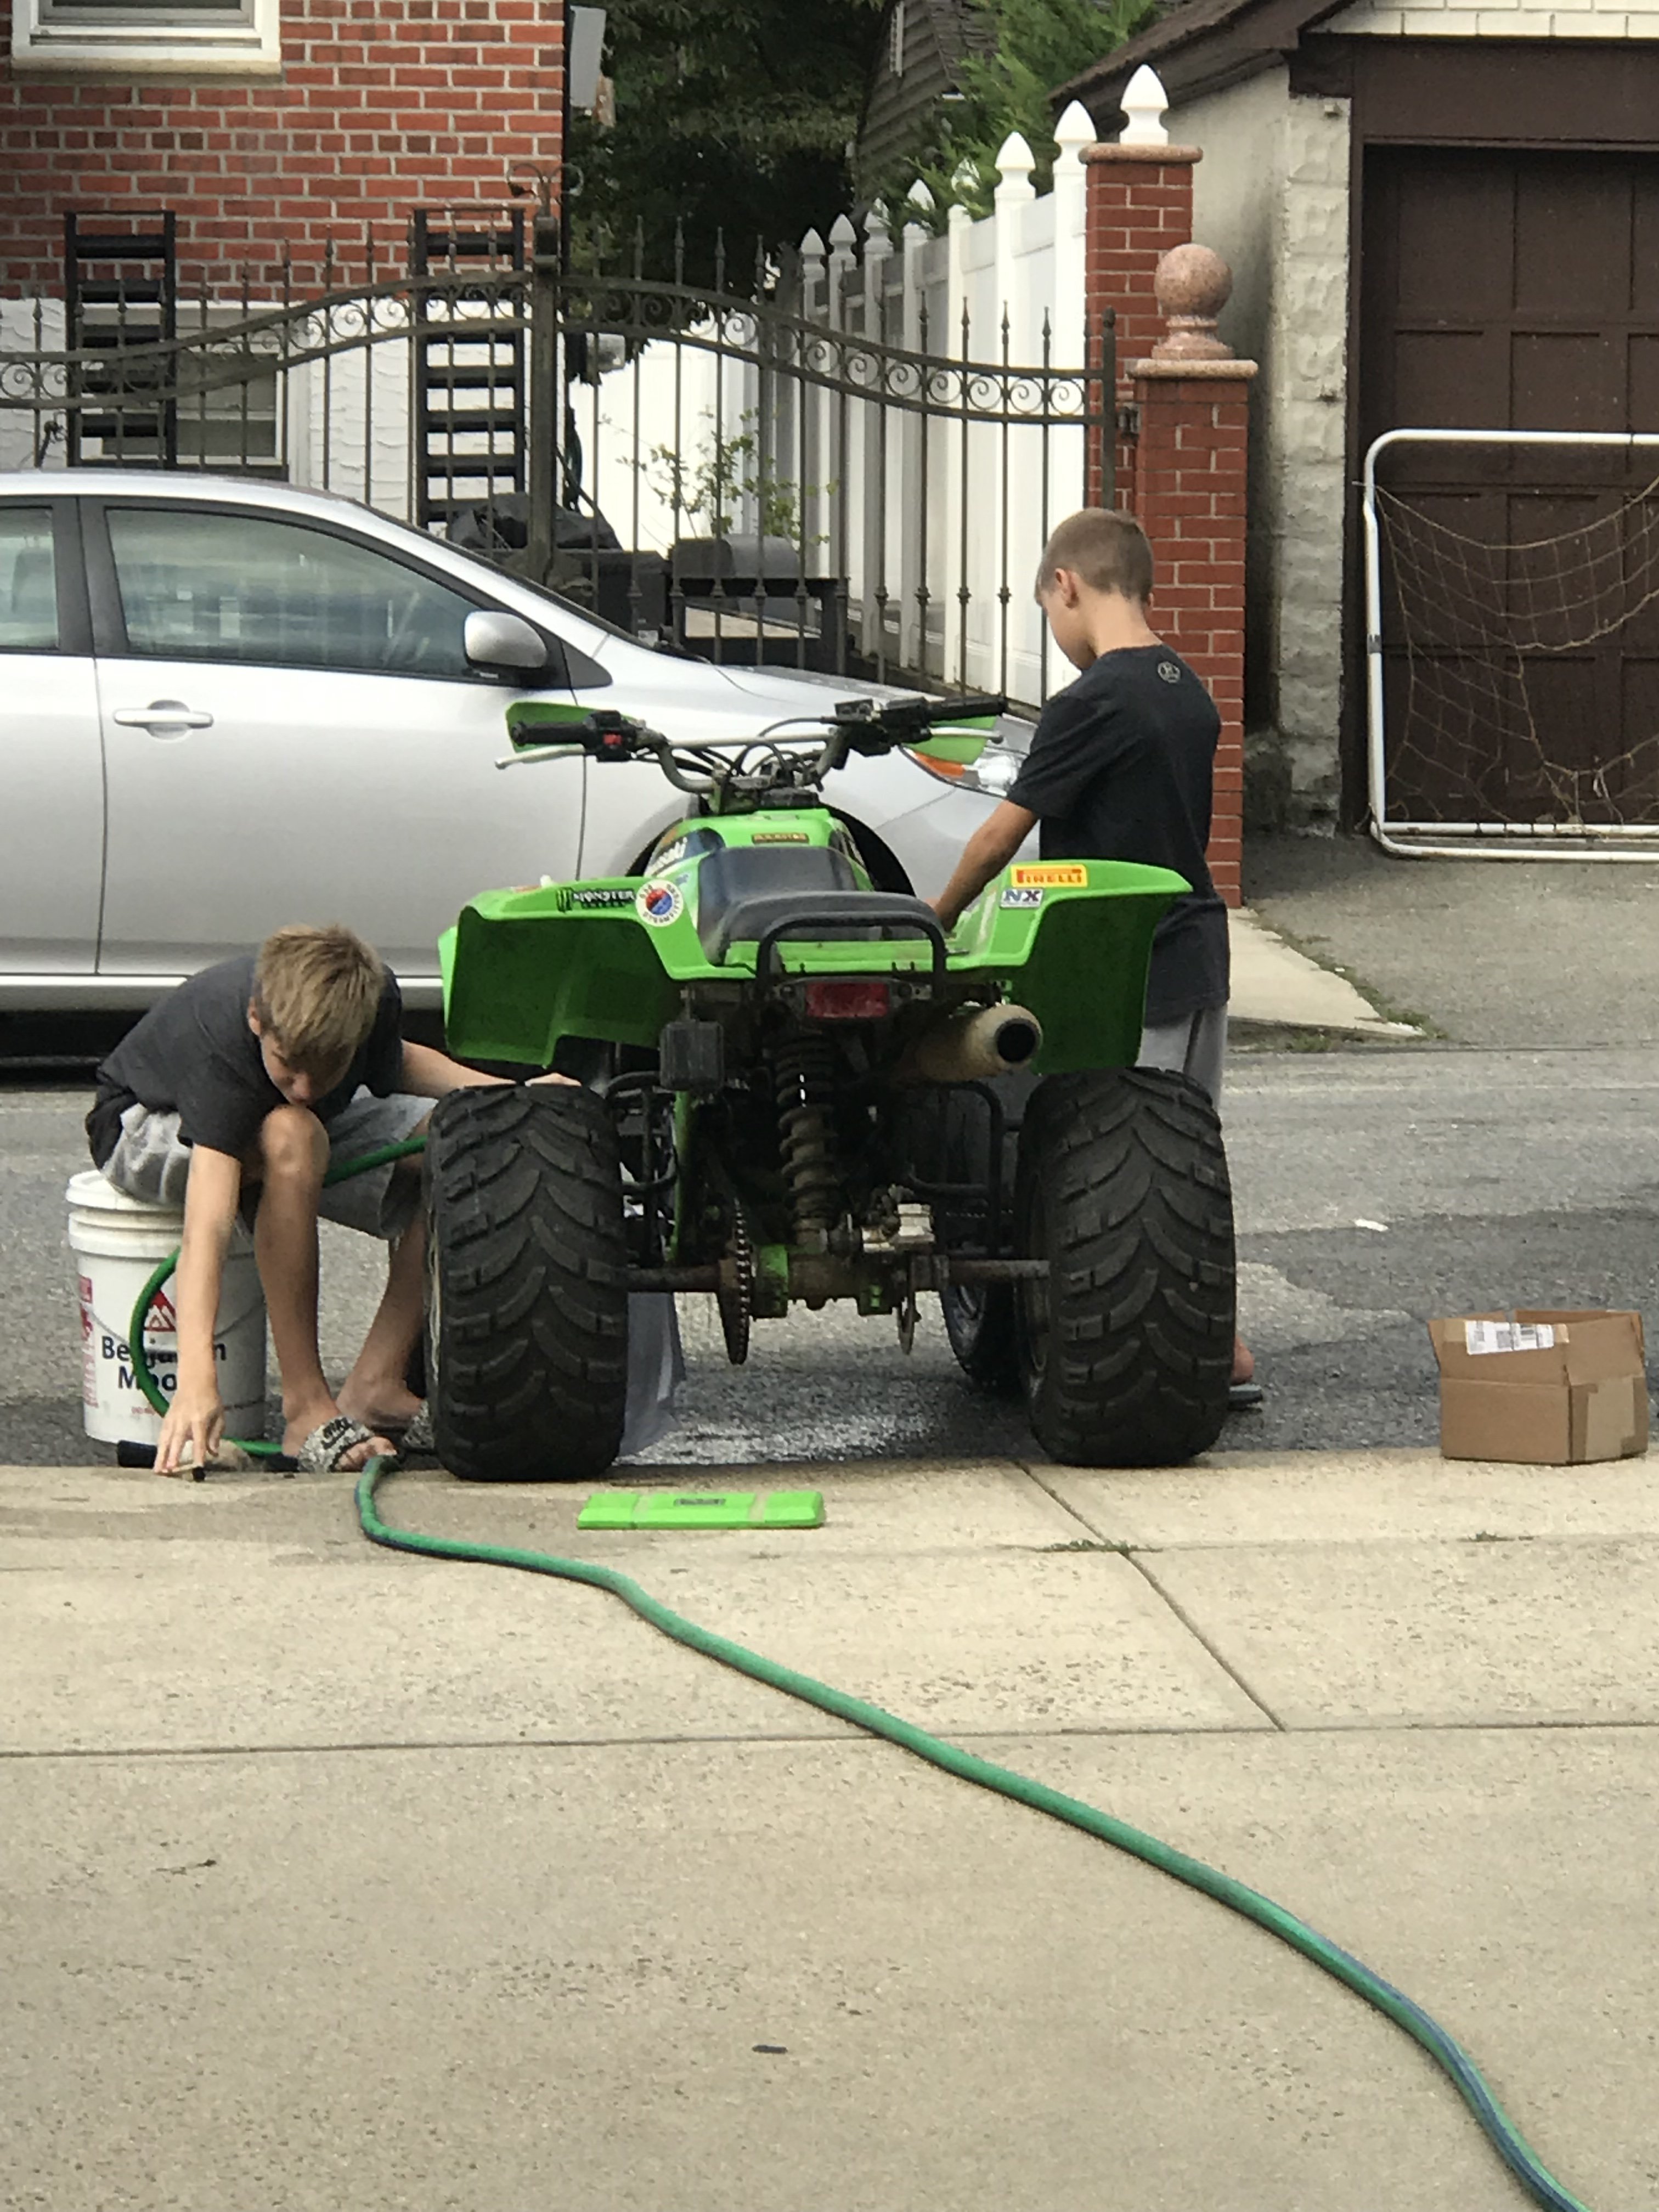
Always fighting the ⏰ never enough time! Story of my life, I finally got around to the Mojave I picked up almost a year ago. I have my two boys washing it down and getting it ready for a tear down. Looks completely in tact, the original tool kit and paperwork was in the rear compartment! Hoping this thing only needs a carburetor cleaning and some fresh fuel and spark plug. Pulling all the stickers that are on it except for the factory ones since they are in great shape. In a few weeks she will be like new, just not sure what the heck I’m going to do with it.
-
'03 Bayou 300 Running rich, choke, air/fuel screw question
Frank Angerano replied to w_r_e's topic in Kawasaki ATV Forum
Ok that sounds like a good first approach to this. I would order a new cable anyway just for sh*** and giggles since it sounds like the cable is a twisted mess. Meantime double check the manual and see where the fuel mixture screw calls to be set at this way your ready go if you need to touch it. -
'03 Bayou 300 Running rich, choke, air/fuel screw question
Frank Angerano replied to w_r_e's topic in Kawasaki ATV Forum
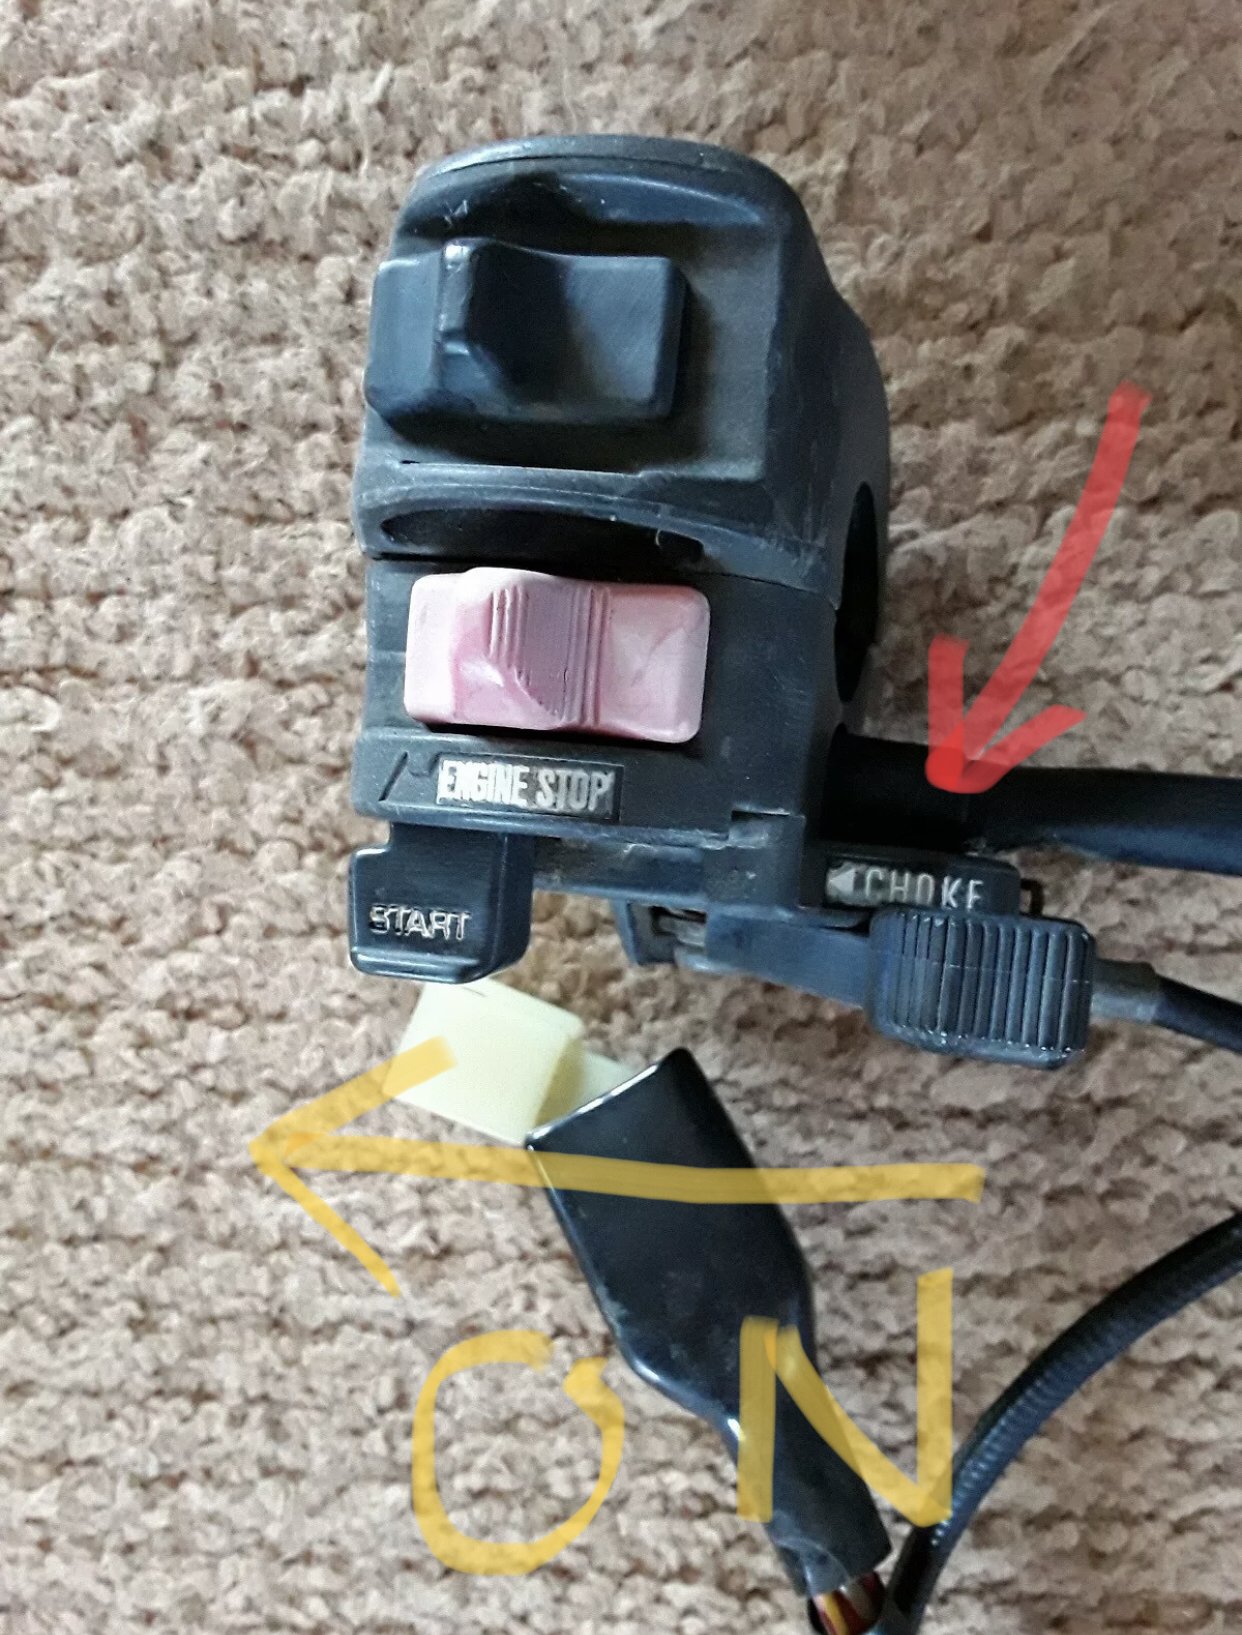
The choke position is as follows. When the choke is slid to the left when you sitting on the bike is ON slide it to the right and it’s OFF. I’ve attached a pic for you. The reason for your running rich maybe a stuck choke assembly so don’t be so quick to start adjusting the air fuel mixture screw just yet. I would take the choke assembly apart and check that the brass plunger is working correctly. If you need some direction on doing that we would be glad to help you along the way. Meantime here are the parts and what they look like for reference. https://rover.ebay.com/rover/0/0/0?mpre=https%3A%2F%2Fwww.ebay.com%2Fulk%2Fitm%2F401831516021 https://rover.ebay.com/rover/0/0/0?mpre=https%3A%2F%2Fwww.ebay.com%2Fulk%2Fitm%2F273421674526
-
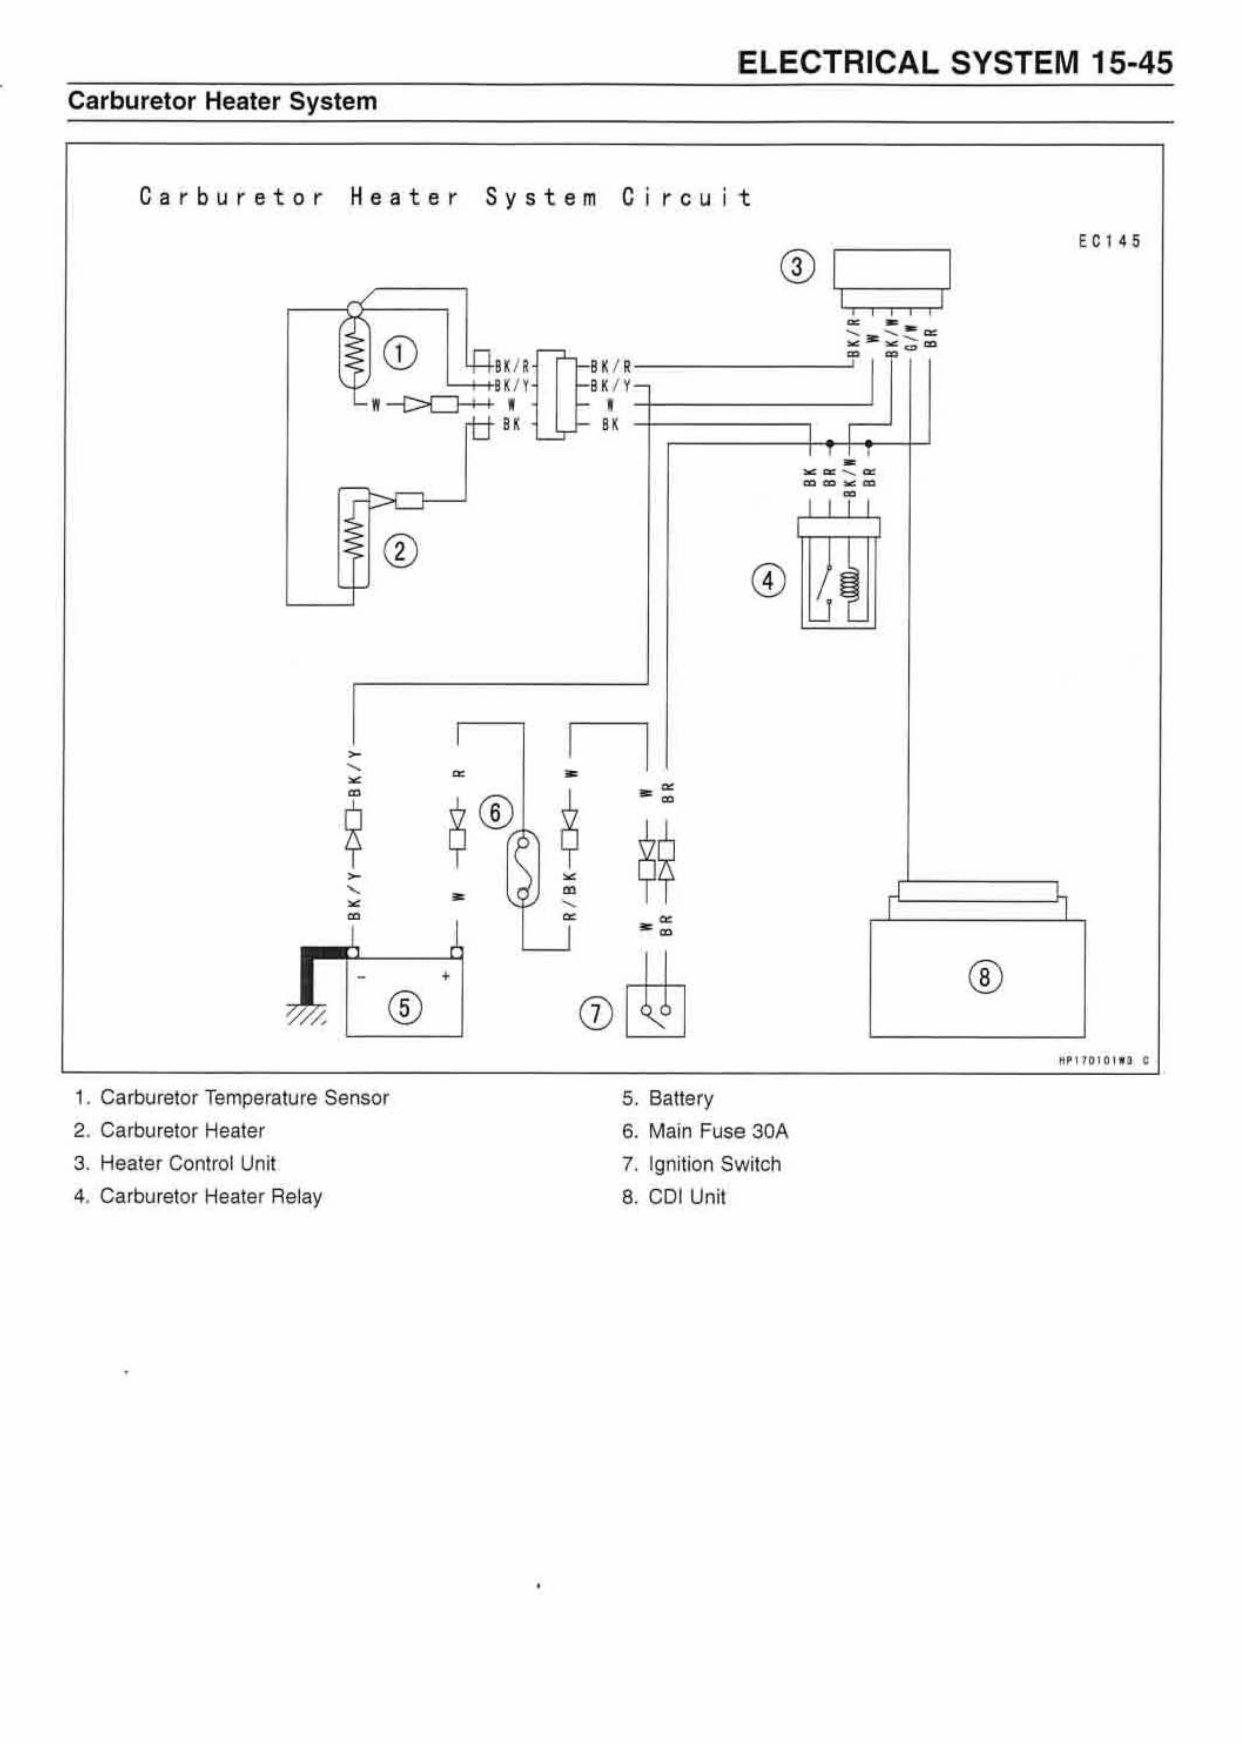
@Spartacus Stroppel awesome job with helping out on that manual . I took a look and the manual is exactly what your machine @Sonders shows on the carburetor wiring. So it works the way I explained and should have the control box that I mentioned. You should have no problem identifying what’s what now. Let us know how that carburetor goes .
-
New atv mechanic mom in training
Frank Angerano replied to Jade Dockery's topic in New Members Area!
Well fuel lines and hoses in general I keep a small roll of 3/8” and 1/4” on hand as well as a bunch of clamps. But I hear you on having a place close by for parts etc. -
2000 Yamaha 400 Big Bear, dies off idle
Frank Angerano replied to MarkinAR's topic in Yamaha ATV Forum
This should not be that difficult and you can blow the carburetor out with as much pressure as you want as long as the float and needle is out. You might have to clean the passages out with a piece of wire as well but it should clear up between the cleaning and the air pressure. Slap it all back together and set the air fuel mixture screw as we’ve discussed before a s see what you got. Throw in a new spark plug as well. -
Polaris 500 sportsman give it gas stalls
Frank Angerano replied to Flipper Tiffany Roper Jones's topic in Polaris ATV Forum
Lol no need to thank us! That’s what we’re here for !! Wiring is one of my strong points so any clarification you need feel free to ask. Nice work so far and keeping your cool, this thread may beat the one me and @JacobSlabach had on his bayou 400. That was a long one I’m going to have to go back and look! Keep us posted. FYI you can have Quadcrazy on your smartphone. -
2002 arctic cat 500 auto won't go forward or reverse
Frank Angerano replied to sprad22's topic in Arctic Cat ATV Forum
Hey @Jasmine May Cox welcome to Quadcrazy. What make, year and model is then machine ? I would start a new topic in the forum section so it’s easier to stay on your topic. Sounds like a belt issue to me though. -
It’s most likely the starter clutch/bendix.
-
Polaris 500 sportsman give it gas stalls
Frank Angerano replied to Flipper Tiffany Roper Jones's topic in Polaris ATV Forum
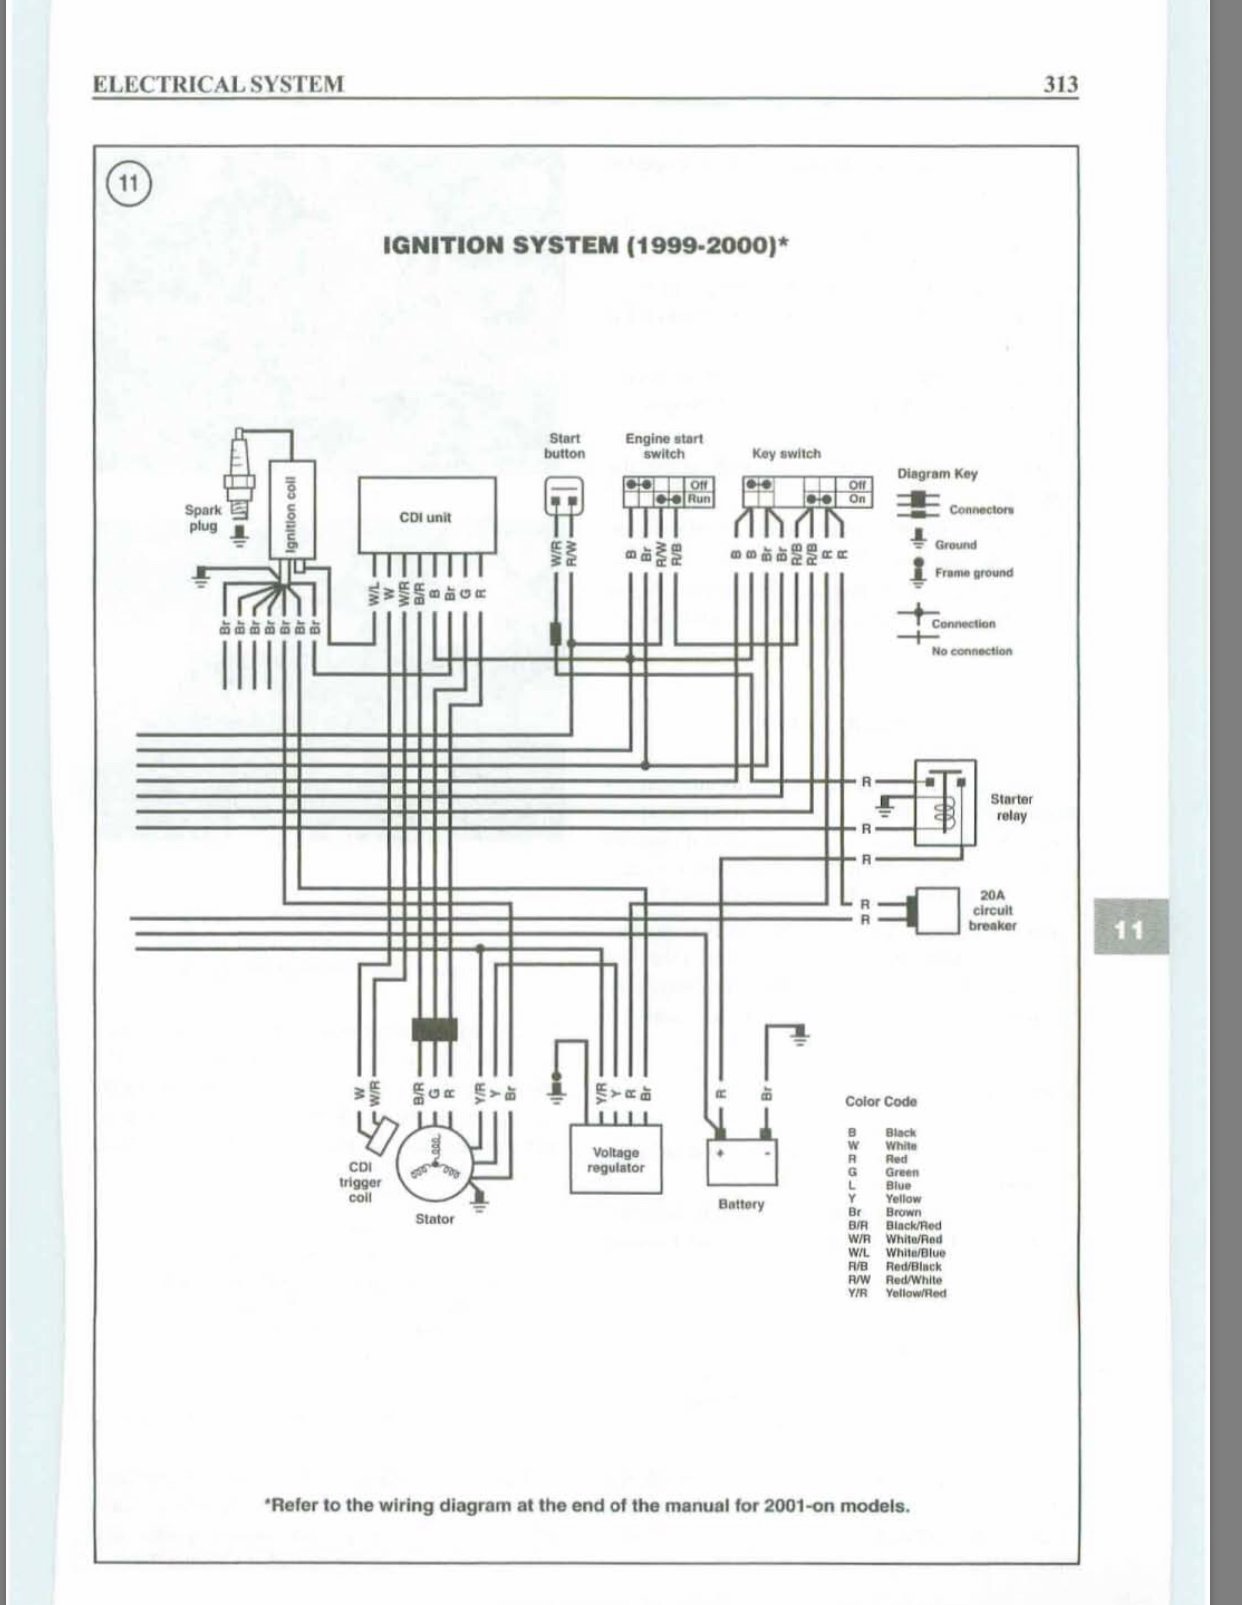
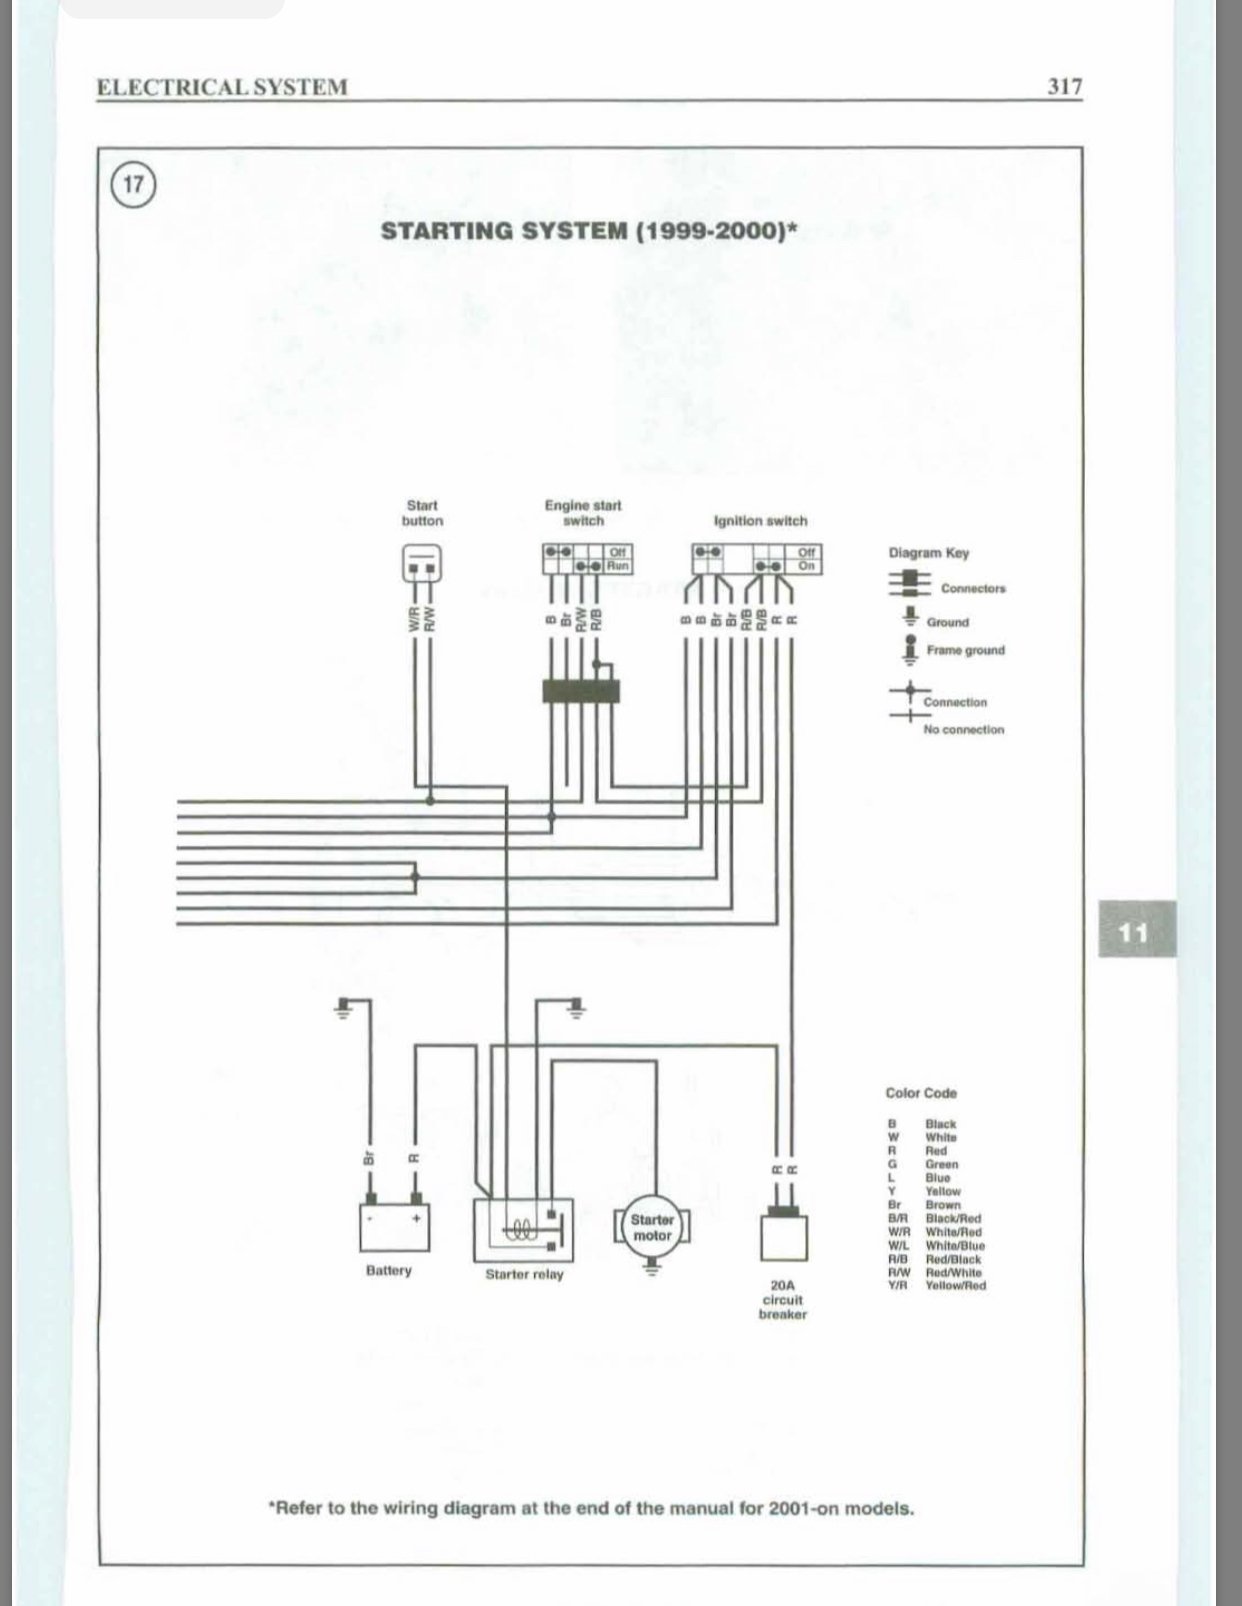
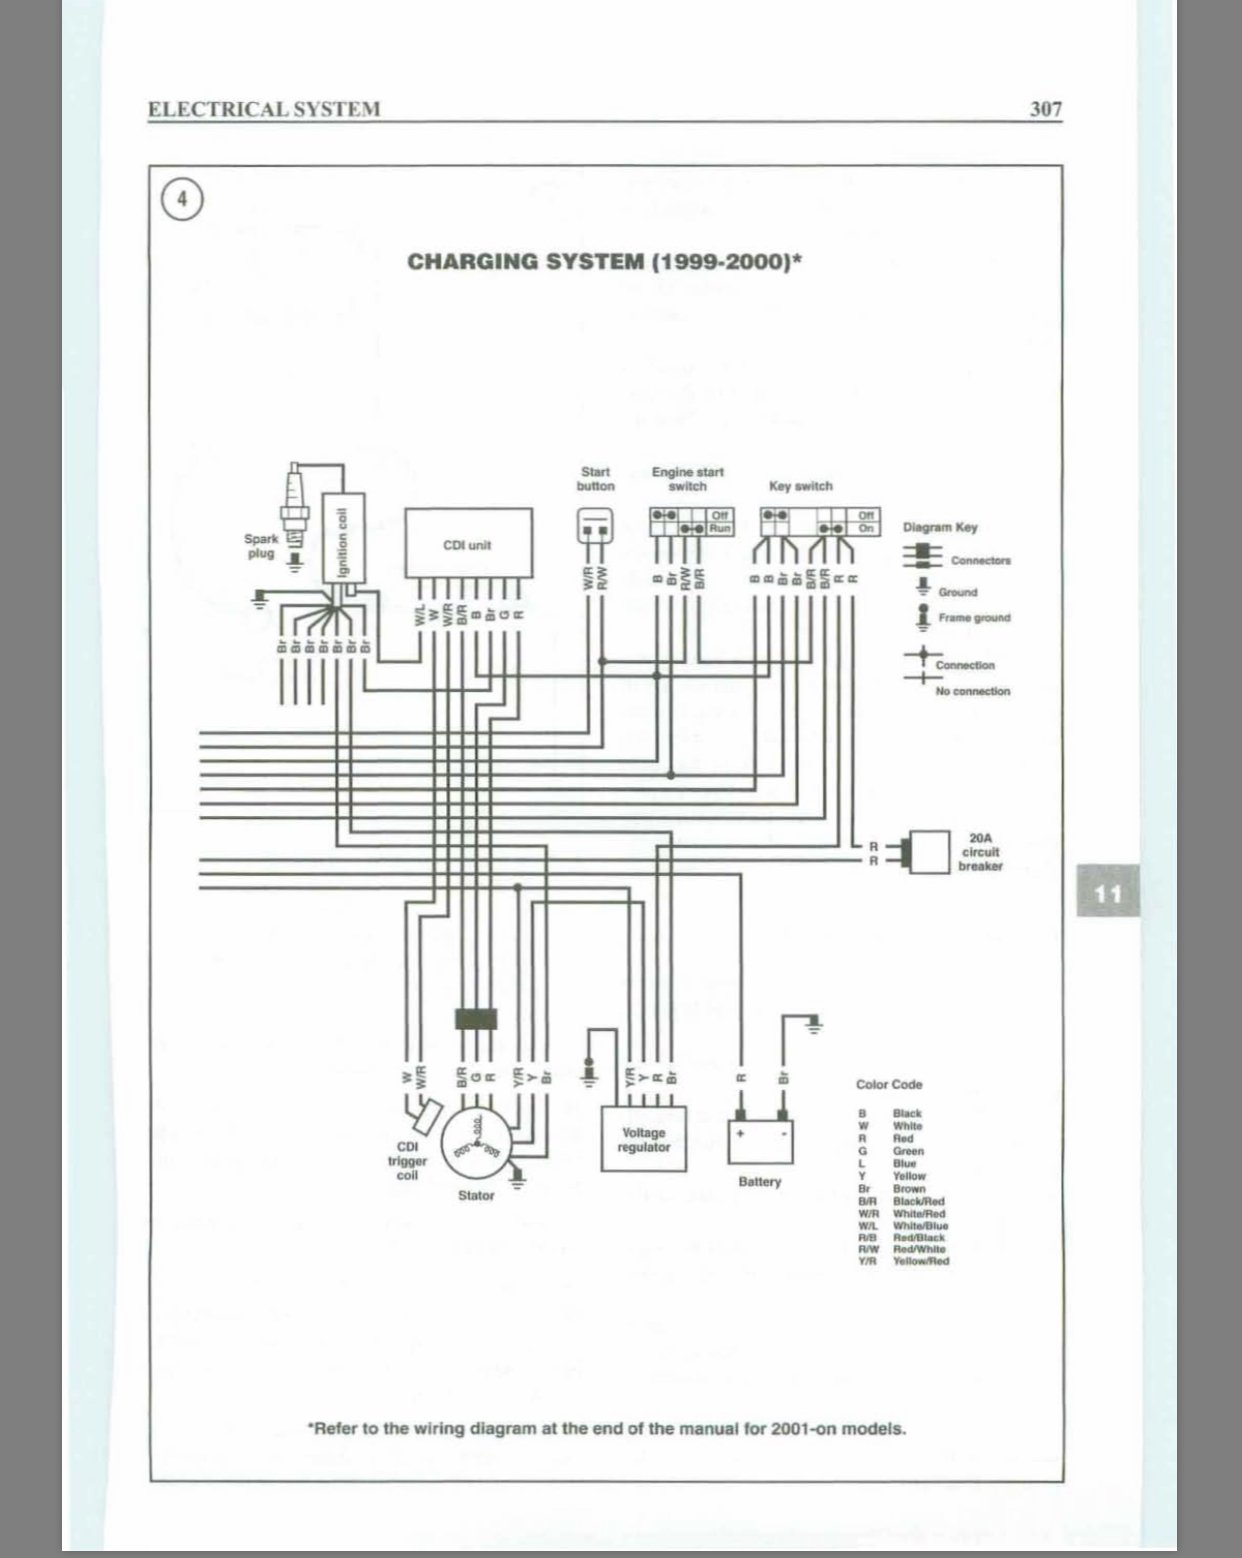
pages 303 on.
-
Polaris 500 sportsman give it gas stalls
Frank Angerano replied to Flipper Tiffany Roper Jones's topic in Polaris ATV Forum
Ok sounds like progress. So a wiring diagram ? What year was it again ? -
Polaris 500 sportsman give it gas stalls
Frank Angerano replied to Flipper Tiffany Roper Jones's topic in Polaris ATV Forum
Go for it. So top end the decompression system. What have you replaced/done ? -
Polaris 500 sportsman give it gas stalls
Frank Angerano replied to Flipper Tiffany Roper Jones's topic in Polaris ATV Forum
Ok great work. Keep me posted. -
2003 Arctic Cat 250 4X4 runs good then bad then good again
Frank Angerano replied to dbconn55's topic in Arctic Cat ATV Forum
Irregular voltage can sometimes cause havoc on the cdi so it could be. As long as your sure the carburetor is properly cleaned and the fuel line going from the tank to the carb is good then I would focus on that voltage right now. That’s pretty high for a voltage reading. Should be no more then 14.5 so I would guess it’s the regulator but I would do a little testing before you buy or order anything. That stator can be purchased a lot cheaper elsewhere also. Download the manual and get a tester, start doing some of the standard tests on the regulator and stator and go from there. If you need any help with that testing let us know.