
Frank Angerano
-
Posts
3,925 -
Joined
-
Last visited
-
Days Won
209
Content Type
Profiles
Forum
Gallery
ATV Magazine
Events Calendar
Downloads
Store
Community Map
Everything posted by Frank Angerano
-
What’s up Jordan welcome to Quadcrazy. Were the wires cut and removed or cut and spliced or just cut and In need of splicing? Everything is color coated so if it’s splicing then it’s not to bad. Get yourself a good splice kit in the mean time. One that seals when heated like the one I posted below. It’s a big help. All you need to do is put the wires in and heat it up.

-

2014 outlaw 90 suspension questions
Frank Angerano replied to Clownking's topic in Kids ATVs and Youth Off-Road
It all depends. If you change tires etc. I don’t think there’s much if a difference on a bike that size plus the weight of your kid. Should be fine. Stand back and look at the from end see how the wheels look. Also have him sit on it and see how the wheels look. Then have him lean down a bit to push the front end down to see if they change. But over all I think it’s set up fine and let it be. -
2014 outlaw 90 suspension questions
Frank Angerano replied to Clownking's topic in Kids ATVs and Youth Off-Road
Welcome to Quadcrazy The rear shock is normal to release slowly. So no worries there. The two sets of holes are for height and wheel adjustment. If you go to the top hole the front end sites a hair lower and the wheel base will may lean a little inward at the top. When you go to the lower hole it helps the front end sit higher and the wheels may lean outward at the top but level off when you sit on the bike. -
Honda Fourtrax bring back from the grave
Frank Angerano replied to JacobSlabach's topic in Honda ATV Forum
Have you tried to adjust the valves ? -
Honda Fourtrax bring back from the grave
Frank Angerano replied to JacobSlabach's topic in Honda ATV Forum
You found the marks on the sprocket and head ? -
Honda Fourtrax bring back from the grave
Frank Angerano replied to JacobSlabach's topic in Honda ATV Forum
There should be a tensioner bolt ? Loosen and reset. But if it’s tight I don’t honk it would jump. Are you 100% sure it jumped ? -
Honda Fourtrax bring back from the grave
Frank Angerano replied to JacobSlabach's topic in Honda ATV Forum
Yes but you have to check the tensioner or maybe the chain is stretched. If it jumps again and any further the valves will collide with the piston and it’s over. -
1990 suzuki ltf250 Quadrunner 4X4 Oil leak
Frank Angerano replied to caperwing's topic in Suzuki ATV Forum
Good luck. Let us know how it goes. -
1990 suzuki ltf250 Quadrunner 4X4 Oil leak
Frank Angerano replied to caperwing's topic in Suzuki ATV Forum
I’ve done it in 2 hours not by choice and it worked great. Honestly... I would wait 24. Also remember to clean the area with a little carb cleaner to make sure all the oil away from the area. Just a little shot will do. Dry it with a rag. -
1990 suzuki ltf250 Quadrunner 4X4 Oil leak
Frank Angerano replied to caperwing's topic in Suzuki ATV Forum
Not sure on the spec but I would just make it tight and go a hair more for now. You won’t strip or break anything. It would take a good amount to do that. -
1990 suzuki ltf250 Quadrunner 4X4 Oil leak
Frank Angerano replied to caperwing's topic in Suzuki ATV Forum
Have you tried to tighten the bolt down? Maybe loosen it up and put some high heat silicone on it and re tighten. Do the other bolts have the same washer ? Might as well check all of them while your at it. -
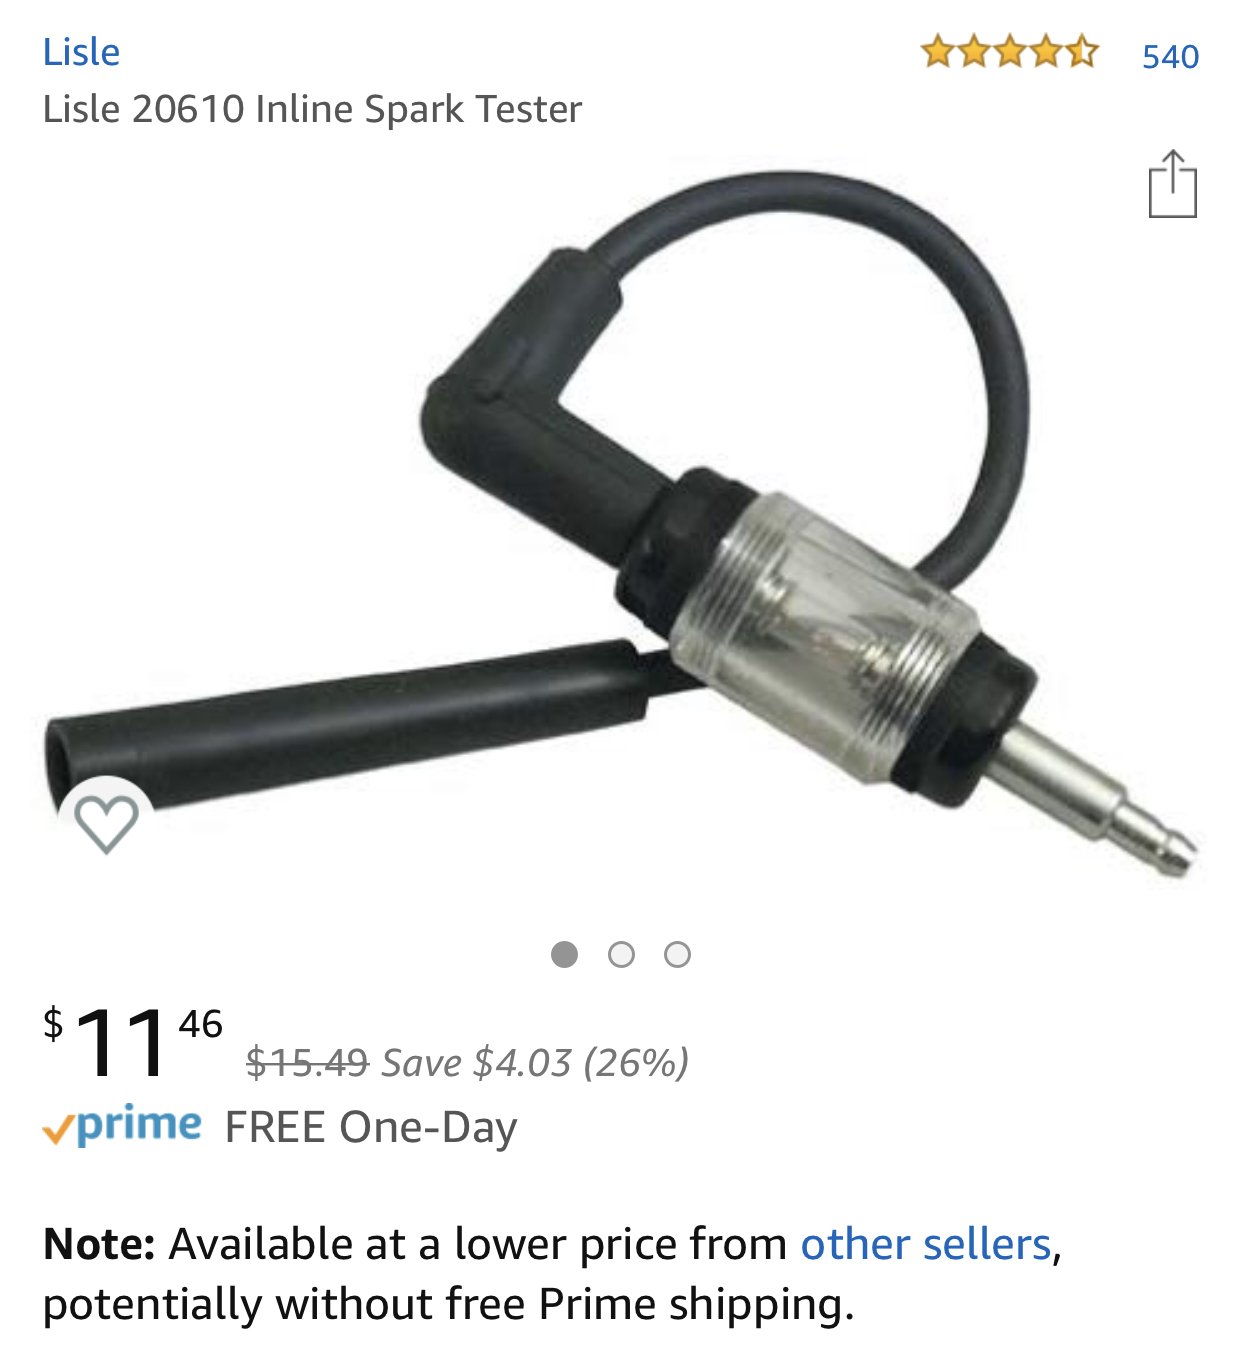
Could be the cdi but not my first choice. I would do some testing first. Maybe test some devices like the pick up coil for starters. Also the stator coil maybe do an ohms test as well look at the secondary ignition coil. Sometimes the spark breaks down after the engine is hot or in your case maybe it’s happening right away. There is a tool to see if the spark is breaking down while the bikes running. Its a useful tool. I know we are talking about electrical items are you sure it’s not a foiled plug or a fuel rich condition happening ? Or timing ? Lisle 20610 Inline Spark Tester https://www.amazon.com/dp/B0002STSC6/ref=cm_sw_r_cp_api_i_ebj1CbF42SW39
-
1990 suzuki ltf250 Quadrunner 4X4 Oil leak
Frank Angerano replied to caperwing's topic in Suzuki ATV Forum
Welcome to Quadcrazy. What bolt is it you are referring to ? Only bolt that should have that type washer is the oil drain plug. Maybe post a picture of the bolt and area on the bike. -
Double check that its not a separate set of wires in the handle bar. As well as trace them to be sure they are disconnected. Or do what I did. Reconnect everything and then open the top cover on the throttle and run the bike. While is backfiring etc separate the contacts on the throttle control and see if it clears. Only reason I’m pushing this theory is it happened to my bike and solved the problem.
-
Handlebars. The throttle have wires going into it? If so open it up and you will find the rev limiter. Try to separate the wires and see if that clears things up. Sometimes on the polaris bikes the rev limiter starts acting up.
-
Yamaha big bear 400 08 irs 4x4 help
Frank Angerano replied to Hunter Aldridge's topic in General Talk - Anything Goes!
Nice work! -
Yamaha big bear 400 08 irs 4x4 help
Frank Angerano replied to Hunter Aldridge's topic in General Talk - Anything Goes!
Can you post a few pics of the stator side of the engine.
-
2001 Yamaha Grizzly 600 Compatible with Big Bear
Frank Angerano replied to Richard Britt's topic in Yamaha ATV Forum
What type of parts are you reffing to ? -
Thanks for the info @mikeexplorer . So the offset makes the bike wider ? I did order the lug/lug nuts.
-
Honda Fourtrax bring back from the grave
Frank Angerano replied to JacobSlabach's topic in Honda ATV Forum
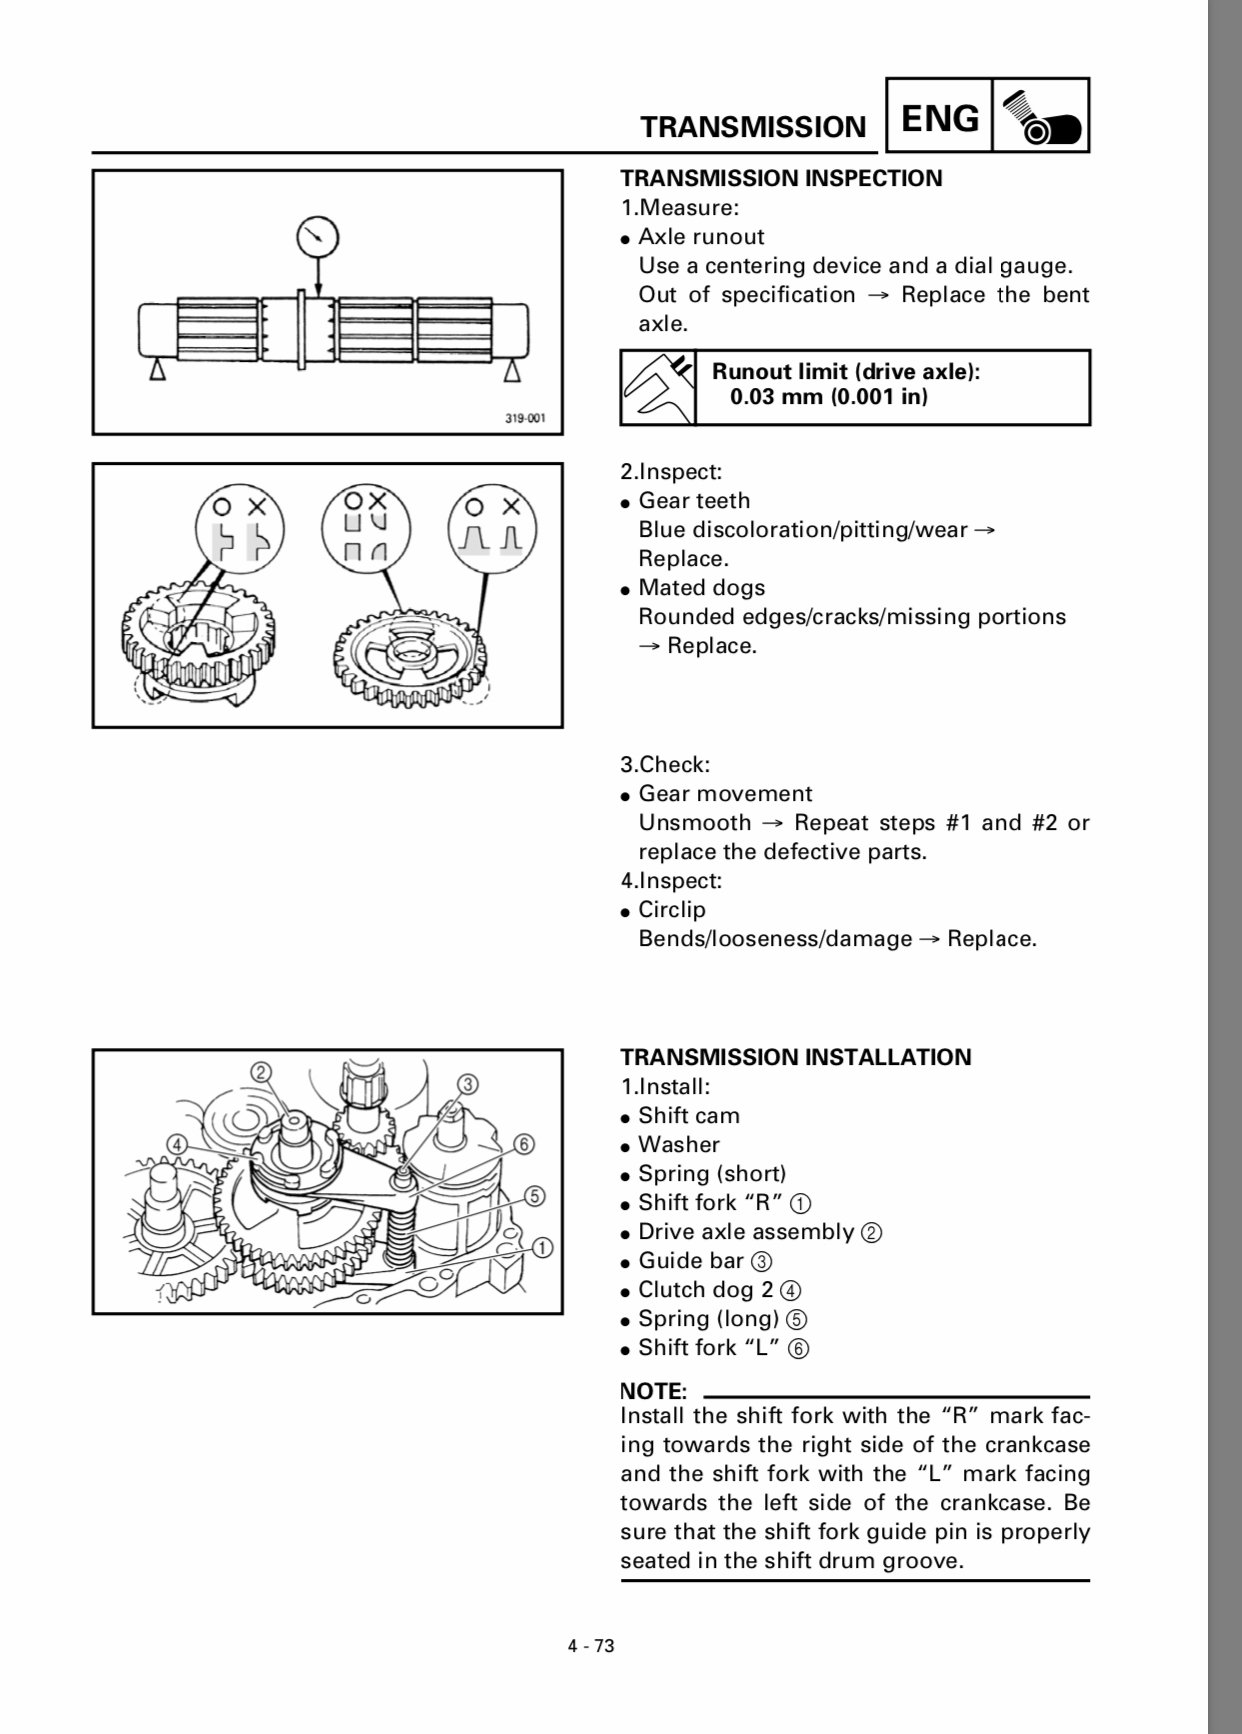
Sorry about the delay in getting back to you. Been busy. Yes the head cover has to come off. Gas tank first. Loosen all the bolts on the top of the cover. You don’t have to remove the bolts just spin them all the way out so there not threaded any more. There are different size bolts so try to keep them where they belong in the head. The rocker arms come off with the head cover when you pull it. Before you do that on the left lower half of the engine there will be two plugs on the side of the engine cover. Screw type plugs that you have to unscrew. Be careful and used the proper screwdriver. A big flat headed will work. These plugs are easily stripped where the slot is. Take the screw plugs out and get a 17mm socket. That goes in the big hole center of the flywheel. The second small cover is to view the T mark for top dead center. Rotate the engine clockwise with the socket driver until you see the T. The can sprocket has a mark on it and a mark on the head. Check your timing chain for proper tension. -
Yea I’m kinda not pavement guy anyway but I’m going all in on this bi*** and setting her up right. And beefing up my sons 350 as well.
-
Honda Fourtrax bring back from the grave
Frank Angerano replied to JacobSlabach's topic in Honda ATV Forum
Ok timing is the exact same as the bayou. Should be a mark on the cam sprocket and the head. The valves (clearance) I have to look at. You should be able to download the repair manual and look. If you have problems let me know and I will help with that. You should be able to determine if there’s oil in the head by looking Into the valve cover opening. -
Thanks @06kfx440 I’m excited. I just looked at the bikes and all looks good as far as fit up. Tomorrow morning I will pull the trigger.
-
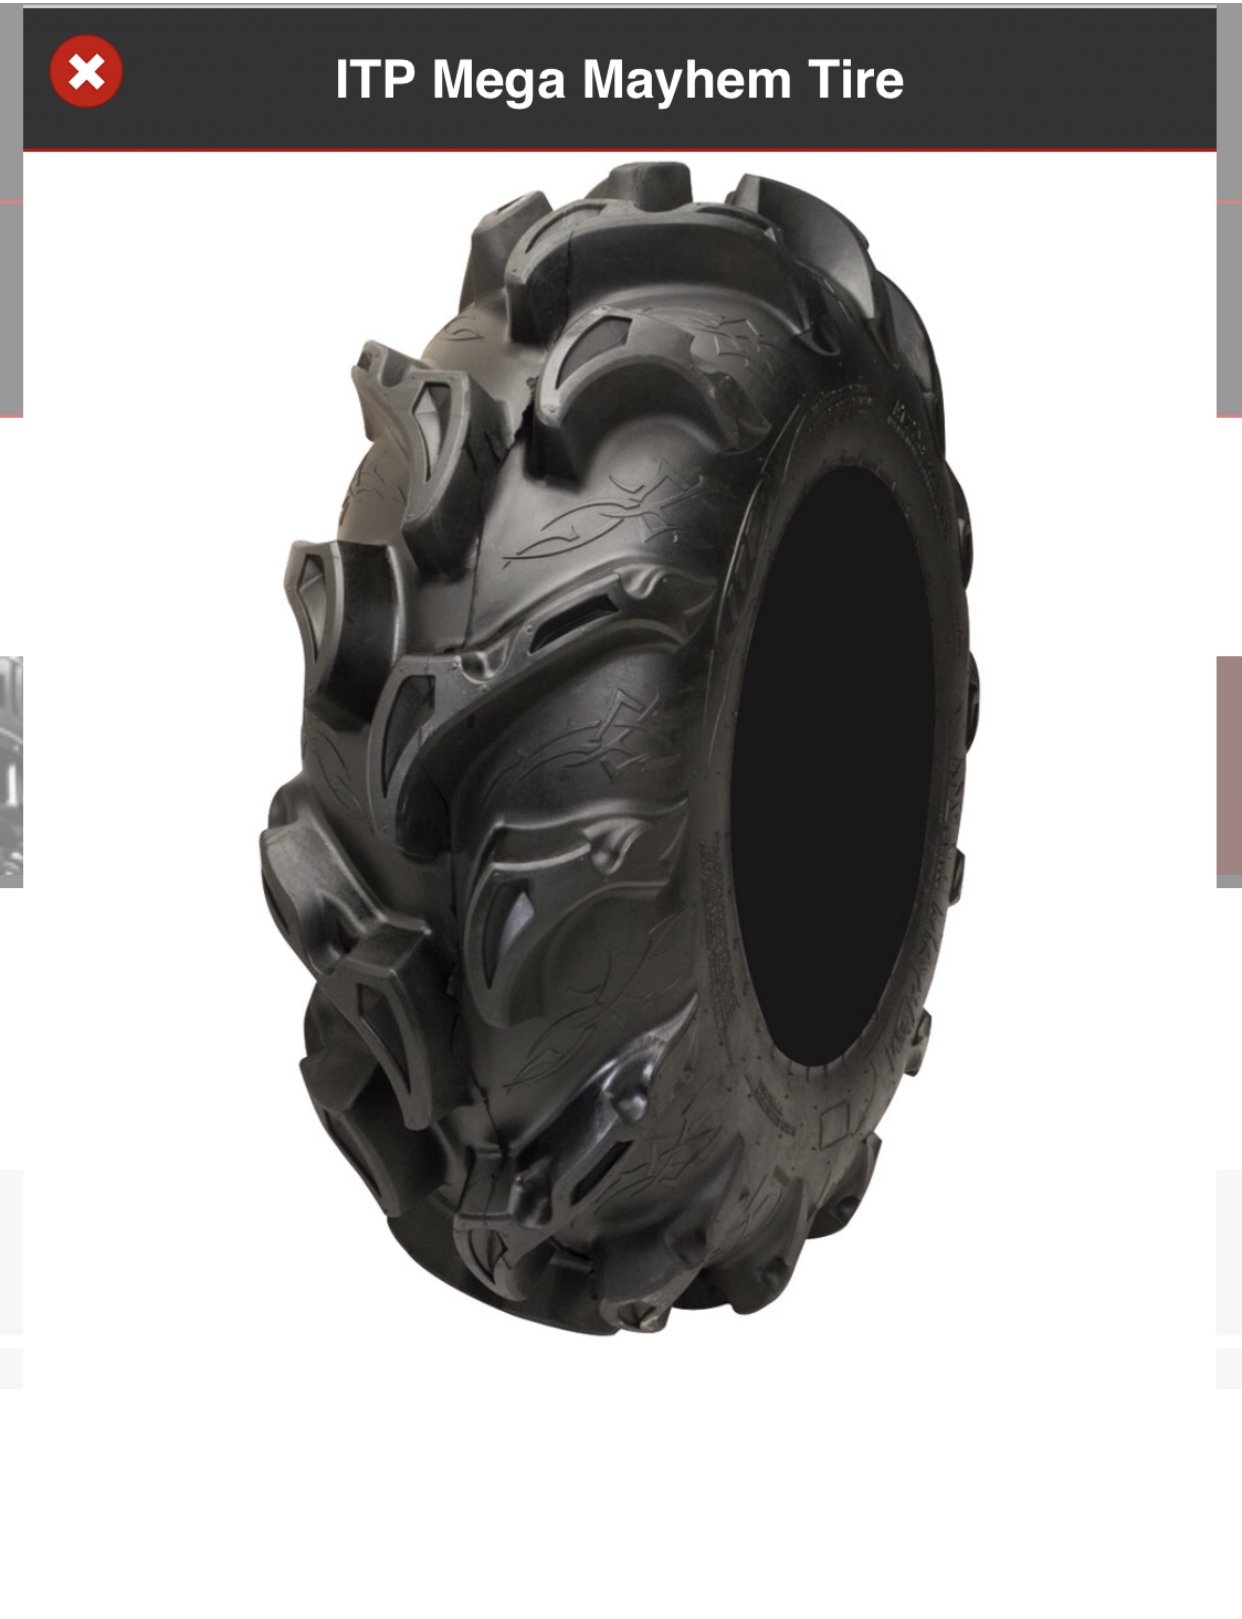
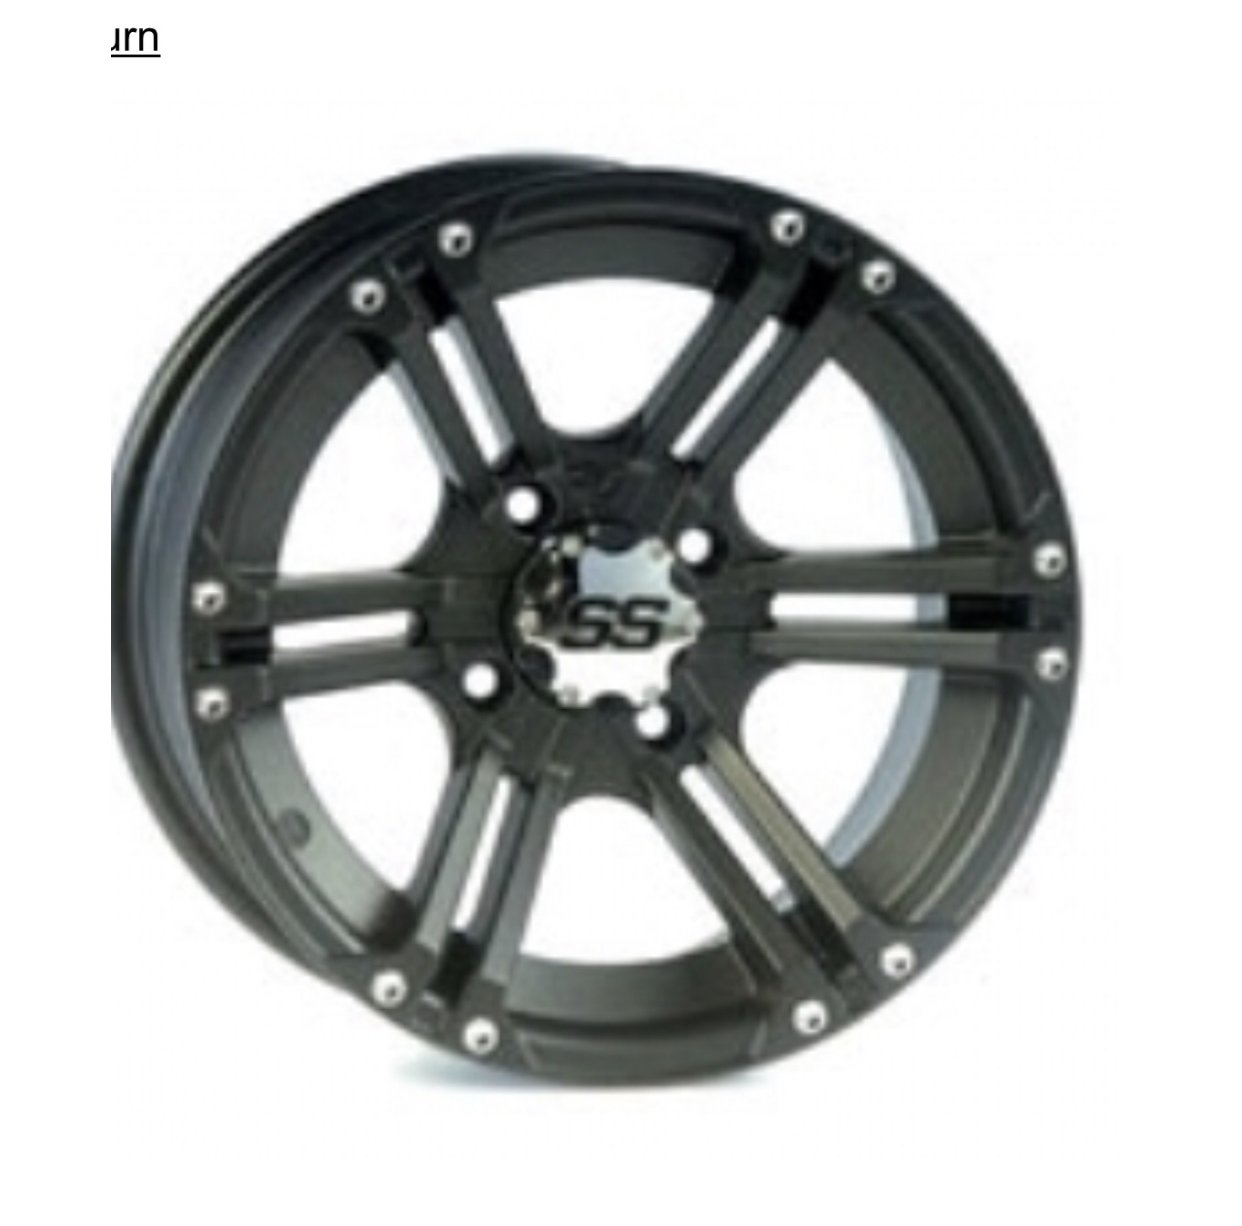
Ok so I think I made my mind up and going to go with a ITP Mega Mayhem tire. 27 inch and most likely up a 2” lift kit while I’m at it. Going to go with a SS rim black powder coated. Any objections/suggestions on a lift kit pros and cons ? Doing the same thing on my sons 350 but staying with a 25 inch tire maybe a 26. No lift needed and a little less aggressive tread. Got a great package deal of $1,575.00 for both sets mounted, lugs and lift kit for both bikes. Sound fair ?
-
What is recommended to do with a newly bought used 1998 Foreman?
Frank Angerano replied to bcsman's topic in Honda ATV Forum
You can inject the grease but just put on a rubber glove and put it all around the fitting. I’m not so keen on making a hole in the rubber if it’s not needed. Also don't forget the differential fluids. How does it run and look ? Post a few pics. I’m a fan of the older bikes.