
Frank Angerano
-
Posts
3,925 -
Joined
-
Last visited
-
Days Won
209
Content Type
Profiles
Forum
Gallery
ATV Magazine
Events Calendar
Downloads
Store
Community Map
Everything posted by Frank Angerano
-
It’s a blue type light.
-
My ranchers. It’s a high tensity bike light. Very bright and very cool. Lift kit and tires/rims are on the way. Posting some pics as we go.
-
Nice work. I swapped out my headlights today with the led super bright. Amazon $15.00. Love them. Talk a look.
-

Honda Fourtrax bring back from the grave
Frank Angerano replied to JacobSlabach's topic in Honda ATV Forum
Have you been to the download section and successfully downloaded a manual before ? -
Good thread @JacobSlabach Compression readings all vary on the size of the engine. (CC = cubic centimeters) which is a metric unit to measure the engine's capacity or its volume. So a 90 CC engine would generally have lower compression based on the size of the piston (volume) inside the cylinder head. A larger CC would produce more volume which creates a larger reading. Every engine has a CC size and a compression value in the manual that states what the acceptable range is for peak performance. Low compression stems from a few things. Bad valve seals. Oil in the head leaks down through the valve stem into the cylinder head and burns up upon the compression stroke leaving a blue smoke. bad piston/rings. Oil seeps up past the rings from pressure built up by the compression leaking into the engine past the rings and causes the same smoke condition but less smoke is seen because the vertical climb the oil has to make up into the cylinder head. Blown head gasket. This allows compression to be lost by escaping the cylinder. Easy way to find it is a soapy spray all around the top end. You will see bubbles during the cranking if the engine and you can also hear it if you crank the engine by hand slowly. Warped or cracked head/cylinder from excessive heat. The head and cylinder cannot meet flush and therefore a void allows air to escape. Same type of test with the soapy water.
-
1996 Suzuki King Quad 300 Smokes [VIDEO]
Frank Angerano replied to crochet homemade's topic in Suzuki ATV Forum
Possibly, just keep in mind it could be just the valve seal. I always like to proceed with caution on my work. If the valves can be exposed and you can see the seals then you can crank the engine and take a Q tip, make up a good soapy solution with dish soap. Dab it around the valve seals. You will see bubbles around the rubber seal as you crank it. You don’t need a lot of soapy water. Just enough to coat the rubber. Any bubbles then it’s a bad set of seals. Change them all and change the oil after ward. -
Fuel lines and vacuum lines 05 phoenix
Frank Angerano replied to Logan Greene's topic in Polaris ATV Forum
What is it exactly your looking for on that bike? I used to own one and had the carburetor off a few times. I don’t remember any vacuum lines etc only fuel and vent lines. -
Also what size is that trailer?
-
OEM vs Aftermarket on a 95 kingquad 300
Frank Angerano replied to Mudrecon's topic in Suzuki ATV Forum
Good idea by rebuilding. Nothing like the real deal. If you need any help let us know. Take a compression reading and see how that goes. Maybe just valve seals might be in order. -
I see that. I will definitely keep that in mind. How’s that trailer working out ? I watched the promo video again on there site. What’s the price range for the trailer you have ?
-
OEM vs Aftermarket on a 95 kingquad 300
Frank Angerano replied to Mudrecon's topic in Suzuki ATV Forum
The cheaper carbs look, fit, and will work to get the bike running. The minute you take off and ride the bike starts to sputter and break down. You will spend hours trying to dial it in with very frustrating results. Not worth the aggravation. What’s wrong with the OEM carb? It looks like it’s all there. Take it apart and rebuild it. -
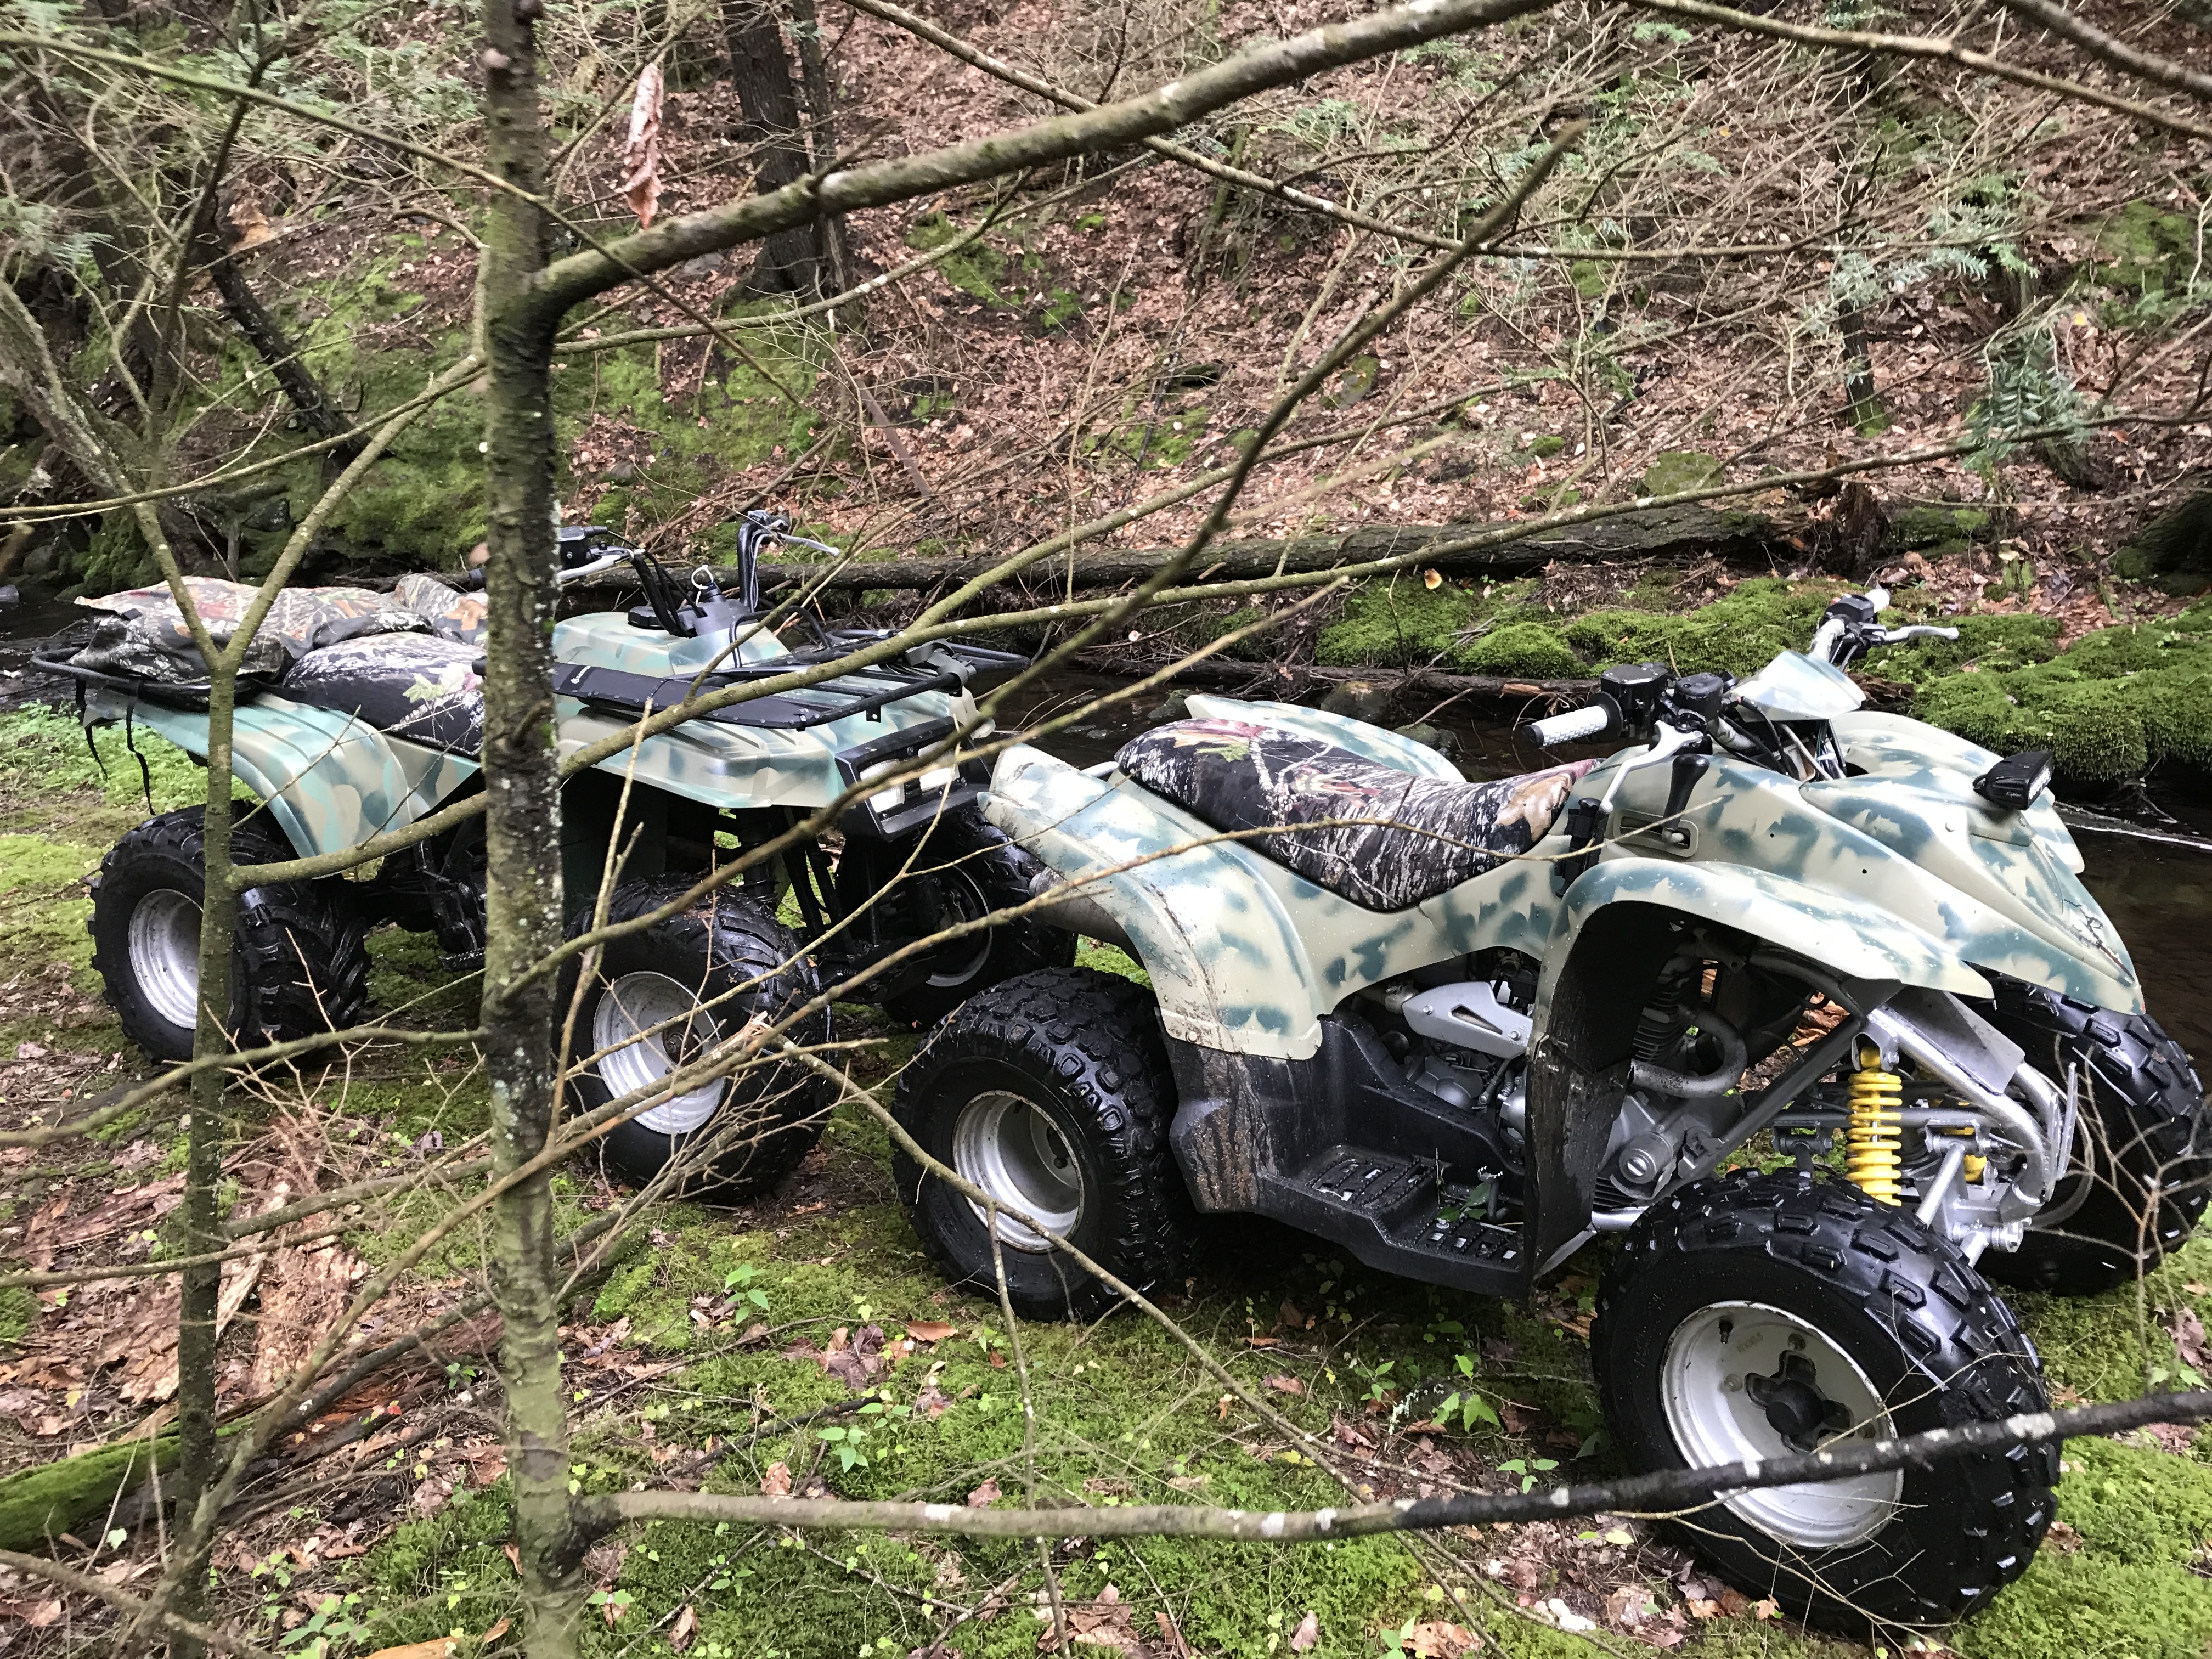
Pulling two quads out of storage
Frank Angerano replied to xpnet's topic in General Talk - Anything Goes!
Definitely going to need a carb cleaning. Bike looks clean! Make sure you put an in line gas filter in just to make sure nothing in the tank or gas valve gets into the carburetor. -
Honda Fourtrax bring back from the grave
Frank Angerano replied to JacobSlabach's topic in Honda ATV Forum
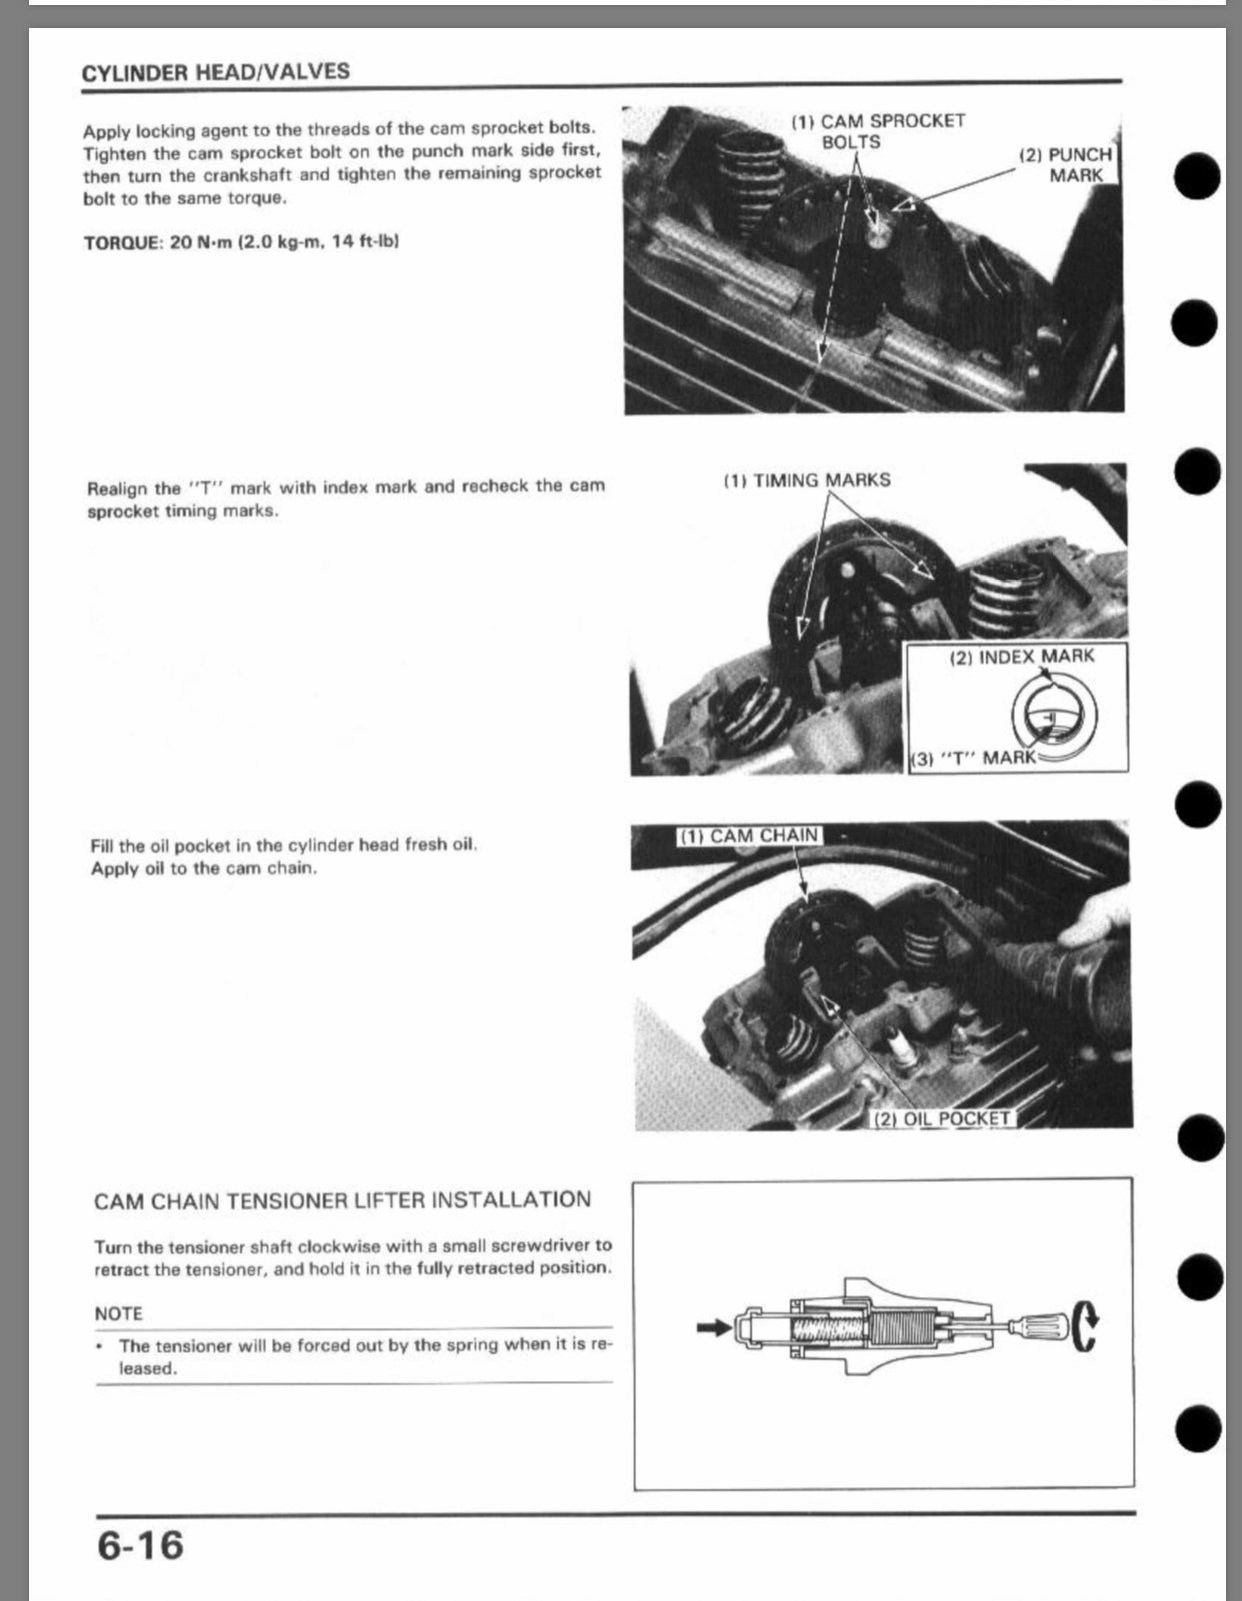
Ok so your timing is there. Get after it. Tensioner is there as well. -
Honda Fourtrax bring back from the grave
Frank Angerano replied to JacobSlabach's topic in Honda ATV Forum
Not sure if this is your bike.
-
Honda Fourtrax bring back from the grave
Frank Angerano replied to JacobSlabach's topic in Honda ATV Forum
What year is that bike and the size ? Vin# Should be on the front frame cross bar in between the wheels -
Honda Fourtrax bring back from the grave
Frank Angerano replied to JacobSlabach's topic in Honda ATV Forum
Upper right side of page drop menu. Manuals etc. -
1990 suzuki ltf250 quadrunner poor idle
Frank Angerano replied to caperwing's topic in Suzuki ATV Forum
Once you install a carb kit (rebuild) things change within the performance of the carburetor. Going back to the original setting means noting other then getting a starting point for adjusting. Do this and see if it helps: Start the bike up and let it warm up. Take the choke off and let the bike idle. Start to turn the fuel air mixture screw in either direction (My guess would be out). Your looking for the engine to start to rev higher. That’s a good thing! Keep going and as the engine reaches it’s sweet spot you will know because it will start to decrease revving if you go to far. So once the engine stops revving higher and starts to break up a little stop! Turn the screw back maybe 1/4 turn. Then you can lower the IDLE screw and get the engine to level off to a healthy idle. See how the bike runs after that. My guess would be somewhere around the 2 to 2-1/4 turns out would be where it needs to be. -
1990 suzuki ltf250 Quadrunner 4X4 Oil leak
Frank Angerano replied to caperwing's topic in Suzuki ATV Forum
It should hold fine. Ride safe. -
Honda Fourtrax bring back from the grave
Frank Angerano replied to JacobSlabach's topic in Honda ATV Forum
It may have been correctly timed in the first place. Did you check the manual ? Maybe reset it to where it was. But check the manual about the alignment before yo do all this. It’s important. -
I read that you gave the cranking voltages on the first post. NOT cranking voltages.Ohms reading on the coils like a said in my last post. This will at least put the coils in spec. This should also be done on the rectifier/regulator. I remember a similar topic on this and it turned out to be a pick up coil that was the problem. Is was a hair to far from the flywheel and on higher rpms is started to act up causing this problem. It was in the Polaris forum. I would not be surprised if it’s the same thing. It was a while ago but should still be in the topics section of that forum. Maybe @Ajmboy or @Admin can help us dig it up? I believe it was the gap between the pick up coil and flywheel. There is a spec limit on that.
-
Yes my truck fits, no issues with room to spare. I’m also looking for a new trailer. 6x12 would work perfect. As long as performance is not an issue I can live with the projection of the tires out 2 more inches.
-
Wow I see that!! It looks more then 2 inches. Thanks for the info. I really appreciate it.
-
Welcome to Quadcrazy. You’ve come to the right place for what you need. Good luck with the project. Post some pics!!!!
-
Welcome to Quadcrazy brother. Quite a collection you are working on. I can only imagine what a gsxr engine would do on a quad frame. Im sure you will find this forum entertaining as well as have plenty of input. Ride safe !
-
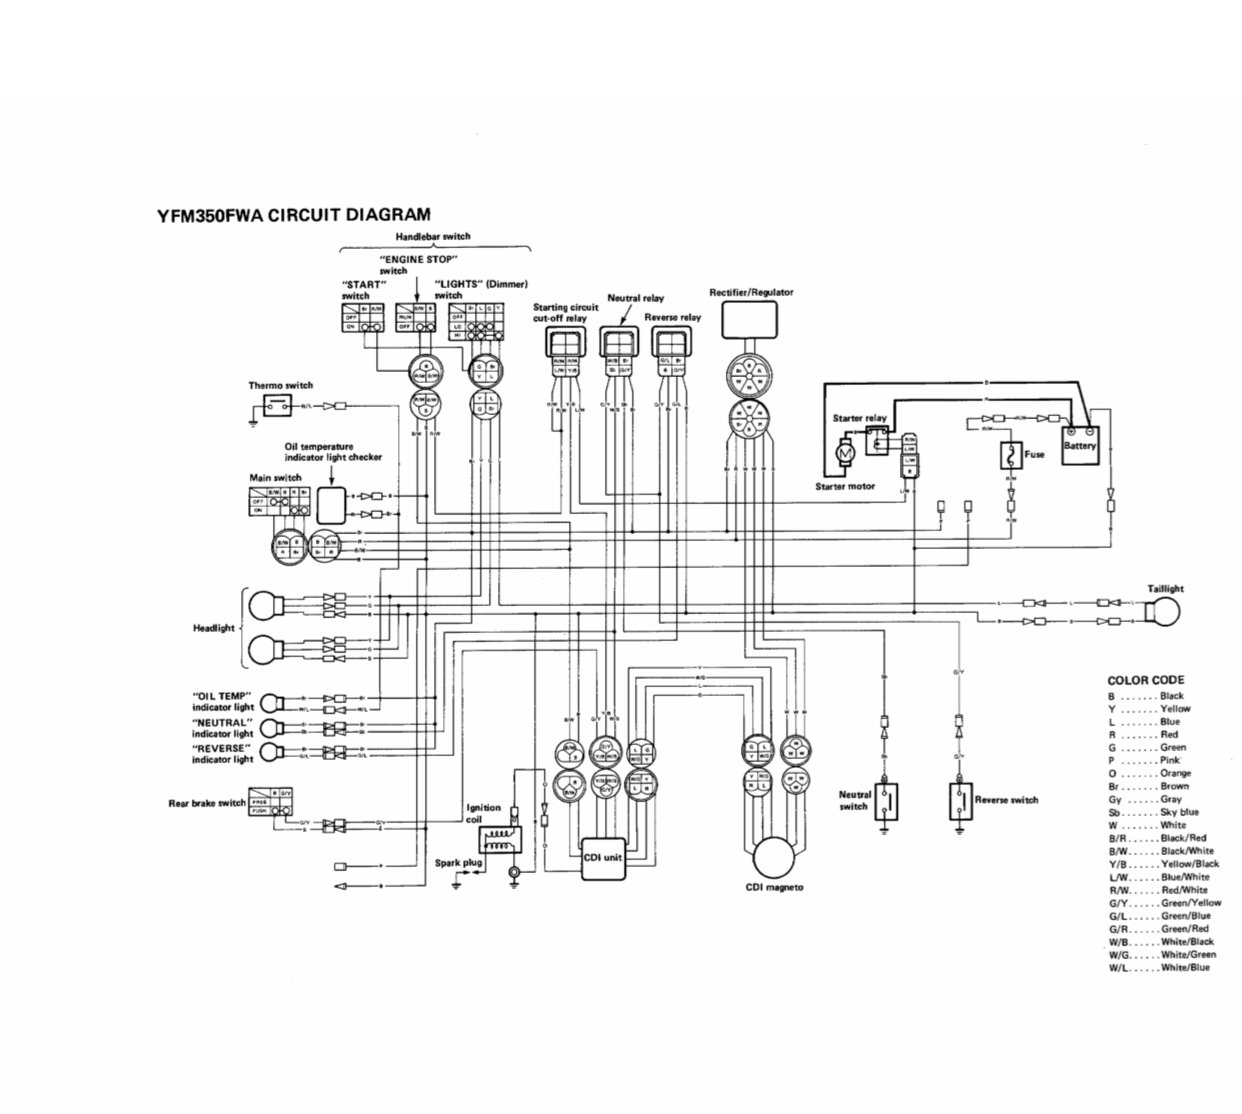
Here’s a diagram I think is for your bike. Double check the colors on the wires to verify. It’s best to print it out and highlight the wires in different colors to separate.