
MarkinAR
-
Posts
607 -
Joined
-
Last visited
-
Days Won
43
Content Type
Profiles
Forum
Gallery
ATV Magazine
Events Calendar
Downloads
Store
Community Map
Everything posted by MarkinAR
-
1996 Kawasaki Bayou 220 no spark HELP PLEASE!
MarkinAR replied to Brother Buddy Gardner's topic in Kawasaki ATV Forum
I would think so but not sure without seeing it. Normally the black wire is closer to the outside if memory serves correctly. The fact that the push button is directly wired is odd, that means some parts are taken out of the normal flow. I'd run it down with the wiring diagram and put it back to normal before doing too much digging with the no spark. It might be that the CDI is simply bypassed since there has been some wiring changes. -
1996 Kawasaki Bayou 220 no spark HELP PLEASE!
MarkinAR replied to Brother Buddy Gardner's topic in Kawasaki ATV Forum
Sounds like wiring gremlins. The starter button would only work regardless of key position if it were wired around the key. If key was off and button still worked it would likely not have any spark. I would put the original CDI back on because I am assuming you bought a $30 chinese one? Those only work about 10% of the time. My first step would be try original CDI and then move on to a wiring diagram and work through each wire. Those are really simple bikes to work on, I've had several. This is a youtube video but has the clearest wiring diagram I can find. Just pause it and screenshot. -
New project in the shop...another 300FW
MarkinAR replied to MarkinAR's topic in General ATV Discussion
That is definitely NOT a banjo bolt in the middle of that oil line. This little 300 is just full of surprises. -
You may never get the rear diff to look clear because bearings and even the dry upper 75% of the ring gear tend to rust if they sit long. I'd just ride it a while and come back later and change it. Chances of the bearings getting a bit loose are high too if it sat for long so you may need to go back into it with new bearings and seals after it's ridden a while.
-
New project in the shop...another 300FW
MarkinAR replied to MarkinAR's topic in General ATV Discussion
-
@Michael Rogers If you're putting in a new valve, don't forget to lap it. The chances of the angle on the new valve matching the old head is about 0%. Might as well lap the other valve while you have it apart.
-
90-03? Kawasaki Lakota 300 Shift Shaft
MarkinAR replied to Michael Rogers's topic in Kawasaki ATV Forum
I've never split the cast on a Kawasaki but I bet it's like Honda or Yamaha of the same year. Pretty straight forward with a service manual. I'd try anything once if it's cheap enough! -
Did it run fine and then one day not? Did you rebuild the top end and maybe get timing off a mark? What does the plug look like? Did you clean the jets out with a bit of wire or torch cleaning tips when you cleaned the carb? How does the diaphragm look on the throttle slide? Any holes in it? Does it rev to WOT in neutral but dies under load? Give us a bit more specific info to work with and I bet the group can help you find the issue.
-
1999 Kawasaki Bayou 220 Wiring...what a mess
MarkinAR replied to Tom Pavlak's topic in Kawasaki ATV Forum
98 I rebuilt last summer only had 2 wires as well. This guy has a really decent wiring diagram for a 220 on his video you can screenshot. I've used it a few times and it's been spot on for me. -
New project in the shop...another 300FW
MarkinAR replied to MarkinAR's topic in General ATV Discussion
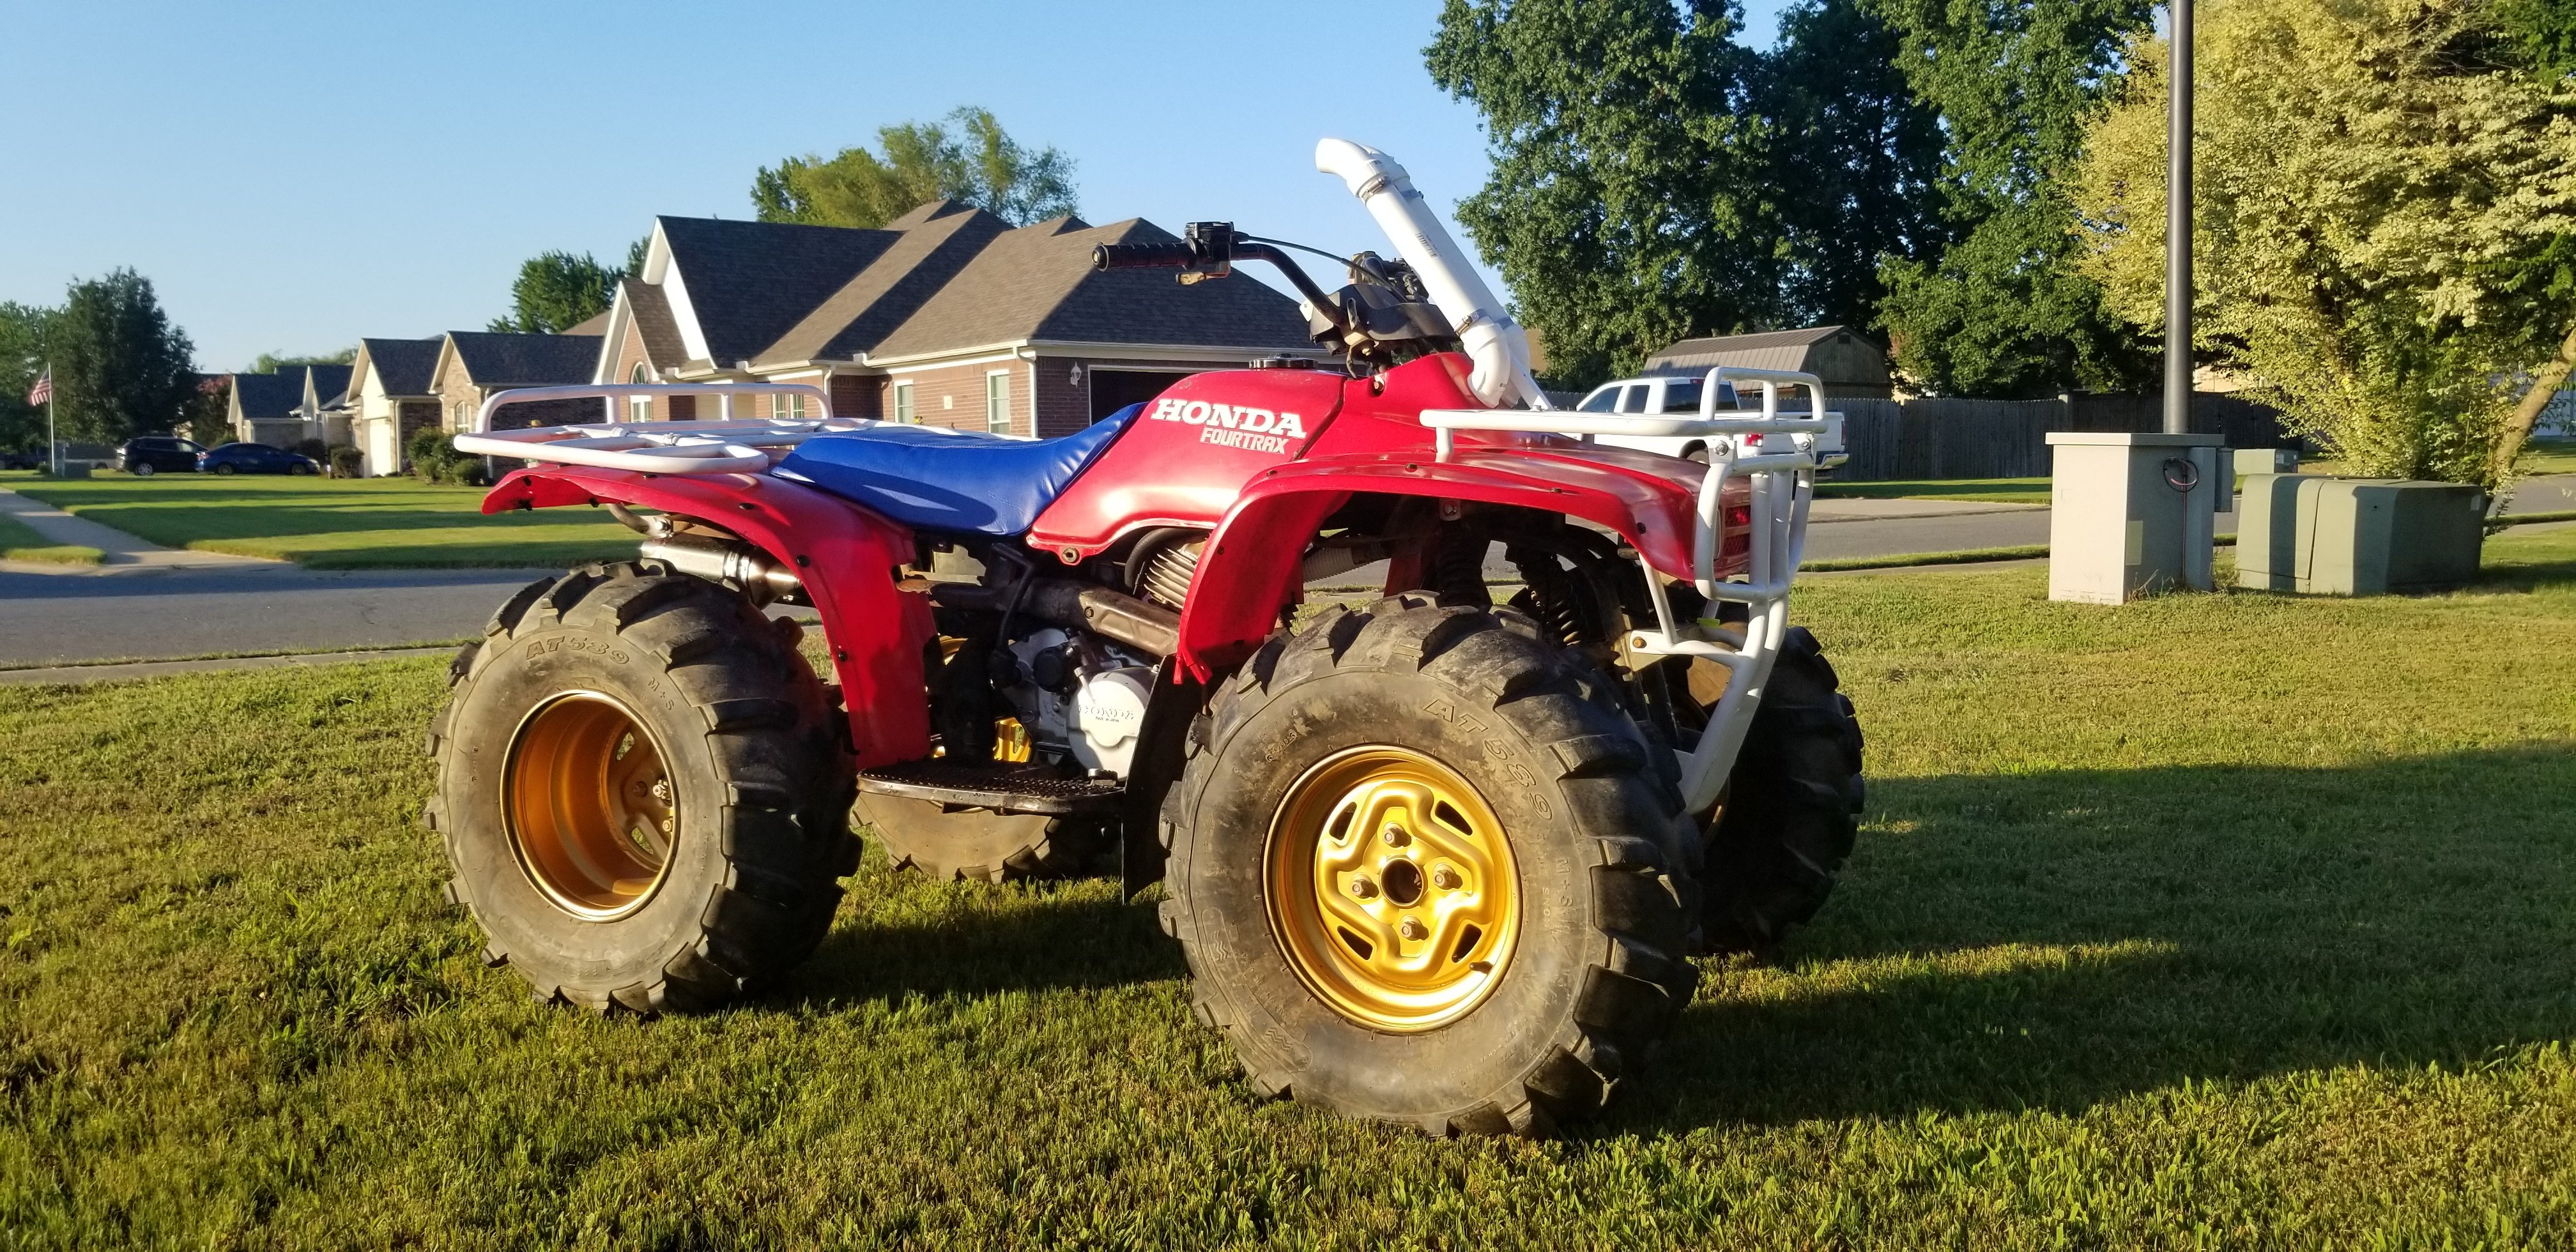
Sneak peak of what this one will look like when it's done. If you were around ATC's when the last 250r rolled off the line, you can see where this is going. Should be pretty cool.
-
I'd say don't take anything to that shop again. It seems they were trying to throw parts at it without an actual diagnosis. That's lazy and incompetent. Glad you got it fixed though, good work.
-
Get some left handed drill bits and good luck. When they're seized they're a bi***.
-
I had a 98 identical to yours and it only had like 90psi of compression....but it still popped right off with the start button. Those 220's were bulletproof little utility quads. Not fast, not obscene amounts of power, but well built and extremely resilient when not maintenanced properly.
-
Hell yeah brother, love to see progress! Start buttons are notoriously finicky because they are just a brass pop style button. Slightest dirt or corrosion and they are hit and miss. Using it again will help it clean itself out a bit.
-
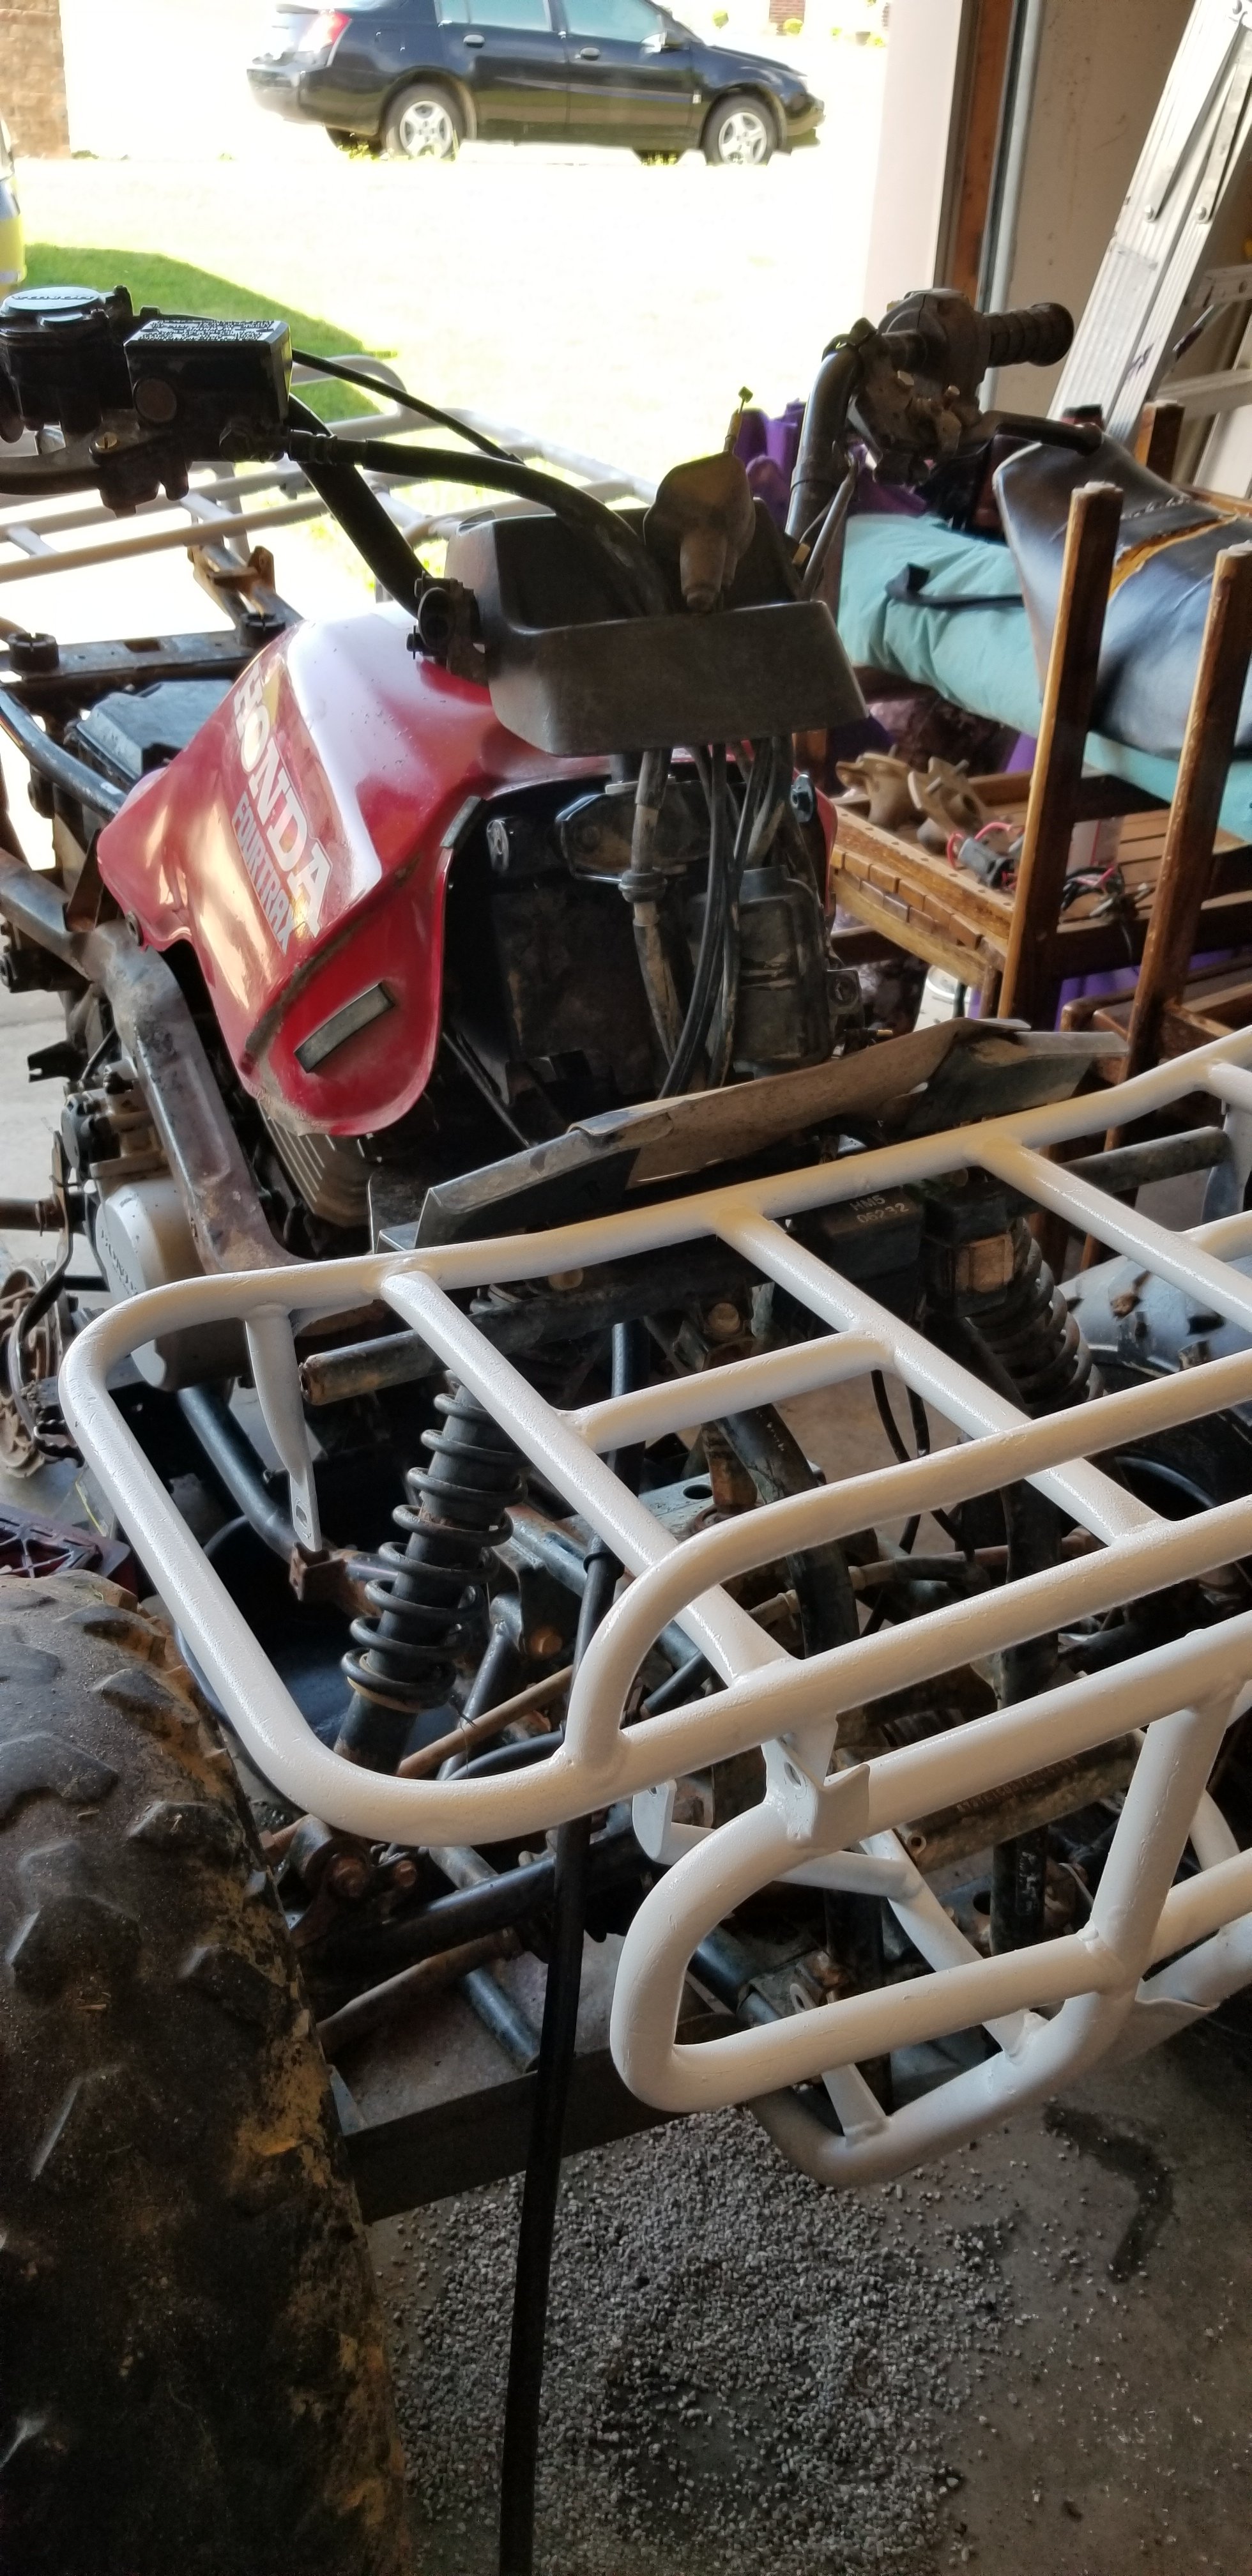
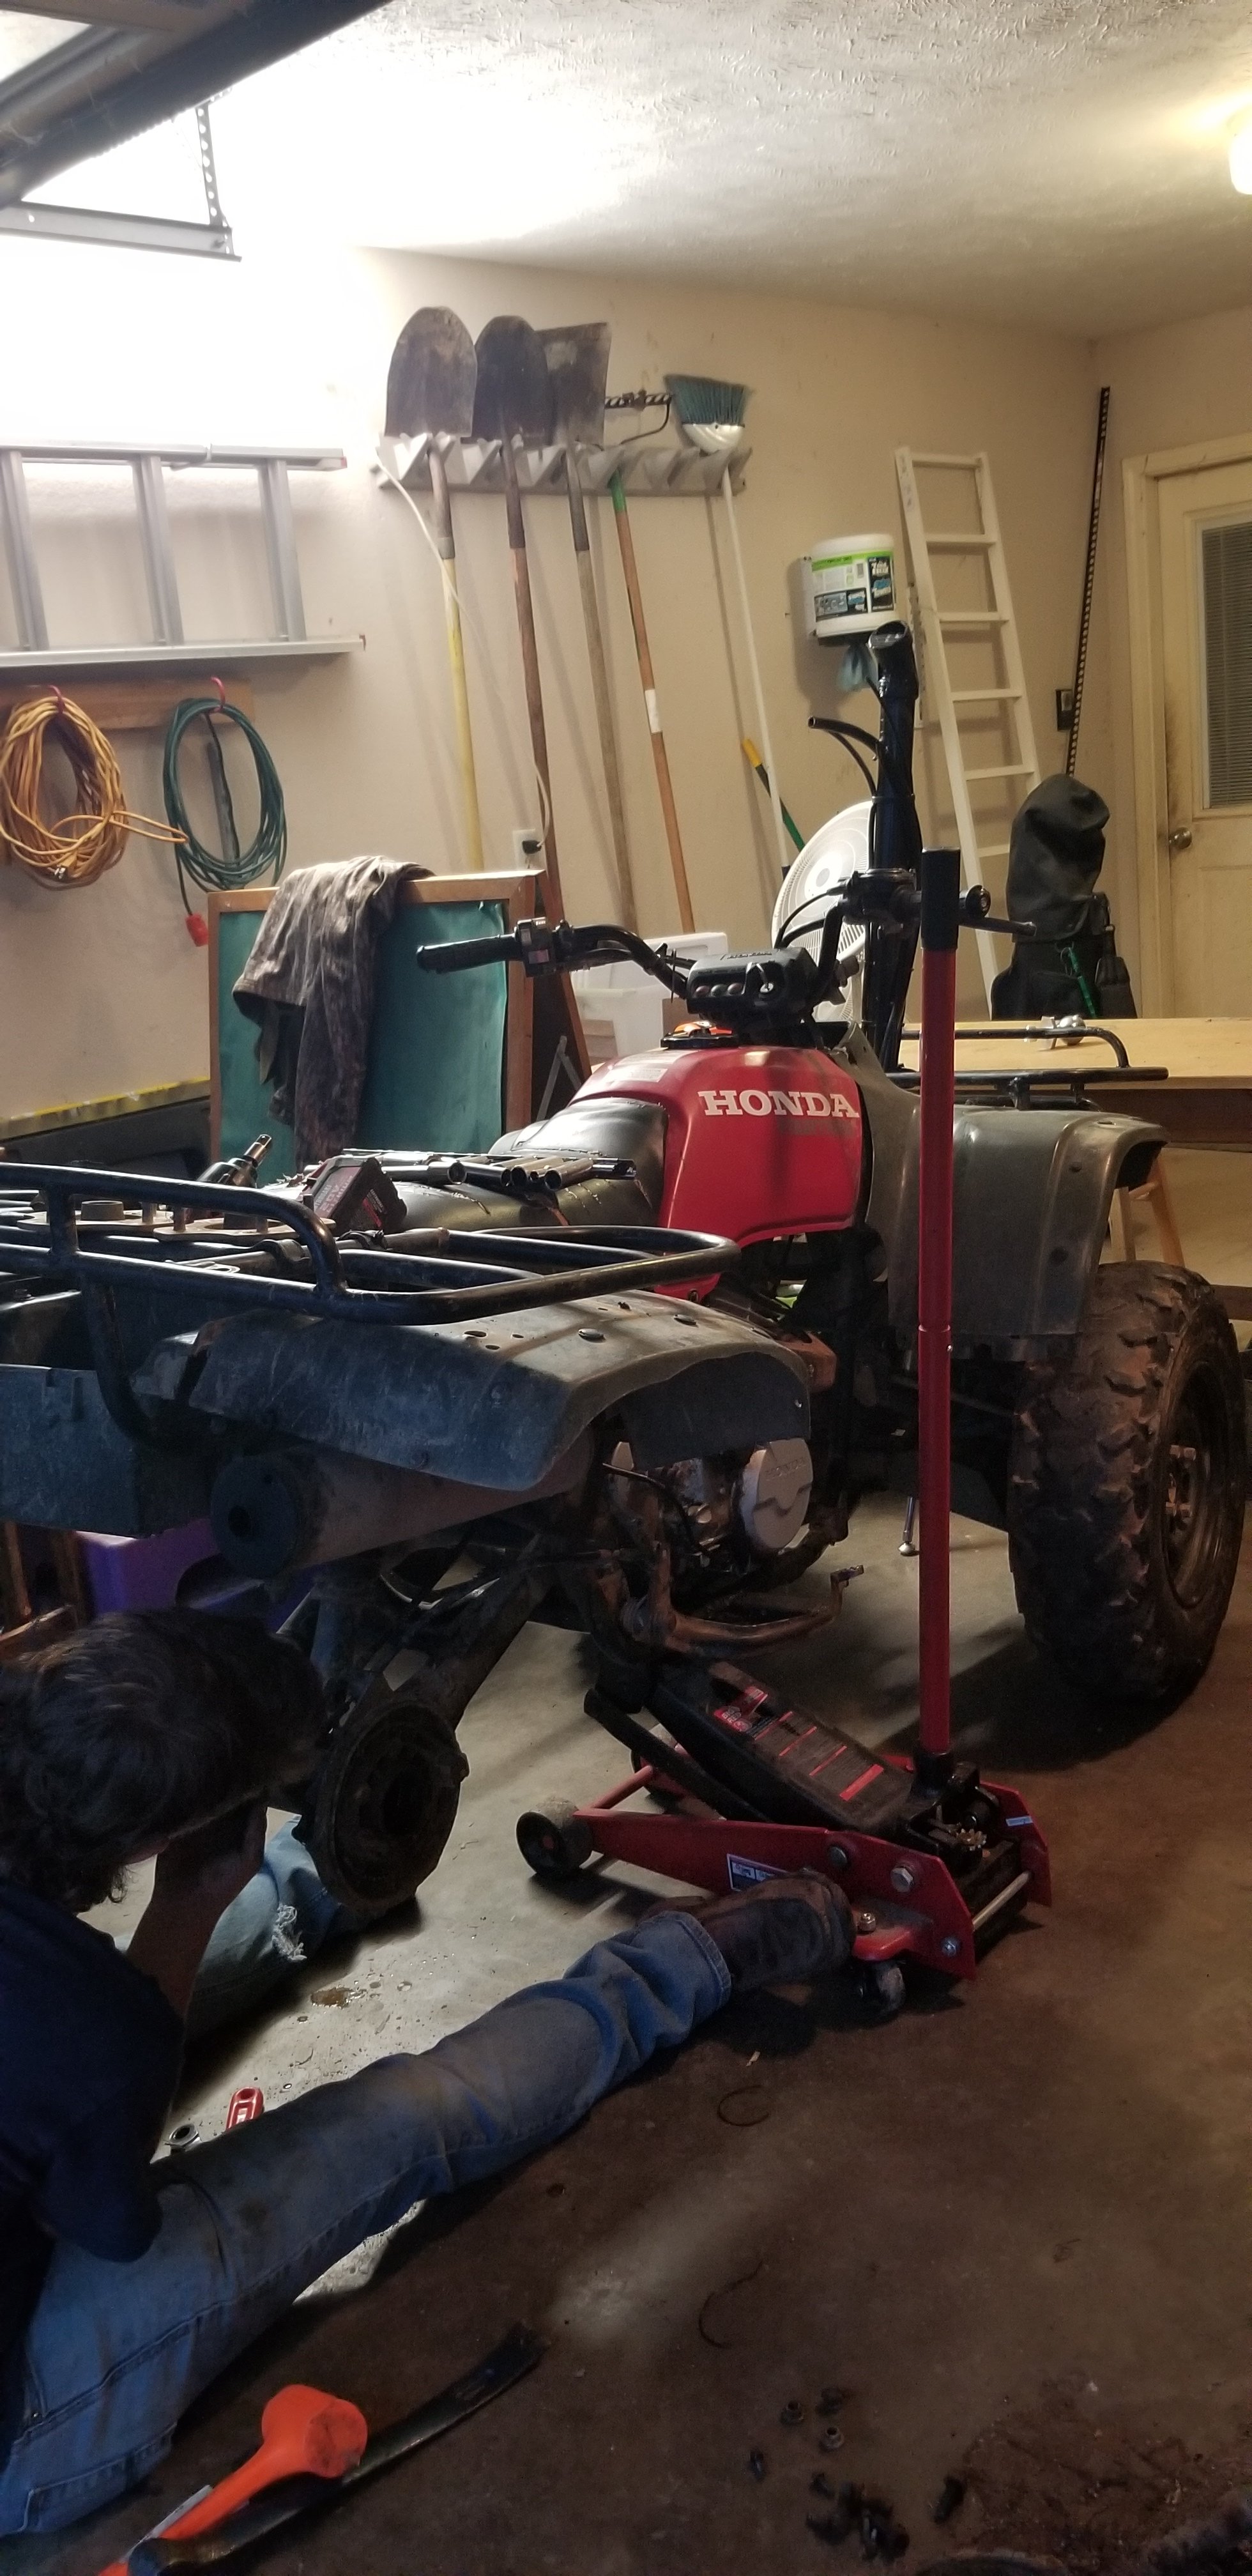
Picked this beauty up for zero dollars this weekend. It has been passed around several of my son's friends and the last kid was just tired of tinkering with it. Mostly complete 96 300FW. The pic is my boy robbing the swing arm and rear diff for his 300 for a big memorial weekend ride. Wiring is garbage at the battery, kick start doesnt work, no coil, smoked like cheech and chong when it ran last. I figure a couple hundred and a few hours and this will be ready to ride. Journey will be documented on Instagram at @martincyclellc if ya wanna follow along.
-
Polaris Sportsman 570 front pinion repair
MarkinAR replied to Jeremy Morris's topic in For Sale or Wanted? Post it here.
If you have a micrometer and the original bushing you can just measure it and find a replacement. Like the seal above has the numbers on it; 30mm ID, 75mm OD, 10mm depth. Bearings and bushings are measured the same way. -
1999 Yamaha Big Bear 350 4x4 Front End Squeal
MarkinAR replied to John Victor's topic in Yamaha ATV Forum
Welcome to the forum! 1. Fill it till it runs out the fill plug. 2. can't usually tell unless there is slop in them. And yes, they are a bi*** to change. You have to pop the circlips and knock the caps out. It sucks. 3. I'd bet the front diff is dry because seals are dry and leaking. If you fill it up and it still makes noise after riding a bit, my next suspicion would be wheel bearings. They may be intact and tight, but that tightness may be residual rust in the bearings. I think those are sealed so there's really no way to repack, just have to replace. Axles rarely make noise other than popping. An option after filling the diff may just be to ride it and see what breaks. If it did sit for a while, it probably needs shook down good. I'm sure all kinds of stuff will pop and squeal as it settles back in to service. I have rehabbed quite a few that sat outside for years and usually I just get em running and ride it to see what breaks next. Bit by bit you work the bugs out and end up with a good ATV without a ton of money invested. -
When you hit the starter button do you get any audible click from the starter relay next to the battery and solenoid? If there is any audible click, i'd try holding the button down and tapping the starter lightly with a wrench. Sometimes the brushes are worn out and not contacting properly. If you have green light though and no click at all from the relay I would suspect bad relay. Relay is like $7 at Autozone in the aux lighting isle.
-
1991 Yamaha YMF100 Moto 4 Electric Start Issue
MarkinAR replied to amharrison24's topic in Yamaha ATV Forum
I'd bet the brushes are bad in the starter. Try holding the start button down and giving the starter a tap with a wrench. I bet it'll pop right off. When it's warm, metal expands a bit and I bet the change in tolerances lets the brushes contact. -
Picked up 93 suzuki quadrunner 250 2x4
MarkinAR replied to pablo Blake's topic in General ATV Discussion
2 boots per axle is about as much as just buying a new axle. -
400ex is generally preferred due to being a bit more simple to work on and has been in production forever with very few changes so the aftermarket is large. 450 is still a good bike though.
-
Not sure I understand what you just tried to say.
-
That's just a ground wire, and it's a factory crimp. If you look at the front under the bars there's a mess of 3 to 1 crimps and even a couple of spare hot and ground wires for accessory. If you're not getting fire pull starting you could always bypass the ignition and run/stop/run and see if it's a bad ignition or multi switch. Blue to ground maybe? Been a minute since I looked at that diagram. I rebuilt 2 just like that last summer that I pulled from the weeds. Good little simple ATV's. Low gearing, reliable motor. And I did the same centrifugal clutch regroove and drum smoothing on one of them. And a Kodiak. And a few others. TufDog also noticed there were no clear diagrams and made a youtube video you can pause and screenshot. This is the one I have used several times. This
-
So it's turning over just fine with the start button. Now you have to move on and see if the spark plug actually fires a spark (or put a screwdriver in the plug boot instead of the plug and see if it will fire against the head), then on to fuel, etc.
-
2001 Polaris Sportsman 500 4x4 Fire Out Of Exhaust and Intake
MarkinAR replied to Chase Cook's topic in Polaris ATV Forum
Normally that symptom is caused by timing 180 degrees out. Lucky the piston hasn't smacked a valve yet. I havent timed a Polaris but on some hondas theres a couple marks then an F timing mark and a T timing mark. Pretty common to time to the wrong mark.